I thought my DIY outdoor furniture set was complete, but then I had requests for a matching DIY outdoor coffee table!
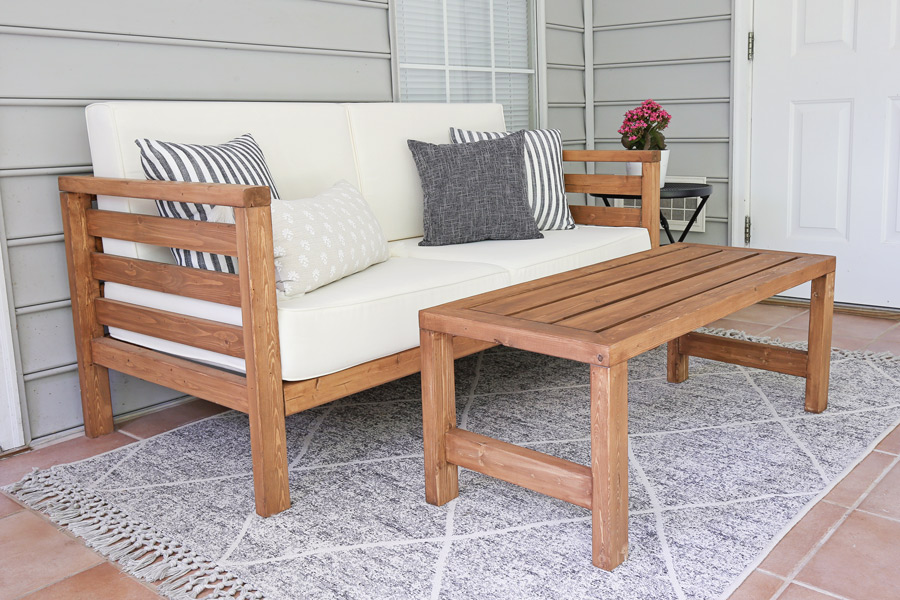
It was a great idea, so we built one and it coordinates perfectly with our DIY outdoor couch and DIY outdoor chair and DIY outdoor side table! I also have a DIY outdoor dining table that compliments the outdoor furniture set too!
Now we really have a complete matching set of outdoor furniture! I’ve been sharing sneak peeks of this table on Instagram stories while building it, and I’m so excited to share the final reveal today!
A special feature about this coffee table is that it’s smaller than your average size outdoor coffee table since we built it to go with the matching DIY outdoor couch which is a loveseat size.
It also coordinates perfectly with the DIY outdoor side table!
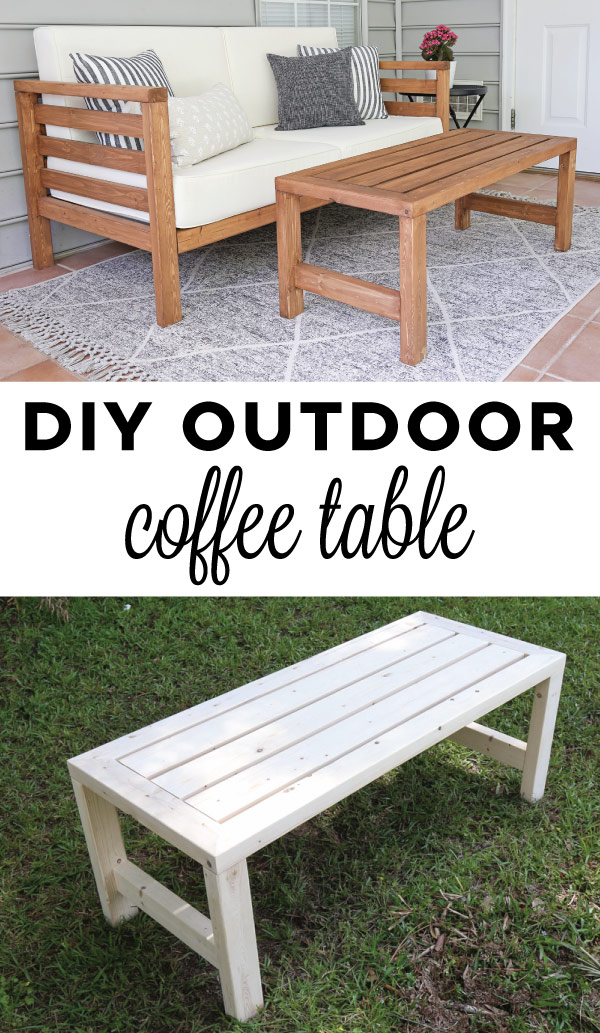
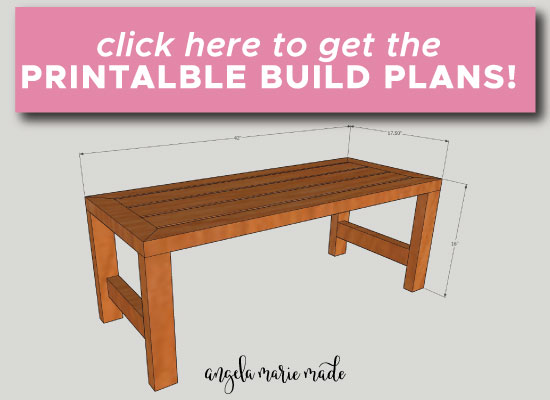
The final size of this DIY outdoor coffee table is 16″ tall x 17.5″ wide x 42″ long.
Just like the chair and couch, this coffee table is really cheap to build, and costs about $20 in lumber!
Note, this post contains some affiliate links. For more info see my disclosures here.
How to Build a DIY Outdoor Coffee Table:
OR click here for the whole DIY outdoor furniture set plans BUNDLE DEAL! Note, the outdoor couch plans are available for FREE in our free printable library (check out that post for details)!
Materials:
- (3) 2×3 @ 8ft (framing lumber)
- (2) 1×4 @ 8ft
- 2 1/2″ Deck screws
- 2″ Brad nails
- 2 1/2″ Kreg screws (weather resistant)
- 1 1/4″ Kreg screws (weather resistant)
- Exterior Stain
- Stainable wood filler
- Waterproof Wood Glue
Tools:
- Kreg Jig
- Miter saw
- Drill
- Brad nailer
- Clamps
- Tape Measure
VIDEO TUTORIAL:
Subscribe to my YouTube Channel here!
1. Make lumber cuts for outdoor coffee table
Click here for the printable build plans of the cut list and building steps!
Use a miter saw and make the following cuts from the 2x3s
- 6 pieces @ 14 1/2″
Make the following cuts from the 2x3s with 45 degree mitered cuts:
- 2 pieces @ 42″ from long point to long point
- 2 pieces @ 17 1/2″ from long point to long point
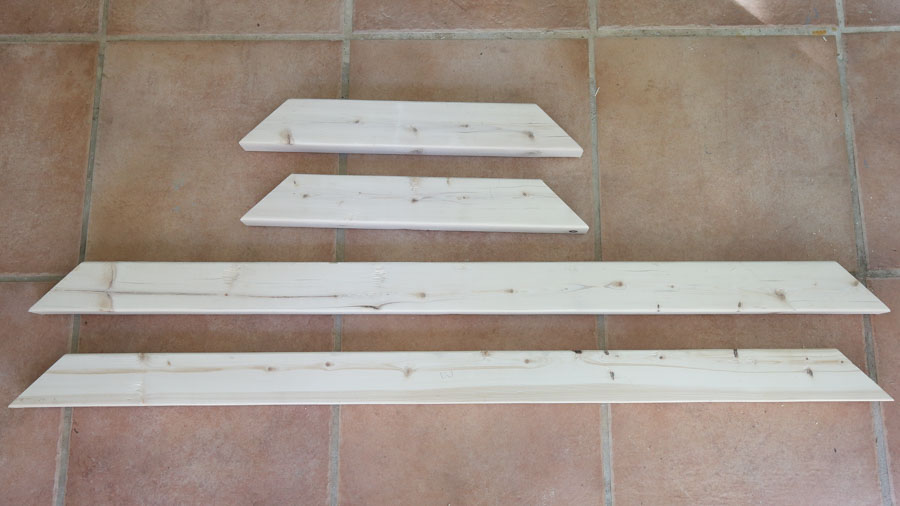
2. Assemble the top frame of the coffee table
Use a Kreg Jig and add one pocket hole on each side of the 2 boards at 17 1/2″.
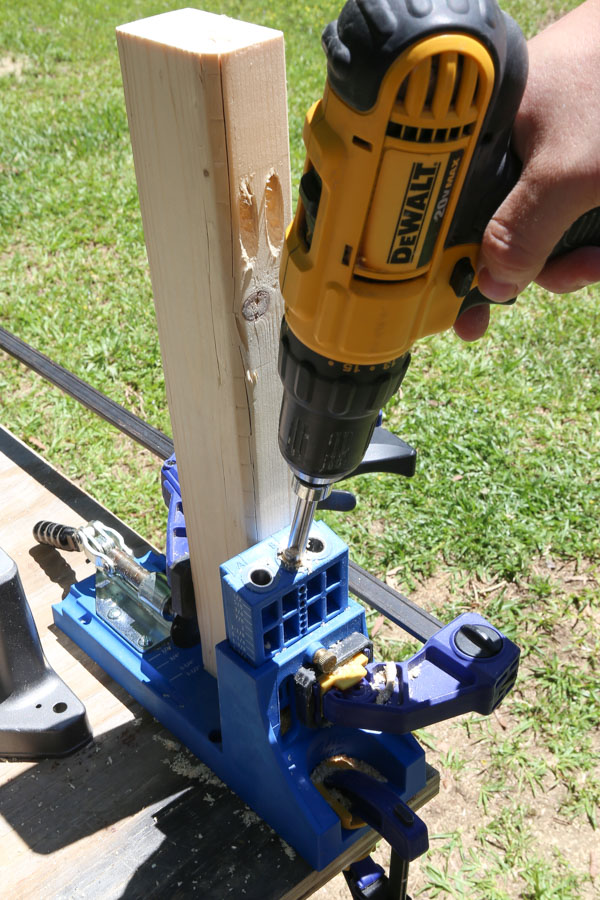
Because these boards were cut with a 45 degree angle, they are only wide enough to fit one pocket hole that doesn’t show on the side of the board. So, when drilling the hole for each one, make sure to line the board up carefully with drill hole B on the Kreg Jig as shown in the photos below.
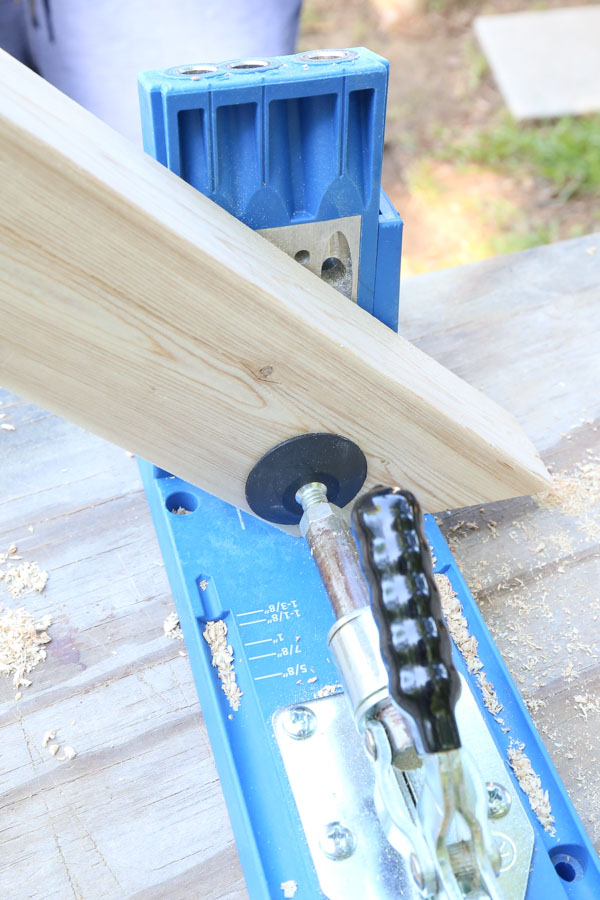
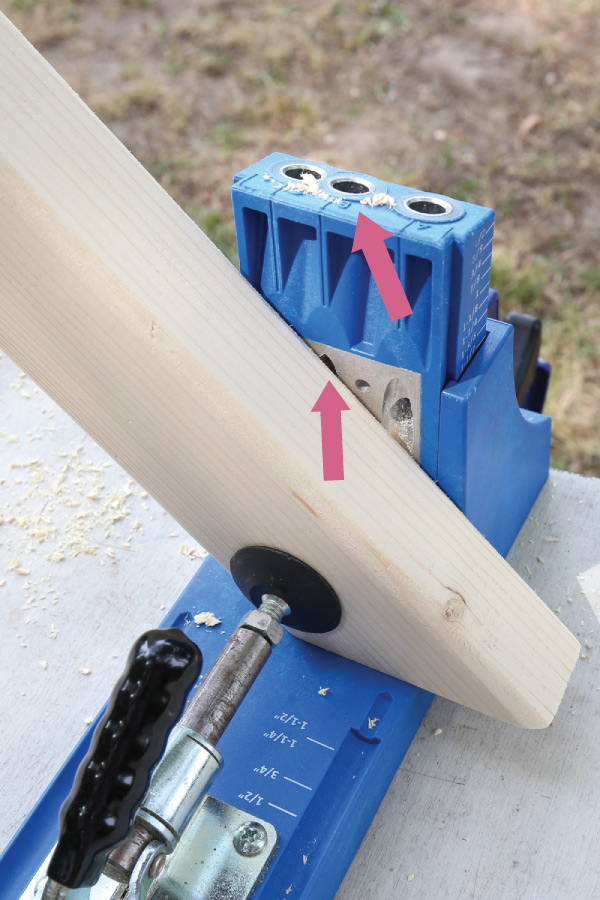
Next, add waterproof wood glue between one 17 1/2″ board end and one 42″ board end. Then, clamp them down together to your work surface.
Use a brad nailer and 2″ brad nails and nail through the two boards together. Make sure to stay away from where the pocket hole screw will be going through.
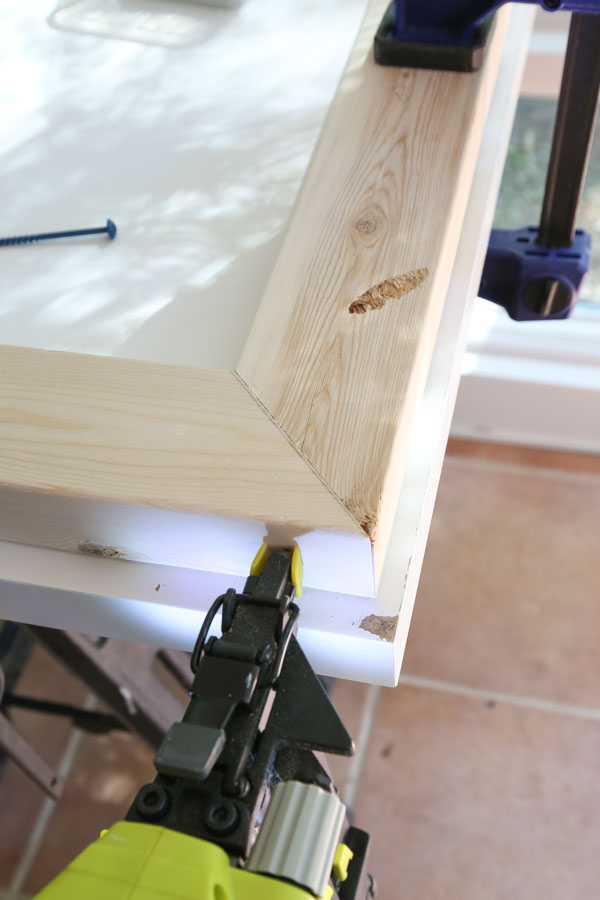
Finally, add a 2 1/2″ outdoor Kreg screw into the pocket hole.
Repeat these steps on the other three sides to complete your outdoor coffee tabletop frame.
Tip: Don’t screw the Kreg screws in super tight because that can cause the board frame to not sit flat if the table isn’t perfectly square.
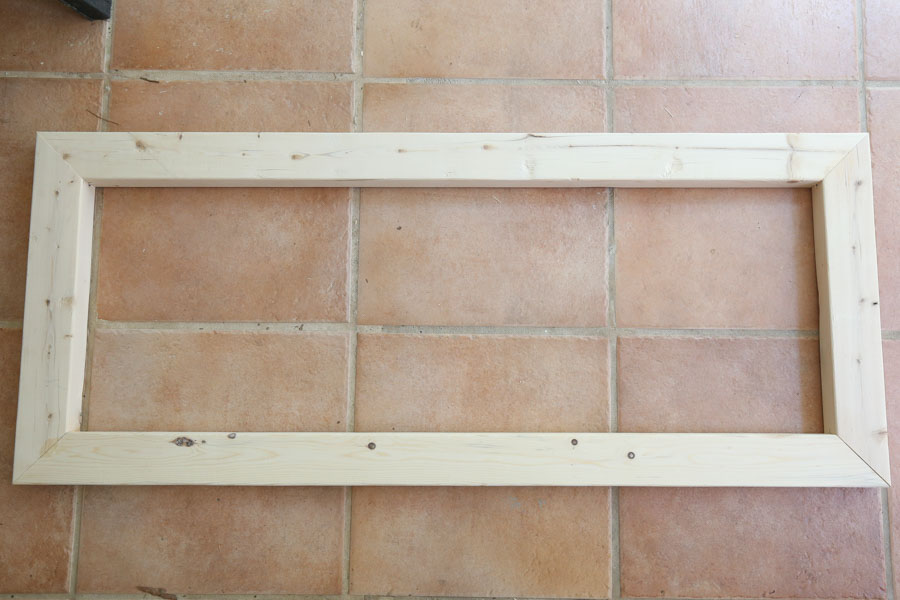
3. Add slat boards to the tabletop frame
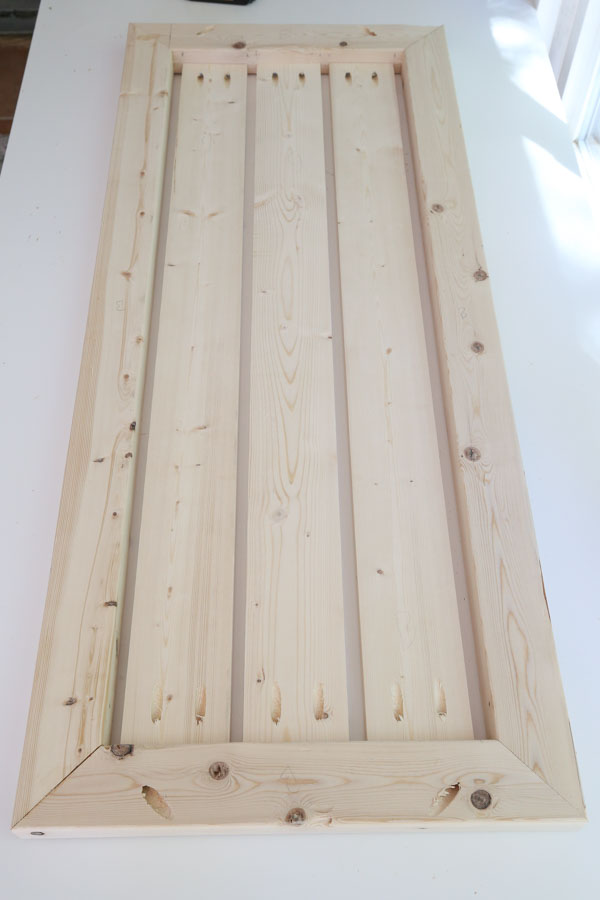
Measure the exact distance between the side frames and cut three 1x4s to this size. The measurements should be 37″ but since we’re working with framing lumber, they may be slightly different.
Add two pocket holes to each end of the 1×4 boards. Make sure to adjust your Kreg Jig settings for 3/4″ thick wood.
Also, at this point if you want to make the staining process easier, go ahead and stain the 1×4 slat boards before attaching them to the tabletop frame. I forgot to do this and it took some extra time to stain between the slat boards at the end.
The slat boards should be attached with 1/2″ spacing between each of them on the table top, so go ahead and mark on the side boards where to attach them. Then, attach with 1 1/4″ outdoor Kreg screws at those marks.
TIP: Put a popsicle stick (or wood shim) under your slat boards when attaching them to the frame, otherwise they may stick up slightly above the 2×3 framing lumber frame once you flip the tabletop over. You can see me doing this in the video above.
4. Assemble DIY outdoor coffee table legs
Use a Kreg Jig and add two pocket holes on both sides of two of the 14 1/2″ boards. Make sure to add them on the side edges as shown in the photo below so that the holes will be hidden. We had to use a clamp to hold the boards in place on our Kreg Jig in order to drill them into the 2×3 side edge.
Mark 3.5″ up from the bottom of one of the 14 1/2″ boards.
Attach the board with pocket holes at this mark perpendicular and flush with the edge using 2 1/2″ outdoor Kreg screws and waterproof wood glue. Repeat on the other side with another 14 1/2″ board to form one of your table legs.
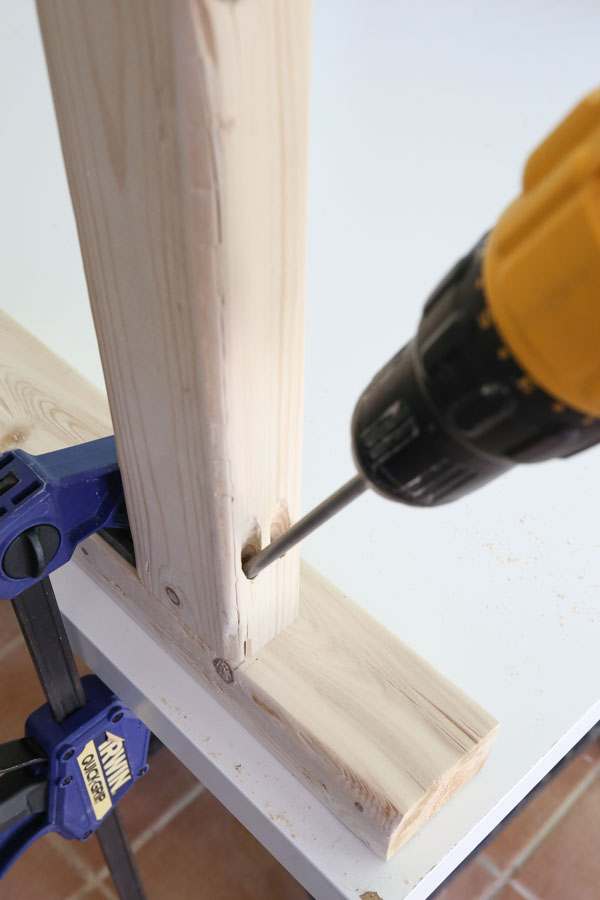
Repeat these steps again to create a second table leg. Now the table legs look like a mini version of the sides of the matching DIY outdoor couch and DIY outdoor chair!
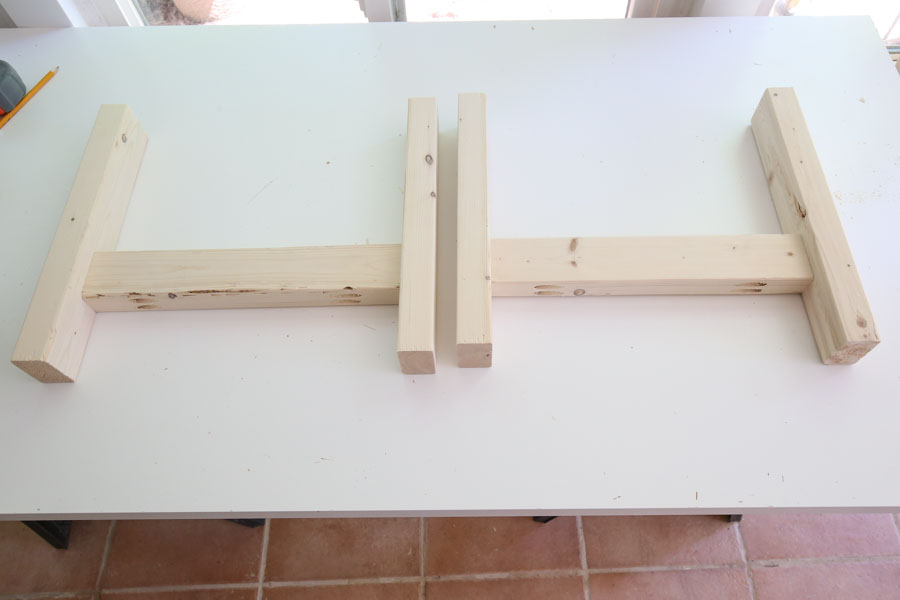
5. Attach table legs to the tabletop
Attach one of the tabletop legs to the table top with waterproof wood glue and a 2 1/2″ deck screw. Make sure they are countersunk beneath the wood surface (you will fill them with wood filler later). I used self tapping deck screws that do not require pre-drilling.
Also, make sure to avoid drilling through the area where the other Kreg screw is underneath from when we attached the side frames together, as well as where the 2″ brad nails went through.
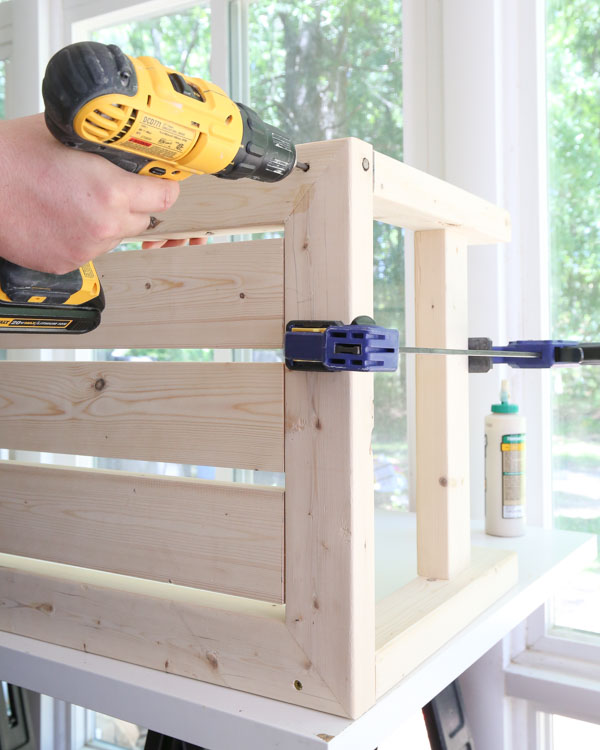
Repeat on the other side for the other table leg. And that’s it for the build!
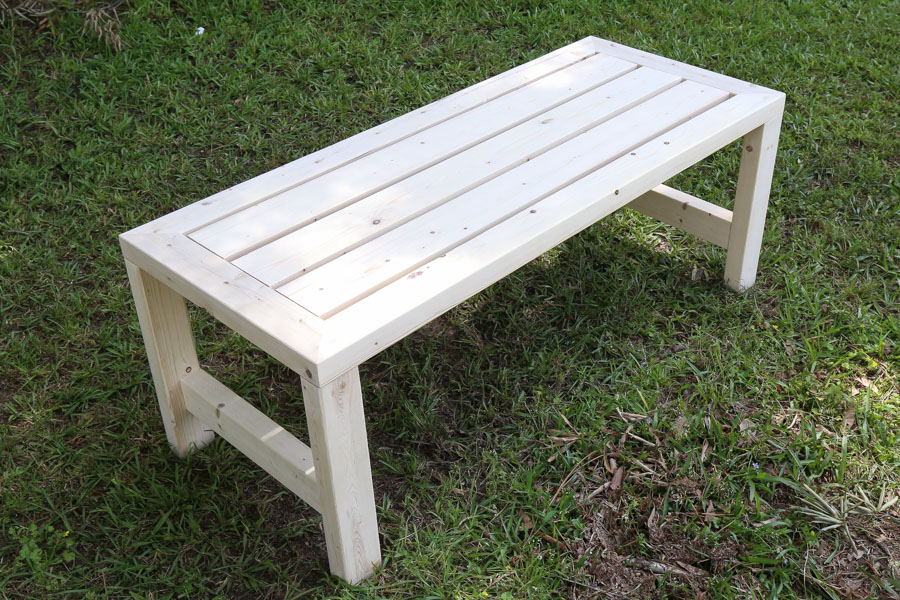
6. Fill holes, sand, and stain the coffee table
The last step is to fill the screw and nail holes with stainable wood filler. Also, finish any needed sanding. For tips on sanding wood, check out my easy guide on how to sand wood. Note, we did sand the tabletop corners to make them more rounded with less of a point.
Finally, stain your easy DIY outdoor coffee table!
Just like the matching DIY outdoor couch and DIY outdoor chair and DIY outdoor side table and DIY outdoor dining table, I used one coat of Valspar semi transparent exterior stain in Pine bark. This stain is harder to use because it dries quickly and is more of a paint consistency, so you have to work a little faster.
Also, if you didn’t stain the slat boards yet, a foam brush helps to get between the slats for staining.
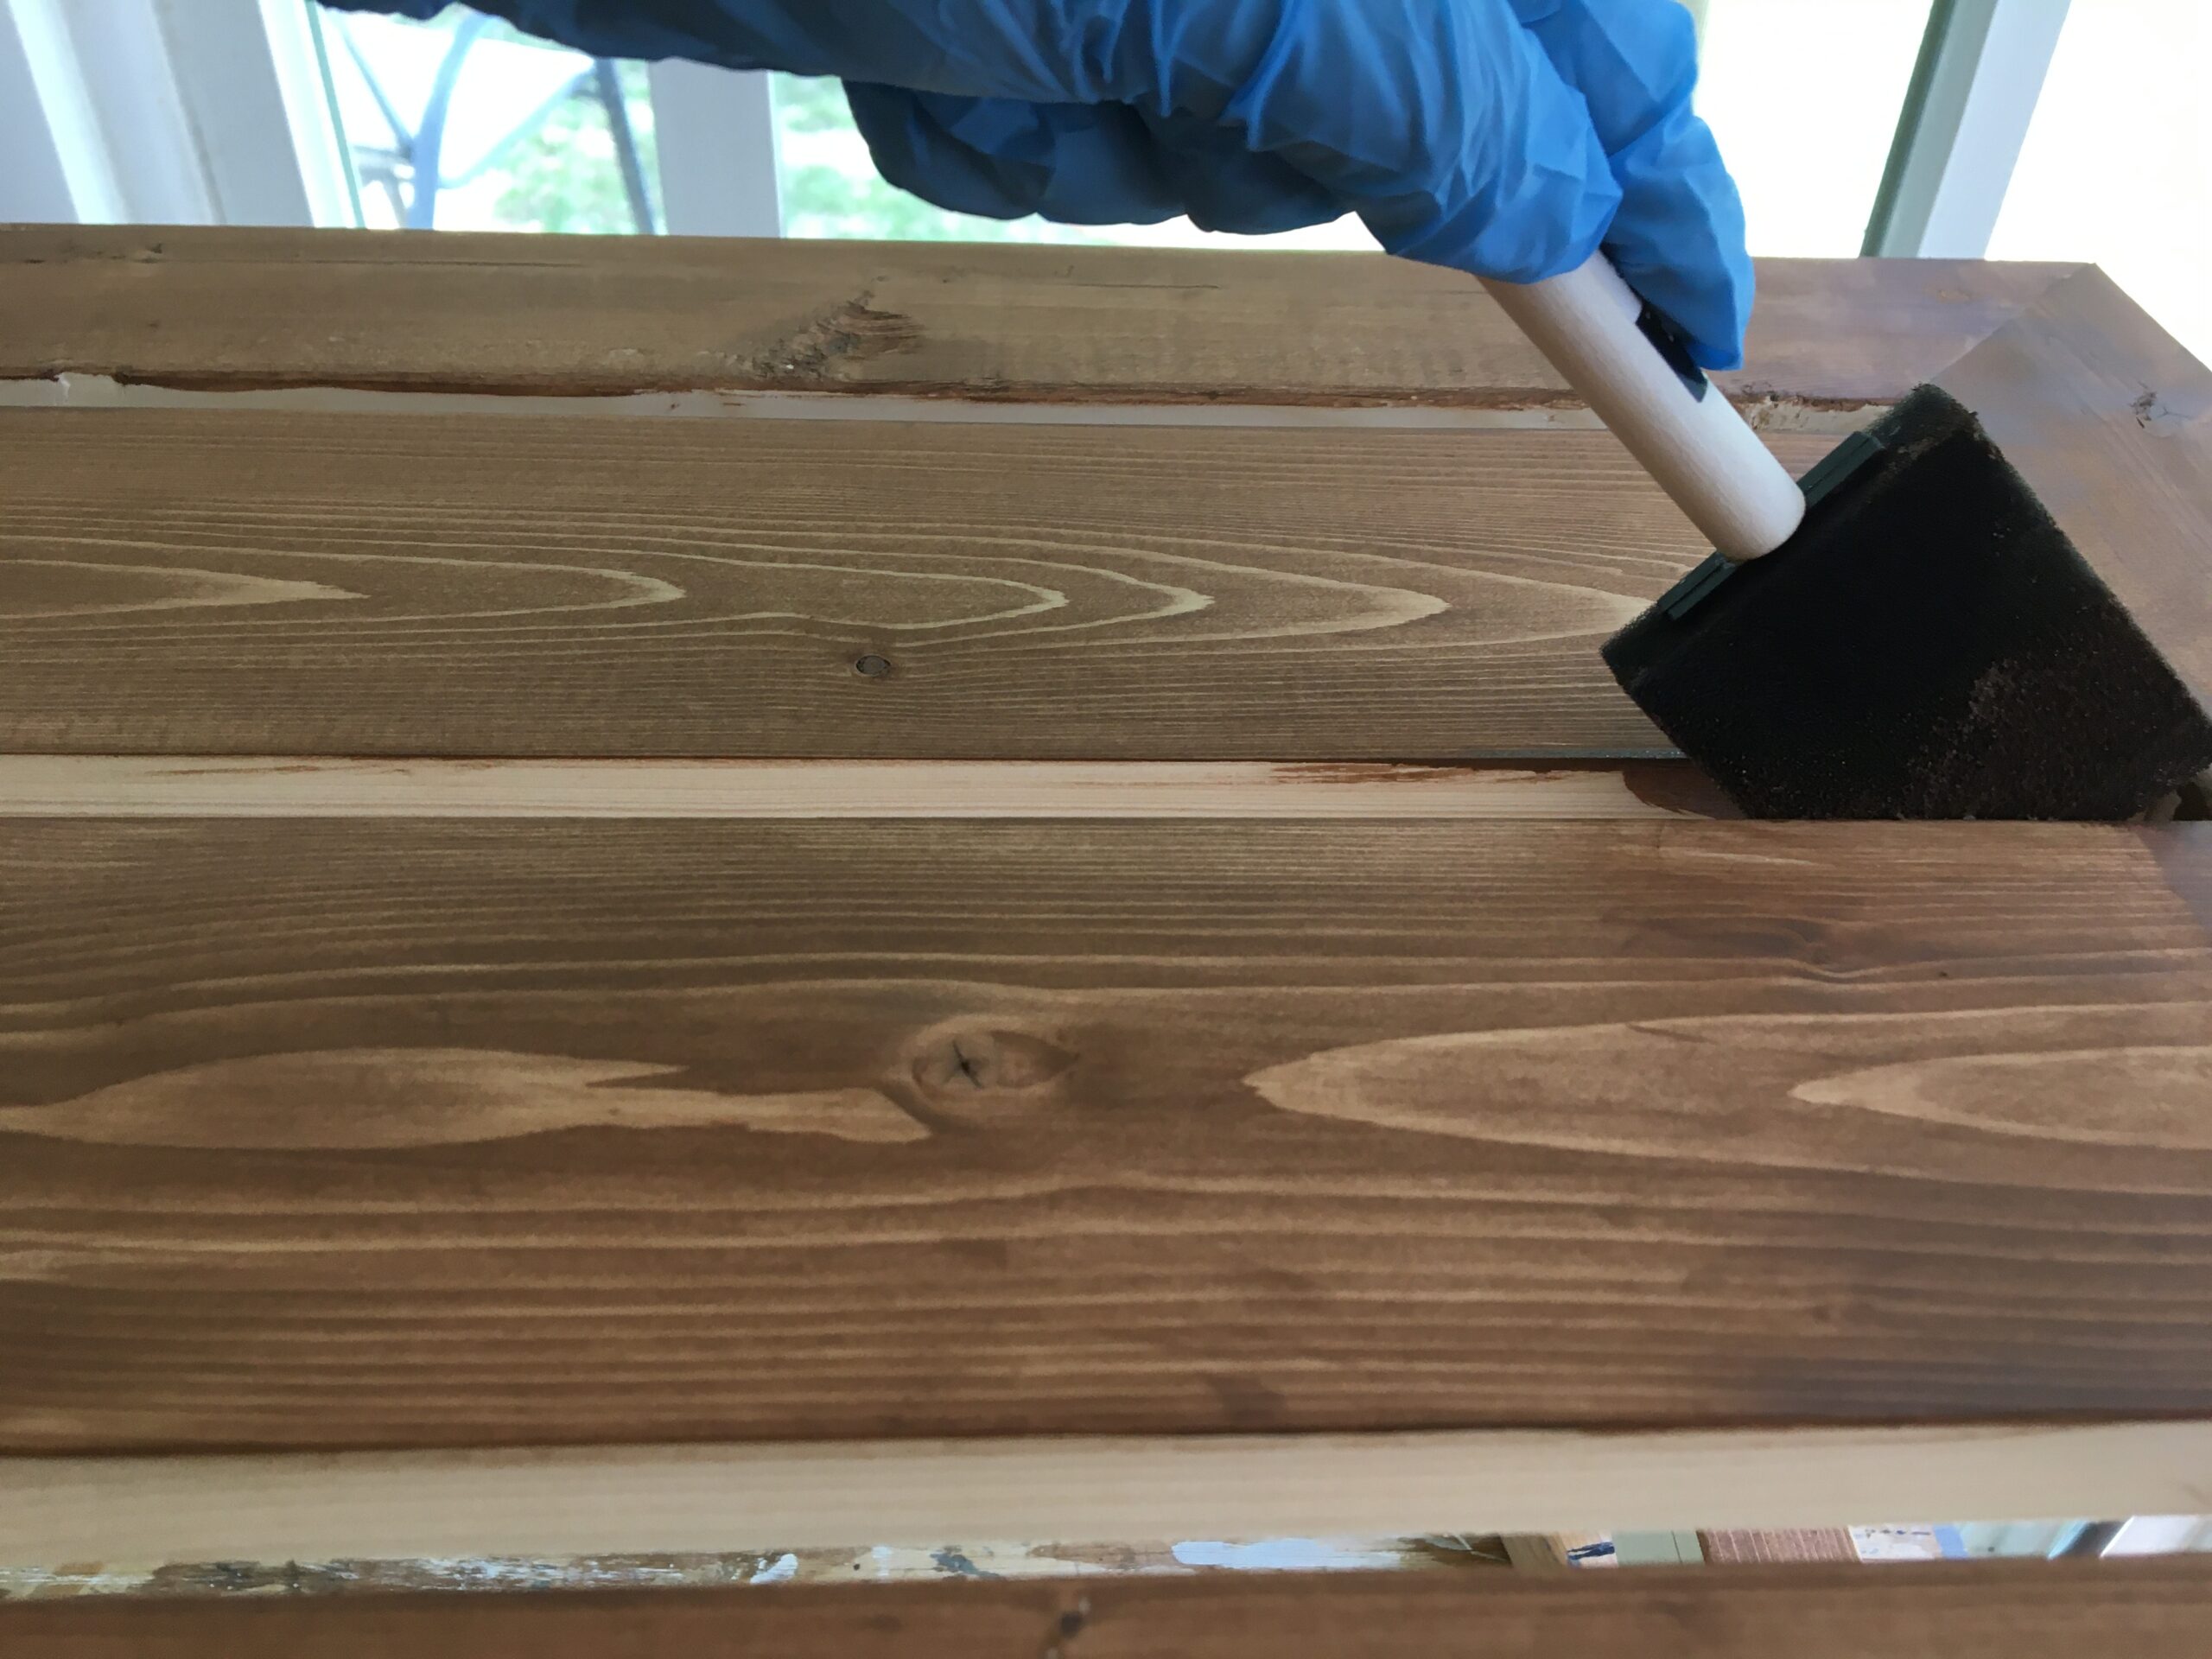
See my tutorial on how to stain wood for a beautiful finish and the best way to apply stain!
I’m so happy we added this cute, matching coffee table to our DIY outdoor furniture set. I didn’t realize how much we needed it until now! And it’s perfect for smaller outdoor spaces too! It was tough to photograph though because of our small sunroom!
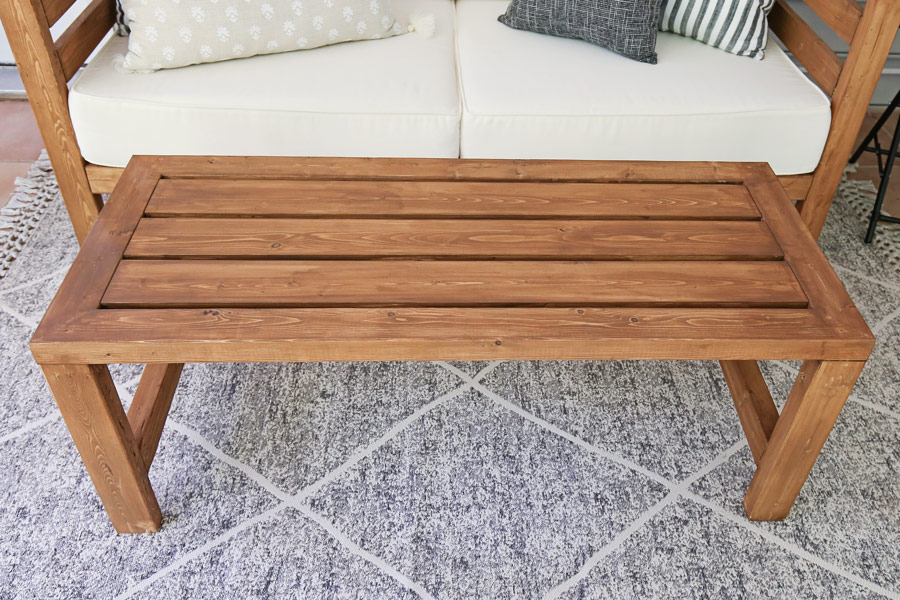
Don’t forget to download the printable plans (or the whole DIY outdoor furniture set BUNDLE deal)!
Follow along on my latest projects and sneak peaks on Instagram, YouTube, and Pinterest!
Brandy Childers
Thursday 25th of March 2021
How can you make an outdoor table with this concept? By the I love the these outdoor furniture plans.
Angela Marie Made
Saturday 27th of March 2021
I love where your mind is, I have been wanting to add a table for this set, maybe this Summer :)
Marie
Wednesday 24th of March 2021
If I wanted to make it one more slat wider how much would I increase the 45 degree cuts?
Angela Marie Made
Saturday 27th of March 2021
That's a great question. So, you would still need to use a 45 degree cut, the only difference would be the 2 side pieces that measure 17 1/2" would need to be changed. Since you are adding (1) additional slat, it would be 17 1/2" plus 3 1/2" (width of the 1x4 slat plus 1/2" (gap measurement) for a total of 21 1/2". I hope this helps. thank you!
Carr mom
Thursday 14th of January 2021
Hi I'm inspired to tackle this project this weekend. My bbn set would be open to the elements on my patio. Which wood works best for outdoor spaces? I'm in the south if that helps?
Angela Marie Made
Friday 15th of January 2021
That's exciting!!!! Cedar wood is great for outdoor projects and is naturally resistant to the elements but it is pricey and does not come in 2x3's that are used in this project. Using pine wood with an exterior stain is also a great option and will hold up to the elements.
Karen
Saturday 2nd of January 2021
Did you seal after staining and if so, what did you use?
Belinda Giddens
Sunday 4th of October 2020
I really got inspired by your video. I ended up making 2 sofas, 4 chairs and coffee table for my sons backyard. Wish I could attach a photo.
Angela Marie Made
Monday 5th of October 2020
Wow, that is amazing!!! You can send them to my email, would love to see, thank you!