Learn how to make DIY pantry labels with vinyl decals and sticker paper!
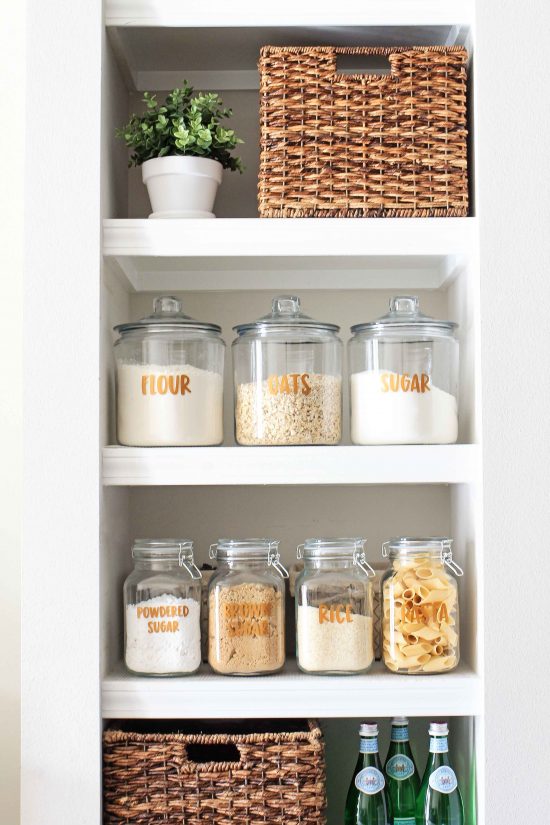
Last week I shared my open pantry shelving. Today I am going to be sharing two tutorials for DIY pantry labels:
- How to make pantry labels as stickers using just a printer, clear sticker paper, and the free pantry label printable below.
- How to make vinyl labels as decals for pantry labels using vinyl, a Silhouette cutting machine, and the free pantry label printable below.
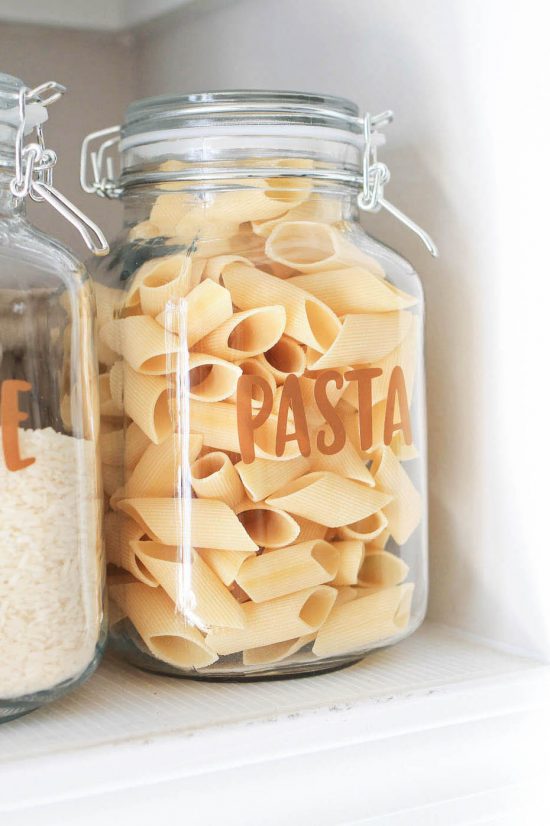
Note, if you have a Cricut and want to make the vinyl labels, see my post on how to make labels with a Cricut (which has a free pantry label SVG file for Cricut Design Space)!
Either way, these labels look great and add function for a pantry organization makeover!
Note, this post contains some affiliate links. For more information see my disclosures here.
If you want to make more custom label stickers see how to design and how to make labels in Microsoft Word with the same font I used or any font you want! This is good to know if you want to make labels for other pantry items not included on my free printable or for custom labels for an office, bathroom, etc!
But today, I’m focusing on how to physically make the stickers or decals!
Let’s get to it and learn how to make some pantry labels!! Get Your FREE pantry labels printable below:
Note, if you have already subscribed, you can find the free pantry label printables in the free printable library. If you haven’t subscribed yet, just click the button above to get your free printables and access to the free printable library!
How to make pantry labels as stickers
Supplies Needed:
- Clear sticker paper
- Printer
- Pantry labels free printable file
- Scissors, paper trimmer or guillotine paper cutter
1. Save and open free DIY pantry labels file
Save the pantry labels free printable file to your computer and then open it in any program on your computer that can open images or jpg files.
2. Load sticker paper in printer
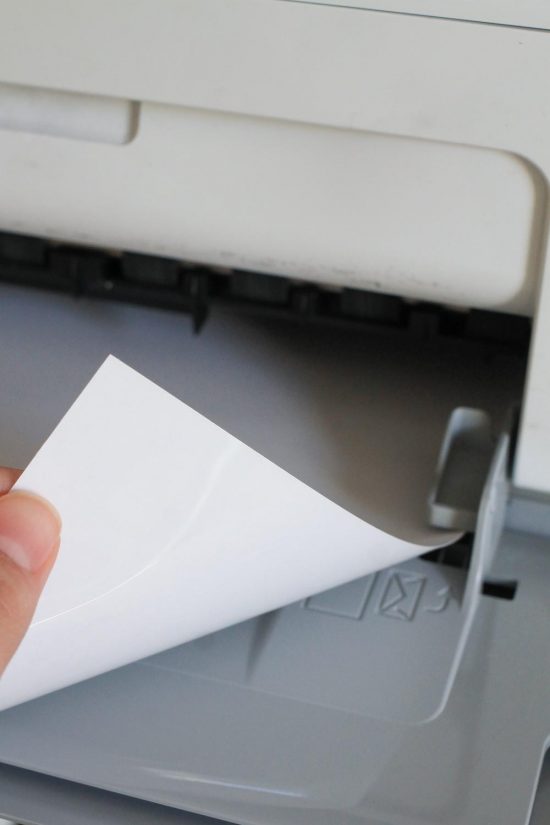
Load your printer with clear sticker paper. Make sure you load it correctly in your printer so that the glossy side will be printed on and not the paper side. For example, with my HP printer, I have to load the paper upside down.
3. Adjust printer settings and print pantry stickers
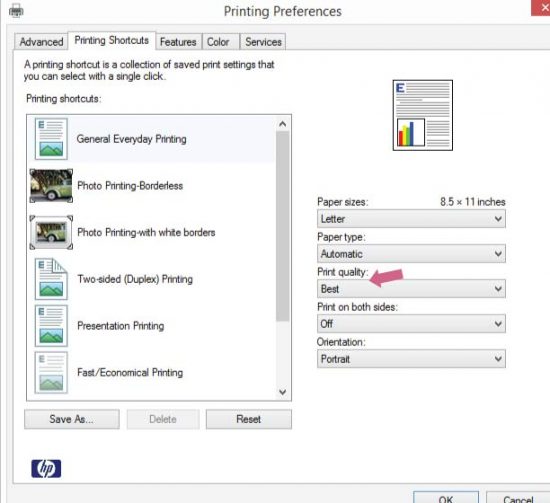
Go to print and open your printer settings or printing preferences.
The printing options will vary depending on your printer type, but the important setting here is to adjust your print quality to its “Best” setting instead of normal. Print your pantry labels printable after the settings have been adjusted and allow the ink to dry for several minutes.
4. Cut pantry label stickers
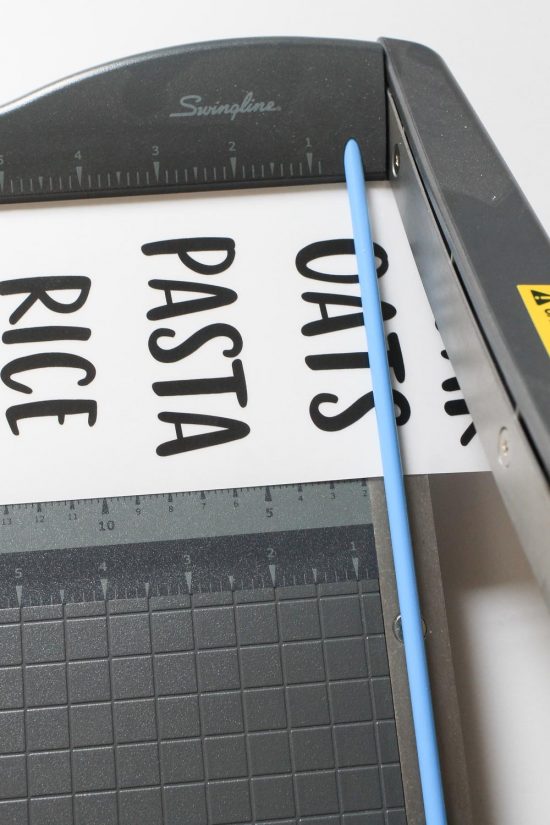
Cut your individual pantry labels out. I prefer to use a paper trimmer or guillotine paper cutter for a clean, straight cut, but you can use scissors too.
5. Add pantry stickers to jars
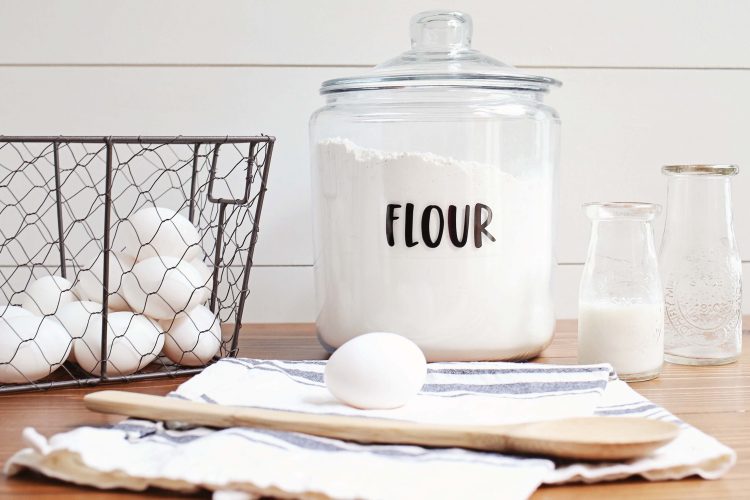
Stick the pantry label stickers to your jars and you are all finished!
***Note, I tested these labels out under a little bit of water and they are not waterproof and will smear if they get wet, just an FYI to be careful if you need to wash the jars after the stickers have been applied.
***
How to make vinyl labels for pantry decals
Decals are made out of vinyl. Vinyl is great for pantry labels because it is waterproof! Although, I still recommend hand washing the jars/containers with decals instead of putting them through the dishwasher.
Note, the following tutorial is for a Silhouette Cameo vinyl cutting machine. If you have a Cricut cutting machine, see my tutorial on how to make vinyl labels with Cricut!
Supplies Needed:
- Silhouette Cameo
- Pantry labels free printable file
- Vinyl (I used Oracal 631 Matte vinyl in Copper)
- Vinyl weeding tool or something with a pin end
- Transfer tape (I use Oratape HT55)
- Vinyl Application Squeegee or old credit card
1. Prepare label file for cutting
Open the pantry labels free printable file in Silhouette Studio. Then, open the trace window and click on “Select Trace Area”
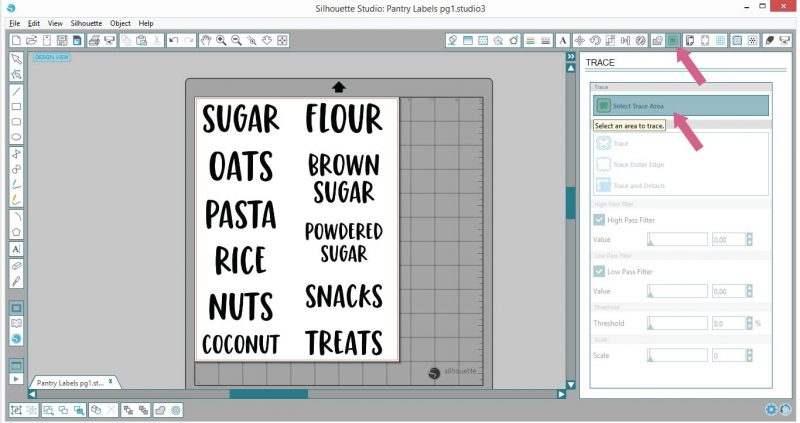
Trace one of the label items. I like to do one or two at a time instead of all the labels at once so I get a cleaner trace and cut.
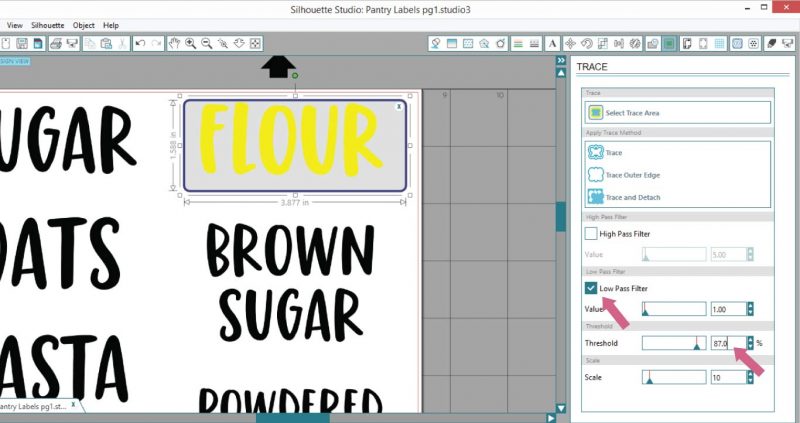
Next, select low pass filter and change the Threshold to 87%. When you select the threshold percentage rate, you want to ensure the yellow tracing highlights are filling in all the letters to the edges and there are no tiny gaps not highlighted, again to ensure a clean, crisp cut of your label!
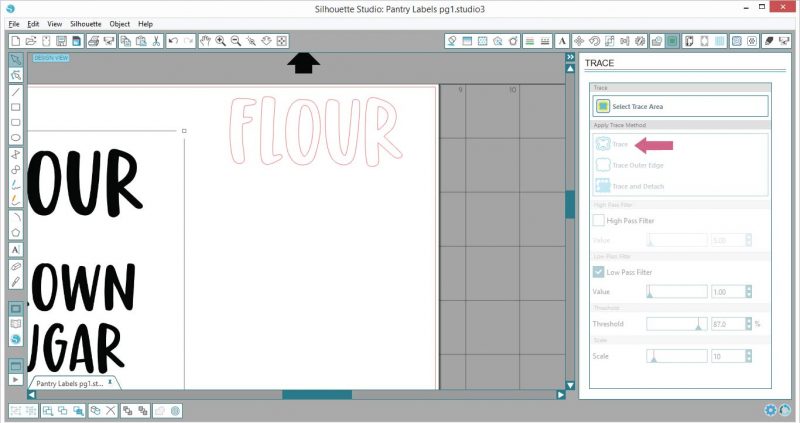
Select “Trace” and move the printable image out of the way to reveal your tracing outline and make sure it looks good! Repeat the tracing steps for the other labels.
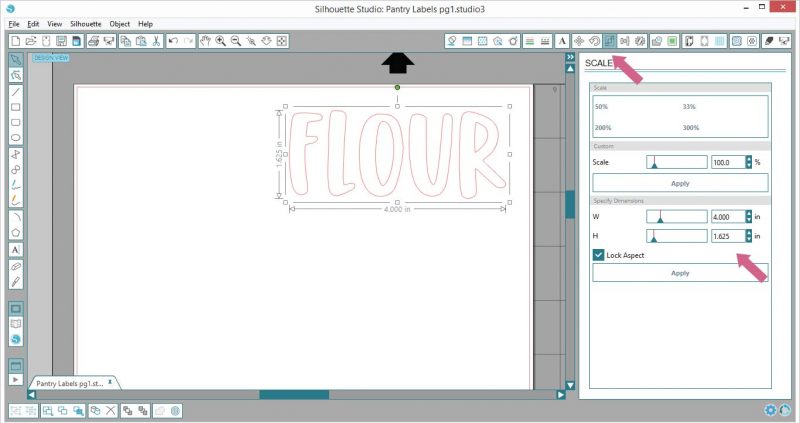
Also, another great thing about decal labels is that they can easily be resized.
If you’d like a custom size for your decal label, click on the traced outline, open the Scale Window, check the “Lock Aspect” box, then change the width or height to your desired size settings, and click on “Apply”.
2. Cut vinyl labels out on vinyl cutting machine
Once all of your labels have been traced, send them to your Silhouette machine and cut!
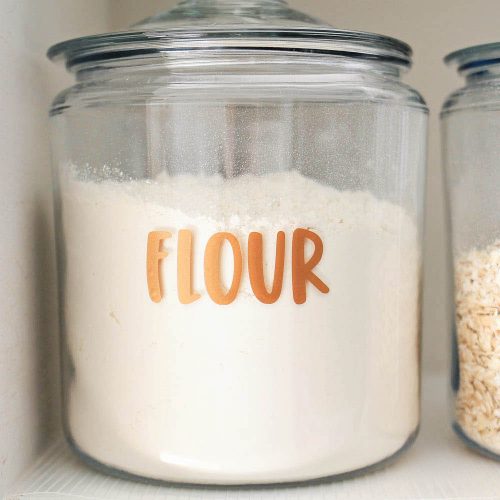
The copper vinyl I used for this project was Oracal 631 Matte vinyl. I always use Oracal 631 because it is a high quality indoor/outdoor vinyl and is easy to apply and remove. It comes in lots of other colors too if you don’t want to do copper!
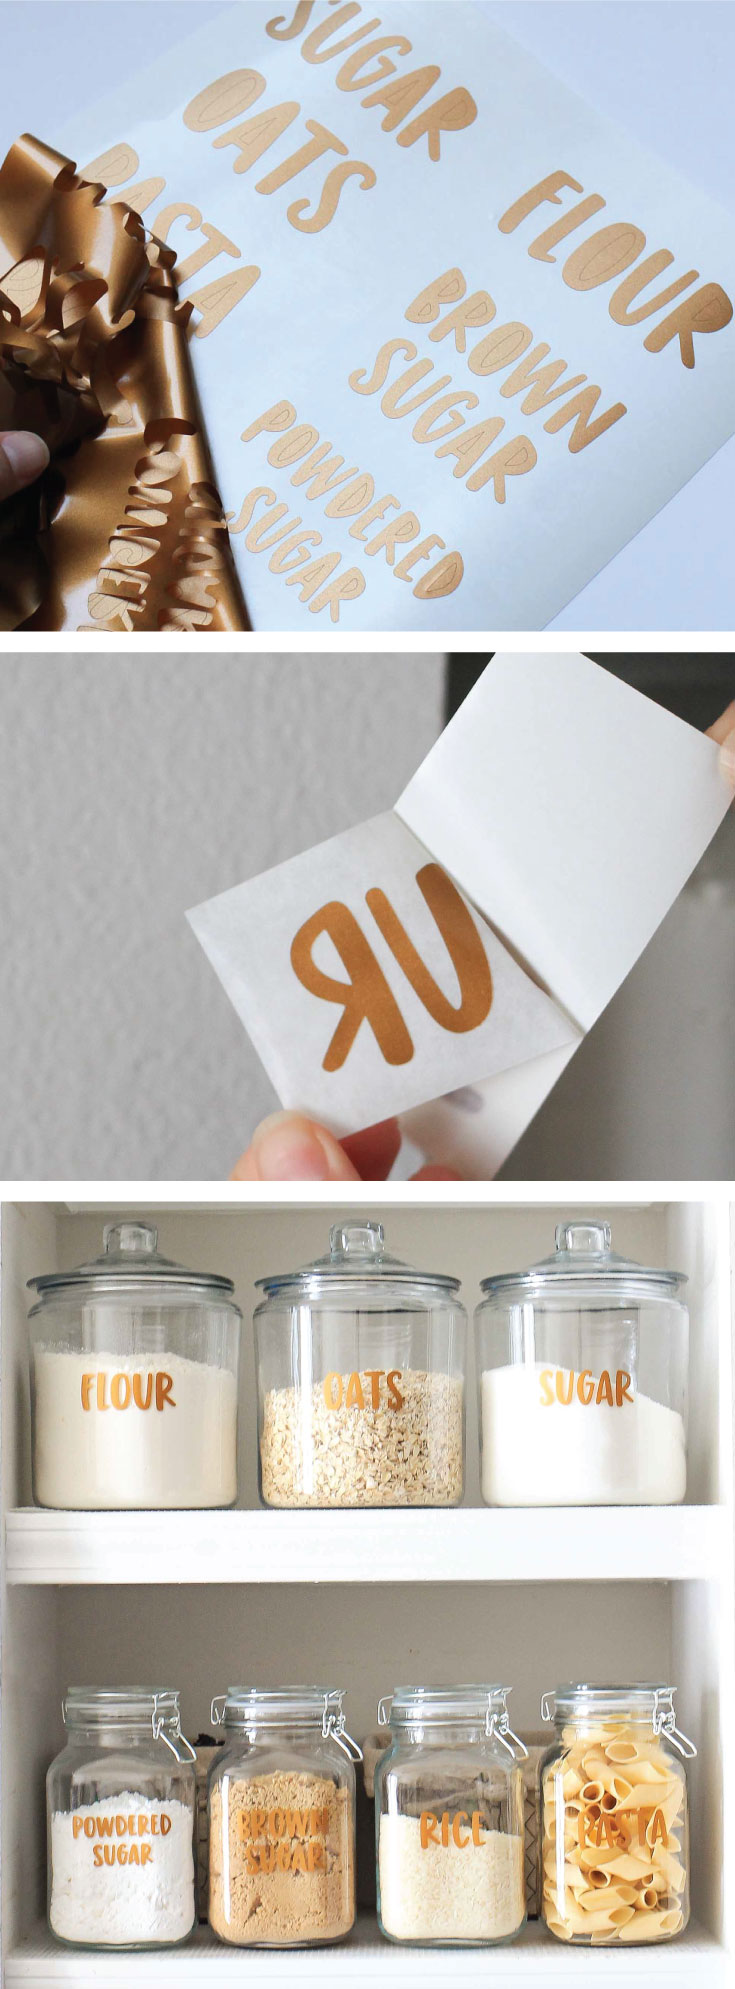
3. Weed vinyl labels
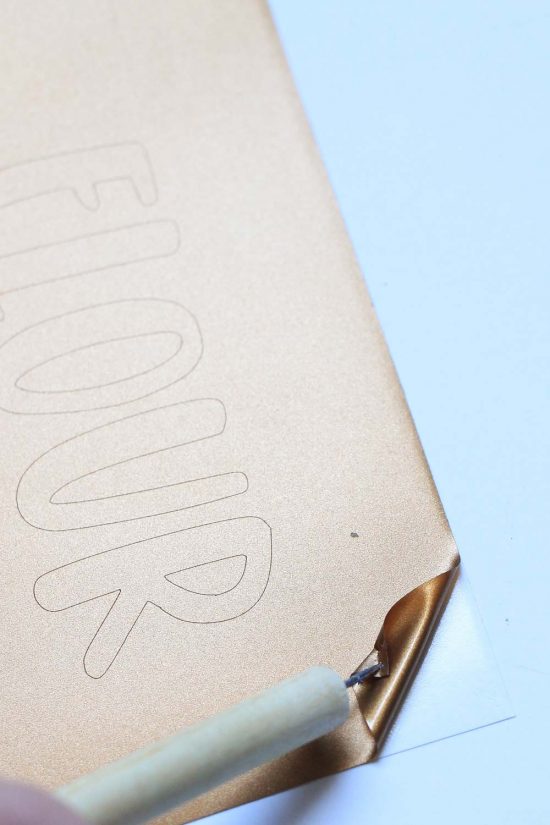
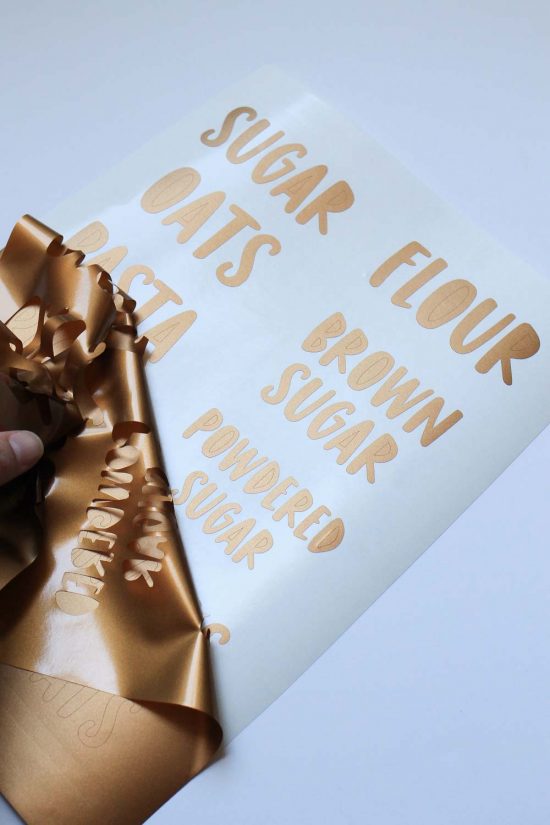
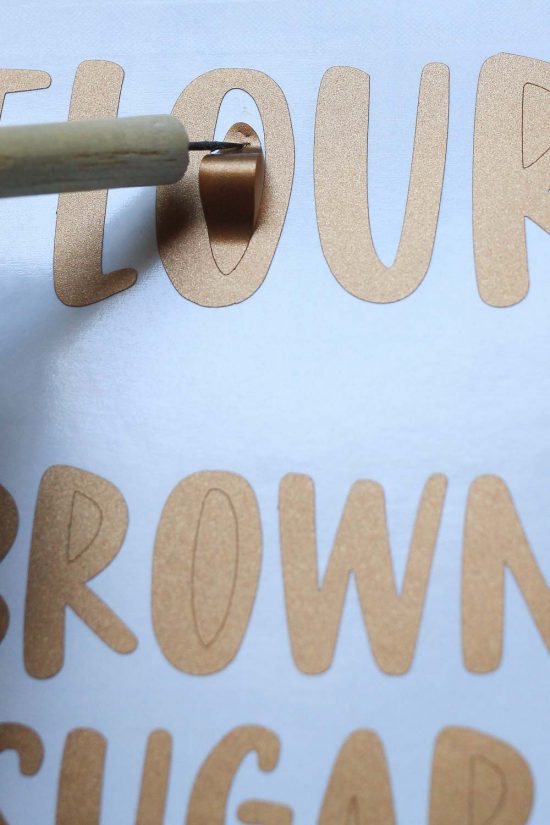
Weed your vinyl! Basically, this means remove the excess, negative space vinyl that is surrounding your label.
You can use a vinyl weeding tool or anything with a pin end like a thumbtack, safety pin, etc. to help with this part. Also, it’s best to start at one corner and slowly peel the excess vinyl away at a 45 degree angle.
4. Apply transfer tape to pantry label decals
Apply transfer tape to your vinyl decals.
I use Oratape HT55 transfer tape, which is made specifically for Oracal 631 vinyl and I buy it in bulk (it lasts a really long time) and it works great! But, any other medium to high tack transfer tape should work fine for this project.
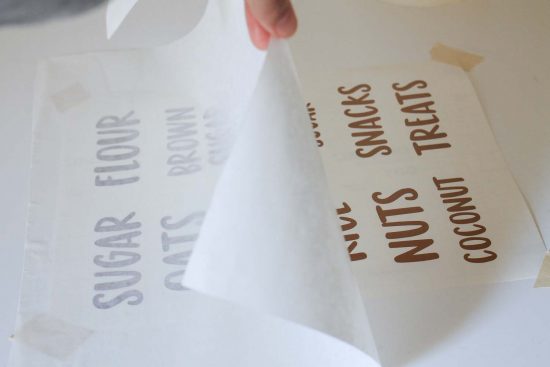
These pantry label decals are small enough that you don’t need any fancy tools or tricks to apply the transfer tape to the vinyl.
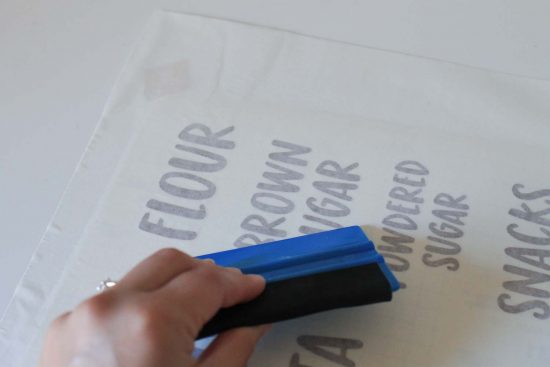
It does help to tape the edges of the paper down with masking tape to your work surface. Apply a piece of transfer tape to the decals and smooth the transfer tape down firmly over the decals with a squeegee or credit card.
5. Cut out DIY pantry labels
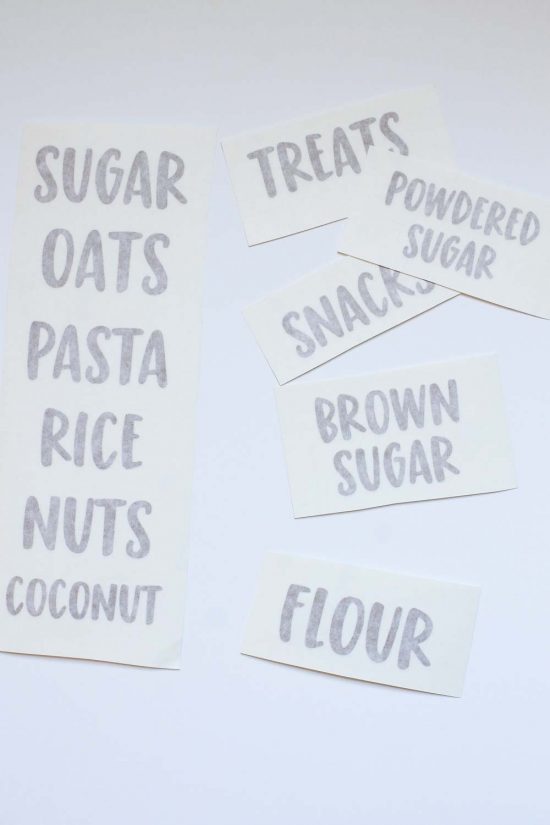
Cut your decal pantry labels out individually with scissors.
6. Apply vinyl decals to jars
Time to apply the pantry label decals to your jars! Clean the area on your jar where you are applying the decal with some rubbing alcohol and let dry. This will really help the decals stick to the glass surface well!
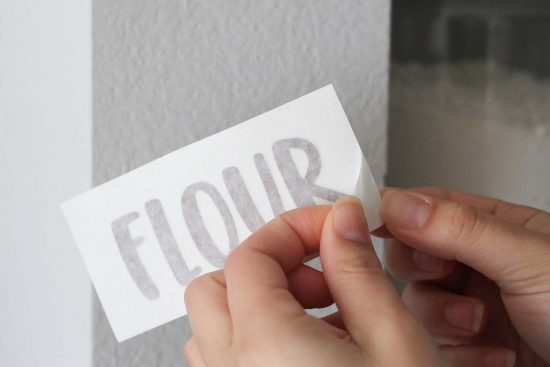
Next, slowly peel the backing paper away from your transfer tape and make sure the decal label is stuck to the transfer tape. If it isn’t, rub back over the transfer tape again firmly with your squeegee or credit card.
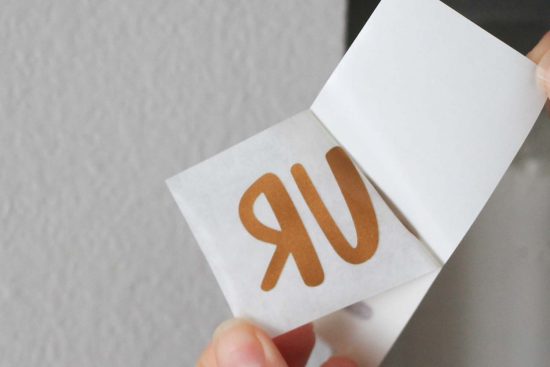
Carefully stick the pantry label decal on your jar and then rub it against the jar with a squeegee or credit card. Finally, slowly peel the transfer tape up at a 45 degree angle to reveal your beautiful, pantry label decal on your jar!
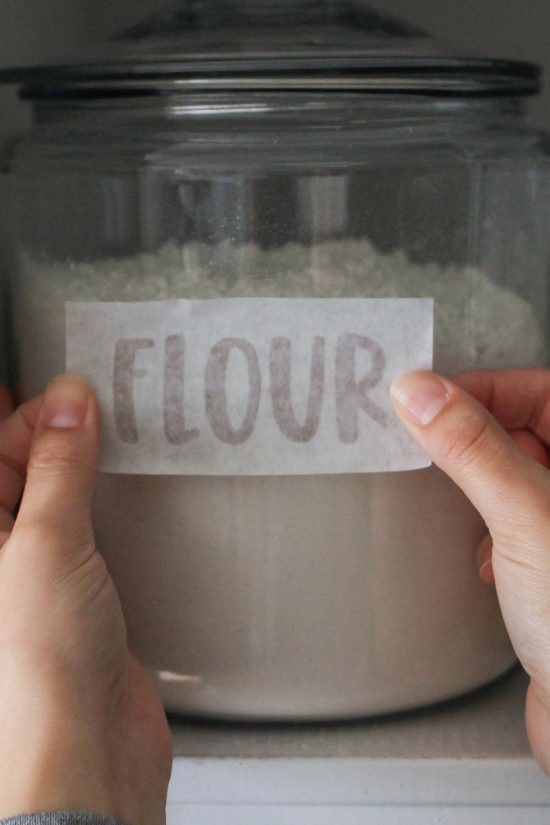
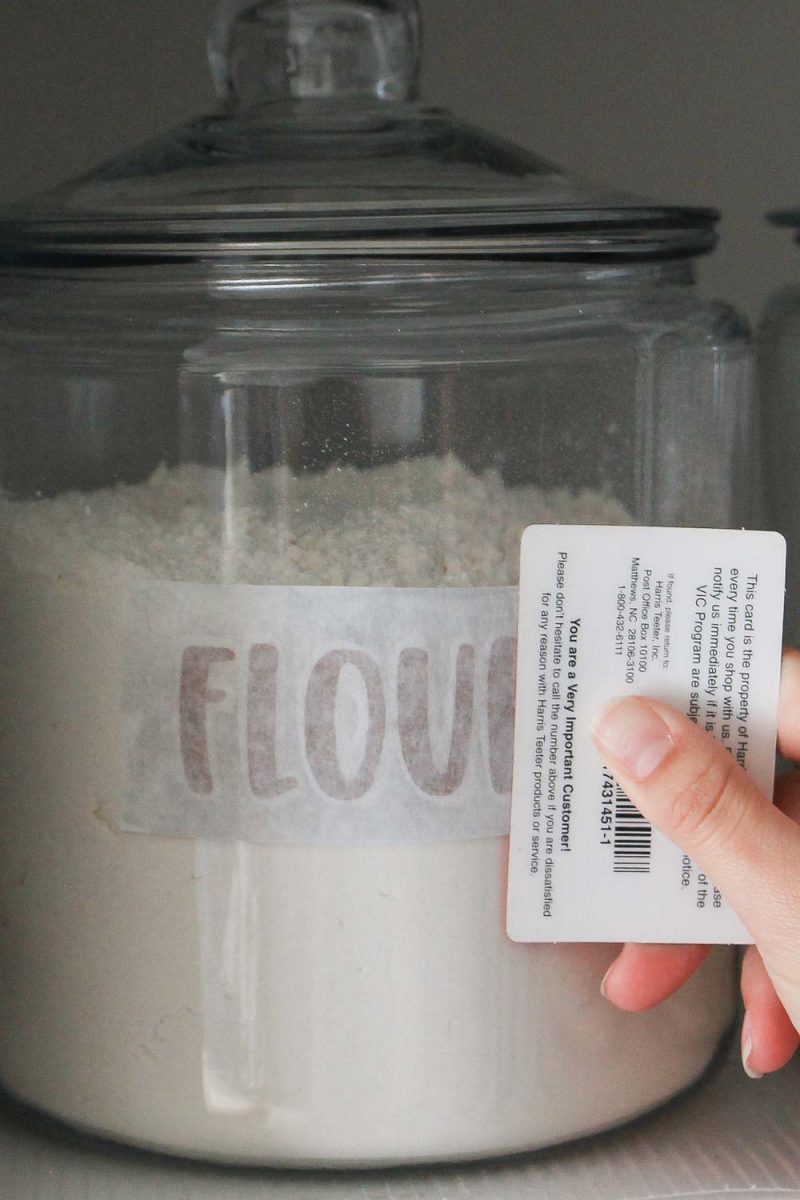
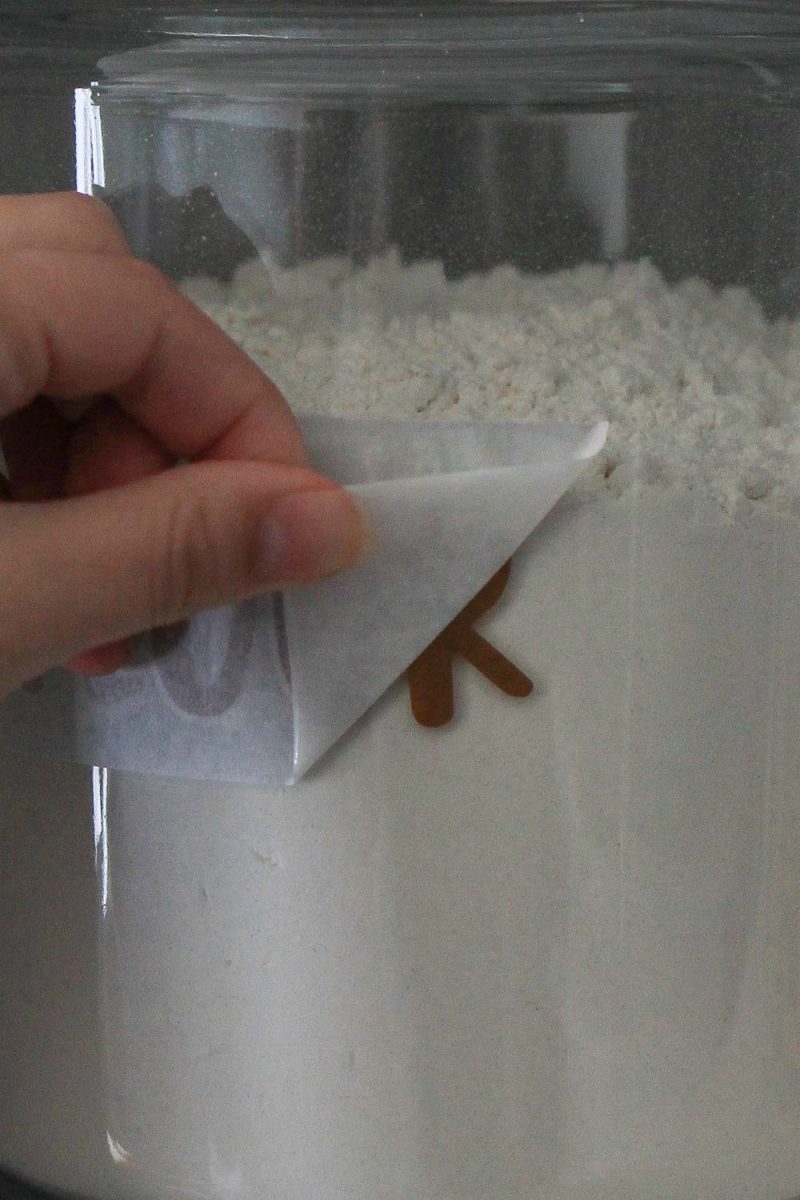
All finished with your pantry label decals!
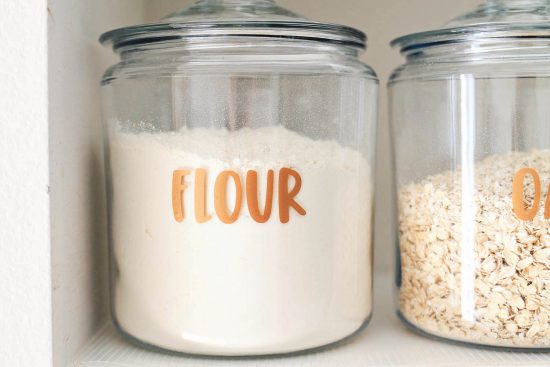
Whew! I know that seems like a lot of steps, but it really is quite easy once you get the hang of it!
Do you prefer to make DIY pantry labels with decals or stickers?! Don’t forget to check out the other tutorial for how to make vinyl labels with a Cricut and how to make custom font pantry labels in Microsoft Word!
Frequently Asked Questions
How to make pantry labels without Cricut
If you don’t have a Cricut or cutting machine, you can make pantry labels with clear sticker paper and a printer.
See my tutorial above for step by step instructions.
How do I make my own pantry labels?
You can easily make your own pantry labels with two different methods:
- A printer and sticker paper
- Water resistant vinyl and a cutting machine like a Cricut or Silhouette Cameo
See my tutorial above for step by step instructions!
I hope this post on how to make pantry label stickers and how to make vinyl labels was informative and will help with all your pantry label needs!
Follow along on Instagram or Facebook for my latest projects, as well as Pinterest!
Want to save for later?! Pin it here:
Save

Maurrissa
Monday 3rd of April 2023
Good morning my name Maurrissa I want to know sticker with paper to spelling words for jars and kitchen containers jars etc…
Janet
Sunday 9th of August 2020
Thank you! Used your pantry labels on mason jars! We are moving into our new house next week and wanted something that looked good! They look great!
Angela Marie Made
Sunday 9th of August 2020
That's awesome, congarts on the new house!
Sam
Friday 1st of November 2019
If you are printing labels, then you have to use a water-resistant material, ink and laminate the labels.
Beth Bilous
Wednesday 25th of September 2019
Please specify which vinyl or sticker paper to use. I m so confused. I have and inkjet printer HP, and i need to know if this will print on it.
Angela Marie Made
Thursday 26th of September 2019
For the vinyl labels I used Oracal 631 Matte vinyl (available here: https://amzn.to/2lie2Sg). For the stickers labels, I used clear sticker paper by Silhouette (linked here: https://amzn.to/2ku0yfY). The clear sticker paper can be used with an inkjet printer! That's what I used as well!
Charlee
Monday 30th of July 2018
Hi! I was wondering how easily the vinyl would come off in the event that I need to label it something different. I am actually trying to figure out the best way to label IKEA trofast bins that store toys ... vinyl or sticker? Since I foresee needing to label it as something else as the kids grow, which do you recommend?
Angela Marie Made
Tuesday 31st of July 2018
I'd recommend the vinyl over the sticker labels. The Oracal brand vinyl I use peels off easily and cleanly, and most other vinyl brands should too. If the vinyl is on the bins for a few years before you need to pull it off, you can also use a hair dryer on medium heat to help get it off even easier.