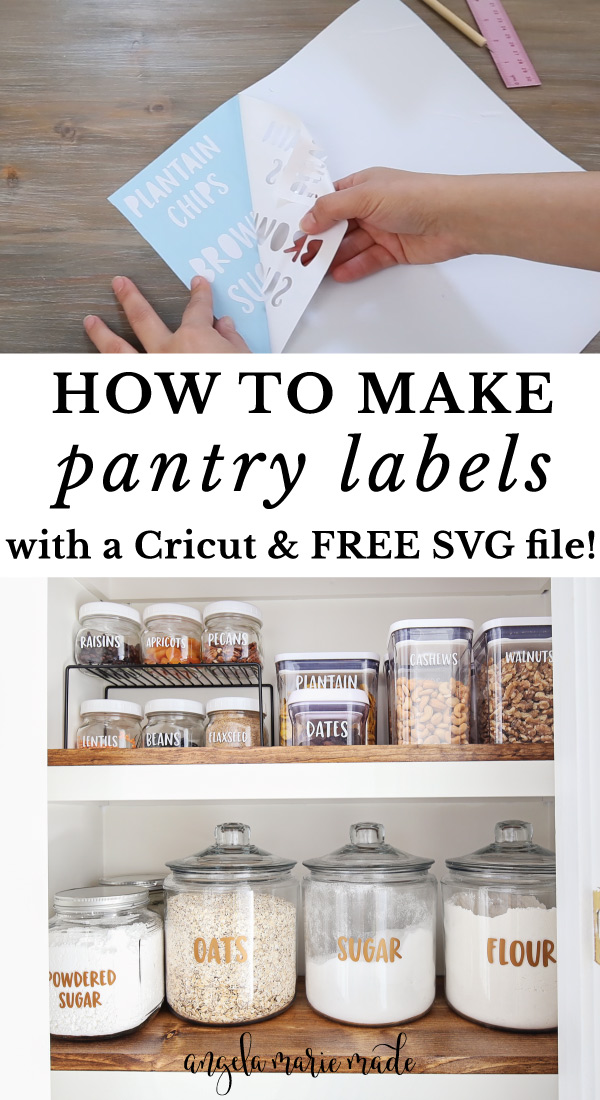
Learn how to easily make DIY pantry Cricut labels and get a FREE SVG file for the Cricut pantry labels!
Today I’m sharing how to make labels with Cricut and using my DIY pantry labels as my example!
I’ve created a free SVG file so you can make your own pantry labels too. Get access to the free file in the free printable library below!
If you don’t have a Cricut, no worries, I have a tutorial on how to make pantry label stickers with a printer and the same free pantry labels in a printable download.
And in that same post is a tutorial on how to make pantry label decals with a Silhouette Cameo, again with the free pantry labels download!

Making pantry labels with a Cricut is a great first project if you are a new Cricut user.
I love making pantry labels, they are my favorite way to update a kitchen pantry and have a more organized pantry!.
Also, you can apply this tutorial in many different ways: labels for spice jars, cleaning supply labels, craft supplies, or any labels needed for glass jars or plastic containers, and more!
Get the FREE pantry labels files

Note, this post contains some affiliate links. For more info see my disclosures here.
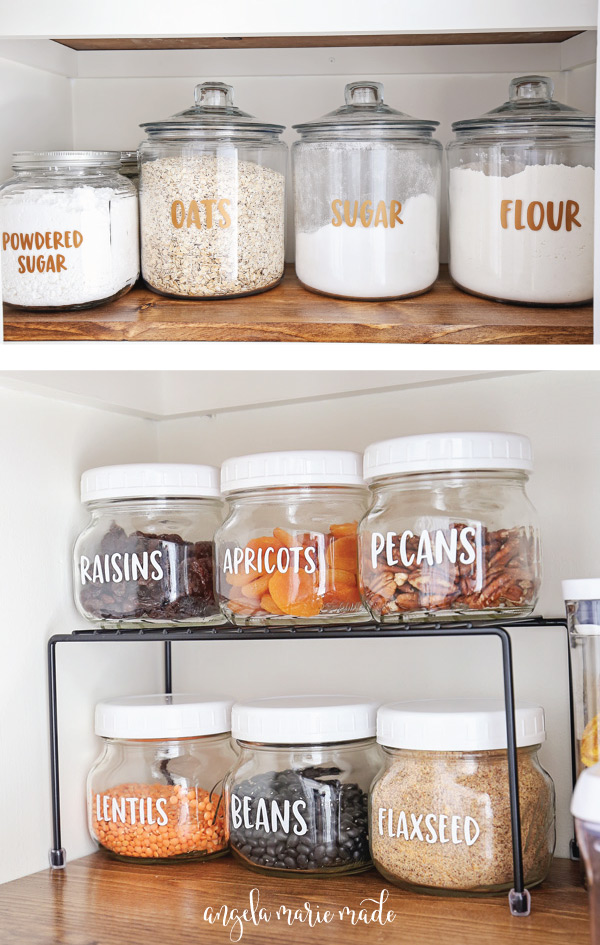
At our old apartment, I created open pantry shelving and made these pantry decals using copper vinyl.
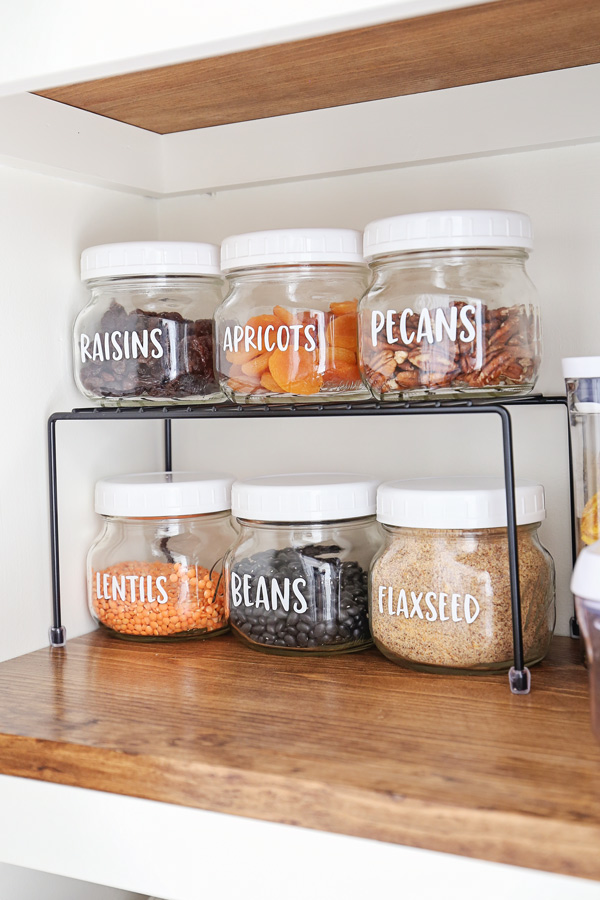
For our small pantry organization makeover in our current kitchen, I wanted to make some new labels using white vinyl and my new Cricut! I just love how they turned out!, they look adorable on my pantry jars!! And my new Cricut cut the labels out perfectly!

I love using vinyl for labels, especially pantry labels, because it’s waterproof, easy to remove, easy to change the label sizes, and looks super cute too! So this post is going to focus specifically on how to make vinyl labels with Cricut.
What kind of vinyl is used for pantry labels?
As far as type of vinyl to use, I recommend using a high-quality vinyl that is water resistant.
Oracal 631 vinyl is my favorite, but you can also use Oracal 651 or Cricut Premium Permanent Vinyl, which are more permanent. Either one works great and they come in multiple colors, including metallic colors!
The step-by-step instructions on how to make labels with Cricut tutorial is below as well as a video tutorial of the whole process!
How to Make Pantry Labels with Cricut:
Materials Needed:
- Cricut Explore or Cricut Maker (I used my Cricut Explore 2 in this tutorial)
- Free pantry labels SVG file (get the free file here)
- Vinyl (I like Oracal 631 matte vinyl in white or Cricut Premium Permanent Vinyl )
- Vinyl weeding tool or Cricut Weeder (something with a pin end)
- Transfer tape (Oratape HT55 for Oracal 631 or Cricut Transfer Tape for Cricut vinyl)
- Vinyl Application Squeegee or old credit card or Cricut Scraper Tool
- Masking tape
- Scissors
- Craft razor blade cutter
- Ruler
Pantry Labels Font
*Note: if you’d like to make more custom labels, besides the ones I’ve included in the free pantry labels download, you can get the same font I used here.
Cricut Explore 3 and Cricut Maker 3 Differences
If you are using a Cricut Explore 3 or Cricut Maker 3, you can use smart materials or smart vinyl, which can be cut without a cutting mat! I will be using my Cricut Explore 2 in this tutorial with my 12×12 cutting mat that came with my Cricut.
Video on how to make vinyl labels with Cricut:
Subscribe to my YouTube Channel here!
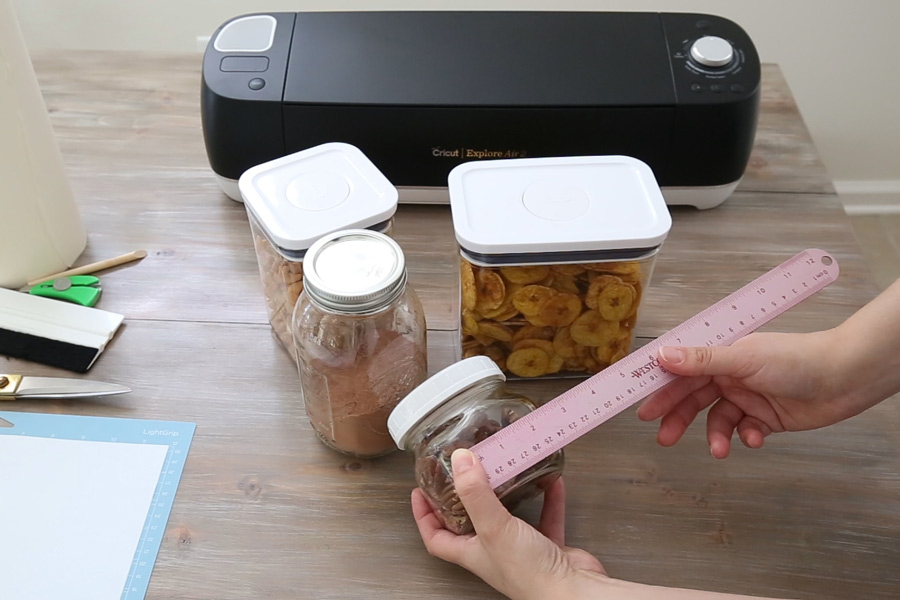
1. Determine the size needed for your Cricut labels
Begin by using a ruler or tape measure to determine the height and width of your labels. Make sure that your label size will be a little bit smaller than the surface area available for your labels.
2. Open your label design in Cricut Design Space
Open Cricut Design Space.
Either create your own label designs using a Cricut font or download my free pantry labels SVG file from the free printable library into Cricut Design Space for the Cricut labels. I love free Cricut label templates and SVG files!
If you haven’t subscribed yet to the library, just click the button below to get your free SVG file and access!
Also, as I mentioned above, if you want to make even more labels other than the free labels I provided, with the same font that I used, get the custom font here!
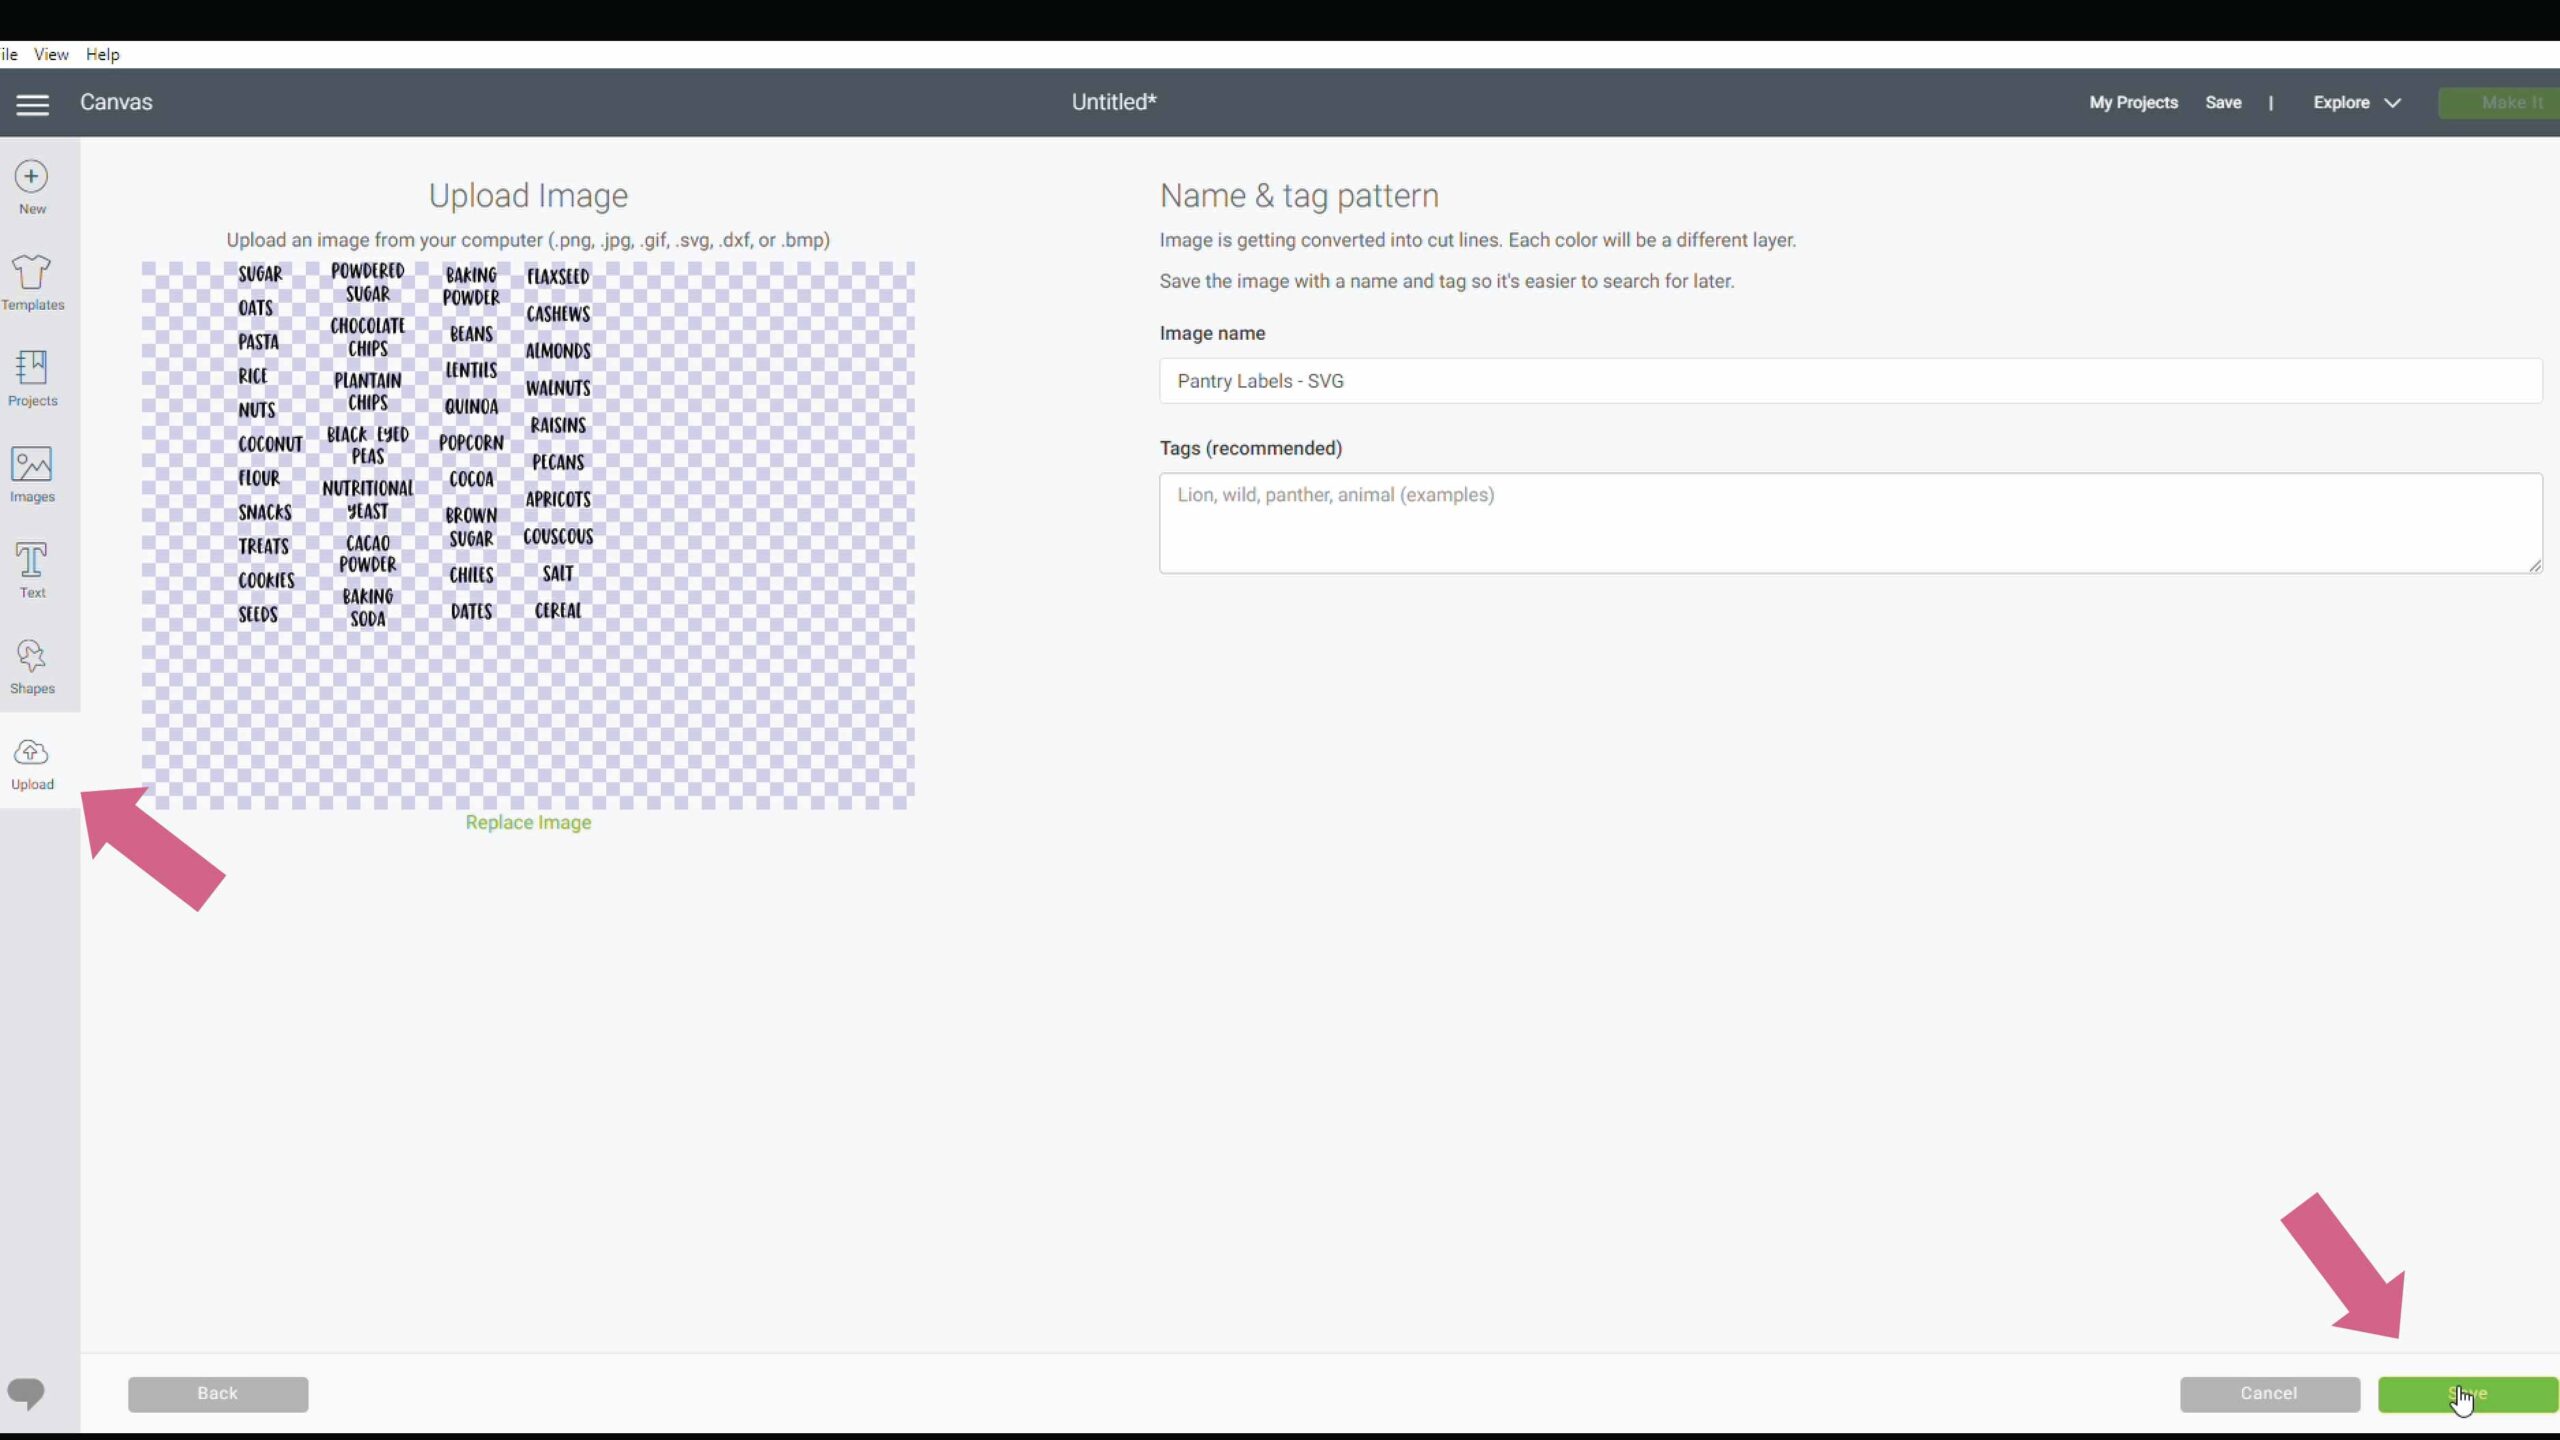
To open the file in Cricut Design Space, click on “Upload” followed by “Upload Image” then “Browse” and chose the file then select “Save”.
***For a full step by step tutorial of this process, see my DIY pantry label video tutorial here.
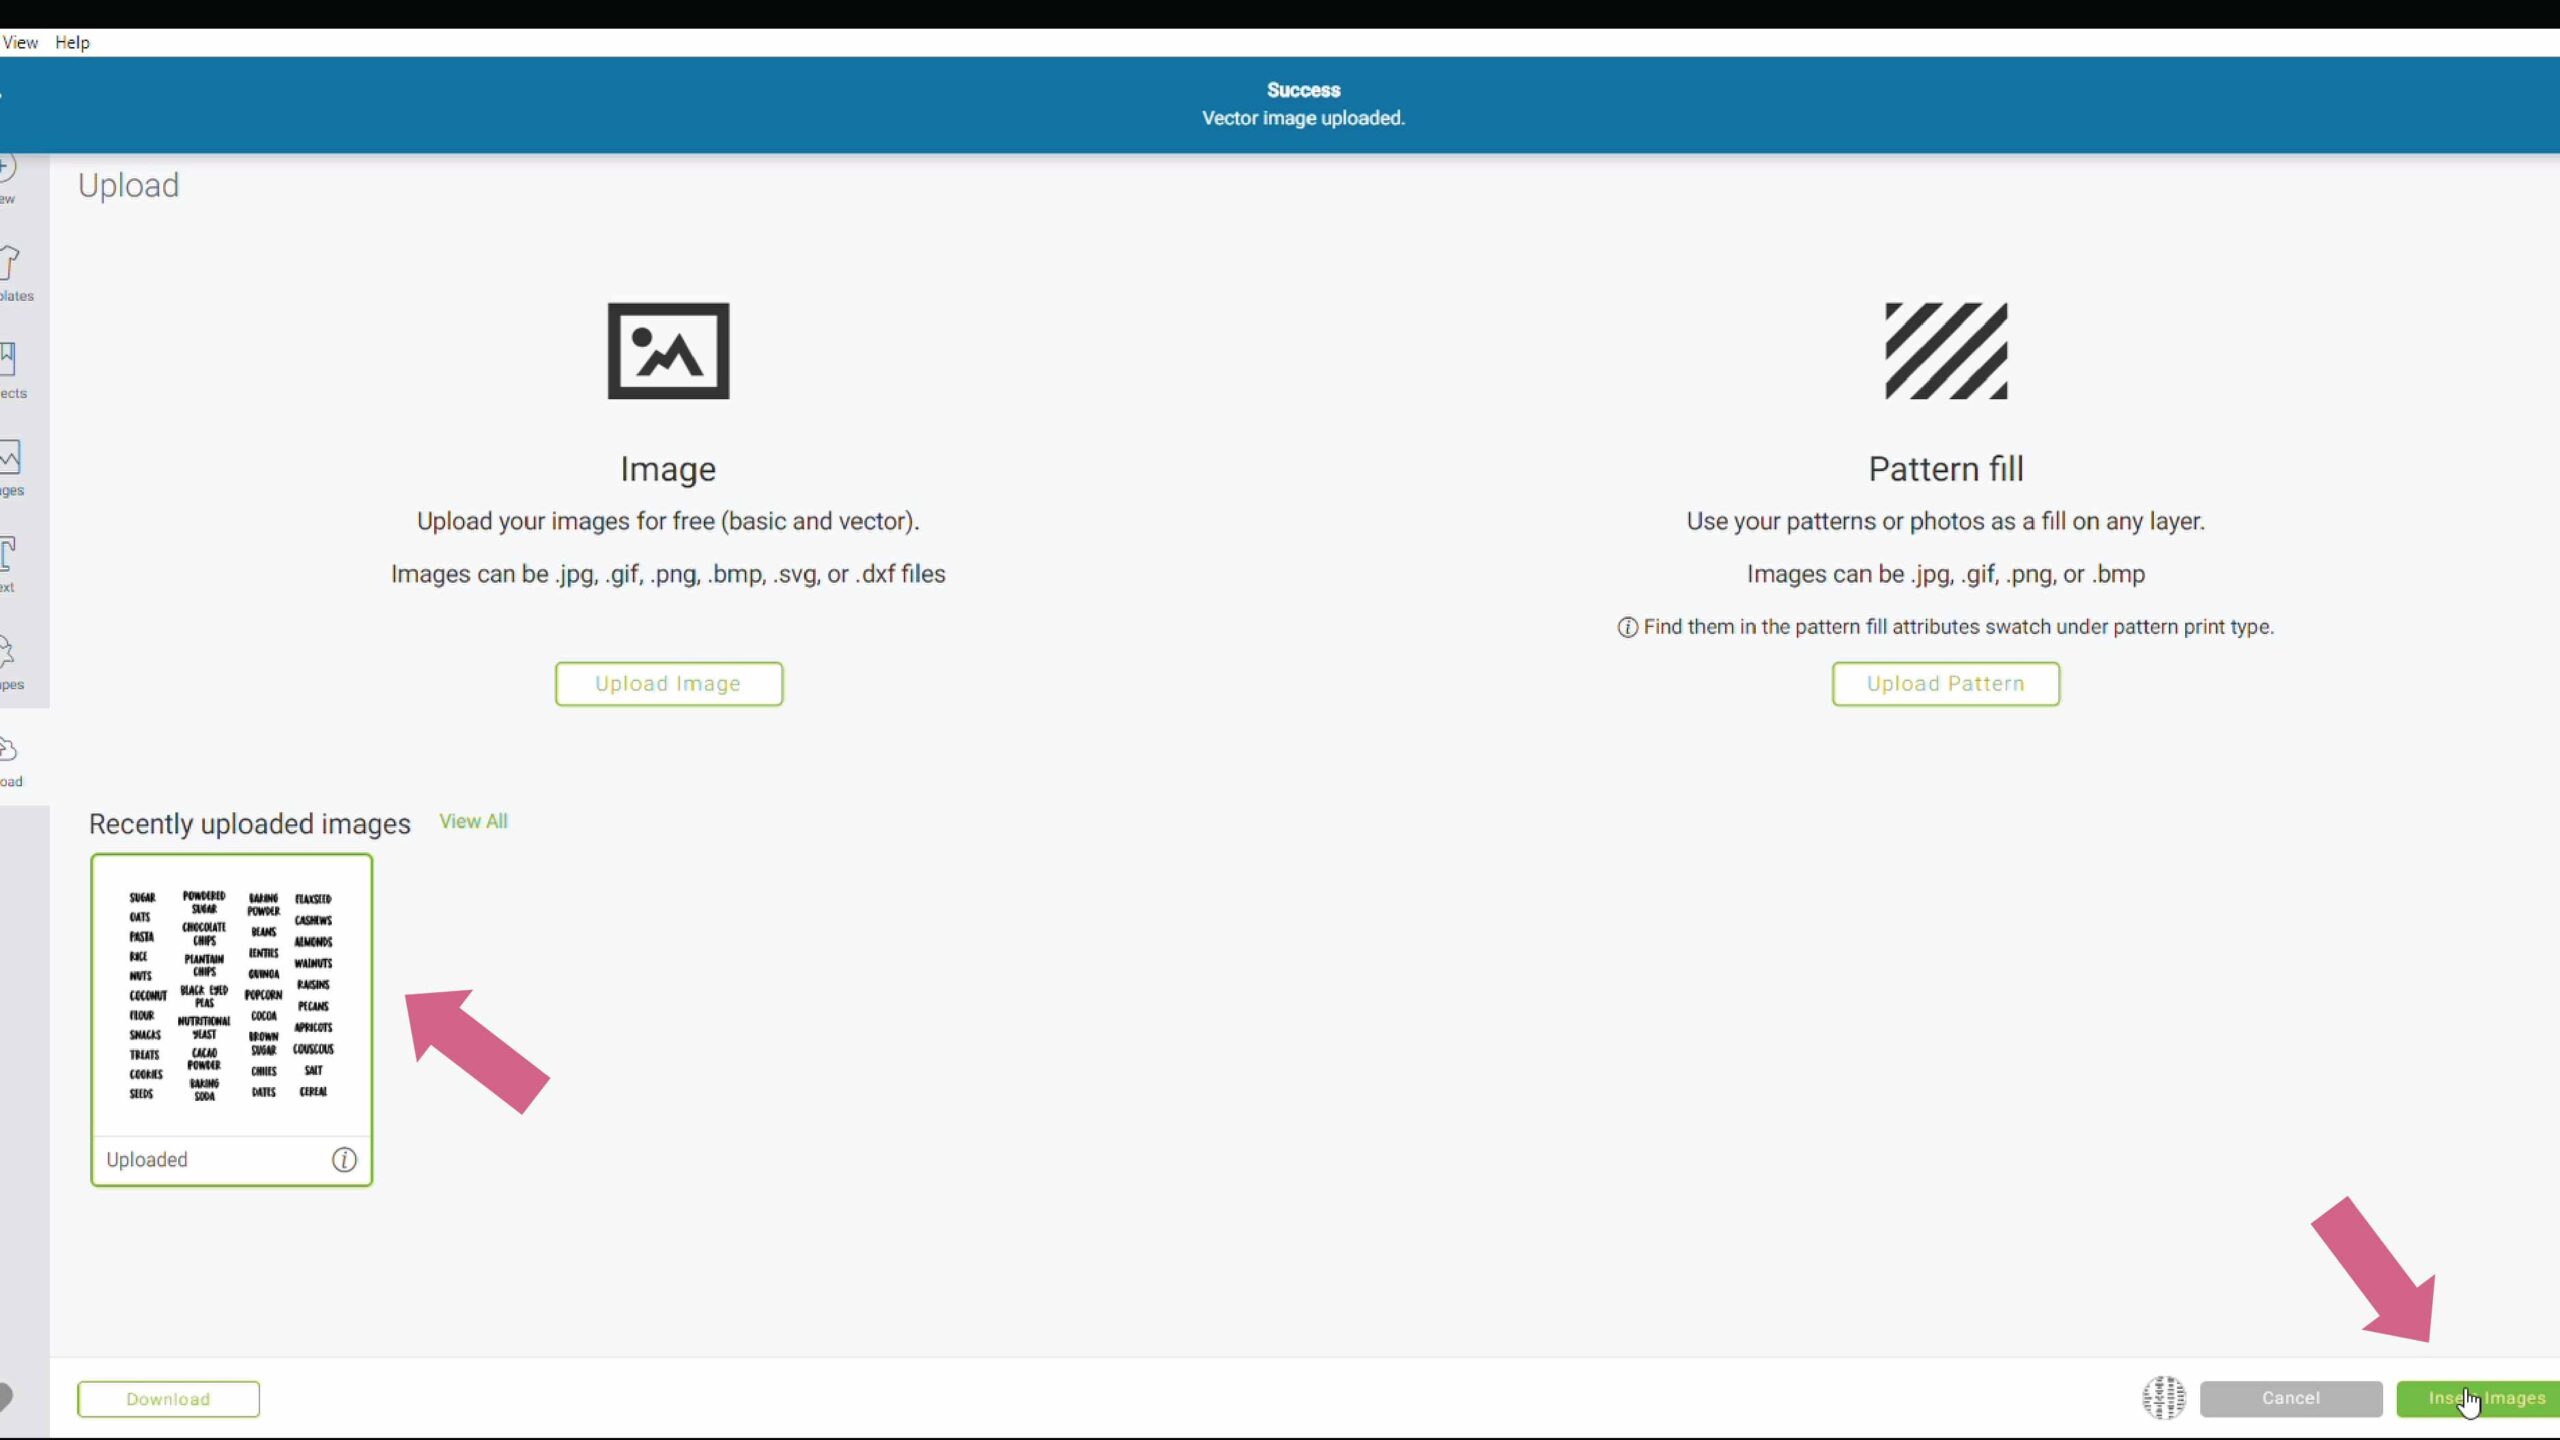
Then, select the file and click “insert images”
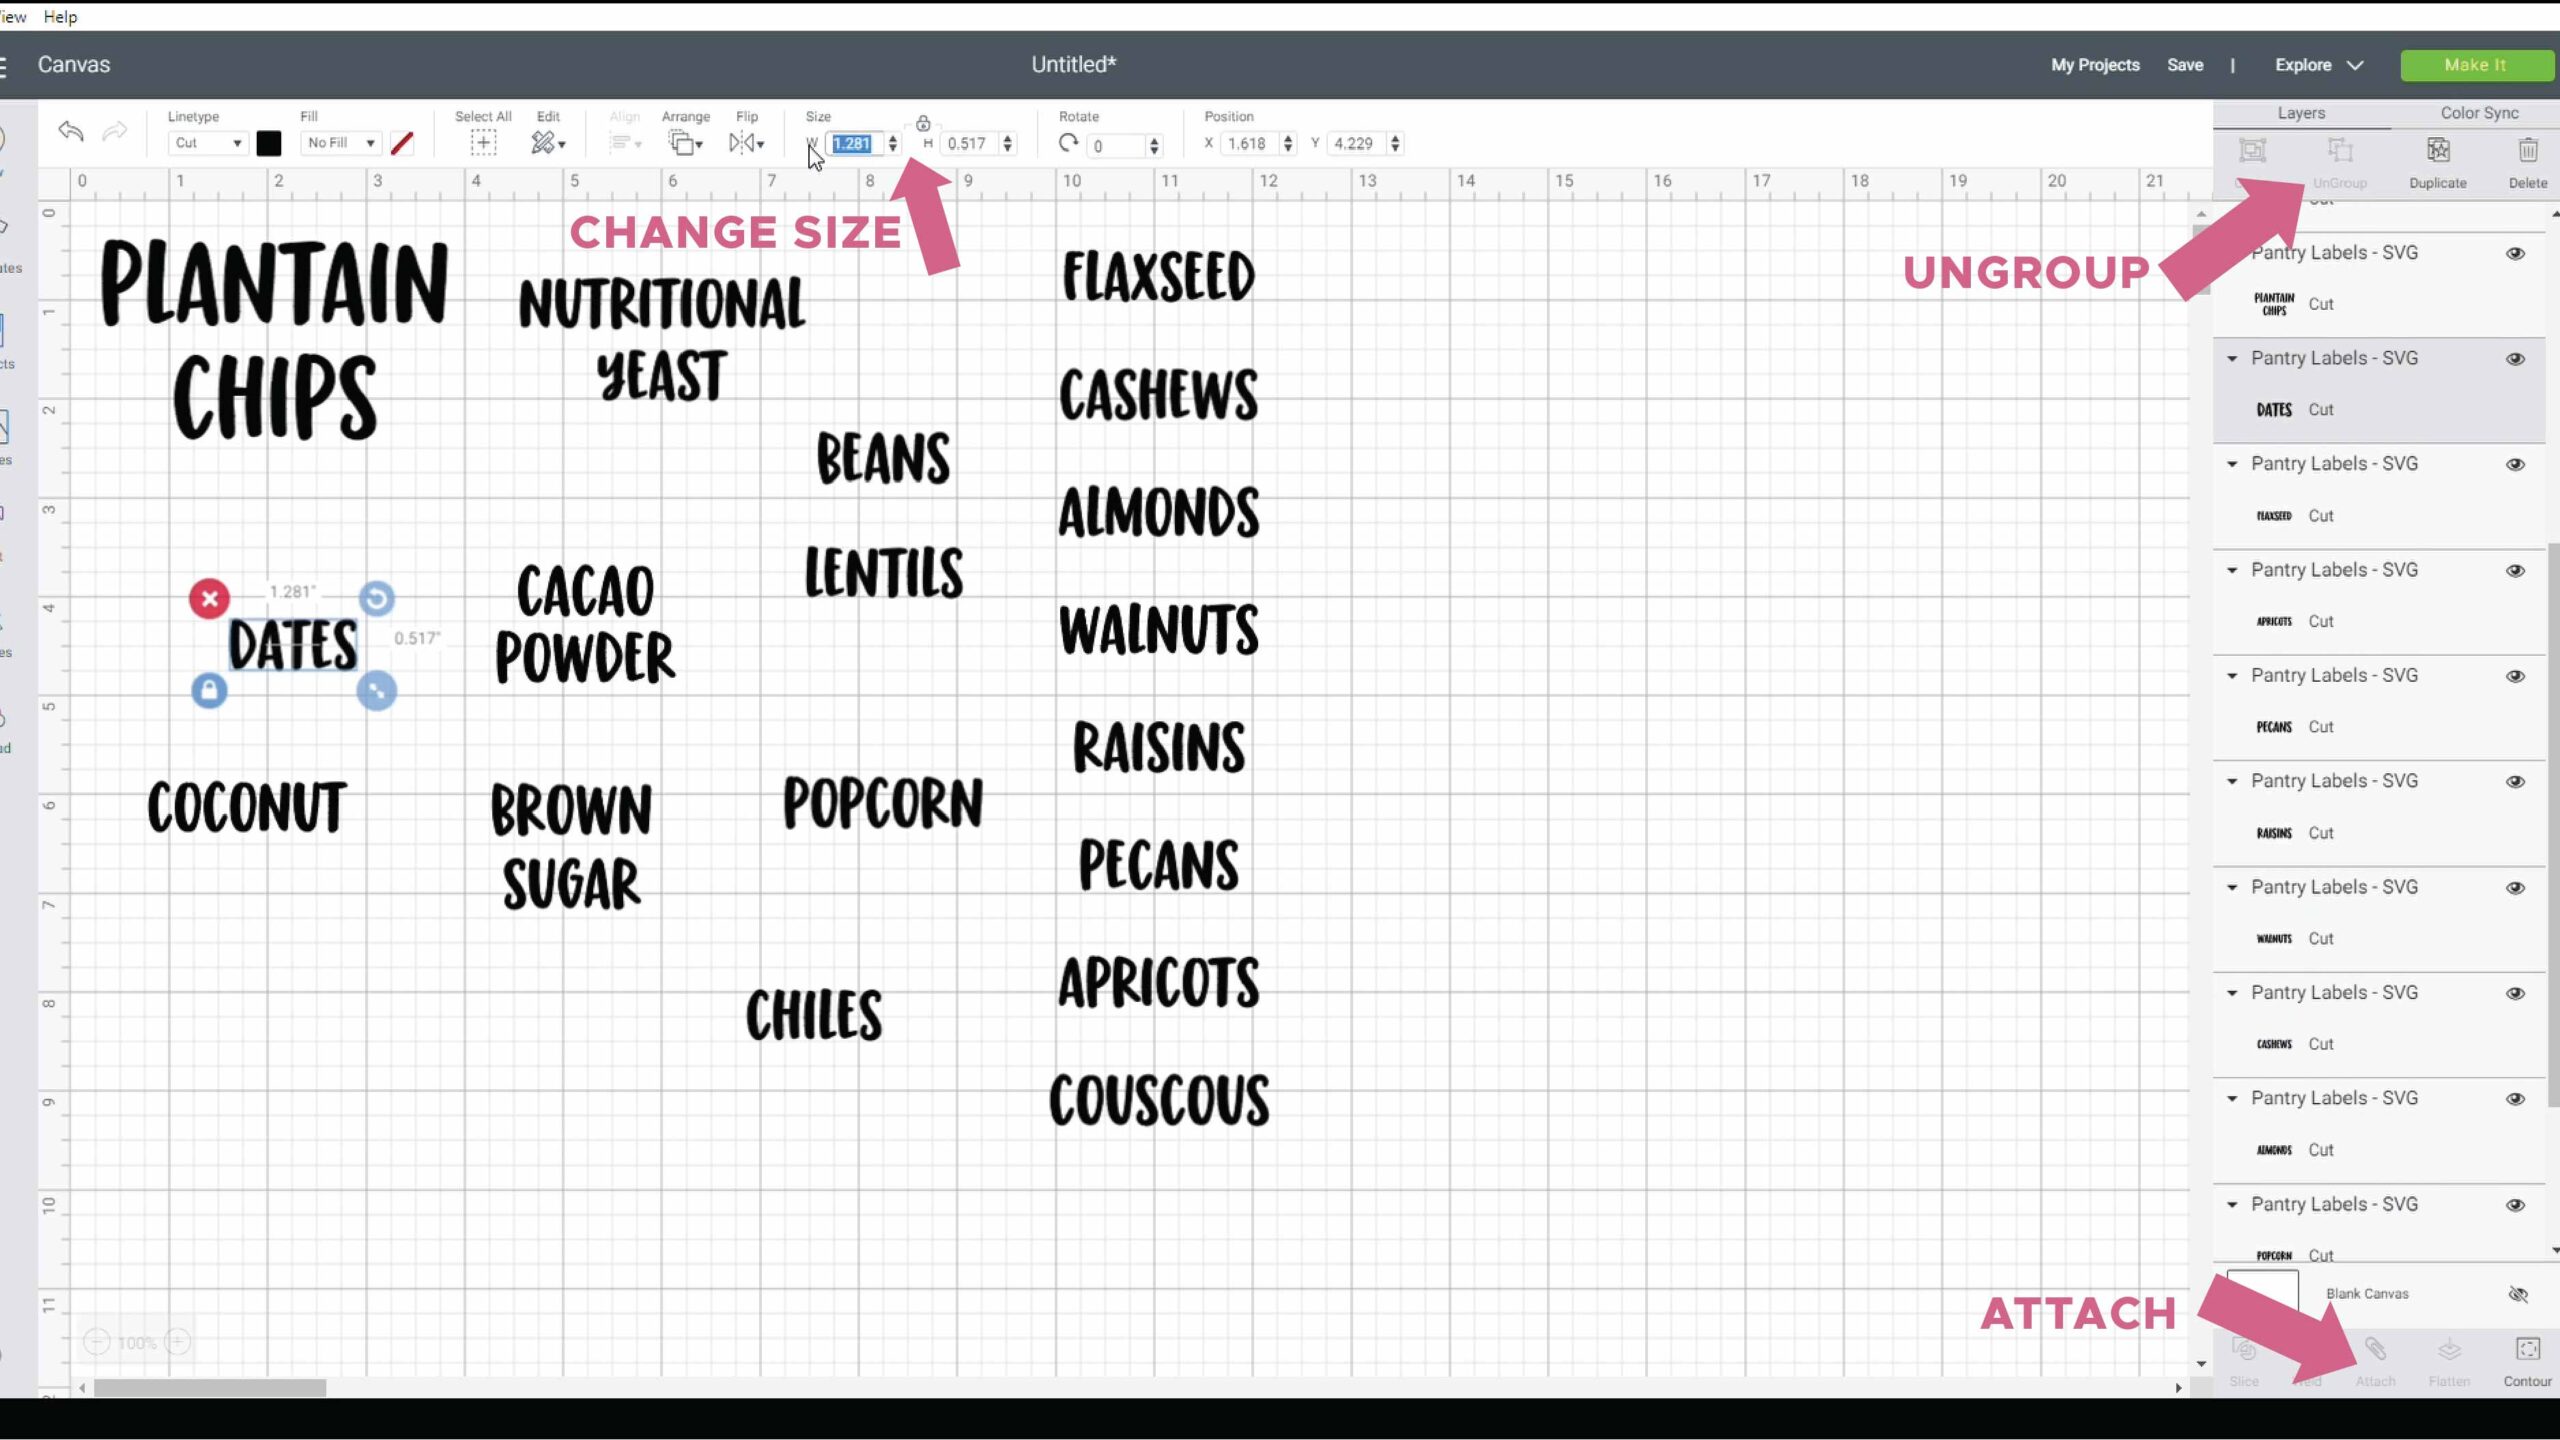
3. Select labels needed and change size of labels as needed
To prepare your SVG file for cutting the labels you need, begin by selecting the grouped labels and then click on “Ungroup”. Next, select any labels you don’t need and hit delete.
For the remaining labels you do want to keep, select each one individually and change the size to the custom size you need by entering it in the width and height size boxes along the top toolbar in Cricut Design Space.
Make sure when you change the size to select the lock icon to lock the scale in place so that the letters don’t get warped when changing the height/width.
Once you finish changing the size of each label item, move the designs so they are in the 12×12 grid lines for cutting purposes.
Finally, select all the label items (press Control A on PC or Command A on Mac) and then click “Attach” in the lower right hand corner so that the file will cut the labels exactly how you see them on the screen.
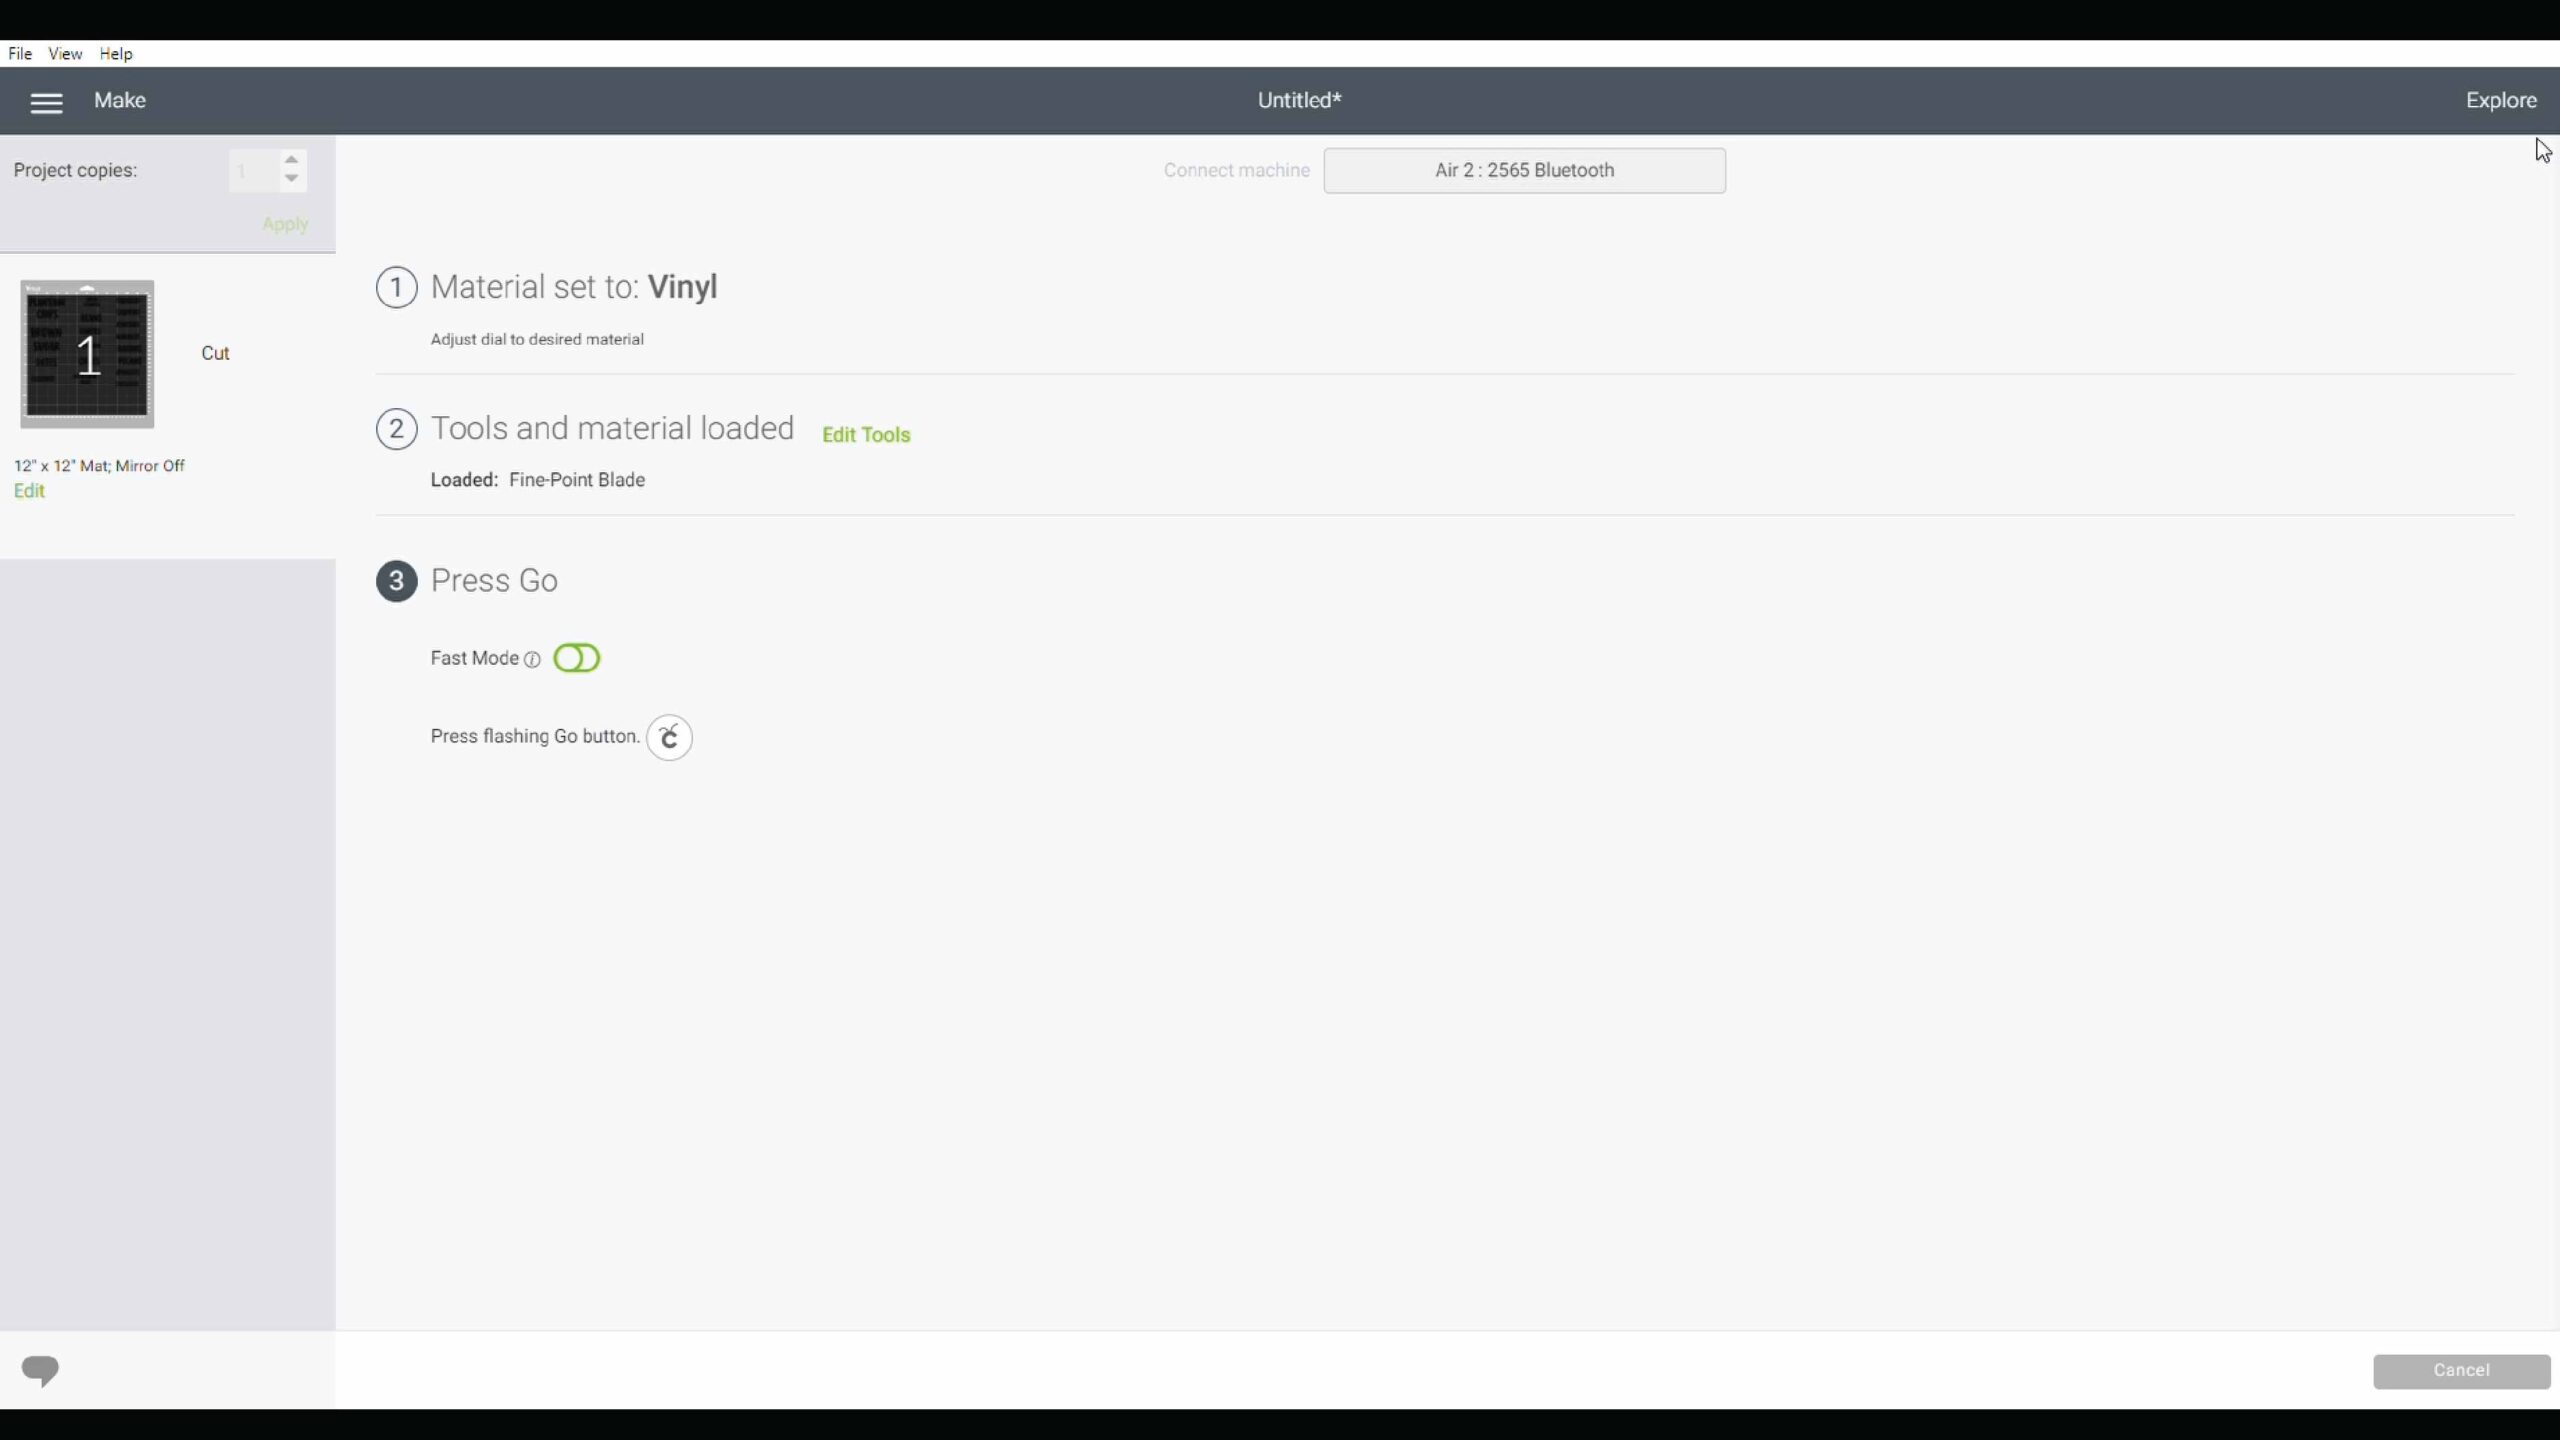
4. Send design to your Cricut and cut the vinyl Cricut pantry labels
Load your Cricut cutting machine with a 12×12 sheet of vinyl on your cutting mat that was included with the Cricut.
On your machine make sure the dial is set to “Vinyl”.

📩 Want to Save This?
Finally, click on the green “Make it” button in the top right hand corner in Cricut Design Space. Make sure the material says Vinyl and your Cricut machine is connected. Then, press the flashing go button on your Cricut machine!!
And that’s it for how to make labels with Cricut! The next steps focus on the vinyl part of the DIY labels!
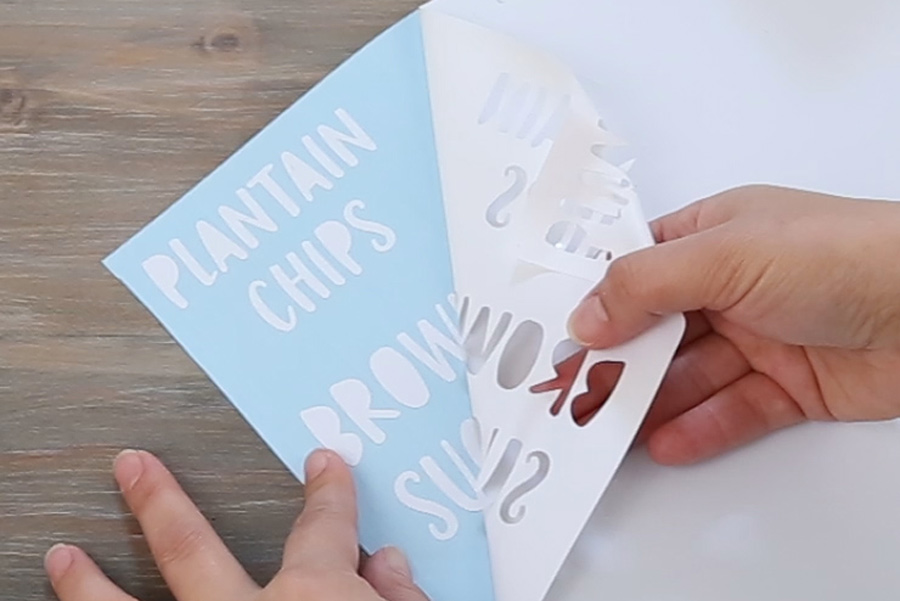
5. Weed your vinyl label decals
Weed the excess vinyl around your Cricut labels.
Weeding vinyl means to remove the excess negative space vinyl that surrounds your cut label design.
I previously shared how to weed DIY pantry labels in my tutorial on how to make labels with a Silhouette Cameo. It’s the same process this time!
Begin by removing the vinyl sheet from your Cricut cutting mat.
Use a vinyl weeding tool or anything with pin end (like a saftey pin), although a weeding tool is much easier. And then slowly pull the extra vinyl back at a 45 degree angle.
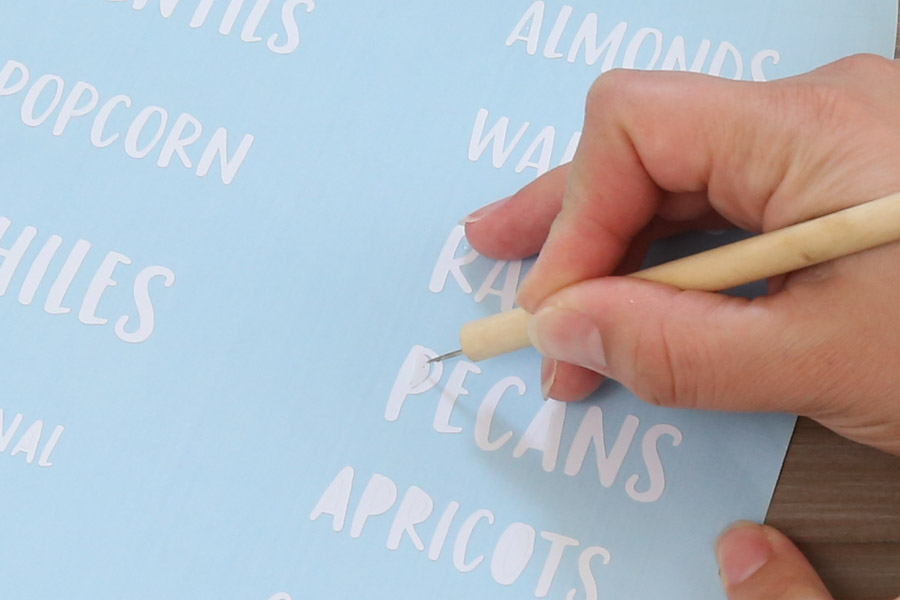
You can also use a craft razor blade cutter or scissors to work in a small section at a time if your labels are very small or intricate.
The vinyl weeding tool works great for getting in the middle of letters or small designs that need the vinyl removed.
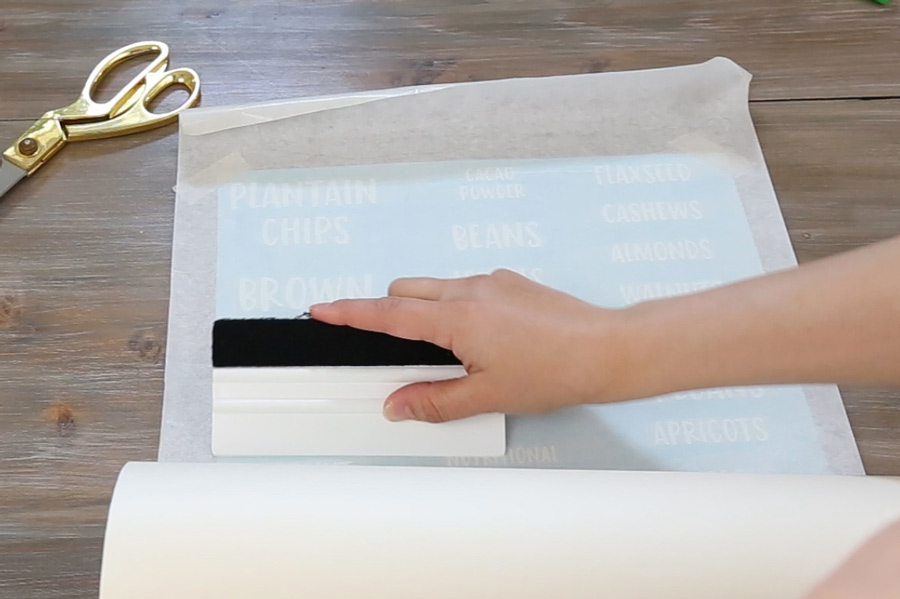
6. Apply transfer tape to vinyl labels
For transfer tape, I use Oratape HT55 transfer tape, which is made specifically for Oracal 631 vinyl and I buy it in bulk (it lasts a really long time) and it works great! But, any other medium to high tack transfer tape should do the job well.
To help make this process easier, use masking tape to secure the corners of your vinyl sheet to your work surface. Masking tape doesn’t leave any sticky residue like other tapes.
Then, the way I prefer to do this without using my transfer tape applicator is to press the end of the transfer tape to my work surface and then slowly roll out the transfer tape over the vinyl sheet and smooth the transfer tape down with a vinyl application squeegee (you can also use an old credit card).
Cut the transfer tape from the roll with a razor cutter or scissors.
I prefer doing transfer tape this way rather than cut one piece of transfer tape for each label.
Again to see this entire process in action, see my How to Make Labels on a Cricut video tutorial!
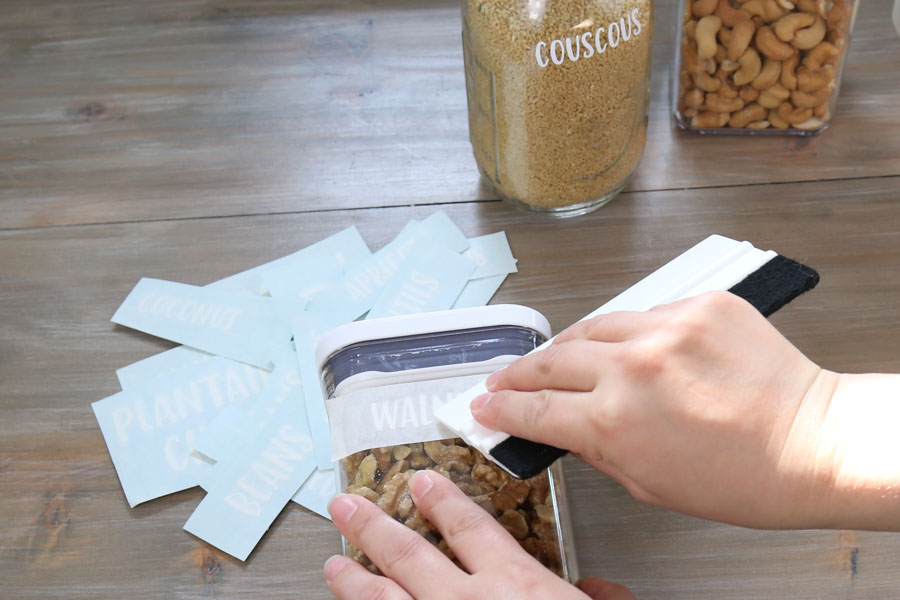
7. Cut DIY pantry labels out and apply to jars
Use scissors and cut out the vinyl pantry labels individually.
Apply each of the Cricut labels to your jars or containers.
To do this slowly peel back the transfer tape from the vinyl backing sheet and make sure all of the vinyl design is attached to the transfer tape. If it isn’t then, you need to rub over it again with the squeegee.
Stick the label on your jar where you want it to go and then rub over the top of the transfer tape with the squeegee to ensure the vinyl is secured to your surface.
Slowly peel the transfer tape back at a 45 degree angle to reveal your pantry label!
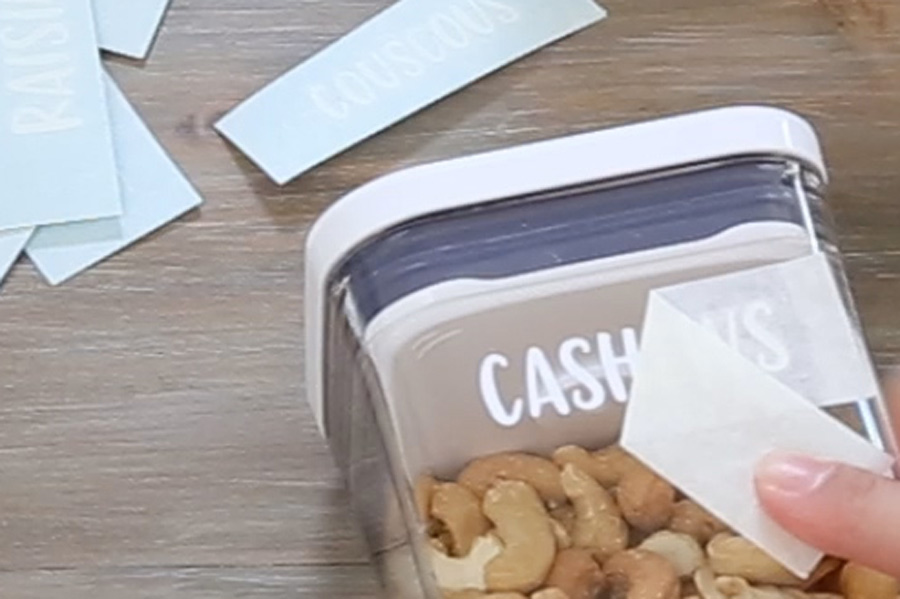
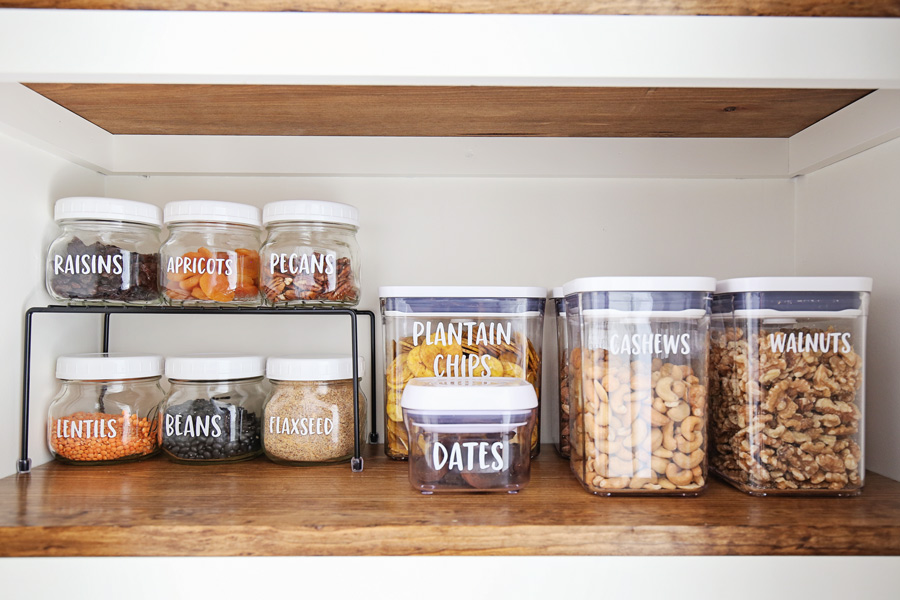
Wow! All finished!!! It’s quite a bit of steps, but really easy once you get the hang of how to make labels with Cricut! These Cricut labels for jars and containers are perfect for pantry organization.
I love my new DIY pantry labels in the white vinyl and it makes finding our bulk pantry items so much easier now in our newly organized small pantry! Plus, I think they especially look cute on our new DIY pantry shelves!
Frequently Asked Questions
How do I make pantry labels on Cricut?
Here is a quick overview how to make pantry labels using a Cricut and vinyl (the most durable material):
- Use the text tool in Cricut Design Space to type out your pantry label item or upload our free Cricut label templates for pantry labels
- Resize your label to the needed size
- Cut the labels out on your Cricut using water resistant vinyl
- Weed the vinyl
- Apply transfer tape to the vinyl pantry labels
- Cut the pantry labels out and apply them to your pantry containers
Again you can get the detailed tutorial above!
What size are Cricut pantry labels?
Cricut pantry labels can be made to any size that you need in Cricut Design Space, as long as they are under 11.5″ tall x 11.5″ wide for a 12″x12″ cutting mat. My Cricut pantry labels were about 1.5″ tall and 2″ to 4.5″ long depending on my container size and label text.
Is a Cricut machine good for labels?
Yes, a Cricut machine is great for making labels quickly and easily! With a Cricut you can make custom labels, change the size of the labels, make vinyl labels, or print and cut labels. You can use custom fonts or designs too if desired!
What Cricut machine is best for making labels?
Any Cricut machine can be used to make labels including the Cricut Joy machine, Cricut Explore Air, and Cricut Maker.
For making multiple pantry labels, a Cricut Explore or Maker is best to use since they can cut larger projects compared to the Joy. And to make labels even faster, without a cutting mat, the Cricut Explore 3 or Cricut Maker 3 and smart materials are the best to use.
How do I make custom pantry labels?
Custom pantry labels can be made using vinyl labels cut out with a cutting machine like a Cricut. They can also be made by printing them onto paper or sticker paper. See how to make custom labels with a printer and paper or sticker paper here.
***
Well this Cricut pantry labels post concludes my small pantry makeover series, as well as my DIY pantry label series!
I hope this tutorial on how to make vinyl labels with Cricut has been helpful and you can make all the Cricut labels you need now to get your spaces organized!
Follow along on Instagram, Facebook, and YouTube for my latest projects!
Want to save for later? Pin it here:
Becky
Wednesday 29th of November 2023
Thinking about double layering vinyl so the white letters look like chalk on a chalkboard label………these will then be put on Fido jars in my pantry / on cupboards…….any words of wisdom on this type of technique?
lizzy
Wednesday 23rd of August 2023
hello thank you so much nice labels :)
Angela Marie Made
Thursday 31st of August 2023
You're welcome I'm glad you like them!!
sarah
Saturday 3rd of June 2023
I am wondering if it's possible to bulk change the font used for these? Once you select multiple boxes, the ability to change the font disappears. Obviously I can do them 1 by 1 but as a bulk lot would be way faster!
Thanks!
Catalina
Tuesday 28th of March 2023
Hi, I want to make this labels. Don't have Cricut yet. Thinking in buying one just to do this project mainly. Can I use a cricut Joy to do this? or which Circuit do you recommend? I bought already some labels form a girl from Etsy, but she close her store. She used same font of your vinyls, can I create my own labels using same font? Thank you for your time in making this video.
Angela Marie Made
Monday 3rd of April 2023
The Cricut Joy can do create labels it just can't make as many at a time as other Cricut machines so it depends on what you need it for! Yes you can download the free SVG file and create labels with this same font
YvonneByrne
Sunday 21st of August 2022
I have just made my pantry labels and with your instructions they have turned out perfectly. Thank you
Angela Marie Made
Monday 22nd of August 2022
So glad to hear that! Thank you!