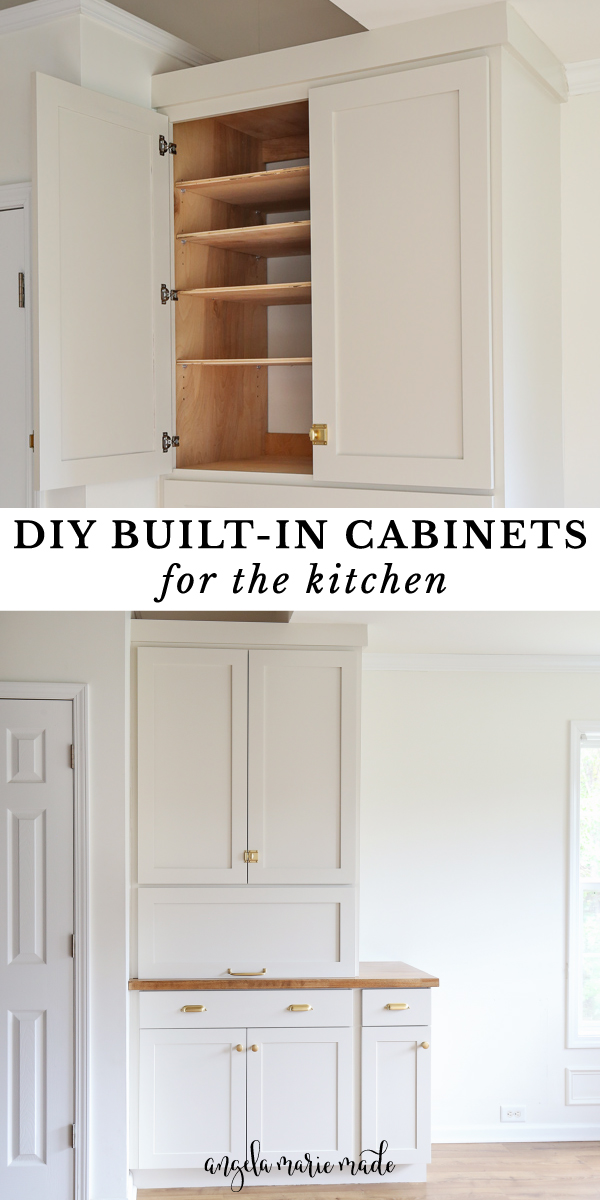
Learn how to install DIY built in cabinets with stock cabinets and a countertop cabinet for the kitchen (or any room) to add storage from floor to ceiling in a beautiful way!
Our kitchen really needed more storage and counter space for small appliances like our microwave.
To fix this problem, I knew custom DIY built in cabinets from floor to ceiling would be the perfect solution to maximize storage space in an empty nook between our kitchen pantry and dining room.
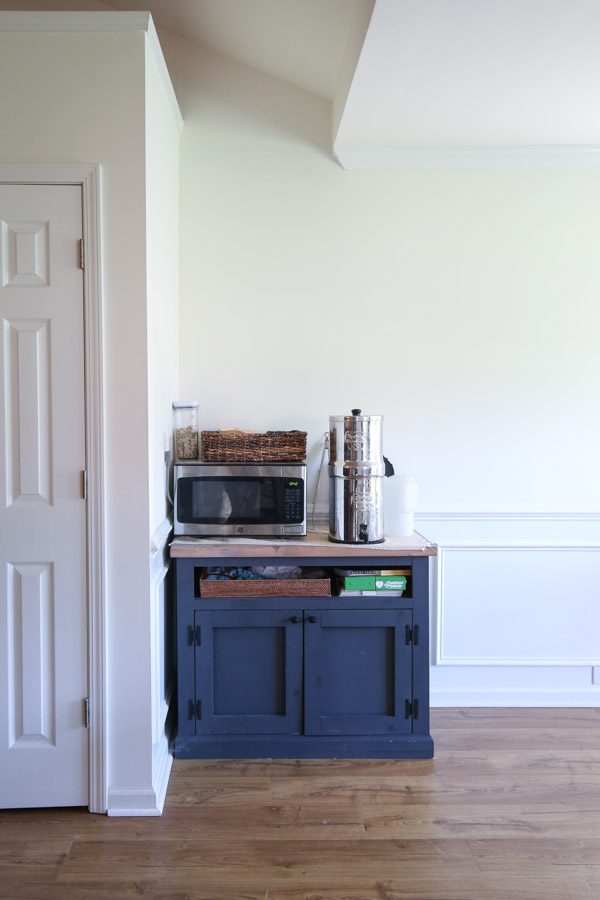
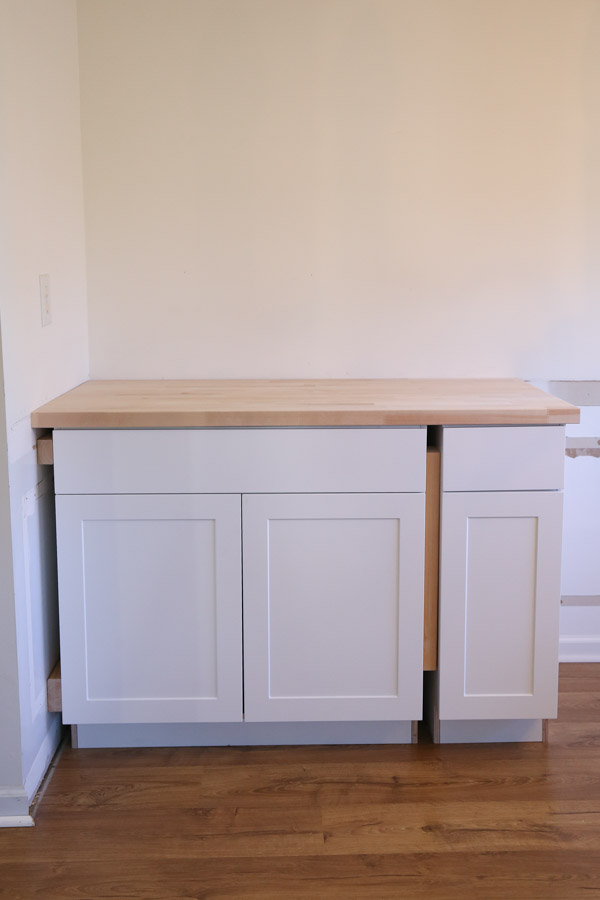
Since we moved into our new house, we had been using our old DIY TV stand for extra kitchen storage and counter space in the nook. This temporary setup was constantly stressing me out every time I looked at it so the custom built ins became our first new house project we tackled!
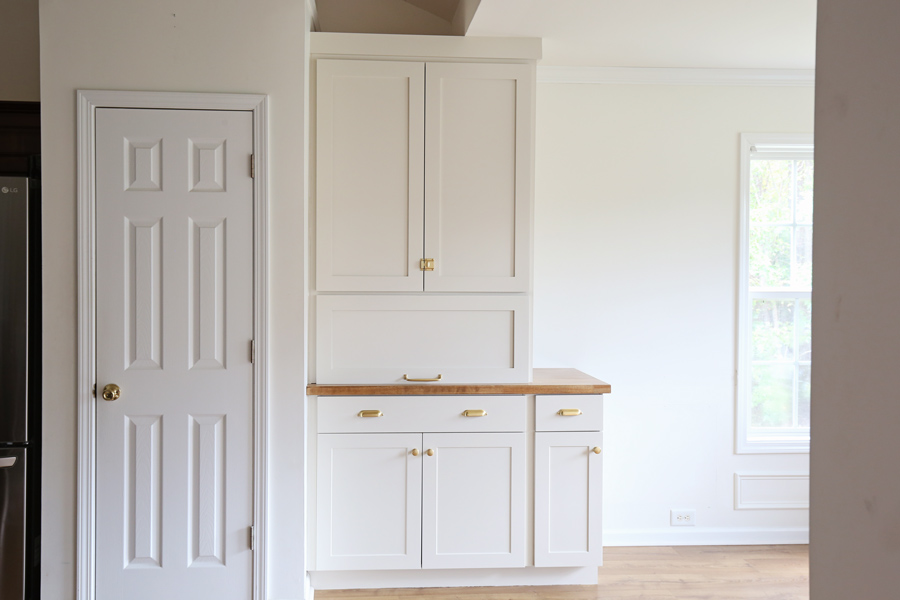
Here is a look at the BEFORE:
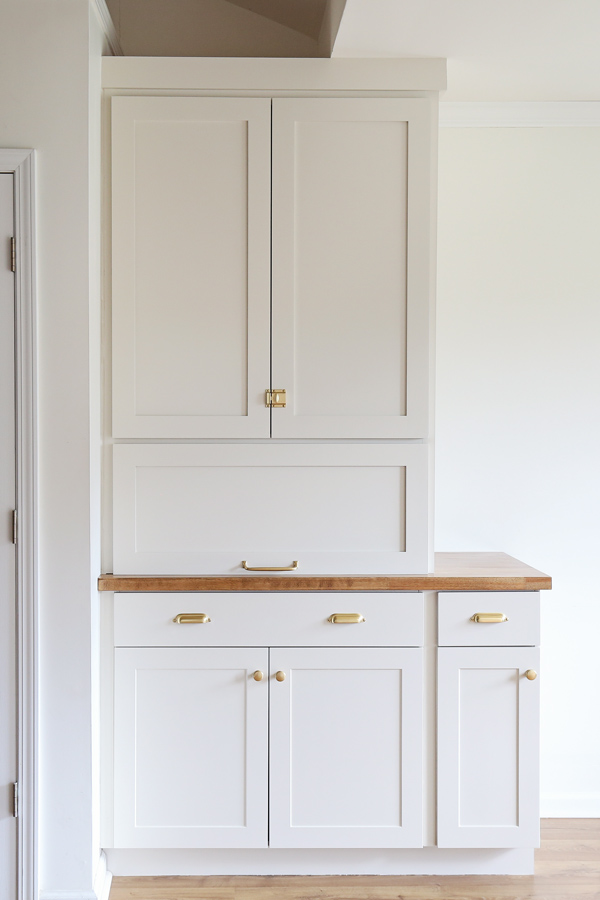
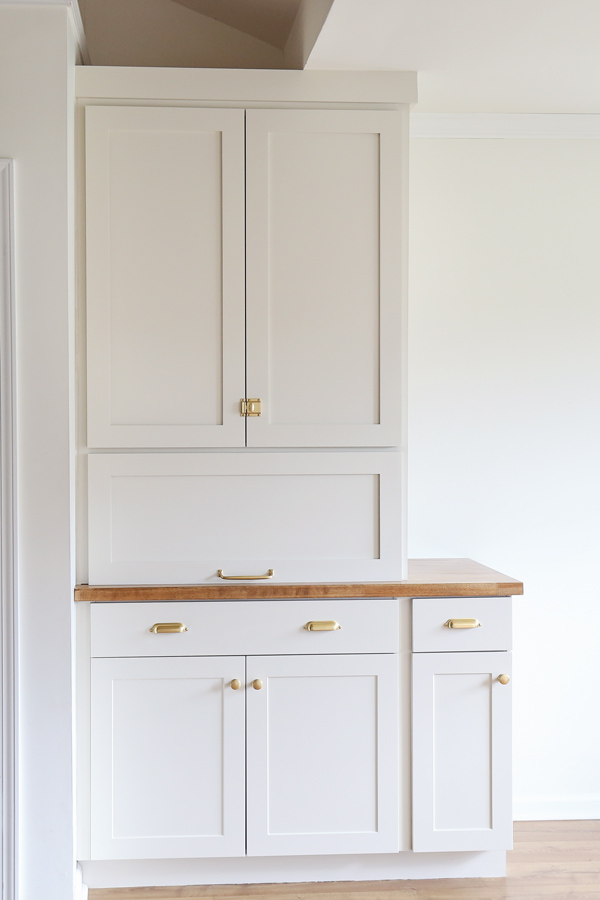
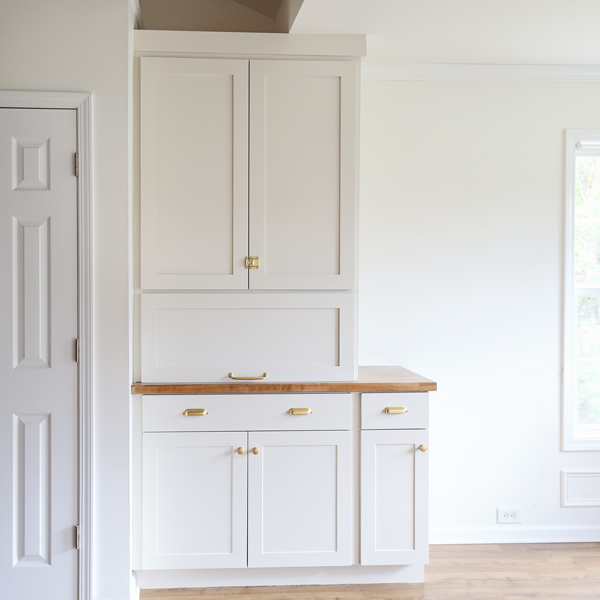
And AFTER:
How to Make Custom Built Ins Faster and Easier
As I shared in part one of these DIY kitchen built ins, we bought stock cabinets with drawers for the base to make this project much quicker and easier. Then, we built the upper countertop cabinet to be a custom size with a kitchen appliance garage DIY too!
Also, we made it quicker and easier by purchasing the doors premade and ready to go in our custom sizes needed. I’m sharing more details on these doors in step #15!
Now that this project is complete I am sharing the full step by step tutorial below on how we built these DIY built in cabinets!
Built in Cabinets Dimensions
Just like our bathroom DIY built in shelves and cabinet and DIY built in cabinet for our entryway, DIY built in office cabinets, living room DIY built in cabinets with stock cabinets, and DIY built in refrigerator cabinet, the built in measurements can vary based on your actual space. So I won’t be including measurements or exact quantities of supplies, but I will show you how to actually build it!
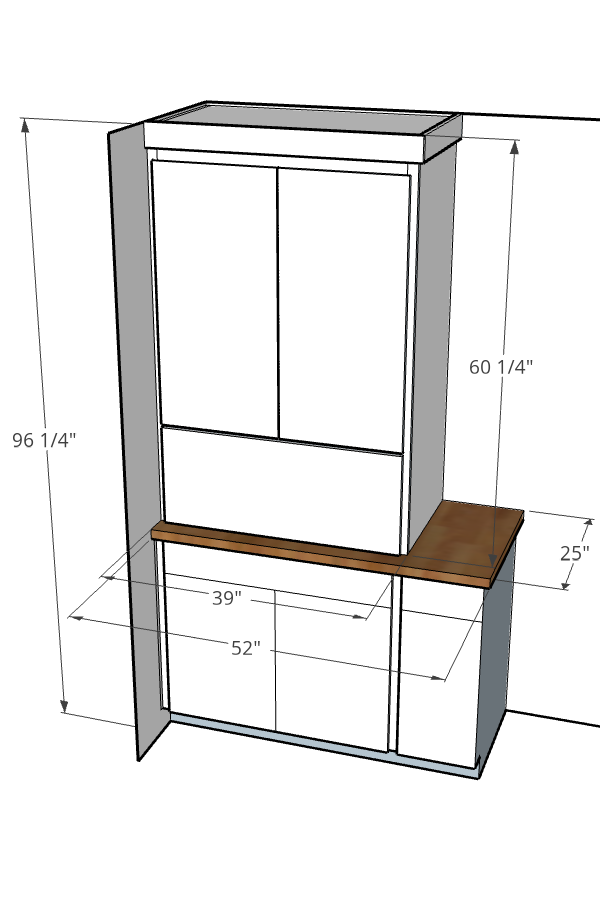
For reference, the final size of our kitchen built ins are about 96″ tall x 25″ deep x 52″ wide (I have a diagram in step #1 below showing more dimensions).
Note, this post contains some affiliate links. For more info see my disclosures here.
DIY Built in Cabinets for the Kitchen Video:
Subscribe to my YouTube Channel here!
I have two videos showing all of the details on how we built our DIY built ins with stock cabinets and how we problem solved all of the issues we came across! Check out part 1 for steps 1-7 and part 2 for steps 8 – 16 and the big reveal!
The final part 3 includes a tutorial and video on the installation of our DIY appliance garage.
- Watch PART 1 of Adding More Kitchen Storage with DIY Kitchen Built-ins
- Watch Part 2 of our Kitchen DIY Built In Cabinets and the big REVEAL!
- Watch Part 3 – DIY appliance garage
How to Build Built in Cabinets:
Note: Material quantities will vary based on your actual built in dimensions!
Materials
- 4ft x 8ft @ 3/4″ thick plywood*
- 4ft x 8ft @ 1/2″ thick plywood*
- 1×4 @ 8ft
- 1×2 @ 8ft (we used pre-primed boards)
- 2×4 @ 8ft (or 2x2s)
- Wood shims
- 1 1/4″ and 2″ wood screws
- 3″ and 3 1/2″ self tapping screws (or wood screws)
- 1″ and 1 1/4″ Kreg screws
- 1 1/4″ brad nails
- Wood Glue
- Stock Cabinets and Toe Kick
- DIY Cabinet Doors or custom ordered doors
- Butcher Block (or other counter top)
- Corner brackets (for attaching butcher block)
- Door hinges for face frame overlay doors (I used these hinges)
- Cabinet pulls, knobs, handle, or latches
- Primer
- Paint (see step #10 for paint I used)
- Pre Stain or SealCoat (optional for butcher block)
- Wood Stain (optional)
- Polyurethane or Butcher Block Oil
- Paintable caulk
- Backer rod (optional)
- Wood filler or spackle
Tools
- Kreg Jig
- Miter saw
- Circular Saw or Table saw
- Drill
- Brad Nailer
- Clamps (48″ clamps work great too!)
- Prybar
- Utility blade
- Orbital sander
- Tape Measure
- Stud finder
- Dremel tool (optional)
- Kreg Shelf Pin Jig (optional)
*I prefer to use this formaldehyde free plywood that is also pre-sanded!
1. Determine the built in cabinets dimensions and design
Measure the wall space your using for your built in to determine your built in dimensions and how much material you will need.
First, I sketched out my design. To make sure that I wasn’t making any mistakes with my calculations, Brandon and I transferred everything over to SketchUp.
The bottom stock cabinets have a full overlay door, but because my upper cabinets will have a face frame, I did a partial overlay door on the top cabinets and pantry garage.
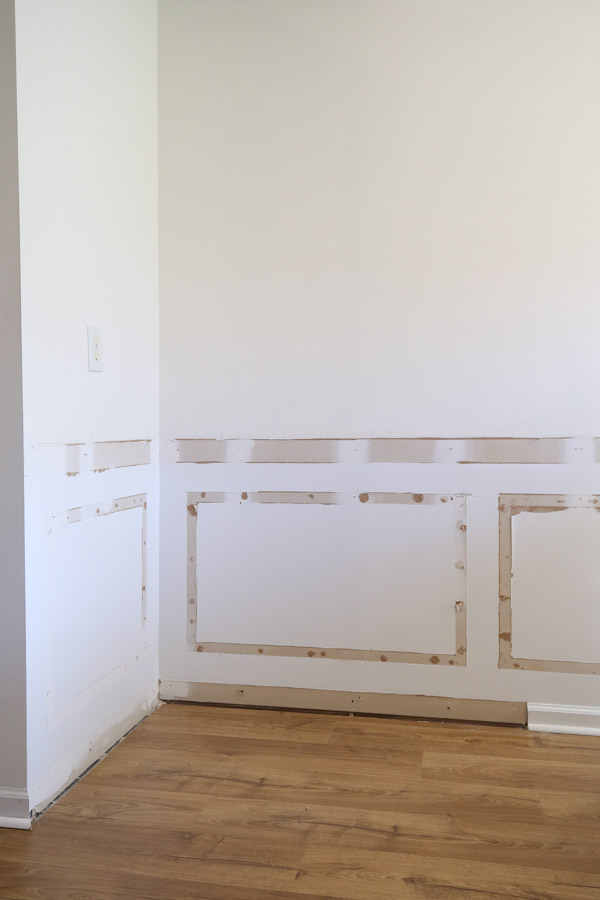
2. Remove the baseboard and crown molding from the wall
We used our Dremel tool to cut the baseboard where the base cabinet will start.
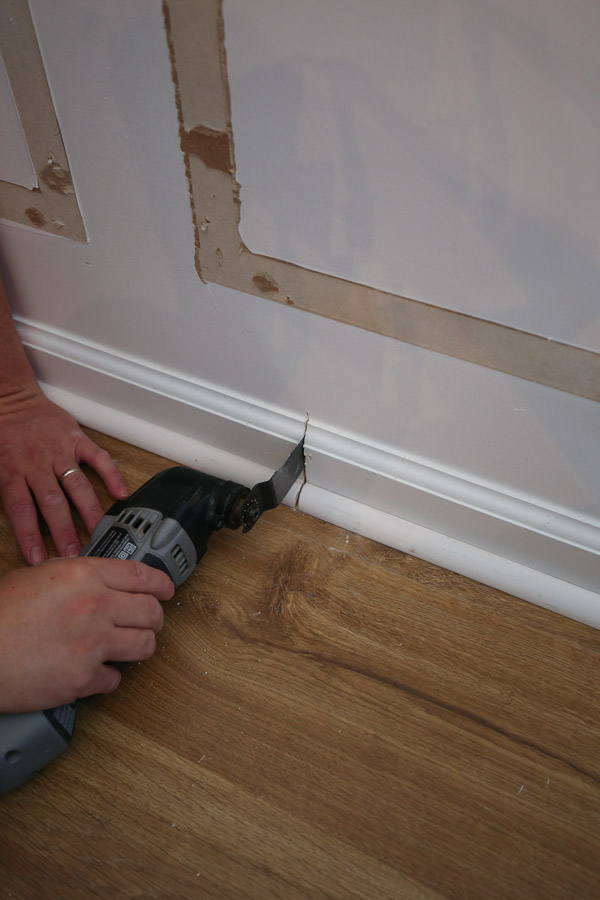
To remove the existing baseboard molding, score the top and corner caulk lines with a utility blade. Then, use a prybar and hammer to remove the baseboard from the wall.
We also removed crown molding at the ceiling where the upper built in cabinet molding will end.

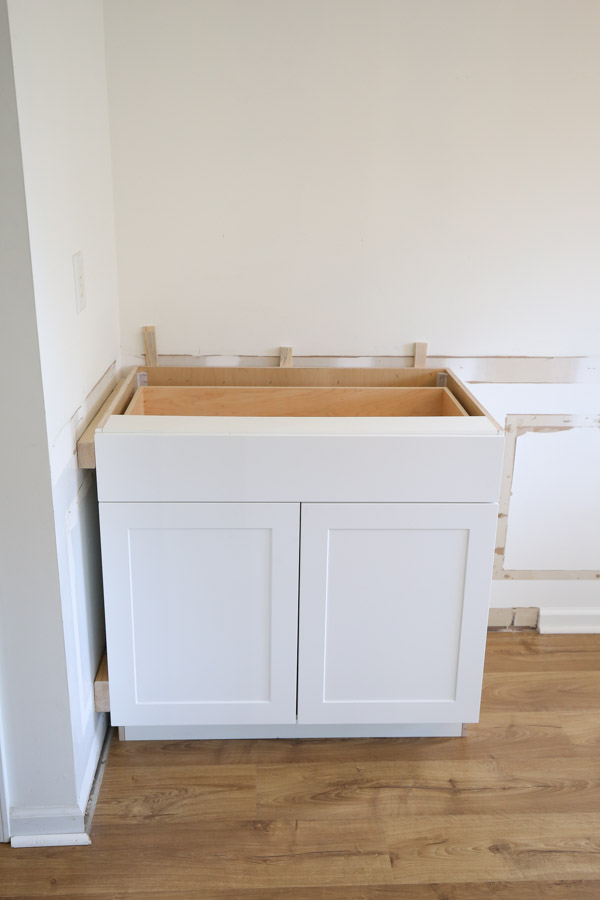
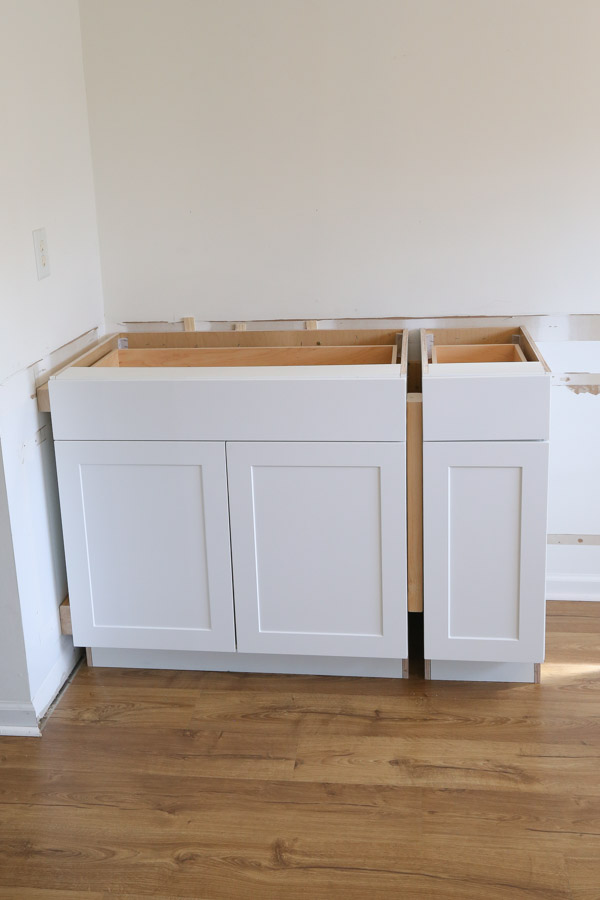
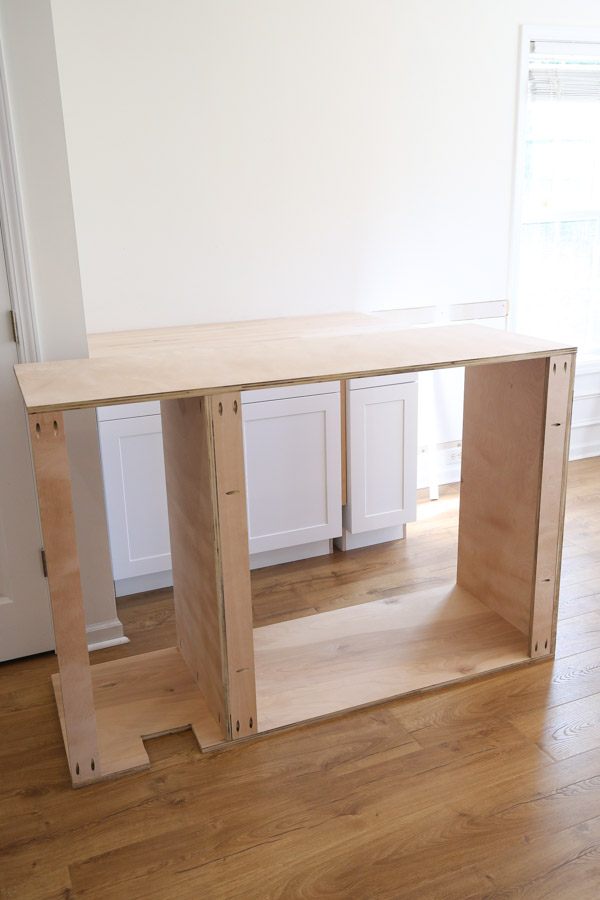
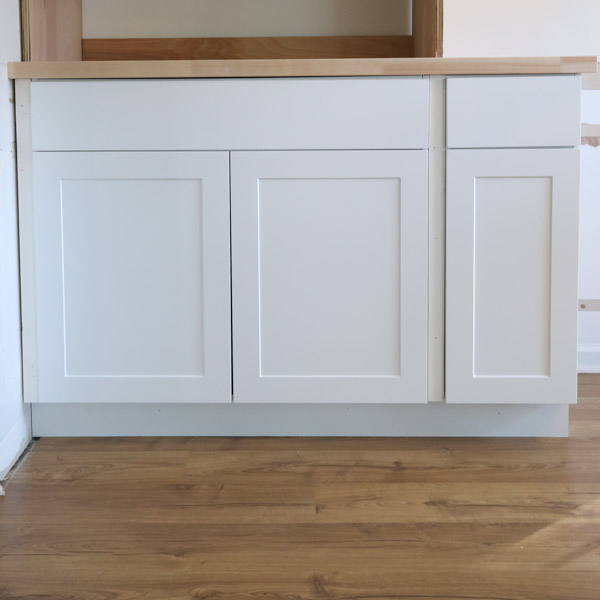
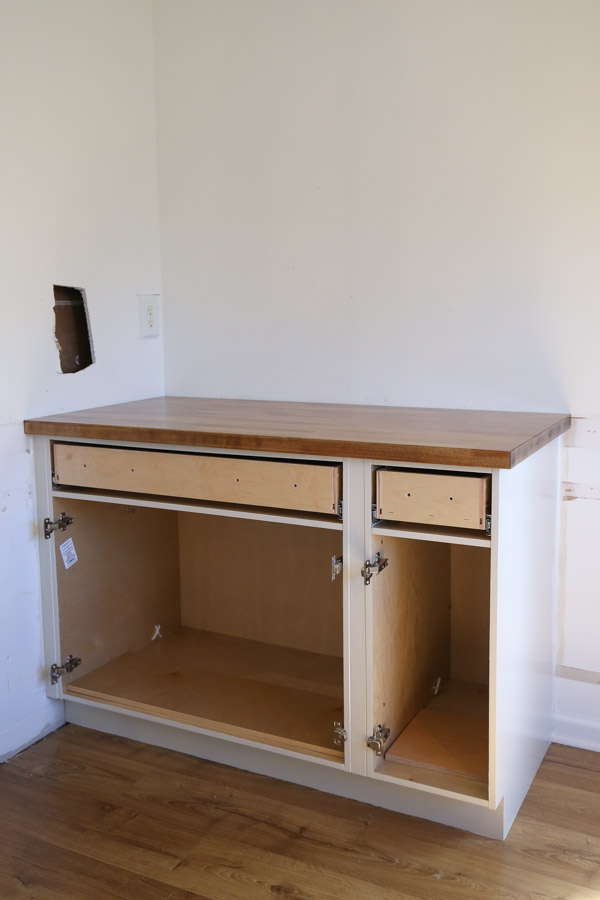
3. Install the base cabinets for the DIY built ins with stock cabinets
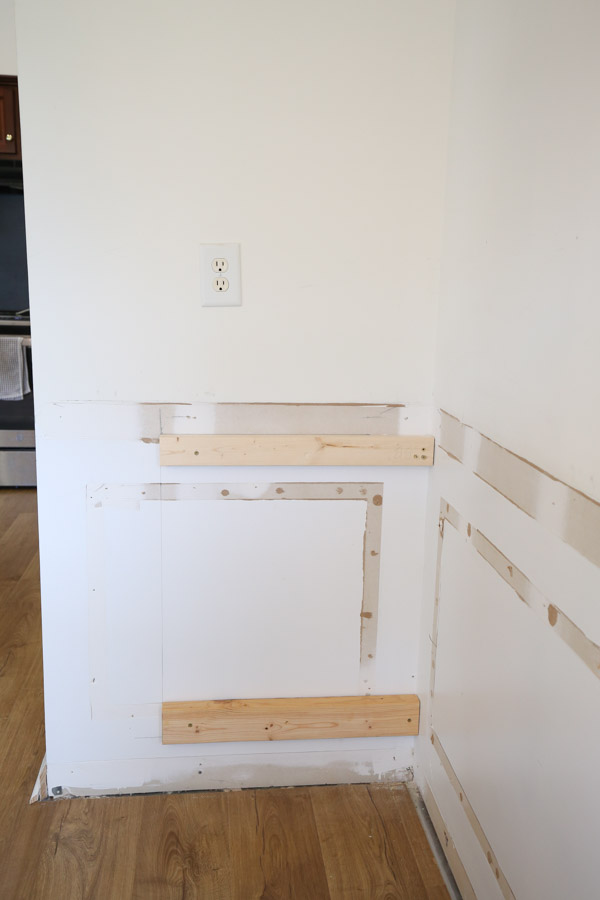
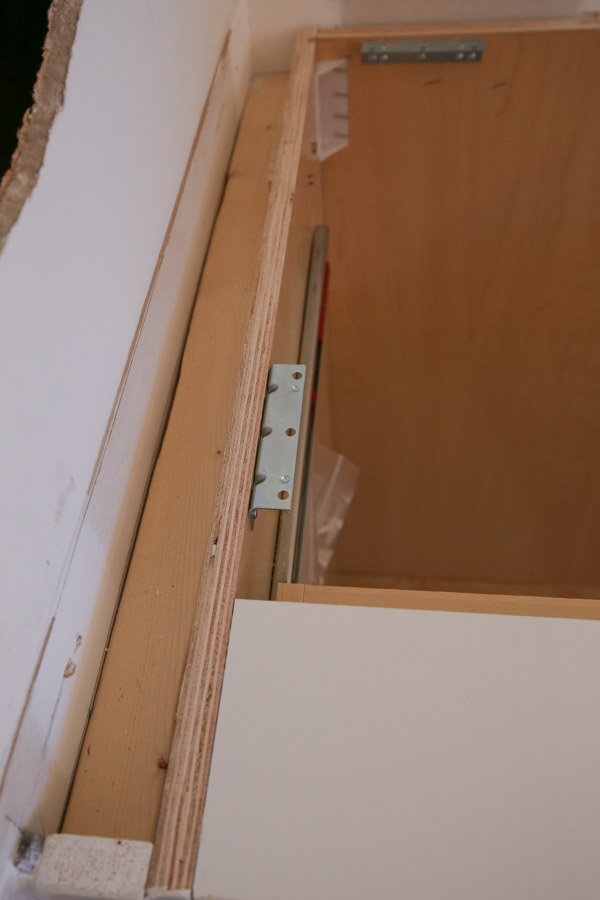
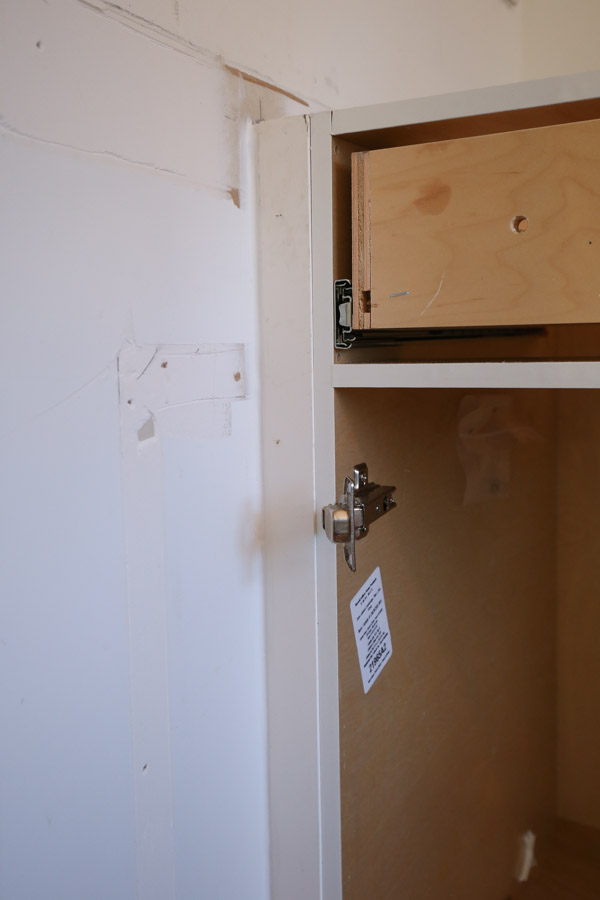
In order for the cabinet door next to the wall to open, there needs to be trim between the wall and door of the DIY built ins with stock cabinets.
Since we couldn’t attach the stock cabinets directly to the wall, we installed 2x4s into the wall studs with 3 1/2″ self tapping screws and trimmed them out with pre-primed 1x2s.
When installing the 2x4s and 1×2 we made sure the front of the 1×2 with the 2×4 behind it was going to line up with the front edge of the stock cabinet frame opening (not the door).
So, the front of the 2×4 was about 23 1/4″ from the back wall, leaving 3/4″ from the front (for the thickness of the 1×2 trim) for our 24″ deep cabinets.
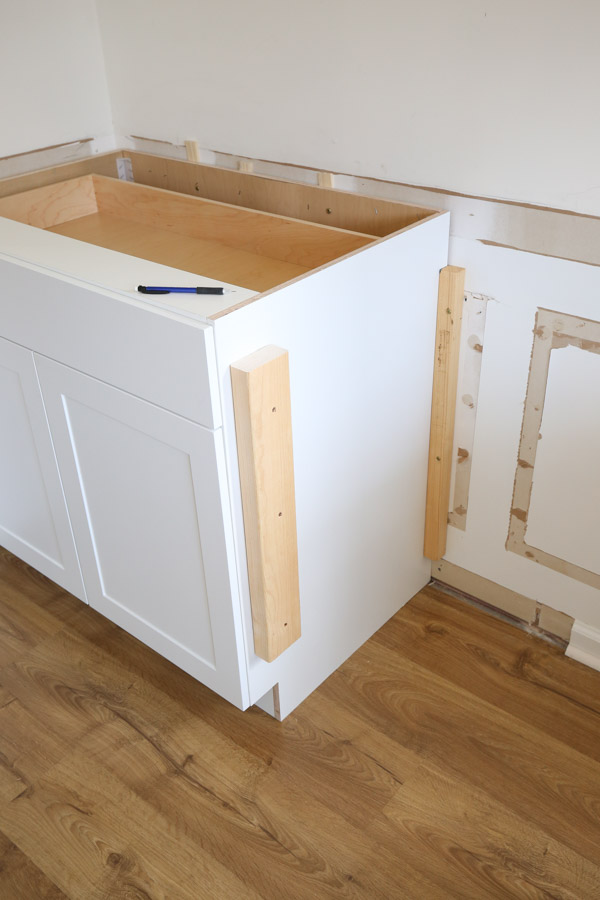
Our 12” cabinet was not going to hit a wall stud along the back, the wall stud was falling right in between the two cabinets where the trim was going, so I used a 2×2 attached to the wall stud and two cabinets.
Between the 36″ and 12″ stock cabinets we used 2″ screws into the 2×4 and 2×2 into the 36″ base cabinet. For attaching the base stock cabinets to the back wall studs, we used 3 1/2″ screws.
Also, our walls were not square so we used wood shims to install them squarely. And Brandon cut the tops of the shims off with our Dremel.
See our stock cabinet installation in action in the DIY kitchen built ins Part 1 VIDEO!
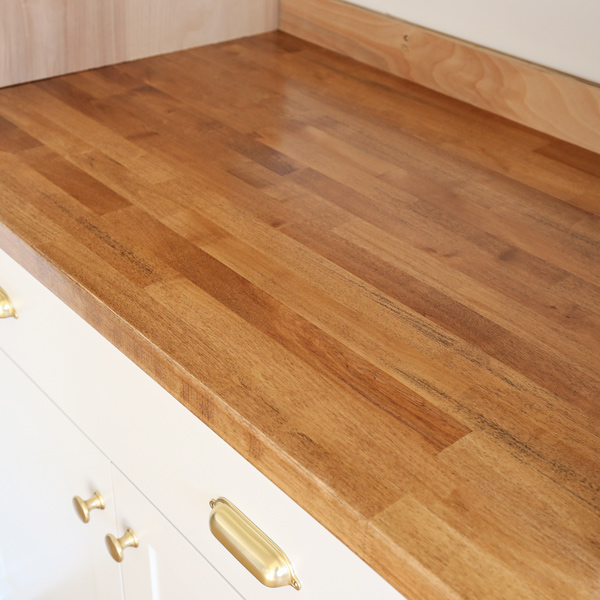
4. Cut the butcher block countertop to size
Cut the built ins countertop to size with a table saw or circular saw and straight edge guide. Or buy the countertop at the size you need.
For the countertop of the built ins, you can use any countertop material. I used butcher block because I love the warmth and character of it for a built in and it was perfect for providing a sturdy countertop for our large countertop cabinet!
Note, if your walls aren’t square like ours, you can cut the butcher block at a slight angle for a snug fit so you don’t have a large gap to fill.
Check out the kitchen built ins part 1 video for more details about our butcher block and how we cut it!
If you still need to finish your butcher block (like us), wait to install it until it’s finished (see step #9 for how we finished ours).
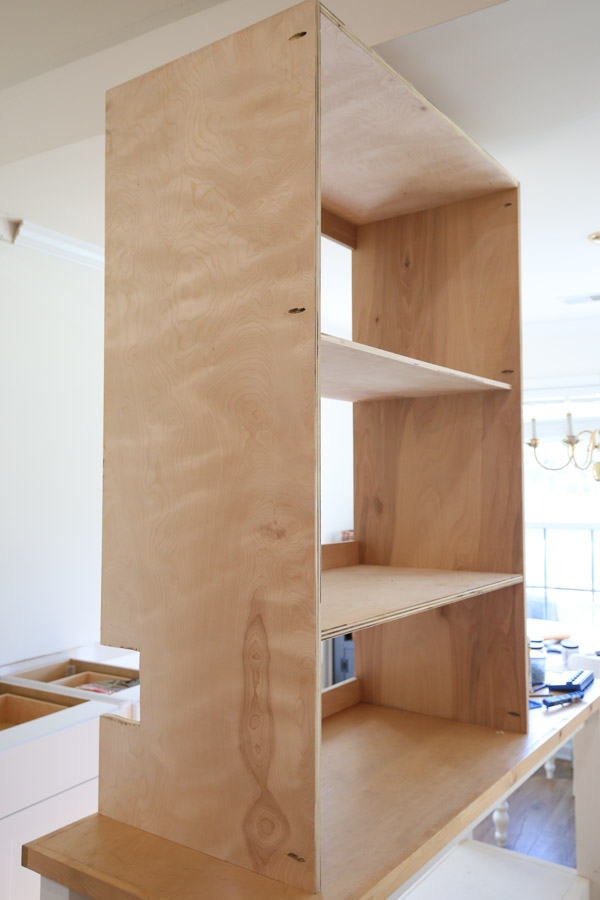
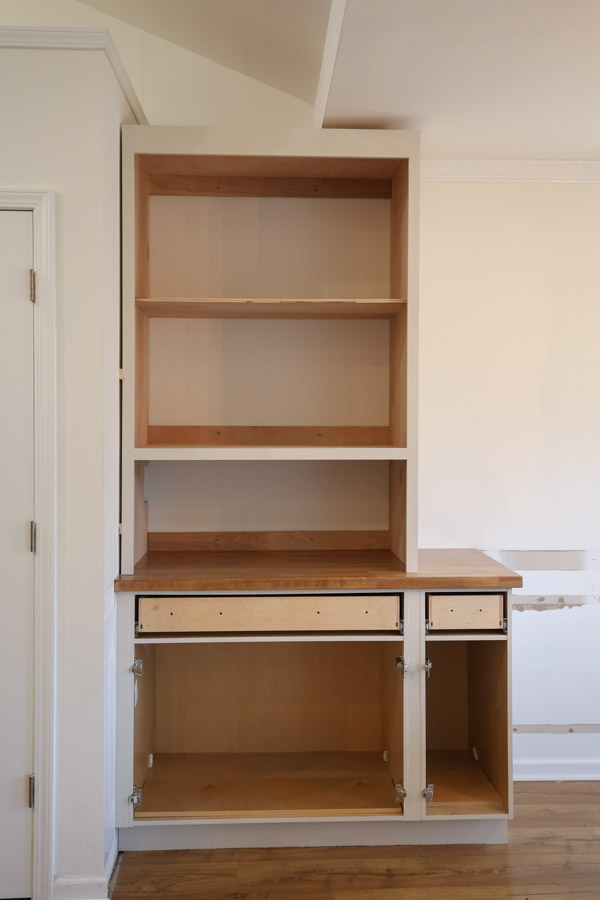
5. Build the top cabinet box frame for the DIY built in cabinets
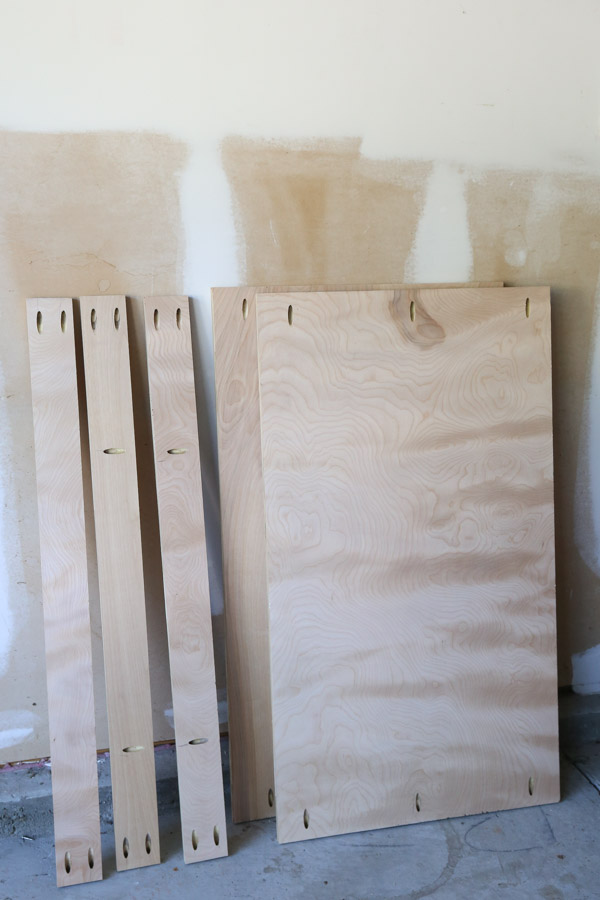
We used 3/4″ thick plywood for the upper countertop cabinet box frame (the carcass of the cabinet). I’m calling this part a DIY countertop cabinet but it’s basically a DIY hutch!
Cut the plywood to size and add pocket holes
We had some of our 3/4″ plywood cuts made at the home improvement store and the rest we made with our circular saw and straight edge guide.
We used the scrap boards of the 3/4″ plywood for the back boards of the cabinet frame. These back boards don’t need to be a full sheet of plywood to keep the weight down of the cabinet. And I used them for screwing the cabinet into the wall studs.
Use a Kreg Jig to drill pocket holes into the plywood top, middle, and back boards for easy assembly of the upper cabinet frame.
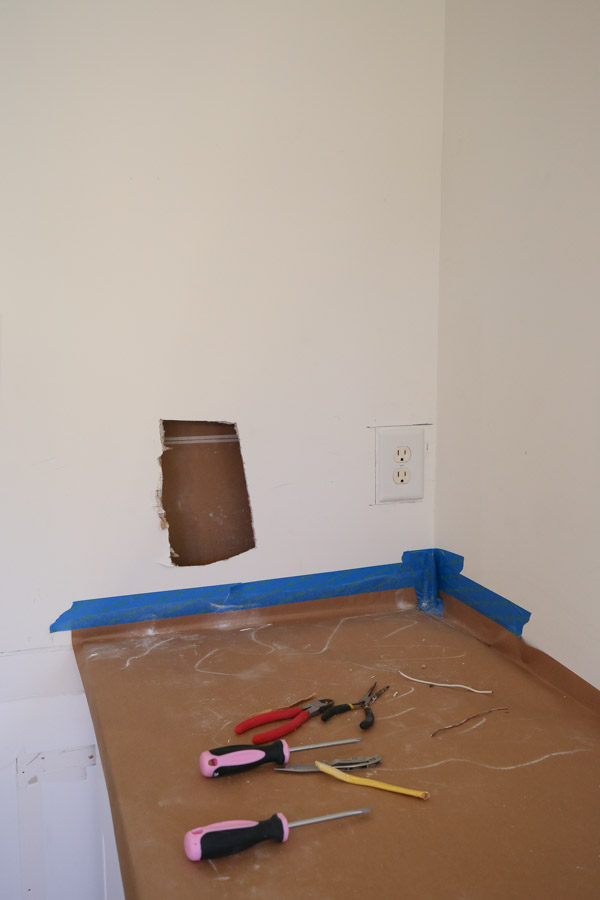
Wall Outlet for the Built in Cabinet and Appliance Garage
Before assembling our cabinet frame together, Brandon went ahead and marked and cut a hole in one of the plywood sides with a jigsaw for our wall outlet. This is the outlet that we are going to use inside of our kitchen appliance garage DIY so we didn’t want to cover it up.
At this point we realized that our appliance garage hinge needs to be installed right where our wall outlet is located. So, Brandon’s dad came up with the idea to move the wall outlet back and he helped us do that! I like it further back too!
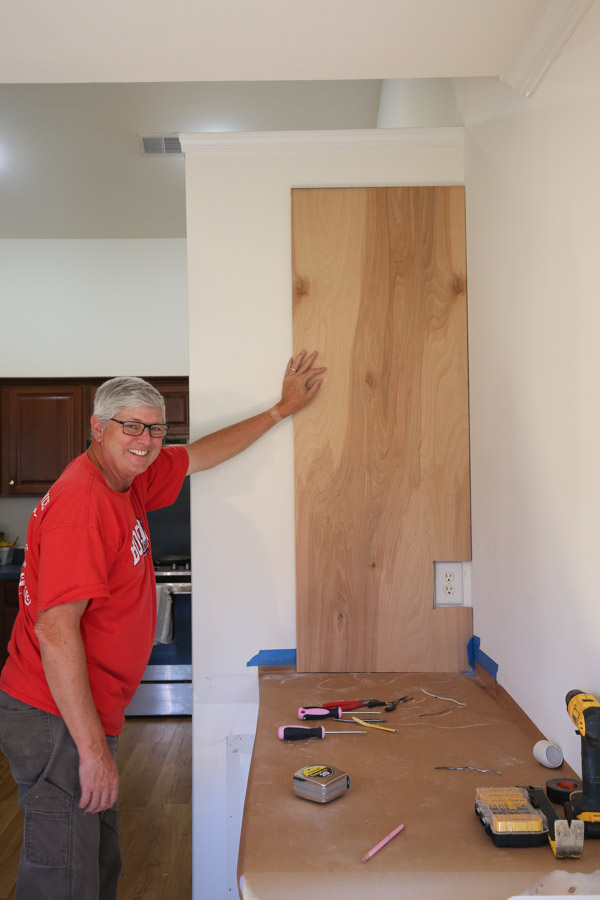
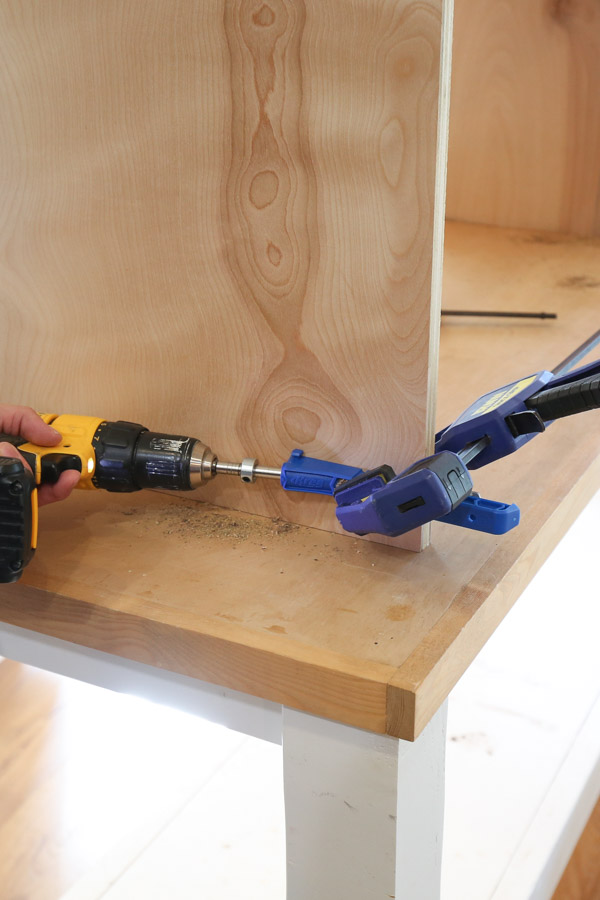
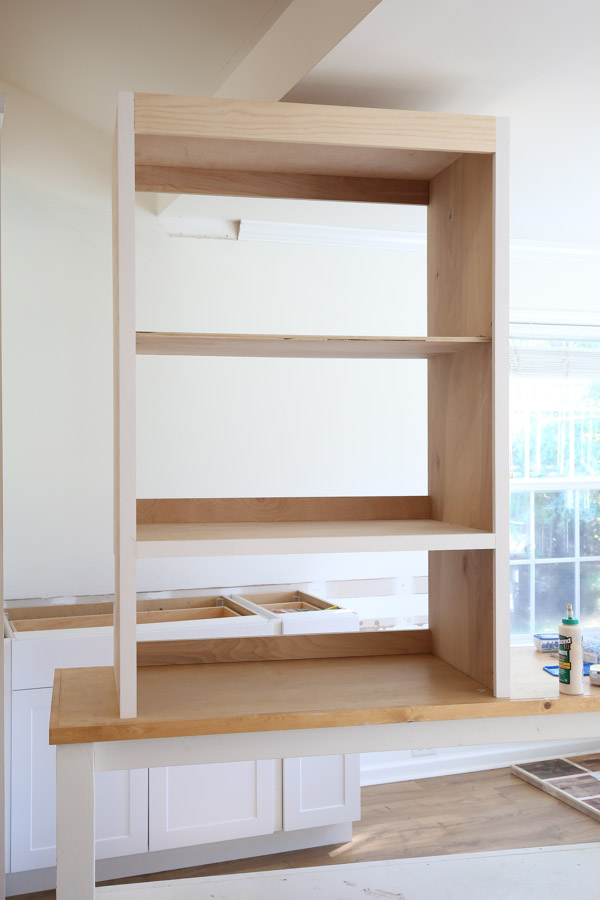
Assembling the DIY hutch countertop cabinet
We assembled the DIY hutch cabinet box together for the DIY built in cabinets with wood glue and 1 1/4″ pocket holes.
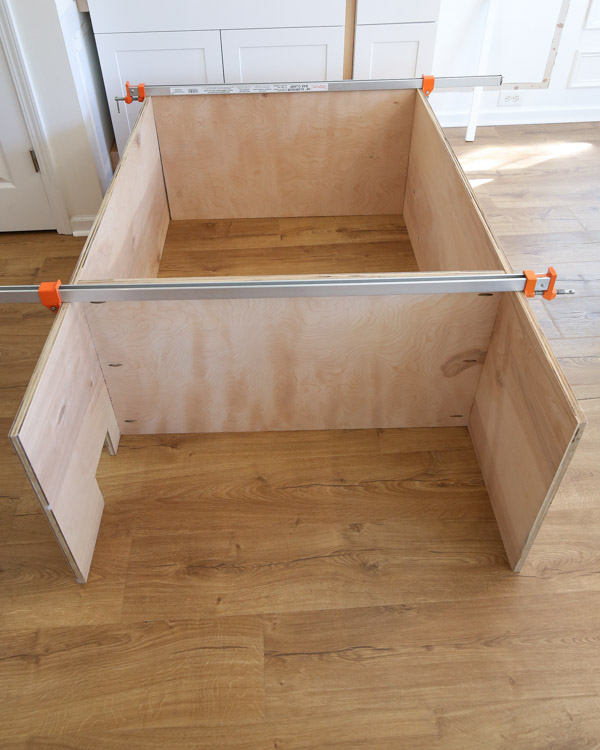
The back support boards were attached last and I made sure to face the pocket holes towards the wall side to keep them hidden.
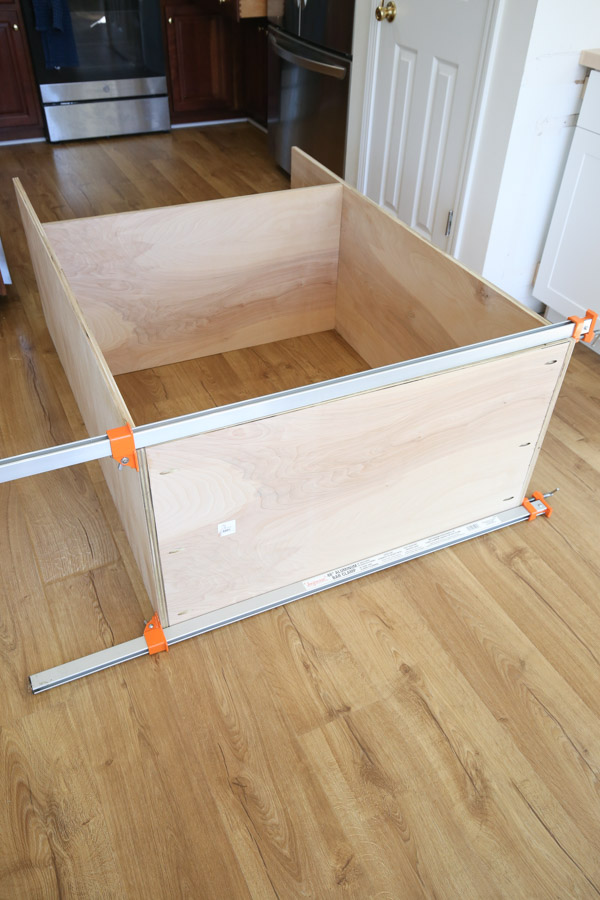
After initially assembling our cabinet frame together we realized it was not square.
To fix this we added a middle support shelf with pocket holes (it’s not as deep as the other middle board). We used 1/2″ thick plywood that we had on hand but ideally I would have used 3/4″ plywood again.
If I built this shelf again I would have added the extra middle shelf board in from the start. This is the largest cabinet we’ve ever built so it was a big learning process and the extra support shelf was needed for keeping things square!
6. Install trim and toe kick on the base cabinets
At this point, the 1×2 trim boards can be installed over the 2x4s on the base cabinets with 1 1/4″ brad nails and a brad nailer.
The toe kick can be installed along the bottom of the base cabinets with brad nails too or Liquid Nails.
📩 Want to Save This?
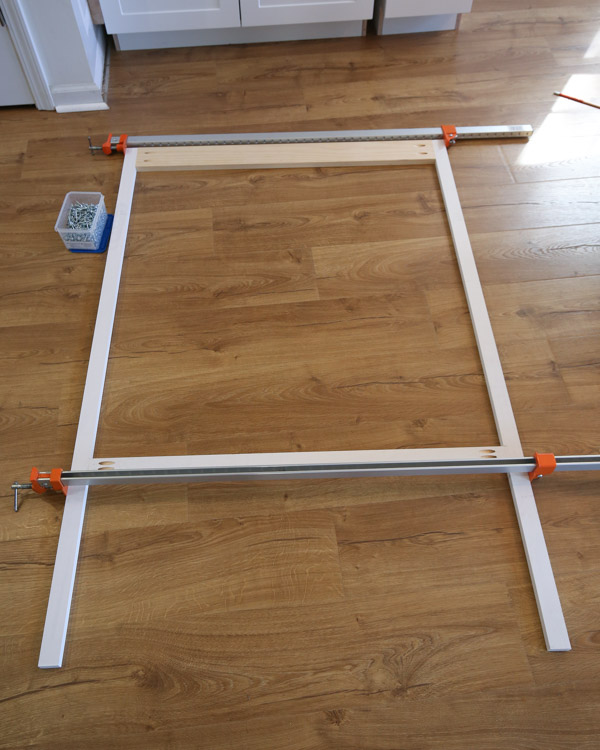
7. Build the face frame for the top countertop cabinet (DIY hutch)
For the face frame of the countertop cabinet we used 1x2s for the sides and middle and a 1×4 for along the top.
Drill pocket holes with a Kreg Jig into the middle and top boards.
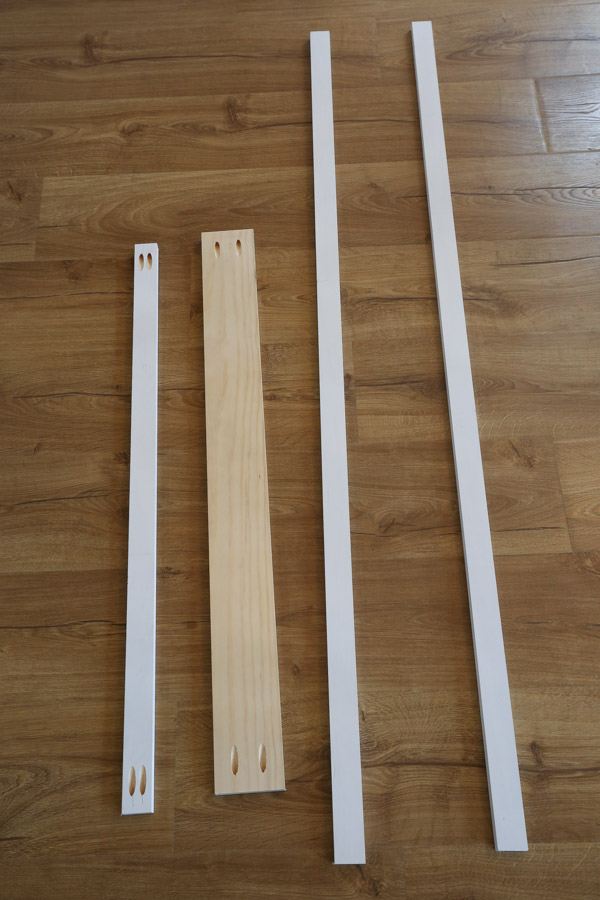
Assemble the face frame together with wood glue and 1 1/4″ Kreg screws.
8. Attach the face frame to the cabinet
Originally, I was going to use wood glue and brad nails to attach the face frame to our DIY built in cabinets. But, then I realized that because we will be hanging the doors from the face frame with face frame hinges, we really needed a strong and sturdy connection.
To install the face frame, Brandon added some pocket holes to the sides, top, and middle boards of the cabinet frame so we could use Kreg screws into the face frame with wood glue. We drilled them on the sides that would be hidden.
If I had thought this through more from the beginning I would have added the pocket holes to the plywood before assembling the cabinet together. ***Tip: Learn from my mistake and drill these pocket holes in step #6 before assembling the cabinet frame.
Face frames on cabinets look so nice and custom! I always include them on my DIY cabinets, like our DIY garage cabinets and custom built in cabinet for our entryway.
9. Stain and seal the butcher block countertop
I tried many different samples tests out on our butcher block to get the best finish that wasn’t blotchy since this butcher block was turning out very blotchy even with a pre-stain wood conditioner.
Check out the built ins kitchen part 2 video to see more about these test samples and the step by step of how I finished the butcher block!
To finish the butcher block, I first applied a coat of SealCoat, which is a shellac/sanding sealer to help prevent blotching. We let this dry for about 45 minutes.
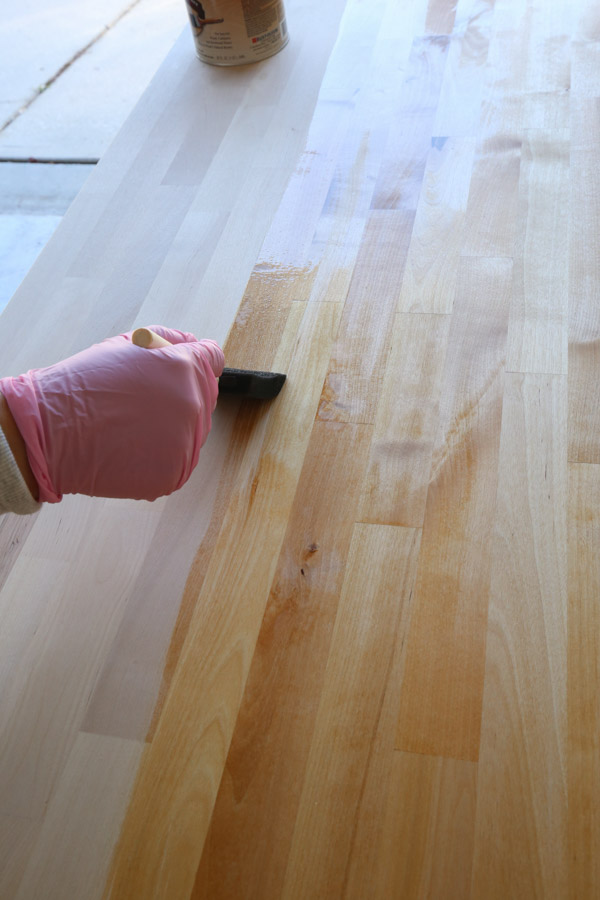
Then, the SealCoat was sanded with 120 and 220 grit sandpaper and an orbital sander.
Next, two coats of this Provincial wood stain were applied.
Finally, two coats of oil based polyurethane were applied. Note, for butcher block, ALL SIDES must have a sealer/poly applied to them to prevent cracking of the wood.
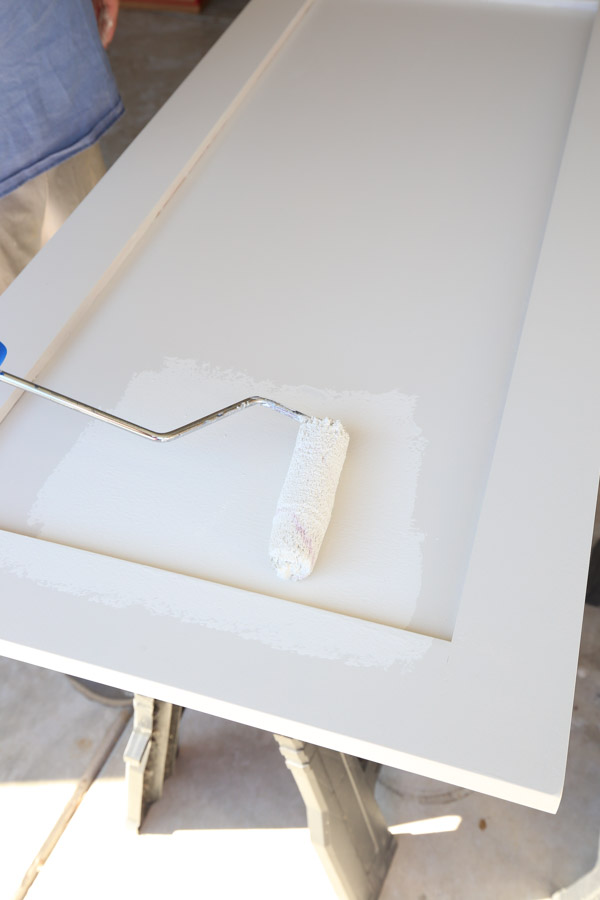
10. Prime and paint the cabinets and cabinet doors
For painting the stock cabinets, we followed the same steps we used for painting our kitchen cabinets in our previous home. Check out my how to paint kitchen cabinets tutorial for the step by step tutorial! And check out the best paint for cabinets and trim for more details on what type of paint to use.
For both the base and top cabinets and doors, we used this primer and Benjamin Moore Advance paint in Edgecomb Gray with a satin sheen.
I think it’s the perfect light, creamy greige color!
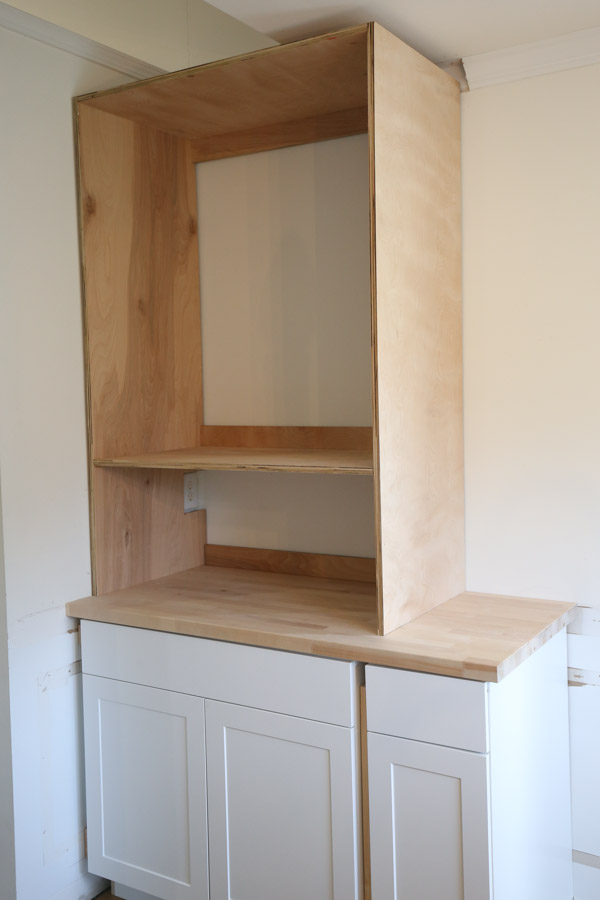
11. Attach the butcher block to the base cabinets
We used corner brackets to install our butcher block. First we attached them to the base cabinets and then the butcher block.
12. Attach top built in cabinet to the wall
The top cabinet was installed to the wall studs with 3″ screws and wood shims to help.
Brandon had way too much shimming this cabinet and we aren’t expert cabinet installers by any means so we just made them work to keep everything square while drilling into the wall studs.
13. Install the trim or crown molding to the countertop cabinet
Add the top trim to the built in cabinet, flush against the ceiling.
We used a 1×4 board with a 45 degree mitered corner for our top trim.

I thought about using crown molding but decided not too since there are already two different types of crown molding between the window wall and pantry wall.
Plus this simple 1×4 board is so much easier to do than crown! But, crown is gorgeous on built in cabinets and we used it for our DIY wall cabinets, DIY built in cabinet in our entryway, and our built in bathroom cabinets too!
We also used crown molding on our more recent DIY built in office cabinets and DIY office storage cabinets. It can totally transform cabinets if you want the extra wow factor!
Don’t forget to caulk, prime and paint the top trim board after it’s installed!
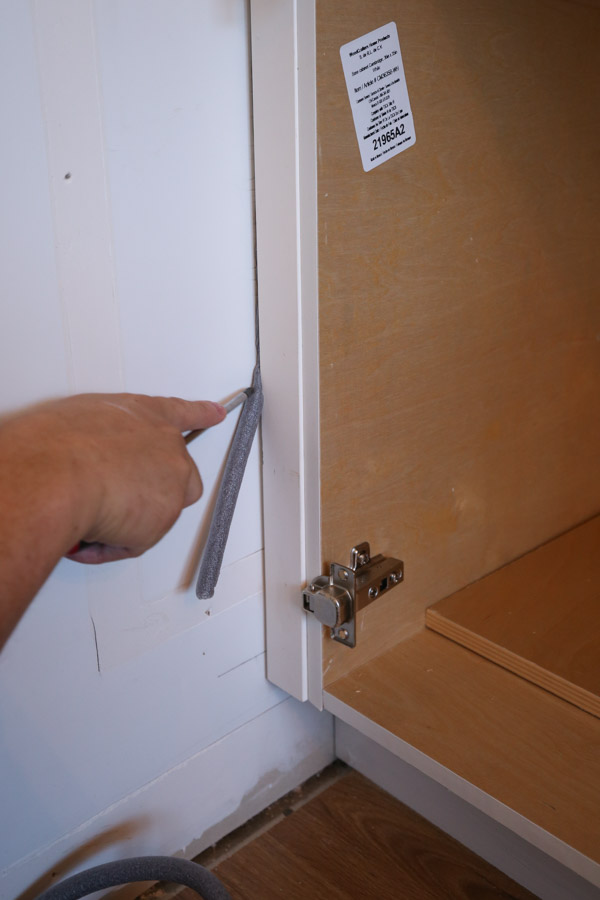
14. Caulk gaps between the wall, trim, and cabinets
Caulk all the gaps including gaps between the wall and trim and the trim and cabinets if needed. Then, paint the caulk the same color as the cabinet.
For the large gap between our wall and base cabinet from our walls not being square, we tried a new product called Backer Rod to help fill in the gap. It worked great for caulking over.
It comes in multiple sizes. We used the 1/2″ size and squished it in place with a screw driver.
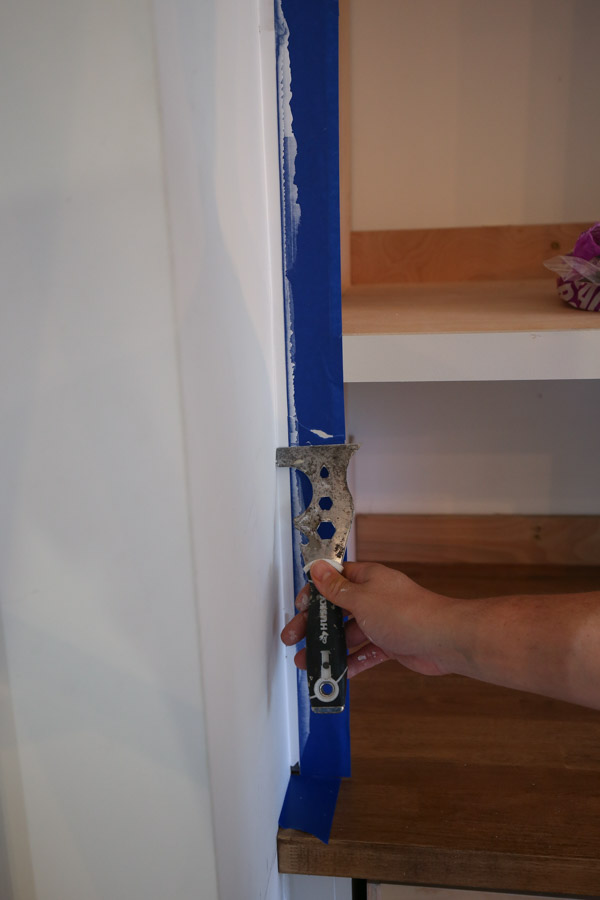
We used it again for caulking the large gap between the wall and upper cabinet. But, for the upper countertop cabinet, Brandon tried a new method of using painter’s tape and a putty knife to get a super smooth and straight caulk line. It worked really well! See it in action in the built ins video!
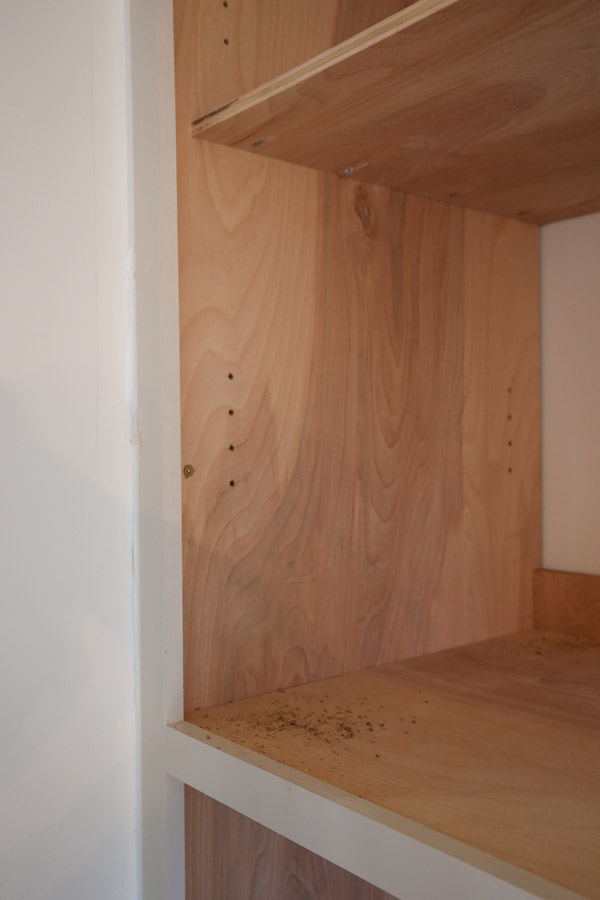
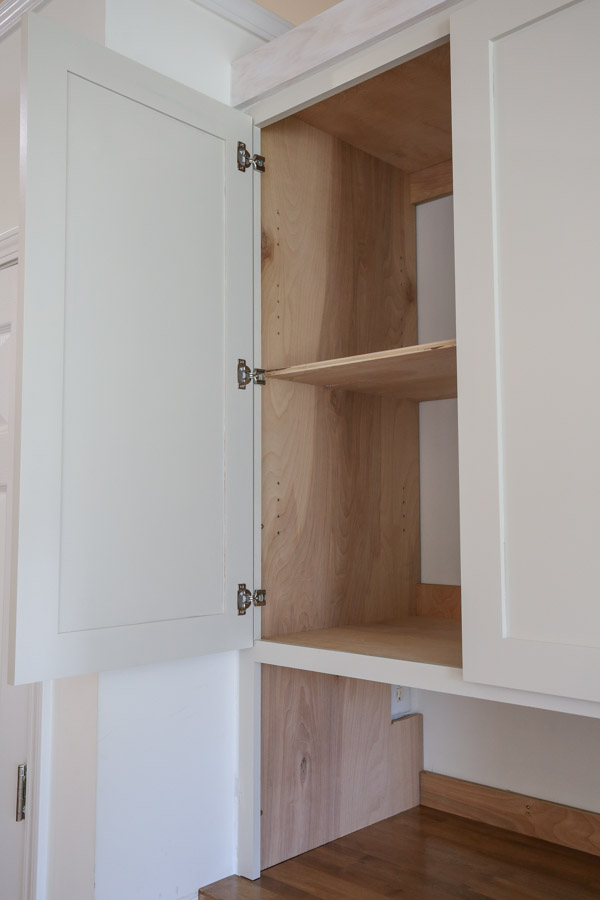
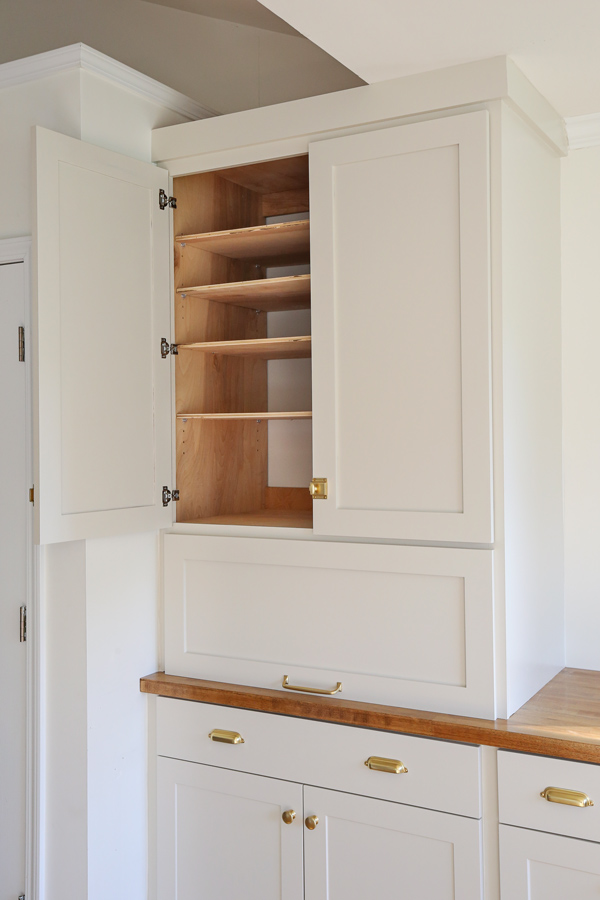
14. Cut shelves to size and drill shelf pin holes
We used 1/2″ plywood cut to size for our upper cabinet shelves to save money. But, ideally an actual shelf material or 3/4″ plywood with edge banding would be more ideal for such a large cabinet to avoid any future bowing in the middle from heavy things.
At this point, it’s easy to drill the shelf pin holes before adding the doors on. We used the Kreg Shelf Pin Jig to help! We used it for our DIY wall cabinet and it’s very nifty to have!
15. Attach the doors to the built in cabinets
As I mentioned previously, I ordered custom size doors that were unfinished (and ready to be painted) instead of building our doors from scratch to save time.
But, if you are interested in building DIY cabinet doors, check out my 3 DIY cabinet door construction techniques, from beginner to professional levels. We did this for our DIY built in refrigerator cabinet.
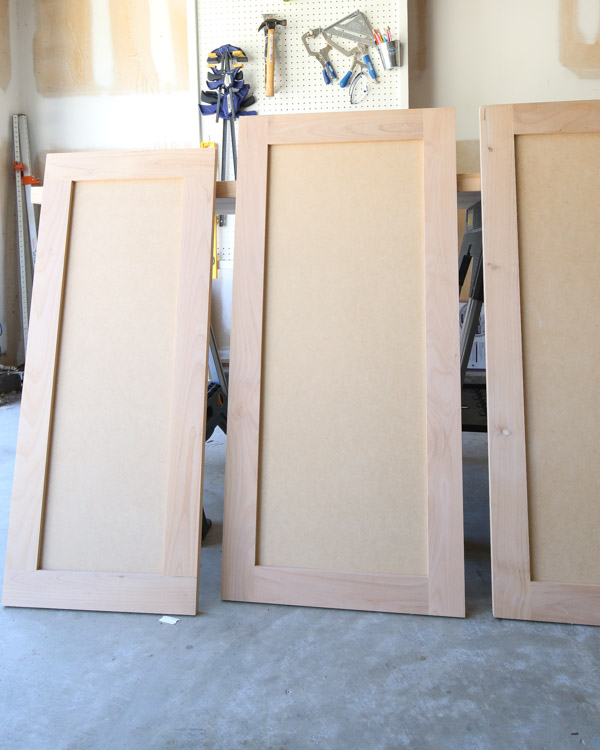
I ordered shaker style doors from Barker Door based on a recommendation from Ana White in her video in this cabinet door hinge tutorial. I’ve never ordered premade doors before since I always just built them but these doors turned out great!
I will say though that ordering premade doors is definitely not cheap…with shipping it cost almost $300 for our three upper cabinet doors! And I picked the lowest grade of wood/MDF combo.
But it was super nice to jump to the painting part and adding hinges. I paid a little bit extra to have the door hinge holes pre-drilled. It was a perfect fit for our door hinges.
If you do want to build your own doors, check out my how to build a wall cabinet and door tutorial and my entryway DIY built in cabinet and door tutorial!
We painted the doors before installing with the best paint for cabinets and trim.
DIY appliance garage
Note, the middle door is for our DIY appliance garage. See the details and tutorial on how we are installing it in the kitchen appliance garage DIY tutorial!
Door Hinges Used for the Built In Cabinet
We used ½” inch overlay face frame hinges that are installed right to the face frame. They are European style hinges which are my favorite because you can adjust the door at the very end for the perfect placement.
I love a perfect gap in between the doors.
We used these same overlay hinges on our easy DIY garage cabinets too.
After installing several inset doors, like on our built in bathroom cabinet and DIY wall cabinet, these overlay style doors are much easier to install especially with two people! We just followed the directions that came with our hinges!
16. Install the cabinet hardware on the DIY built in cabinets
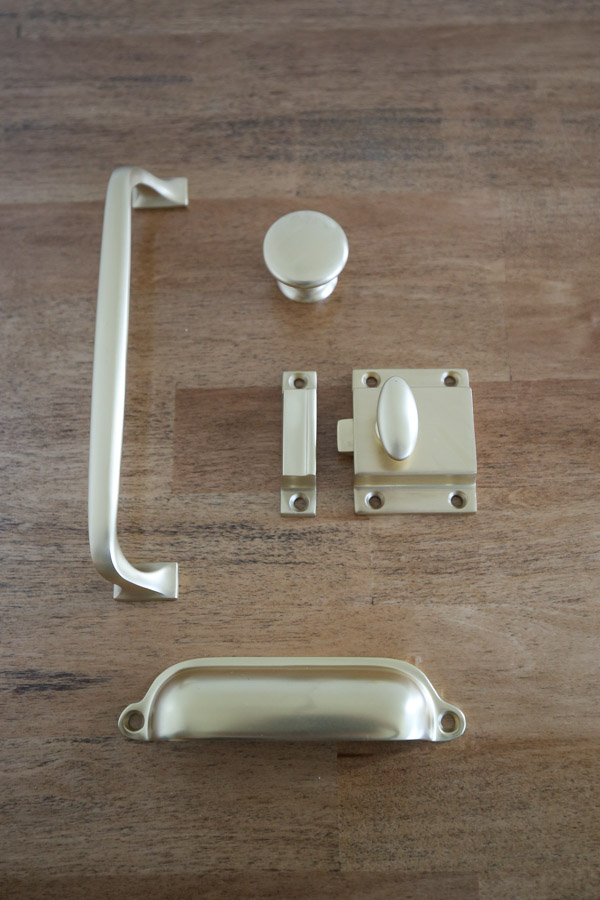
The last step, after any minor touch ups, is to install the hardware! I splurged on the hardware for this build! Here is what I ordered:
- Cabinet pulls (for the drawers)
- Cabinet knobs
- Cabinet handle (for the appliance garage)
- Cabinet latch (for the larger top cabinet doors)
I’m obsessed with this matching hardware set, it totally fits my vision for this project!
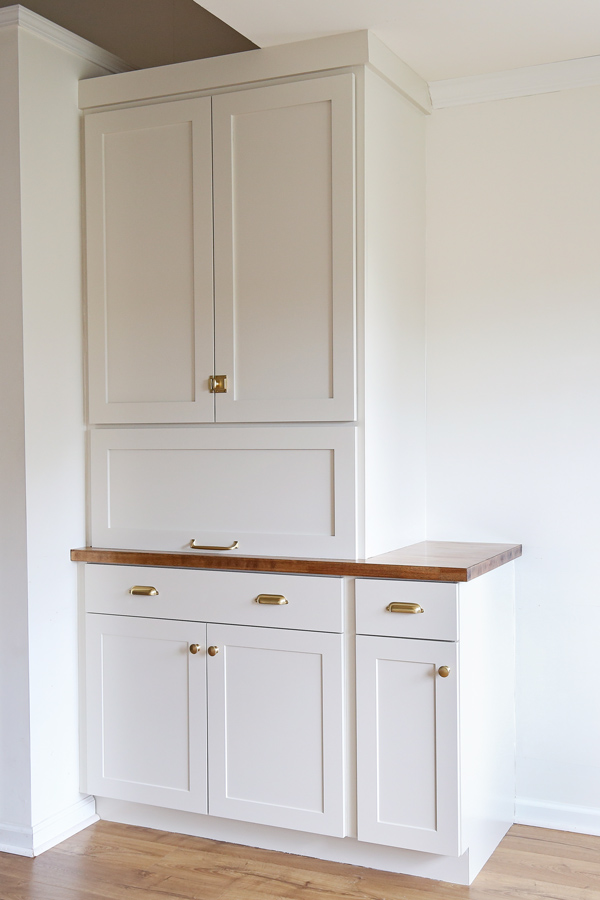
Wow, what a build! My three year old said, “Mama and Dada you built that!” Haha I love it! It really turned out stunning and I can’t wait to start using it and filling it up with kitchen supplies!
What do you think of these DIY built ins with stock cabinets and a DIY countertop cabinet?!
This really was a huge project and it took us over a month to build. I hope this kitchen DIY built in cabinets tutorial and all of the lessons we learned are helpful if you want to build something similar for your home!
Next week I will be sharing the final part 3 of these DIY built in cabinets which is the DIY appliance garage in the middle! Stay tuned!
Make sure to follow along on Instagram and YouTube for part 3!
Lindsay
Tuesday 19th of November 2024
This is a very inspiring and helpful DIY. I am looking to do a mixture of stock and DIY cabinets as well. Did you color match the paint for the stock cabinet doors and the custom cabinet doors?
Angela Marie Made
Thursday 9th of January 2025
The stock cabinets I got were not painted, I just painted everything with the same color!
Dorothy C.
Monday 7th of November 2022
I love your ideas and the detail descriptions. I am planning on turning our laundry room into a pantry after we move the washer and dryer upstairs. Your latest on the built in is great inspiration to attempt something similar.
Angela Marie Made
Monday 14th of November 2022
Thank you! This would be so great in a pantry! :)