Sharing 7 ways how we added character to our builder grade bedroom with architectural details for phase 1 of our primary bedroom makeover!
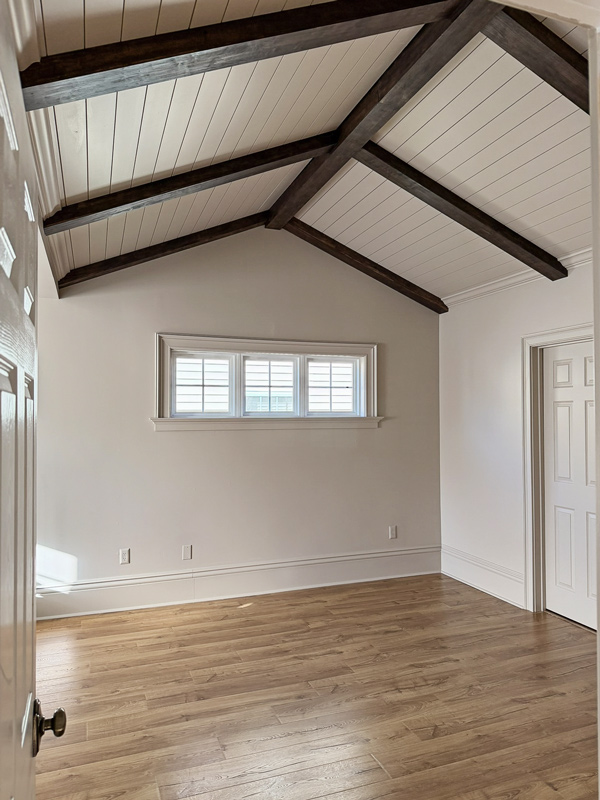
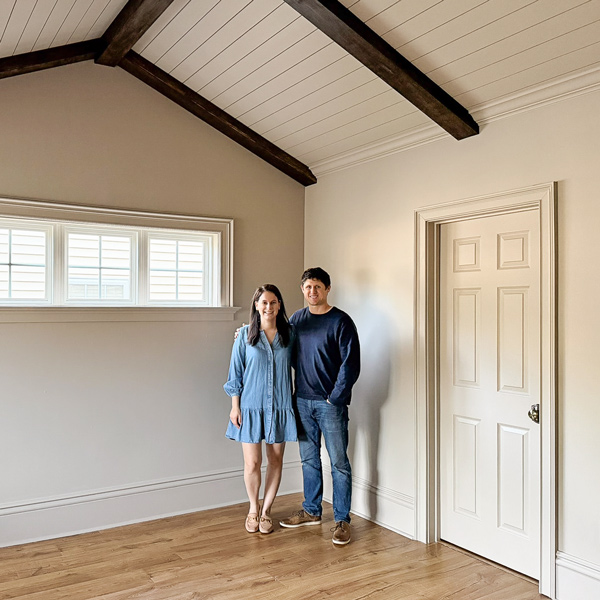
Phase 1 of our bedroom makeover is complete! Here is a look at our BEFORE AND AFTER!
Here is the story of our primary bedroom Part One transformation!
Note, this post contains some affiliate links. I may earn a commission if you shop those links (at no cost to you). Thank you for supporting my small business. For more info see my disclosures here.
SOURCES: All items used can be found in my Lowe’s Storefront here and I’ve also linked many items at the bottom of this post and throughout the post!
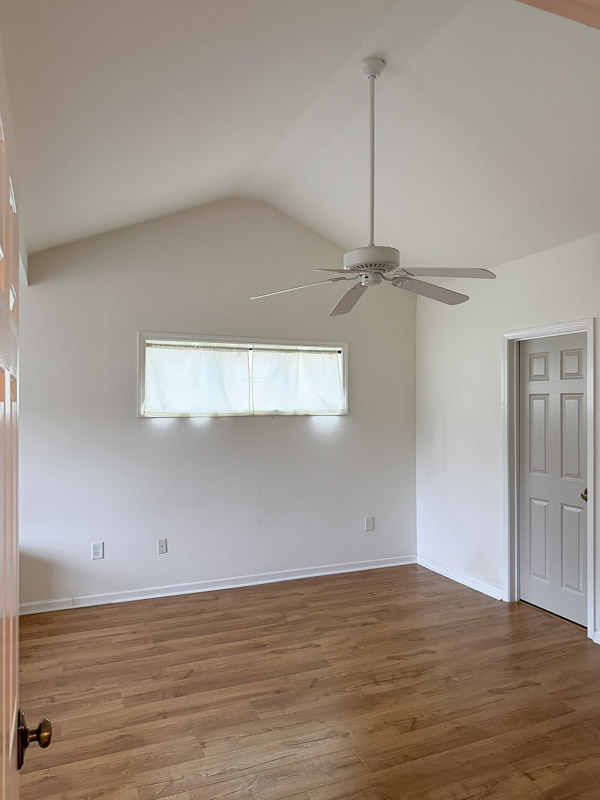
For the past 4 years we’d been living with all white walls that hadn’t been painted in over 20 years. Our room was builder grade with nothing to exciting about it, except the vaulted ceiling which had potential!
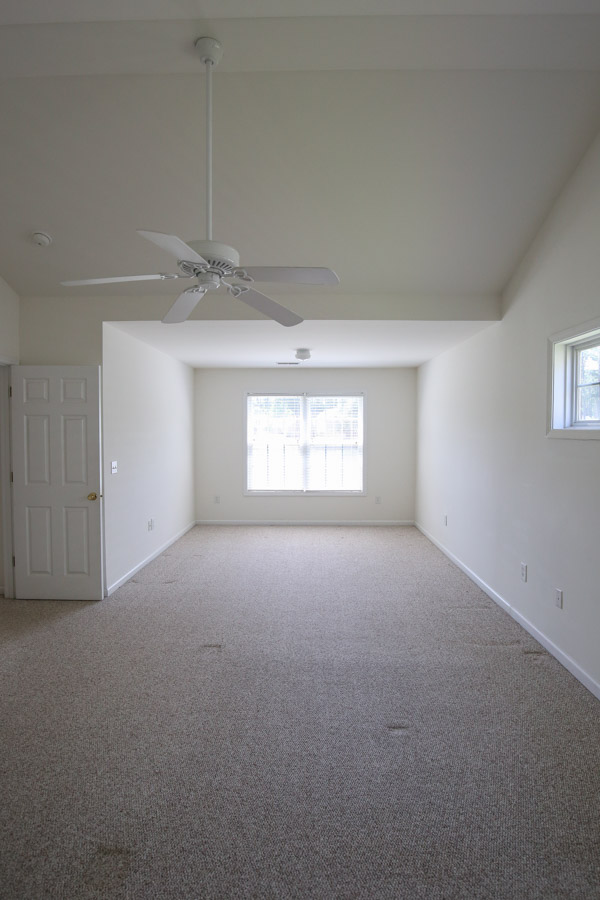
It’s also a fairly large space with 2 sections, the vaulted ceiling side and the 8 foot ceiling side which I guess is technically a sitting room? Here is before photo from move in day of the entire space:
For this phase 1 makeover we chose to focus on the vaulted ceiling side only and add as much character as possible with architectural features. Here’s how we did it!
7 ways to add character to a builder-grade room
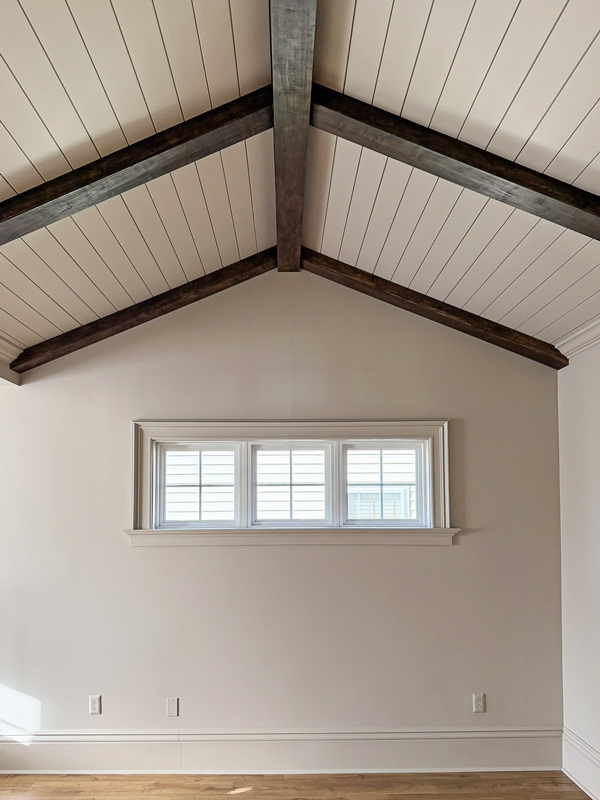
1. Plank the ceiling
We used these shiplap boards from Lowe’s to plank the vaulted ceiling. I love tongue and groove boards, but the shiplap achieved a similar look, was less expensive, and less thick!
We’ve used these shiplap boards so many times in past home projects, like our DIY vertical wall and DIY shiplap ceiling in our bathroom, the quality is great and they are so easy to work with and paint! They come in 8ft and 12 ft sizes.
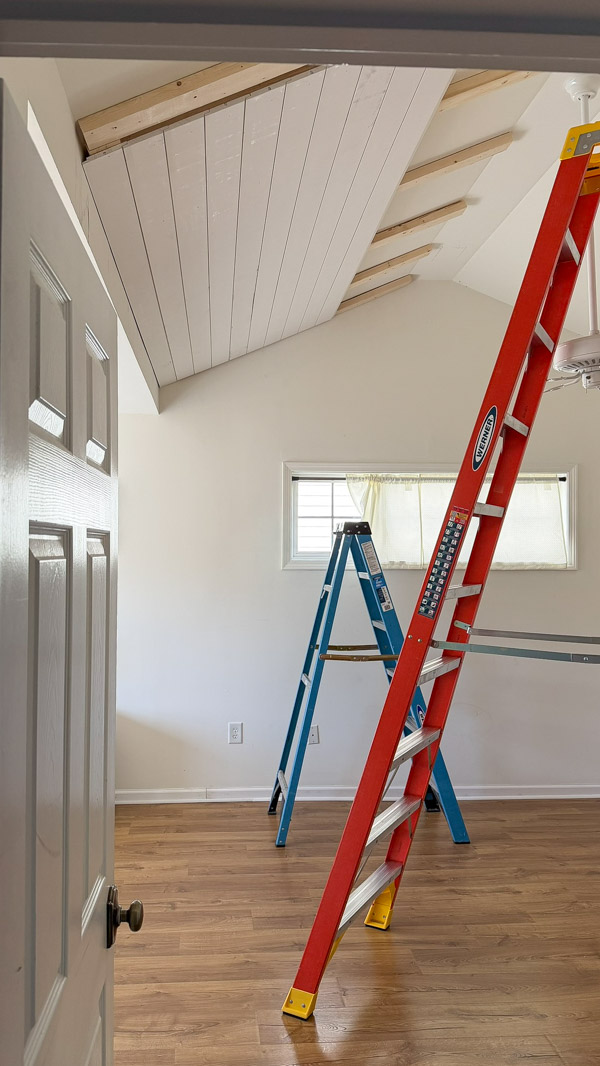
We did have to add 2x4s to the ceiling joists to change the angle of the ceiling slightly so we could make our center beams work.
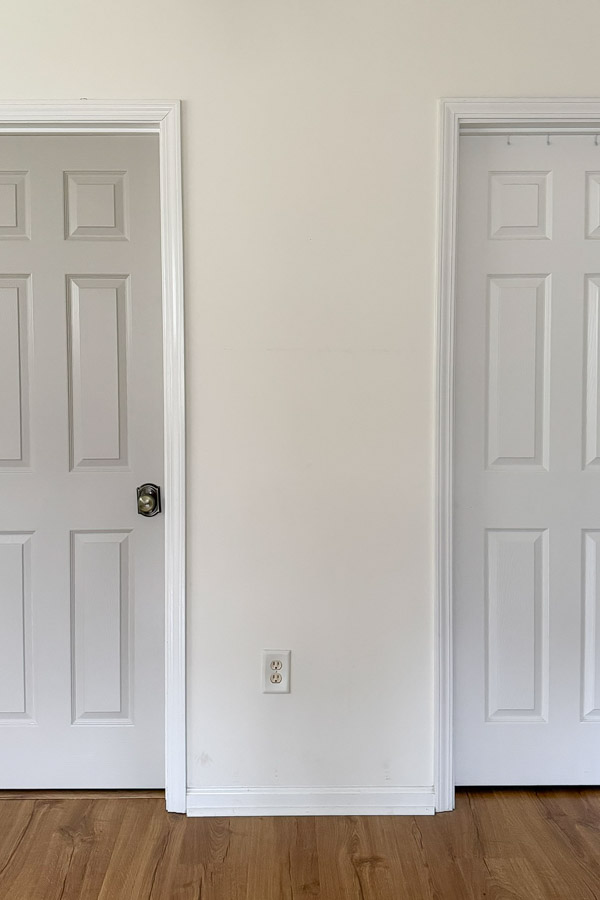
2. Upgrade the door casing
We used this thicker, detailed casing for a more charming look and it was an instant upgrade!
Before and after of the casing:

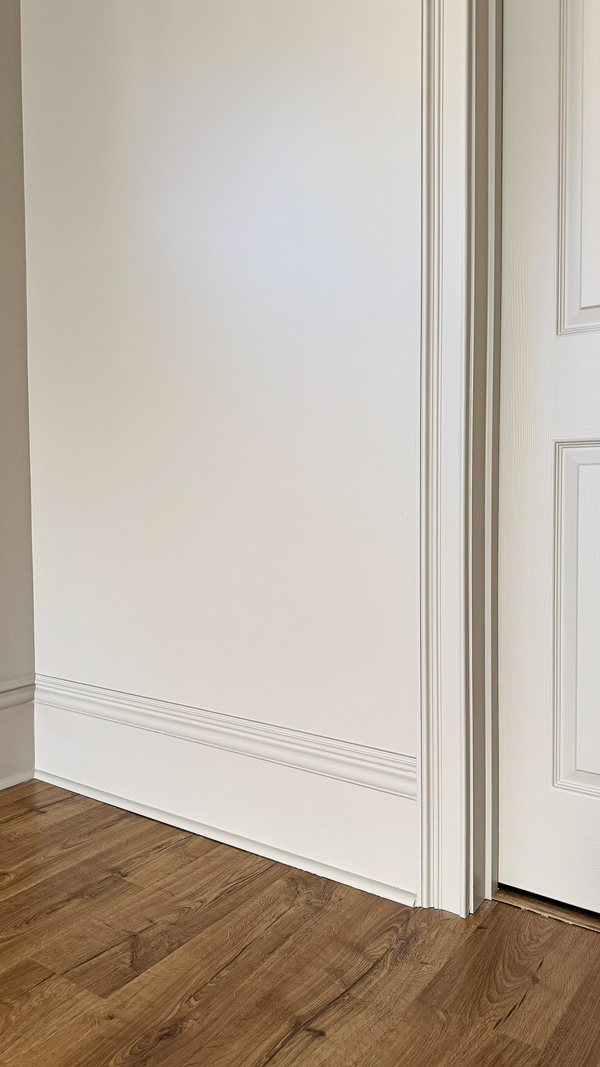
3. Replace the baseboards
A simple hack using a primed 1×8 plus decorative molding to get 10-1/2″ tall baseboards you’d find in a 100-year-old home. I love extra tall baseboards, and this method worked great to get that look!
Before and after:
📩 Want to Save This?

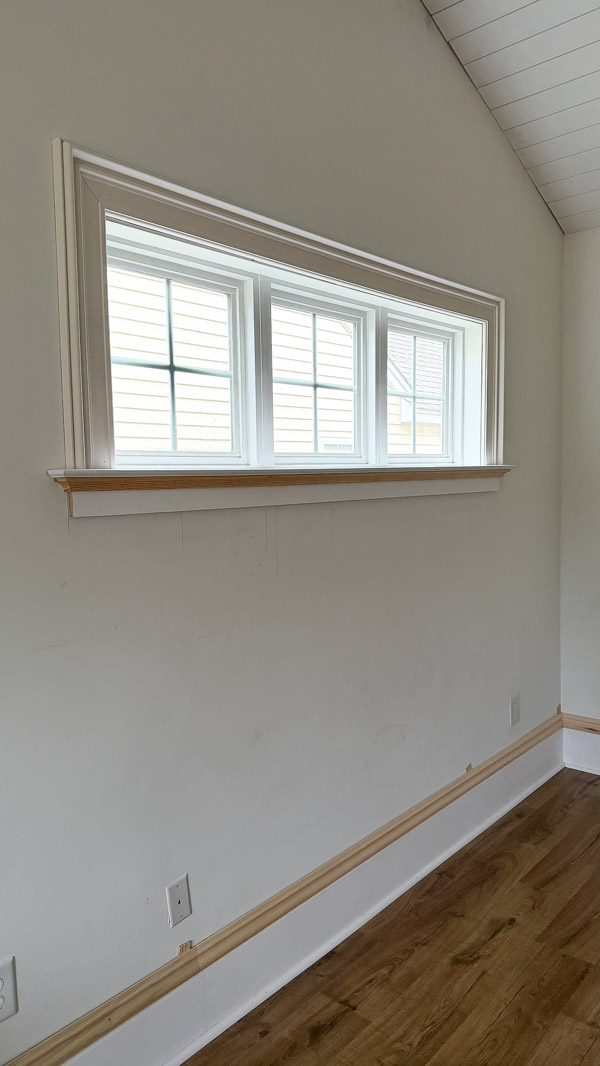
4. Trim out the window
We used fancy molding, specifically this extra wide casing. And we added a more substantial window apron and stool. You can find all the materials we used here!
5. Color drench
Just like our entryway, we color drenched the room and painted the walls, ceiling, and trim all the same color, Balanced Beige by Sherwin Williams.
6. Add wood beams
Lowe’s has ready to go wood beams – you just stain and install. We used these 5.5″ tall wood beams for the center of the ceiling and the 3″ tall wood beams for the side angled beams.
Get more details on how we installed them in my DIY wood beams on a vaulted ceiling post!
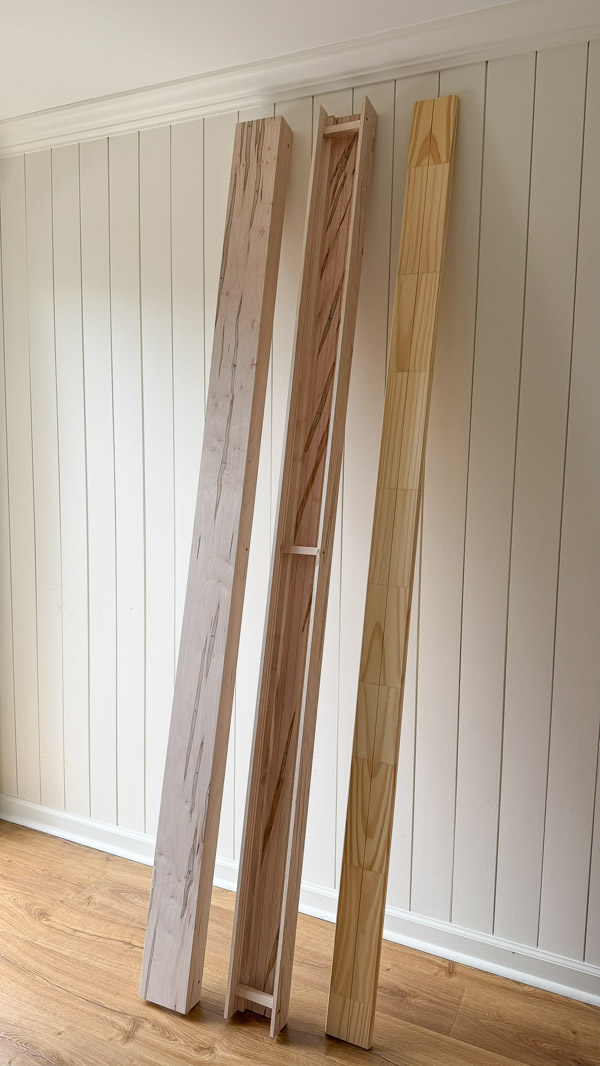
We used gel stain on them in the color Coffee.
7. Finish with crown molding
Finally, the finishing touch was crown molding between the side beams which gave it some extra charm and character!
I can’t wait to add a chandelier and bedroom furniture/decor next, stay tuned!!
VIDEO
You can see the full transformation in action in my bedroom makeover reel on Instagram here, which was sponsored by Lowe’s!
Make sure to check our our primary bedroom makeover in our last home too!
Follow along for my latest projects and sneak peaks on Instagram, YouTube, TikTok, and Facebook!
Melissa Duryea-Gaudet
Sunday 25th of January 2026
You’ve done it once again! This is so impressive. You took a plain old room and transformed it into a real haven. I can’t wait to see the furniture placed etc I’ve gotten some great plans now. Thanks for your visions.
Angela Marie Made
Monday 26th of January 2026
Thank you :) Can't wait to share the furniture/decor next!