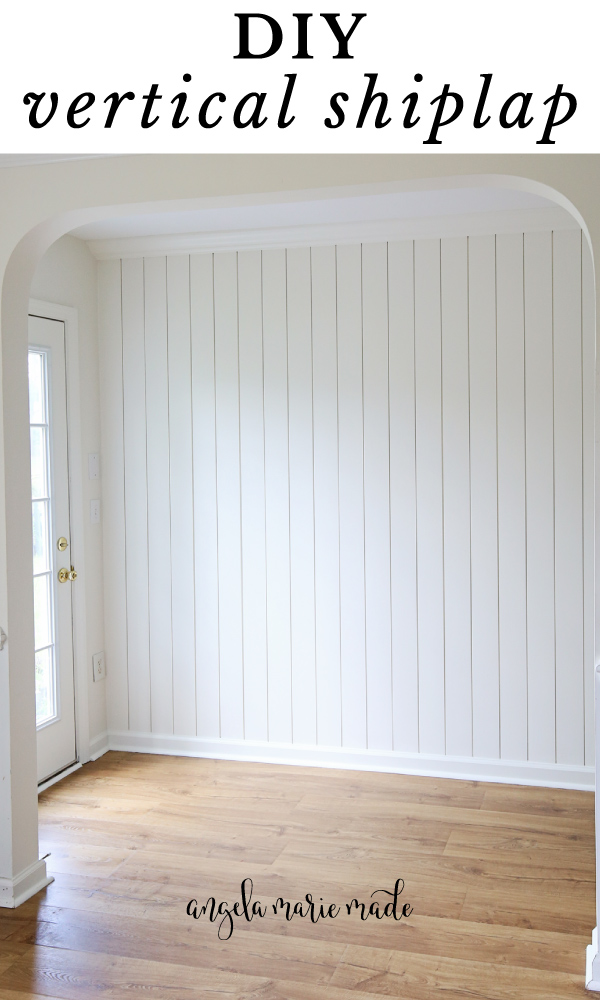
Learn how to install vertical shiplap on a wall using real shiplap boards from floor to ceiling!
A vertical shiplap wall or accent wall is an easy way to add character to a room with a modern touch!
I love shiplap for a wall treatment! In our past home, we actually installed a vertical shiplap half wall using faux shiplap with plywood, which is a really easy and cheap method! It’s especially great if you have a lot of walls to cover and need to keeps costs down.
I have a great tutorial on how to paint shiplap walls and a DIY painted accent wall too!
I’ve also used shiplap for a lot of other projects, including our DIY shiplap accent walls with horizontal shiplap, a DIY vertical shiplap half wall in our dining room, and also our DIY shiplap ceiling which covered our popcorn ceilings.
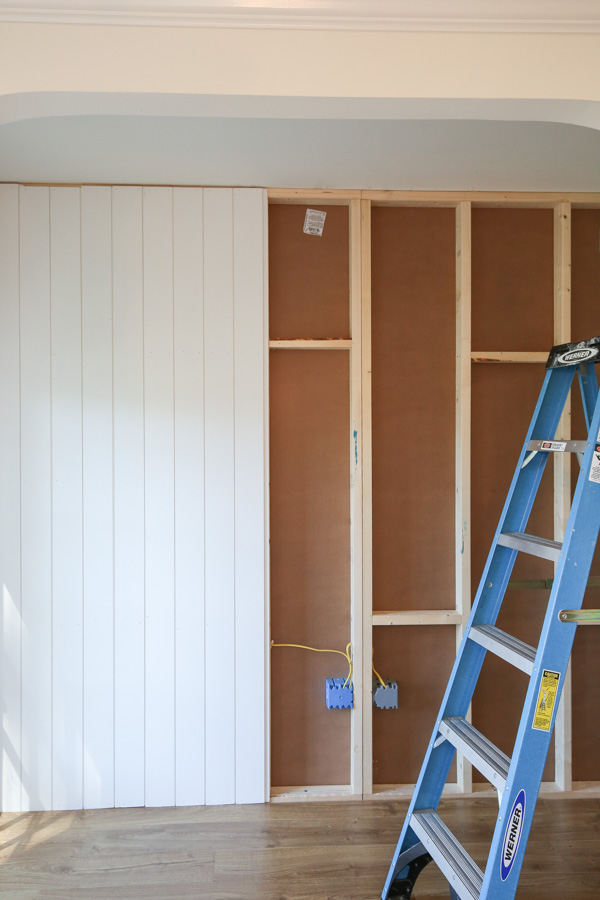
For our current office makeover that’s in progress, we built a wall. On one side of the wall we installed DIY beadboard, which actually has a similar look to vertical shiplap.
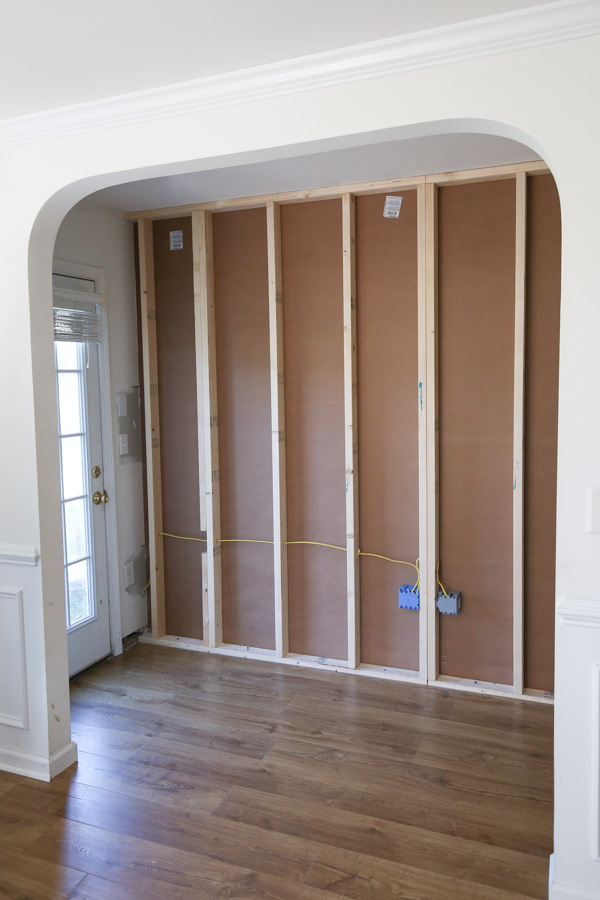
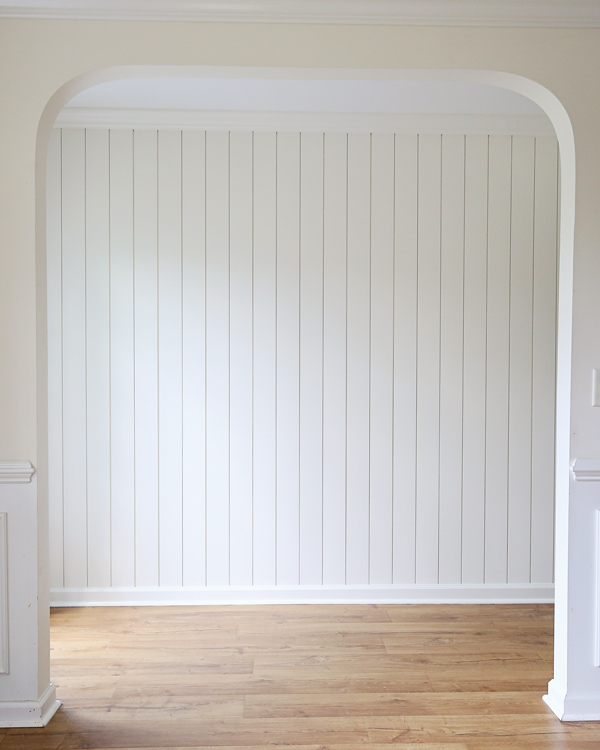
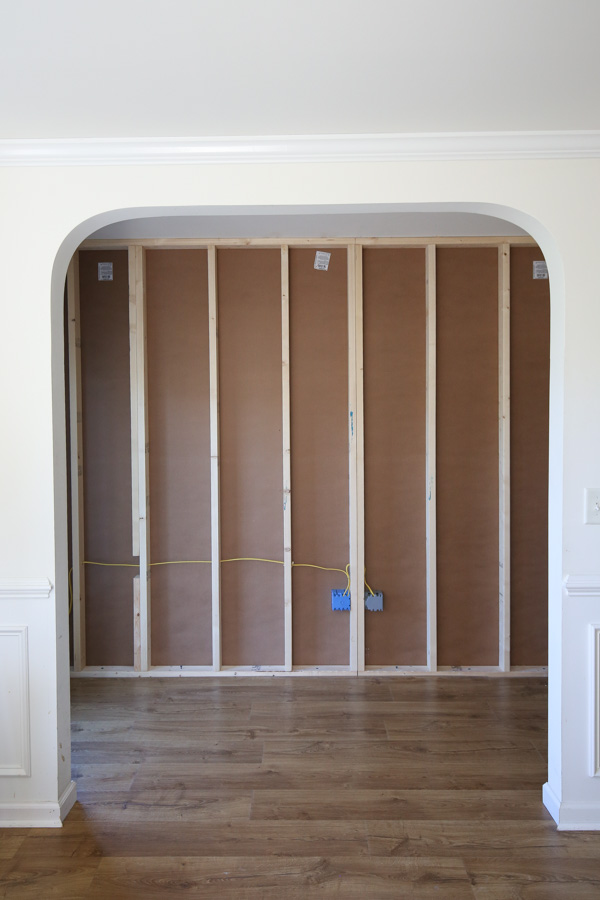
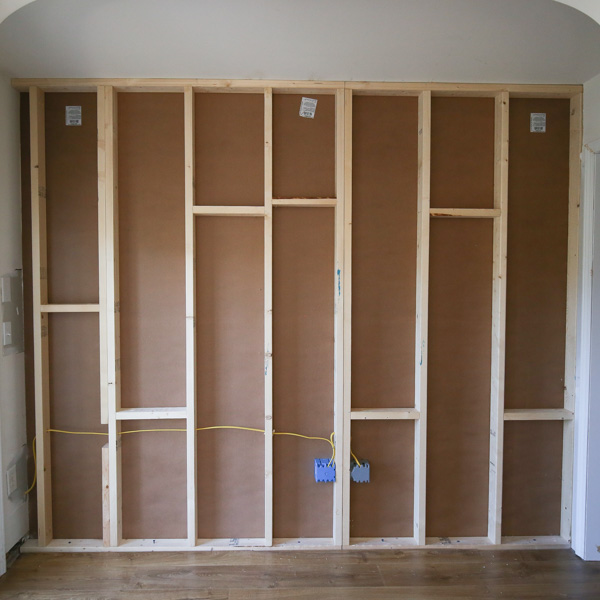
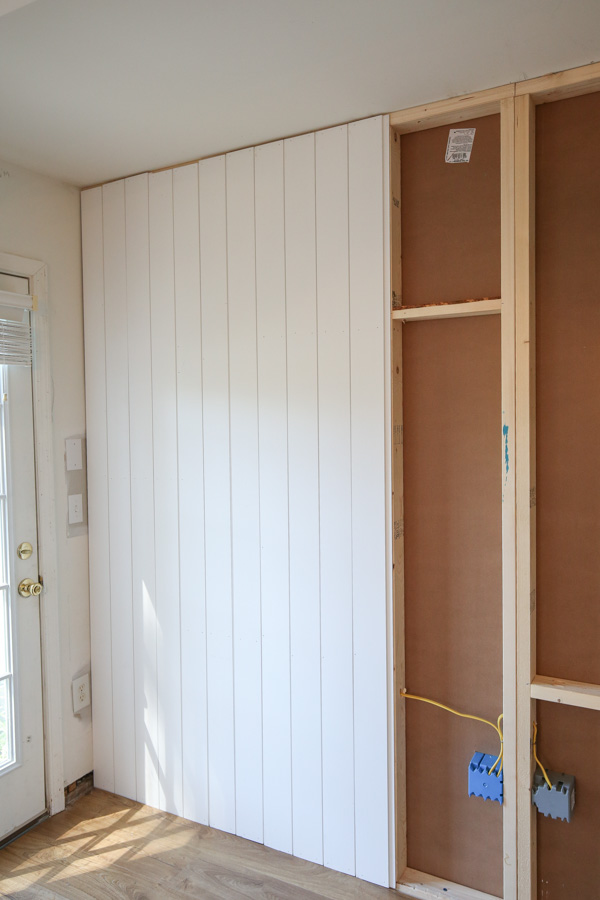
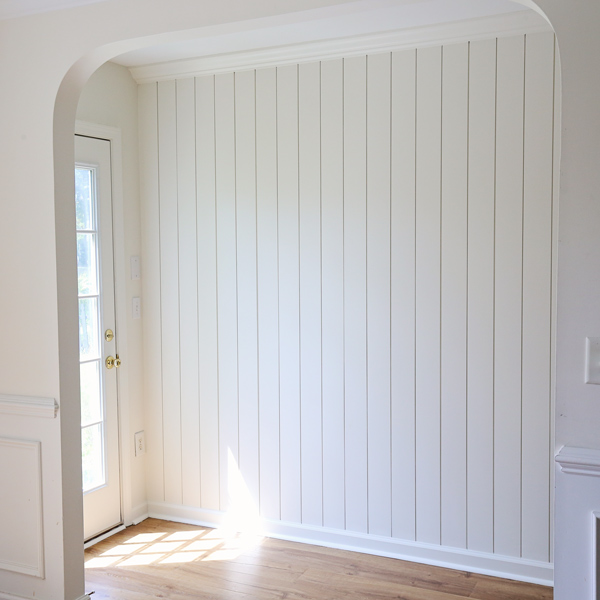
But, for the other side of the wall, which is part of our hallway to the back door, I wanted to install shiplap vertical using real shiplap boards for the entire wall. Here is a look at the wall before installing vertical shiplap:
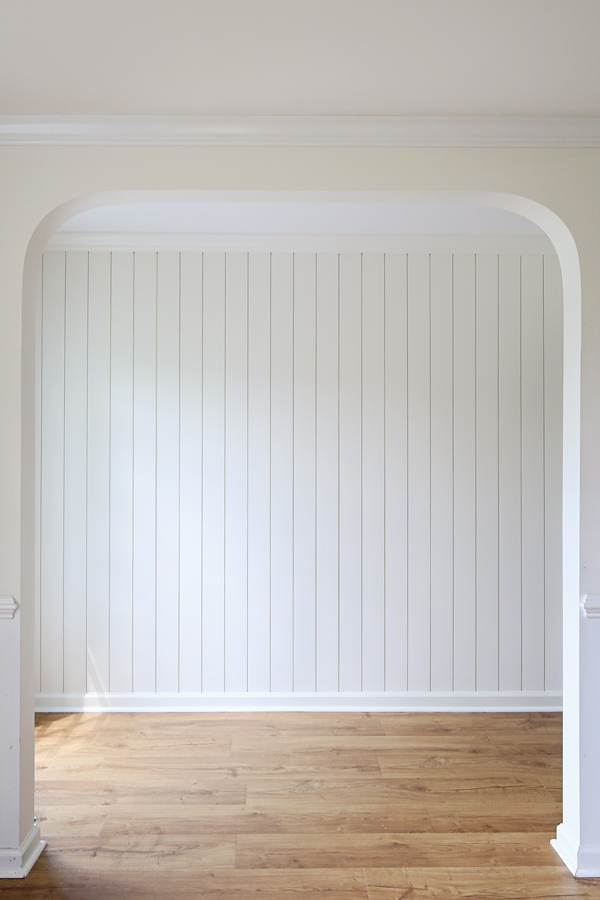
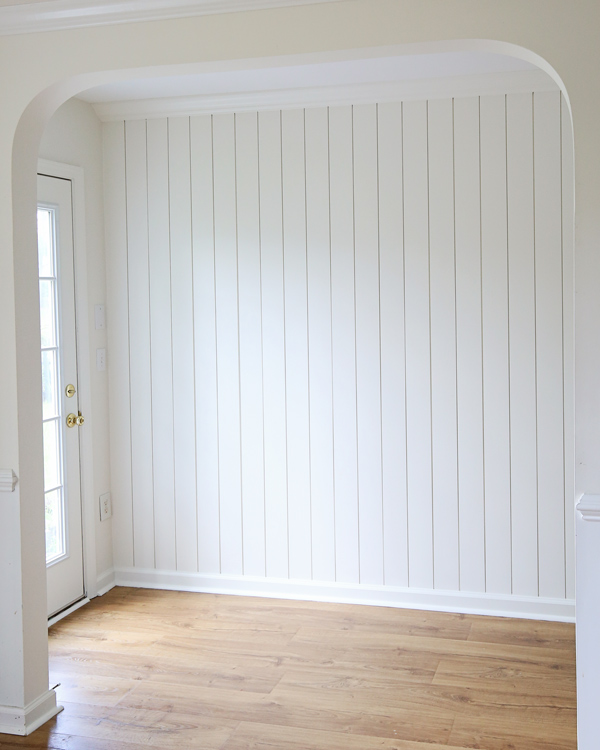
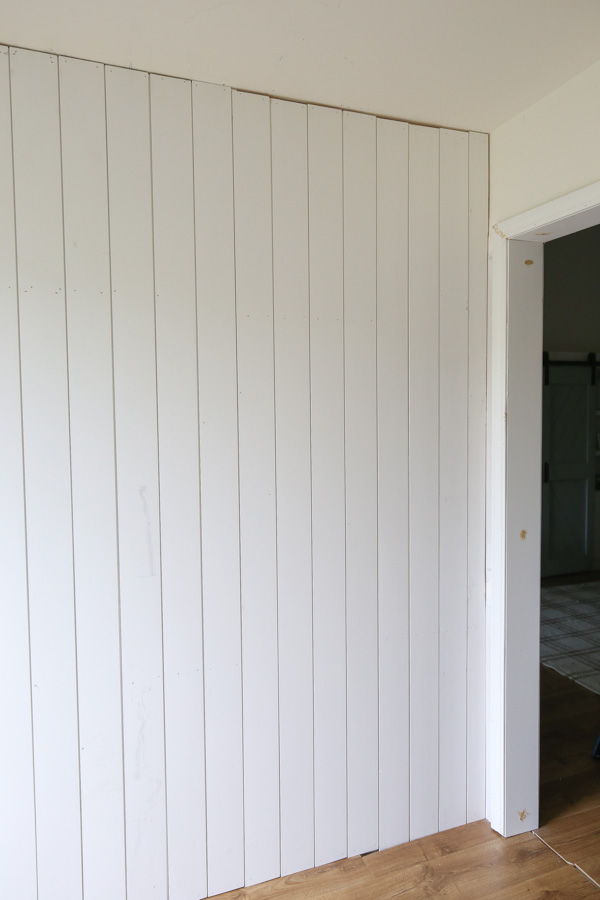
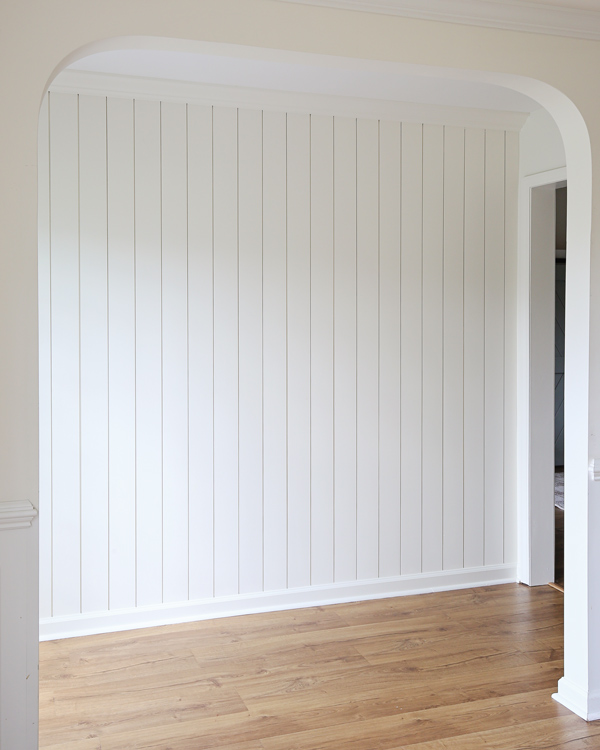
And after!
Real vs Faux Shiplap Boards
Because we were just doing one accent wall of vertical shiplap and it was going from floor to ceiling, I decided to do real shiplap boards that are pre-primed.
These primed shiplap boards are easy to install and make the process go super fast. However, they do cost about $8-$10 per board so it can get expensive fast.
If you are wanting to do a full room of vertical shiplap walls or just want to save money doing one wall, check out my how to install vertical shiplap easy and cheap method using plywood that we used in our DIY bathroom makeover.
It also shows how to trim them out if you want to do a vertical shiplap half wall or vertical shiplap wainscoting.
Alternatively, you can also use tongue and groove boards as well for a similar look! Learn about shiplap vs tongue and groove here.
Cost of the Vertical Shiplap Wall with Real Shiplap Boards
For our almost 10ft wall, we used 25 shiplap boards. When we bought them they were about $8.50/board. So, it cost about $213 for the shiplap plus the crown molding ($39) and new baseboard ($16) for a total of $268 for this accent wall.
Brand of Shiplap Boards
Both Lowe’s and Home Depot sell the primed shiplap boards. However, there are a few differences to note which can make a difference in the installation process.
Note, you can also check out your local lumber store for shiplap board options too!
Home Depot Shiplap Boards
These primed shiplap boards from Home Depot have one obvious front side. The back has grooves.
However, during my installation process I realized some of the boards were not milled properly, causing uneven gaps. See step #7 for details and how to avoid these types of boards when buying them.
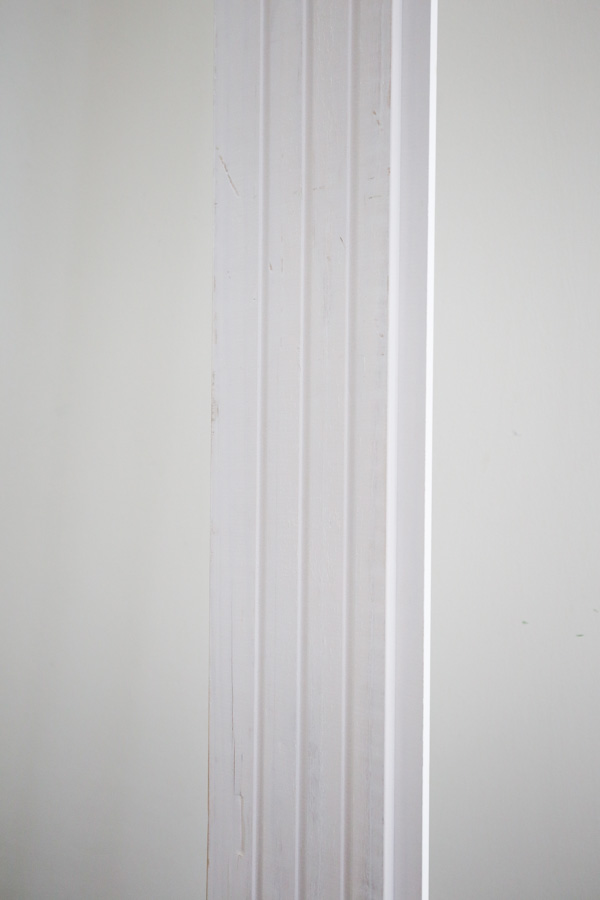
Lowe’s Shiplap Boards
These primed shiplap boards from Lowe’s have a front and back side that look very similar. It’s not the easiest to tell what the back vs the front is with these pre-primed shiplap boards unless there is a sticker on the back.
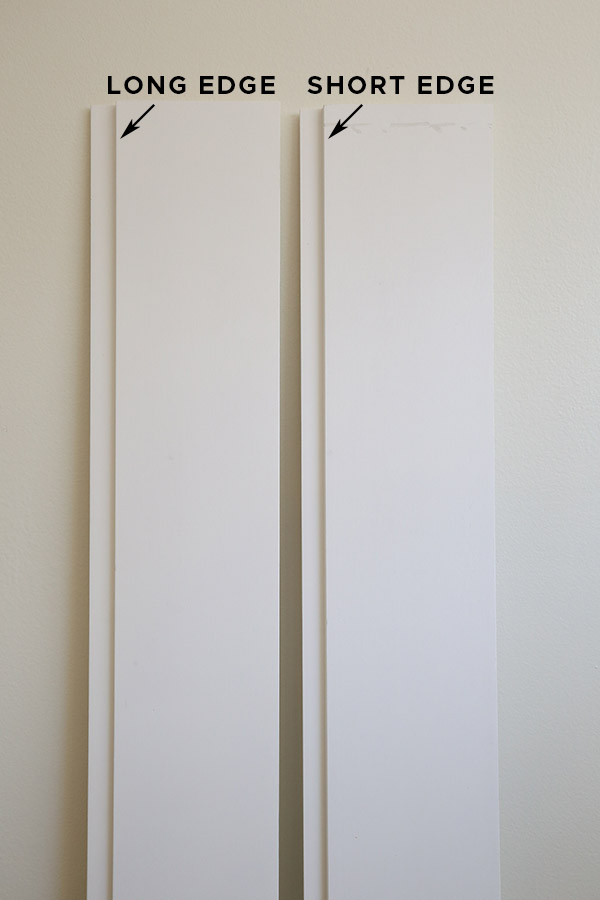
But, each board has a short edge and a longer edge. The shorter edge is the back and the longer edge is the front. Make sure to install them correctly.
Also, I never had any major quality control issues with these shiplap boards in the past when I used them for projects like our DIY shiplap ceiling and DIY double barn doors. So, I would recommend getting these boards over the Home Depot boards.
However, you should still inspect each board when buying them as explained in my DIY vertical shiplap VIDEO and in step #7.
Note, this post contains some affiliate links. For more info see my disclosures here.
DIY Vertical Shiplap Wall with Real Shiplap
Materials
- Shiplap boards (we used these pre-primed shiplap boards)
- Construction adhesive, like Liquid Nails (optional, see step #2)
- 2″ and 1 1/4″ brad nails”
- Lightweight Spackle or wood filler
- Paintable caulk
- Paint (we used Swiss Coffee by Benjamin Moore in eggshell)
- Primer (if boards aren’t pre-primed)
- Paintbrush and Roller
- Crown molding (optional)
- Wall outlet spacers (optional)
- Backer rod (optional)
Tools
- Miter saw
- Brad nailer or nail gun
- Level
- Dremel or jigsaw (optional, only if needed)
- Table saw or Circular saw (optional, only if needed)
- Measuring tape
- Stud finder
- Prybar & Utility cutter (to remove old baseboard – optional)
DIY Vertical Shiplap with Real Shiplap Video Tutorial:
Subscribe to my YouTube Channel here!
Watch the vertical shiplap video here!
1. Determine the amount of shiplap boards needed
For the first step, measure the width of your wall(s) where the shiplap will be installed. Divide the wall width by the shiplap board width. That will be the number of shiplap boards needed.
However, because of the shiplap gap, the actual width of each board can vary some. For this reason, it’s best to get a few extra shiplap boards. You can always return them if you end up not needing them!
2. Remove existing baseboards from the wall if needed
Because real shiplap boards are usually about 1/2″ thick, it’s best to remove your existing floor molding or baseboards if they are less than 1/2″ thick. Otherwise your shiplap board will hang over the baseboards and it’s going to look funny.
To remove the existing baseboard, score the top and corner caulk lines with a utility knife. Then, use a prybar and hammer to remove the baseboard from the wall.
If you will be reusing the baseboard, be careful in the removal process.
Note, because we just built our wall, we didn’t need to remove any baseboard at this point!
3. Cut shiplap boards to size if needed
If you are installing your shiplap boards from floor to ceiling like us, measure the height of your wall from the floor to the ceiling.
Tip: Make sure to measure at different points on your wall since the ceiling may not be perfectly square and measurements may vary from one end to the other like ours did!
Crown Molding Considerations
If you are going to be installing crown molding (or trim) over the vertical shiplap at the end like we did, then you only need to cut your shiplap board about 1/2″ or so less than the floor to ceiling height measurement. The cuts for the top of the boards don’t need to be perfect because the crown molding will cover any gaps.
However, if you don’t want to add crown molding or trim, then your measurement and cut needs to be very precise and only about 1/8″ or less than the floor to ceiling height measurement.
You want a snug fit and you can just caulk the small gap between the shiplap boards and ceiling at the end.
Note, the bottom of the shiplap will be covered by baseboard.
Cut the shiplap boards to size with a miter saw.
4. Mark the wall studs (optional)
Most walls have wall studs that are placed every 16″. Use a stud finder and mark the studs.
Because you are installing vertical shiplap, most of your boards will not be installed over a wall stud. However, it’s nice to know where they are and place some nails into them for the boards that do go over the studs.
Otherwise, the boards will be secured with construction adhesive as explained in step #6.
Note: Because we built our wall and did not have any drywall installed, our wall studs were exposed and we decided to add blocking with 2x4s going horizontally between each of the vertical studs.
We placed them strategically for things we might want to hang on the other side of our office wall. And we are going to be able to nail into these horizontal blocking studs, as well as the top and bottom studs.
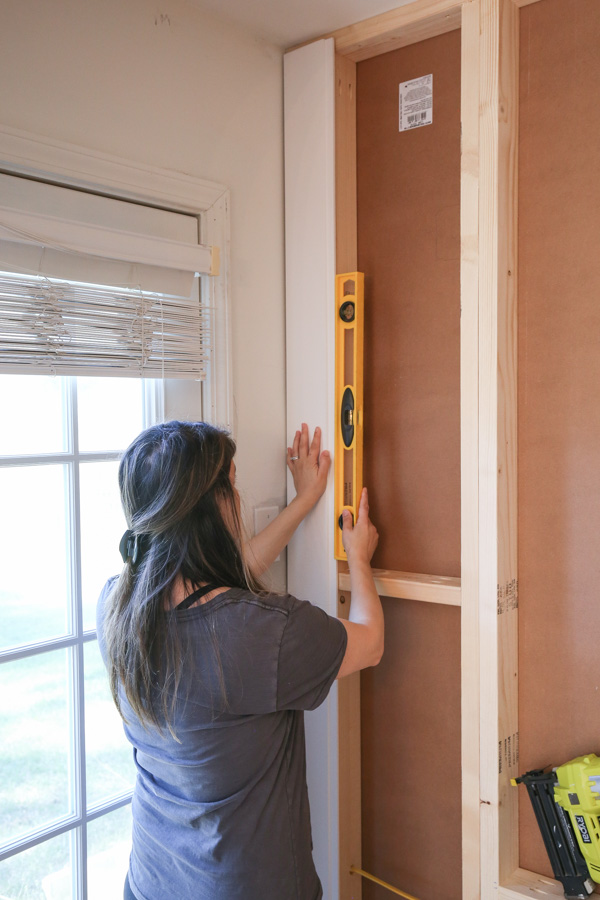
5. Line up the first vertical shiplap board and make sure it’s level
Line up the first vertical shiplap board with the corner of the wall. Make sure that the straight edge of the board is lined up on the wall side and not the shiplap tongue edge (if you are using this same style shiplap board as us).
If you are using boards like these Lowe’s shiplap boards, make sure to start with the back side towards the wall as explained above.
Hold a level vertically to the first board and make sure that it is level. Our corner wall was not straight/square, so we had to tilt our board a little to get it level.
📩 Want to Save This?
We had to do this same process with our vertical shiplap half wall in our dining room too.
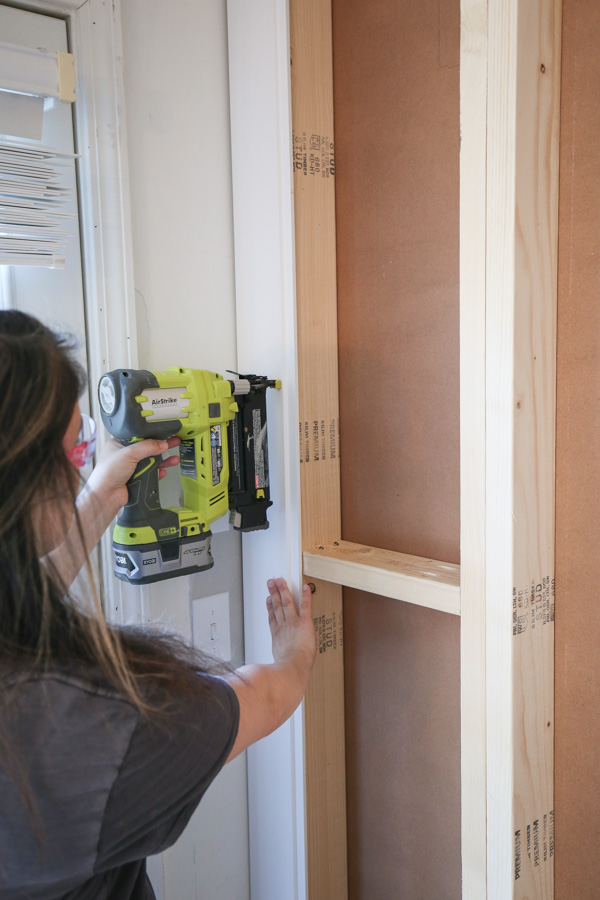
6. Attach the first shiplap board to the wall
How to attach shiplap boards over drywall
If you are installing vertical shiplap boards over drywall, like we did for our vertical shiplap half wall, use construction adhesive like Liquid Nails and 2″ brad nails to attach the vertical shiplap boards to the wall. Also, nail into the wall studs when you can.
Attach the first vertical shiplap board to the wall, making sure it is still level.
Note: As explained above, we just built our new wall so we didn’t have any drywall and we just nailed our shiplap boards directly to our wall studs and blocking (horizontal 2x4s). So, we did not need to use construction adhesive.
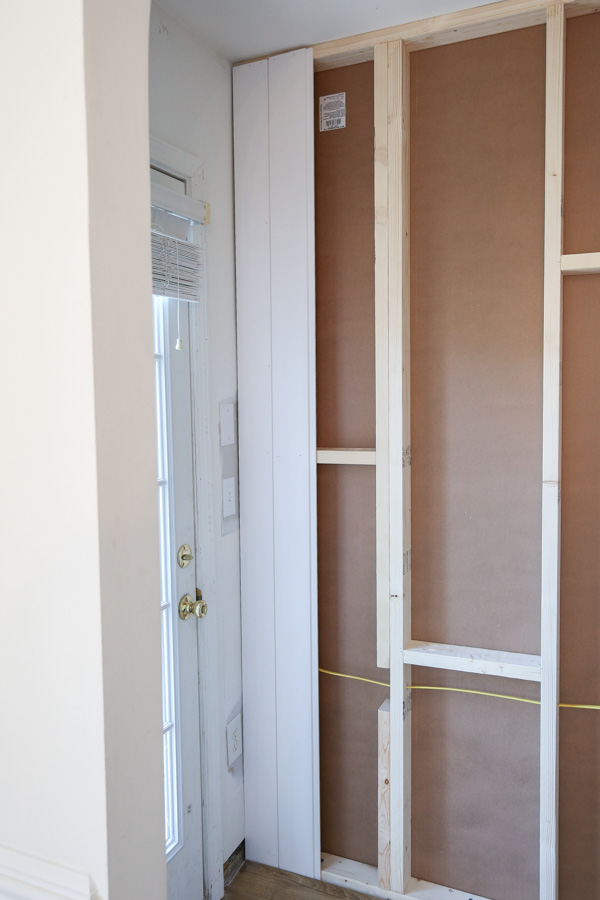
7. Install the remaining vertical shiplap boards
Continue to install the remaining vertical shiplap boards.
Paint in between the vertical shiplap boards (optional)
If you are going to be using a dark or bold paint color, it’s easiest to paint in between each board as you install them like I explained in my how to paint shiplap tutorial and how to install vertical shiplap wainscoting tutorial.
However, if you are doing a white color like us over the primed boards, you can get away with waiting until the end and just paint the gaps with an angled paint brush.
Vertical shiplap wall installation tip:
When we were about a quarter of the way through installation, I noticed some of the shiplap board gaps were not even and oversized compared to the correct size gaps of other boards.

After a lot of checking and brainstorming, I realized that the boards had been milled wrong and they were poor quality. Ugh!
You can see my reaction during the install and more details in my DIY vertical shiplap VIDEO here!
I have never had this problem before with the shiplap boards. But, it’s something to be aware of now and important to test out putting the boards together at the store and making sure you buy the good ones!
Make special cuts for wall outlets, pipes, or light switches (if needed)
At some point you may need to make a special cut for something like a wall outlet, pipe hole, or light switch.
Remove any outlet covers. Measure and mark on your board where you need to cut it for the special cut. Use a Dremel, jig saw, or drill to make the special cut. We used this method for our bathroom vertical shiplap with plywood and cutting around pipes.
For outlets, to make them look right, you will need to bring your outlet out 1/2″ or the thickness of the shiplap board. To easily do this you can use outlet spacers like these.
We did not have anything to cut around on this wall, since our wall outlets are on the other side, our DIY beadboard wall.
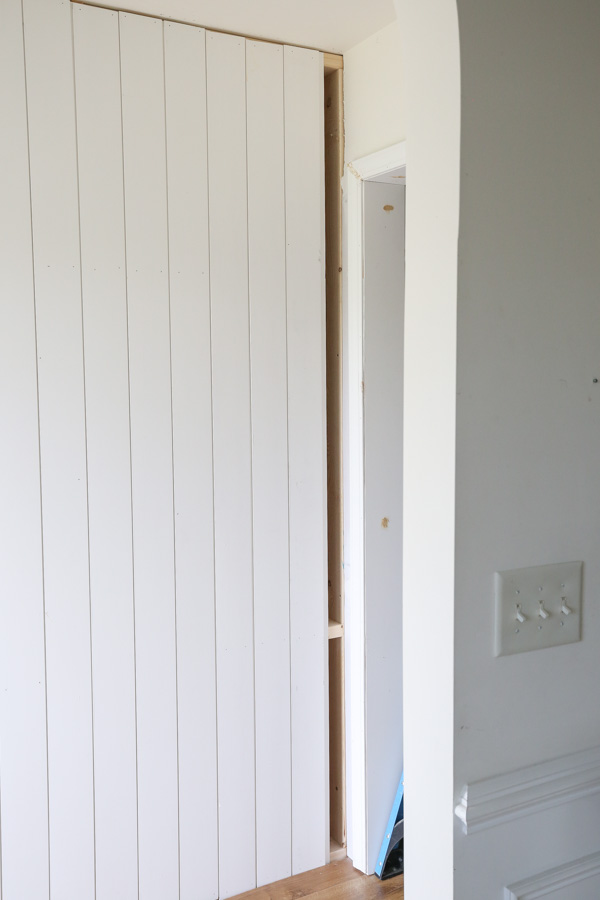
8. Rip cut the last shiplap board to size if needed
When you get to the last board, measure the remaining space left and rip cut the shiplap board to that size. Note, you can subtract an extra 1/8″ from the measurement to give yourself some wiggle room to get the board in place and then caulk the difference at the end.
We used our circular saw and straight edge guide to make the rip cut, but you can also use a Dremel (like we did for our bathroom vertical shiplap) or a jigsaw.
Yay now the vertical shiplap wall installation is complete and we can move on to the finishing steps!

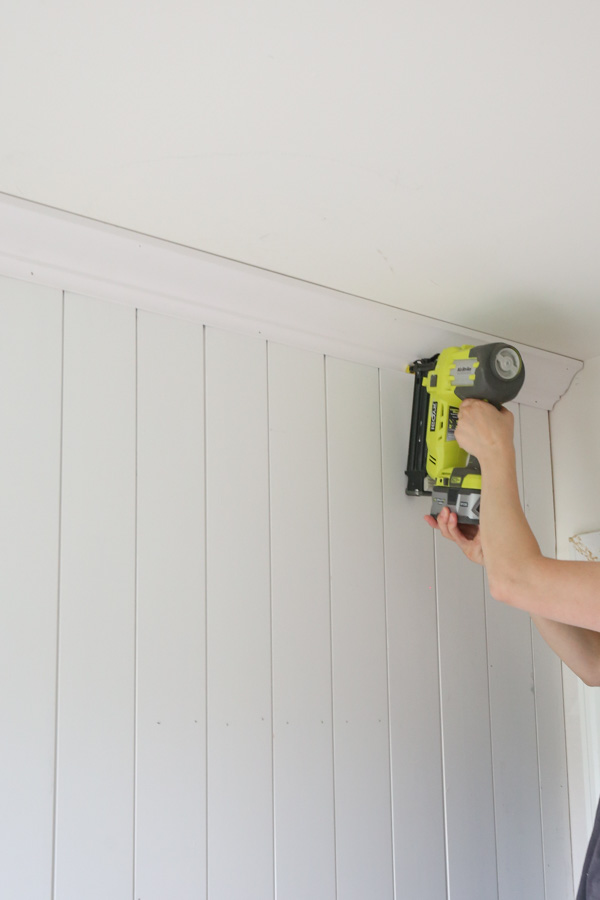
9. Install baseboards and crown moldings
Once the shiplap installation is complete, the baseboards and crown molding can be installed!
I love how the crown looks over our vertical shiplap wall, it really elevates it and covers all of our ceiling gaps and nail holes at the top!
We used 1 1/4″ brad nails and a brad nailer to install our molding and baseboards.
Note, for any adjacent wall or walls that don’t have shiplap, you will need to cut the baseboard by 1/2″ or the thickness of the shiplap board so it aligns properly with the baseboard on your shiplap wall.
You can do this with a Dremel or chisel, like we did for our DIY board and batten accent wall.
10. Prep for paint and paint the DIY vertical shiplap wall
Prepare for paint by filling in all the nail holes with a lightweight spackle or wood filler. Once the spackle or wood filler has dried, lightly sand it.
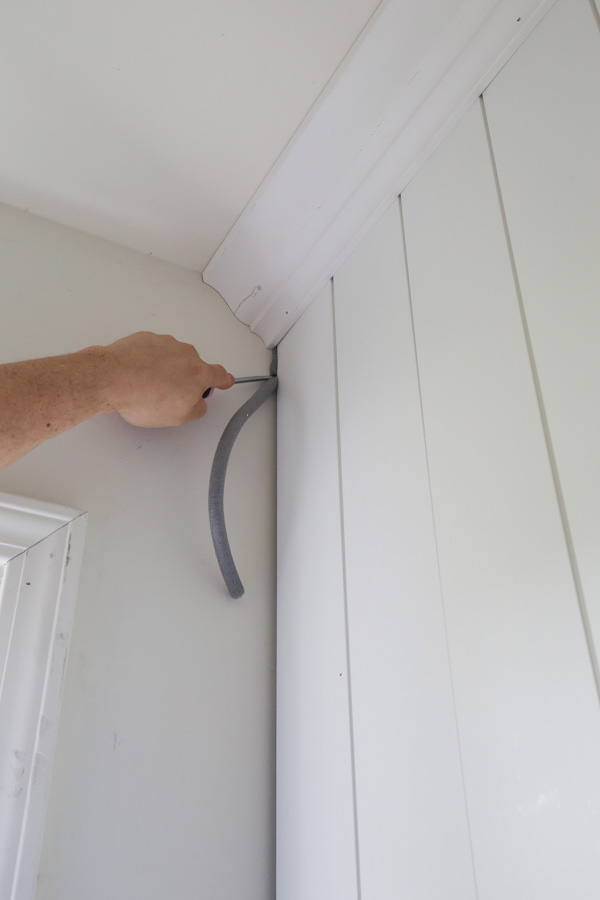
Caulk all seams and corners needed on the vertical shiplap walls with a paintable caulk.
Tip: If you have a large gap between the wall and end shiplap board because your walls are not square, like us, use Backer Rod to fill the gap in for easy caulking!
Finally, it’s time to paint! Begin by painting the shiplap gaps with an angled brush if you didn’t paint them yet. As noted in my how to paint shiplap tutorial it’s easiest to paint these gaps in as you go for a darker color.
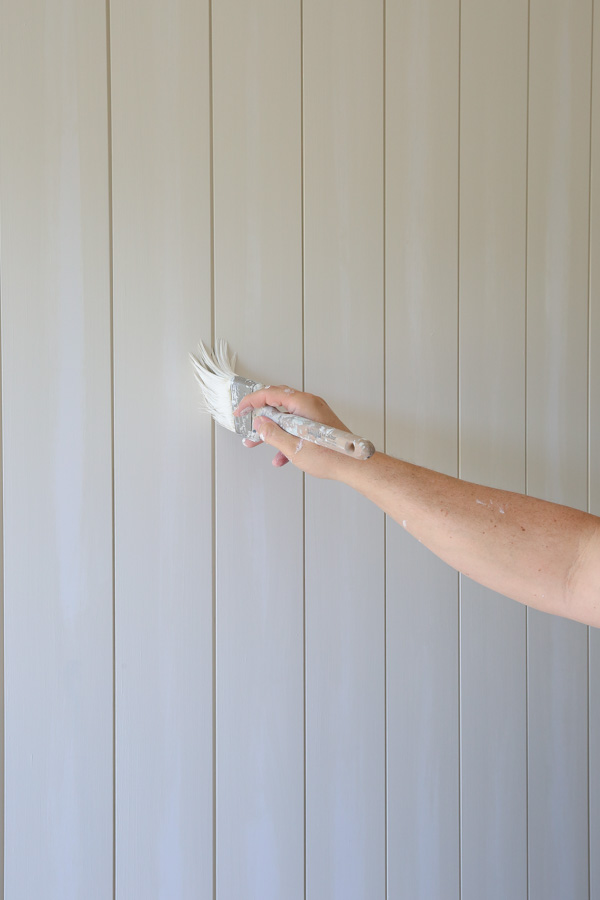
After doing all of the paint cuts, roll two coats of paint on the wall.
For more help on how to paint an accent wall, check out our DIY painted accent wall tutorial!
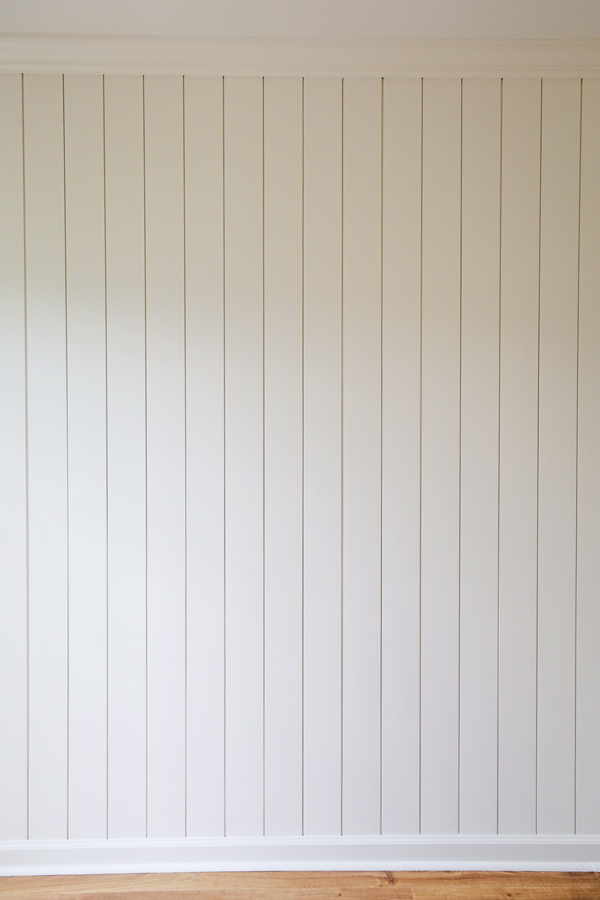
We used Swiss Coffee by Benjamin Moore in eggshell for the vertical shiplap and a satin finish for the moldings.
What do you think of our new vertical shiplap wall?!
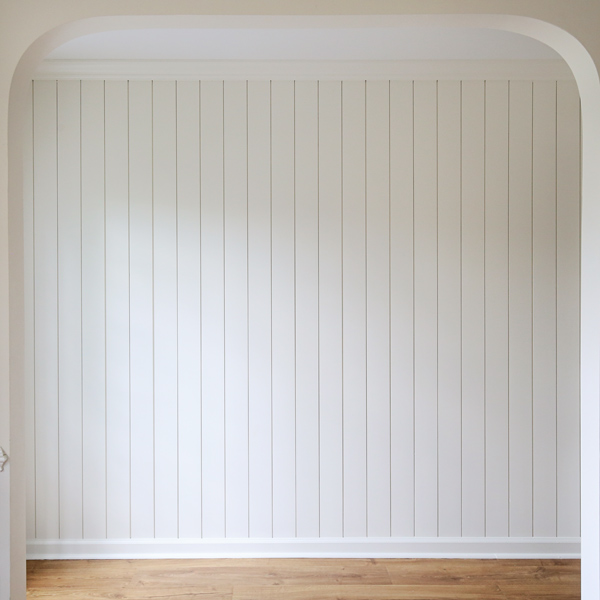
I absolutely love it, it brings so much character and warmth to our home! The white looks beautiful too in the morning, afternoon, and evening light!
Frequently Asked Questions
Can shiplap be installed vertically?
Yes, vertical shiplap can be installed vertically. If you have drywall on your wall, you will need to use construction adhesive and brad nails to attach it securely to the wall since you won’t be able to install every board over a wall stud.
If you are applying the shiplap directly to the wall studs like us, then blocking can be added to the studs so you can nail the boards directly to the studs and blocking.
Is vertical shiplap still in style?
This is a personal choice question, but yes vertical shiplap is still in style! Look at Pinterest and any popular interior designer, like Studio McGee. Vertical shiplap is being used often in projects because it’s beautiful and adds character to a space. And installing shiplap vertical is a fresh, modern way to do it!
What is the best wood to use for vertical shiplap?
The best wood to use for vertical shiplap is real shiplap boards that have a rabbet cut on them creating a nickel gap. However, to save money, 1/4″ plywood can be used instead for vertical shiplap installation with a similar look!
Also, tongue and groove ca be used too for a similar look. Learn about shiplap vs tongue and groove.
***
I hope this DIY vertical shiplap with real shiplap boards tutorial has been helpful especially if this was your first time installing vertical boards! Let me know if you have any questions below!
And make sure to check out the DIY vertical shiplap accent wall VIDEO to see everything in action!
If you want to learn how to do shiplap with real boards just part way up the wall, check out our DIY vertical shiplap half wall.
Follow along for my latest projects and sneak peaks on Instagram, YouTube, and Pinterest!
Christine
Sunday 26th of May 2024
Thank you so much for your post. I put up a verticle plank wall and couldn't figure out how to finish it ( for months). I came across your post and saw what you did with the crown moudling and thought it looked very well finished. I just finished my wall yesterday (with my pops help with the crown) and it looks great! It's soooo nice to finally have the room done! Thank you soooo much for your post!
Linda
Saturday 15th of April 2023
This is gorgeous! What an inspiration! I am about to undertake an entire family room with all tongue and groove on walls. Going to paint SW Aesthetic White. Would you paint baseboards the same or use pure white.