Sharing my top 4 tips for installing peel and stick full wall wallpaper!
A few years ago, we started making over my 5 year old son’s bedroom. We started with a dark green accent wall, linen look blackout curtains, and a DIY shiplap headboard.
After getting distracted by lots of other house projects, we never finished his room makeover! Finally, we are working on it again!
Note, this post contains some affiliate links. I may earn a commission if you shop those links (at no cost to you). Thank you for supporting my small business. For more info see my disclosures here.
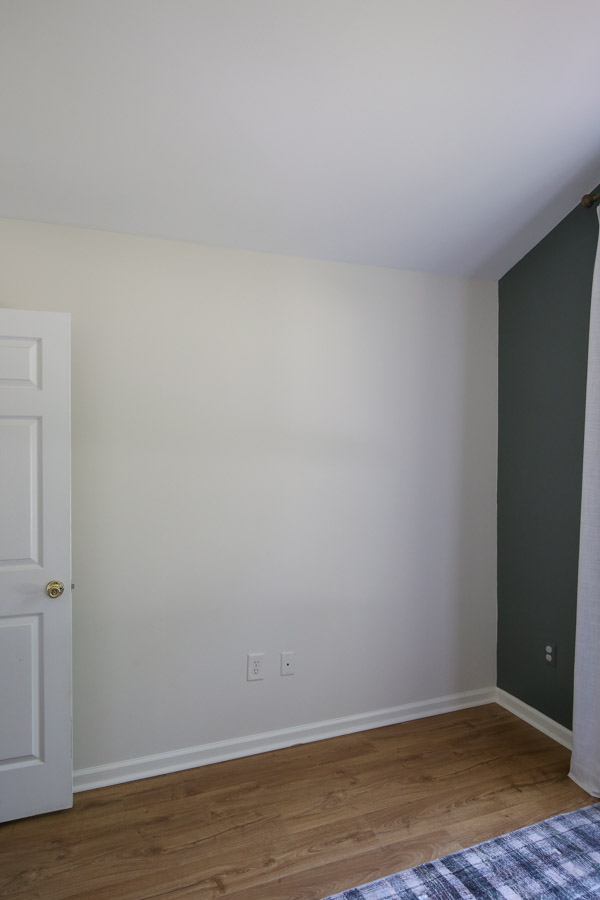
The wall above his bed has been blank and really needed some personality.
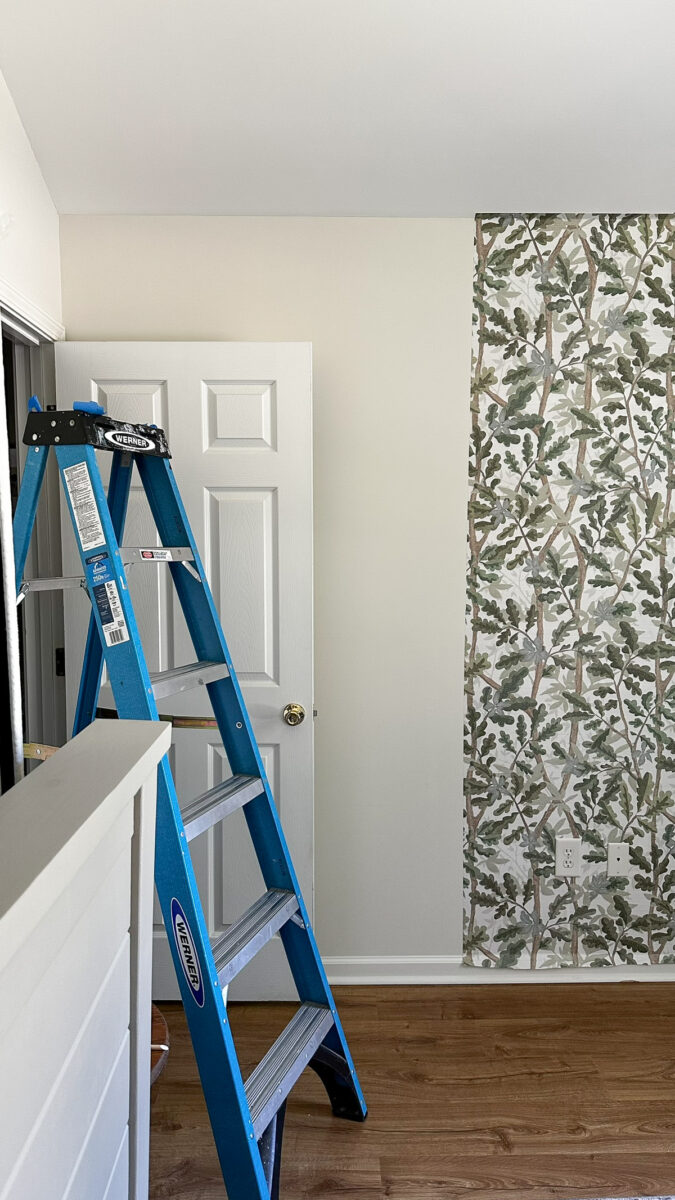
So, we both narrowed down a few wallpaper samples and he picked this adorable, woodland tree wallpaper for it. It’s available in multiple colors too!
I decided to do the peel and stick format in case we ever wanted to easily remove it in the future.
I’ve installed unpasted wallpaper in his nursery and peel and stick wallpaper in our dining room before, but those were both half wall treatments. This was my first full wall wallpaper project.
Today I am sharing how the wallpaper turned out and my top tips for installing peel and stick full wall wallpaper!
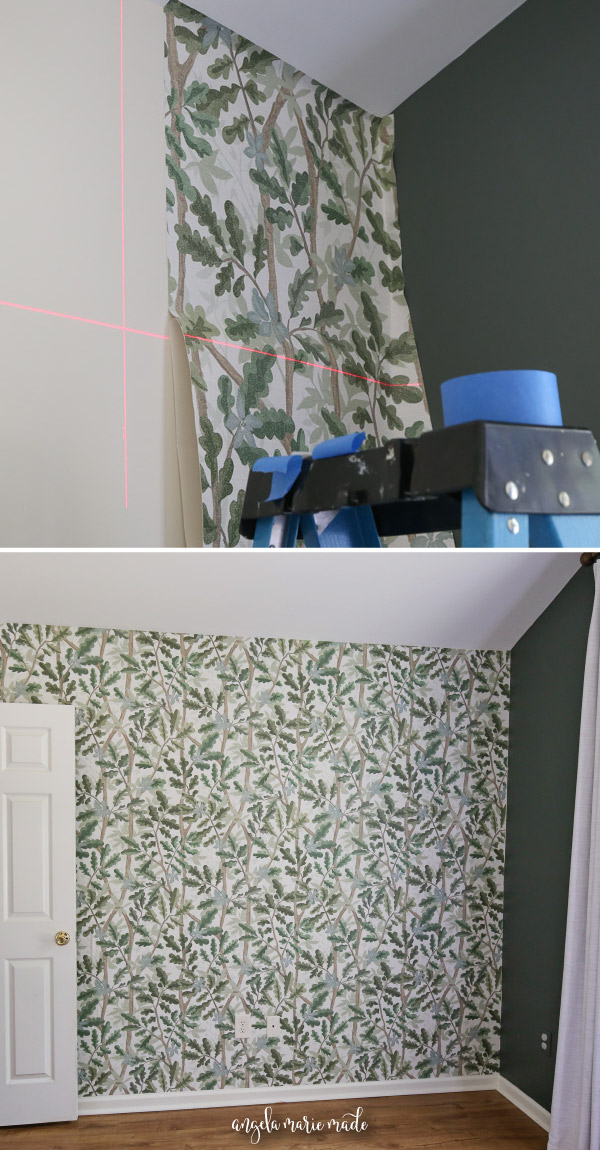
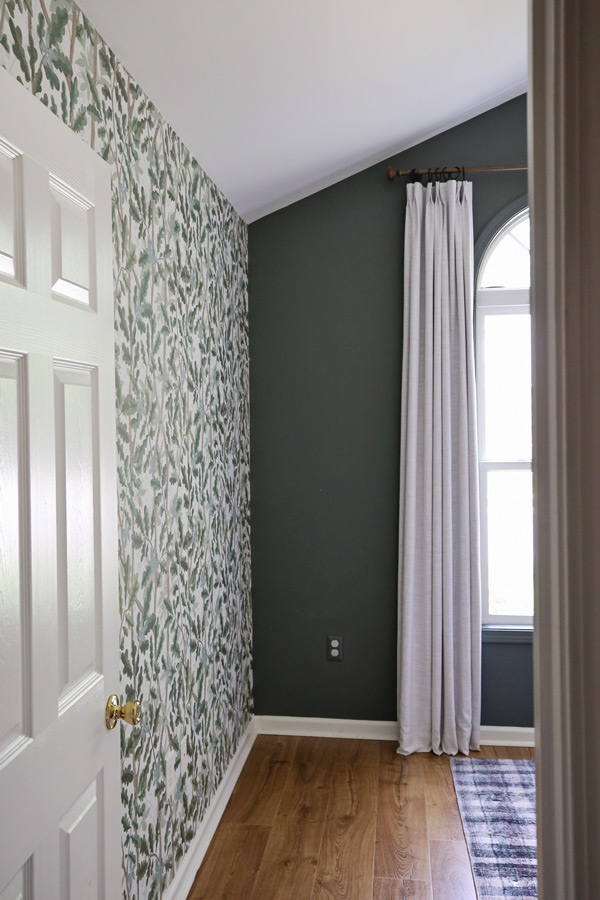
Here is the final before and after with this woodland tree wallpaper!
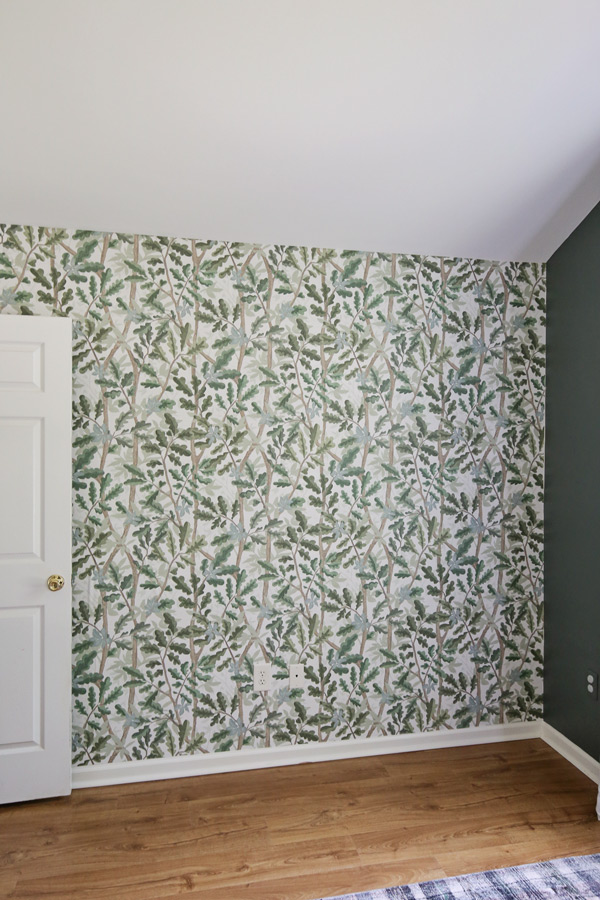
I love how much personality and character it added. Jackson loves sticks and acorns so this wallpaper is really perfect for him!
Here are my top tips for installing peel and stick full wall wallpaper. Note, I have a full tutorial on installing peel and stick wallpaper here.
Top Tips for Peel and Stick Full Wall Wallpaper
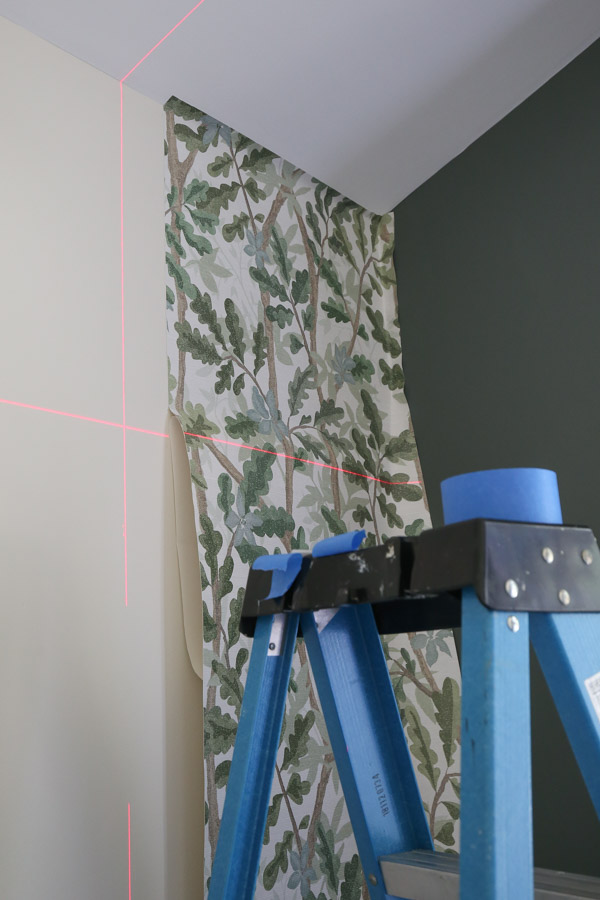
1. Use a laser level
Although, you can use a regular level and draw a level line to get started, it really helps to use a laser level for a full wall application. Because it’s easy for the long wallpaper roll to start to get a little off as you apply it to the wall.
With a laser level line that goes at least halfway down the wall, it helps to ensure you are applying the wallpaper perfectly level from the start.
📩 Want to Save This?
You use painter’s tape to hold everything in place and make sure your wallpaper edge is level against the laser line for at least the first 4 feet, before starting to apply it to the wall.
A laser level is really helpful as you continue installing each roll to make sure your pattern doesn’t start getting crooked as you continue which is a much more prevalent challenge with full wall wallpaper!
2. Use painter’s tape for initial placement
Speaking of painter’s tape from tip #1, it is super helpful to get your initial wallpaper edge lined up in place before you start peeling the backing paper off the roll. I explain this in full detail in my how to install peel and stick wallpaper tutorial.
It’s much easier to tape one side in place, especially when you are trying to match the repeat as you go, and then line up the other side with your laser line.
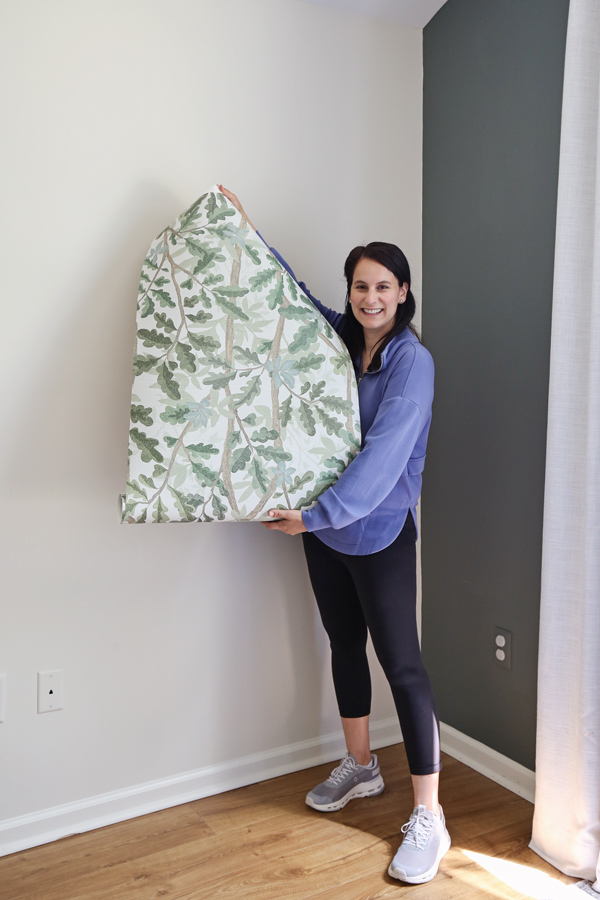
3. Use clothespins to help control the roll
When installing the 9 ft roll of wallpaper to the wall, I had a really hard time dealing with all of the extra wallpaper at the bottom of the roll.
So, I started to use two clothespins at the bottom of the roll to help keep it rolled up until I needed it. This helped tremendously with controlling the roll during installation.
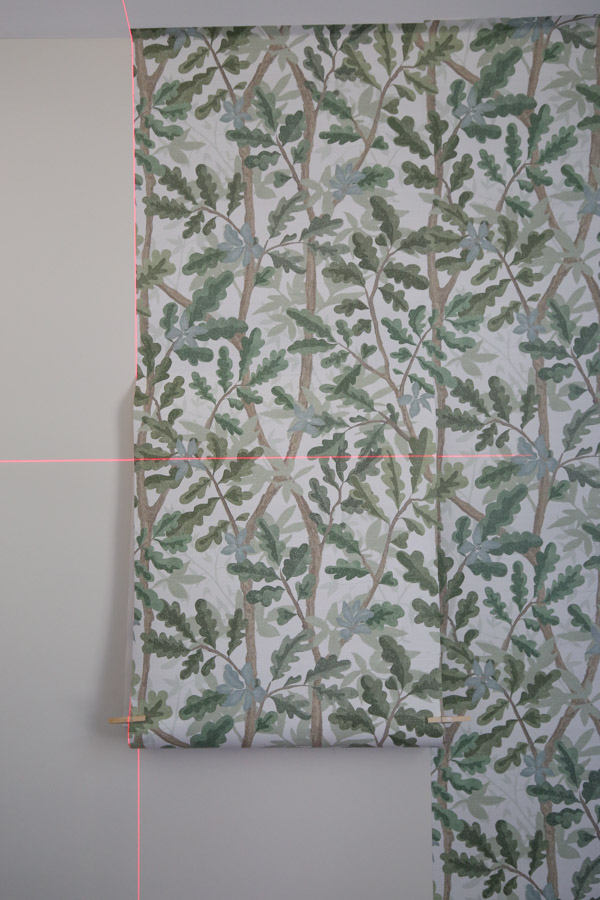
Note, be careful of other clips that might leave indents in the wallpaper. Clothespins are nice because they don’t leave marks.
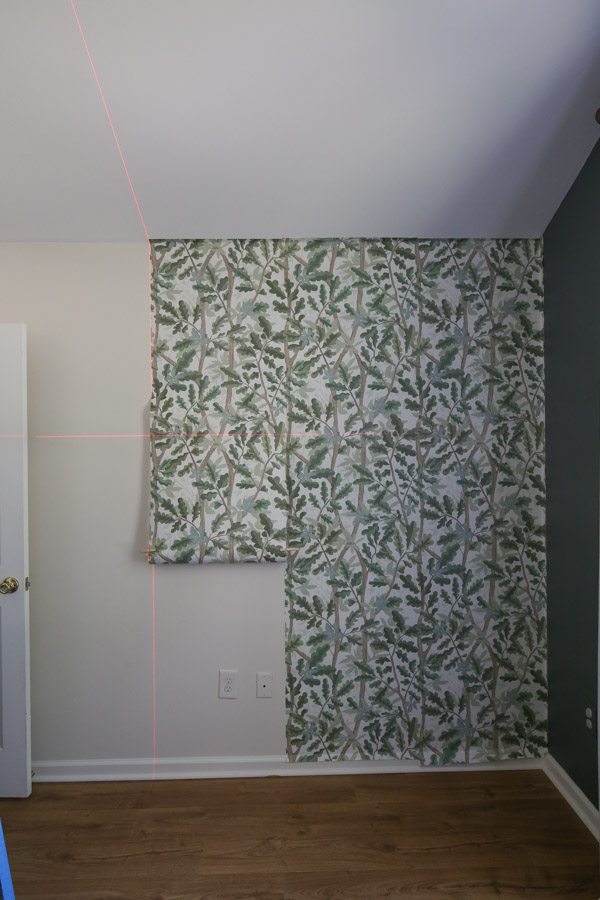
4. Use a pin tool for air bubbles
Another issue I had to deal with more than ever on peel and stick full wall wallpaper was air bubbles. I mean it’s basically one huge piece of vinyl, so air bubbles are common.
To remove these, use a pin tool to gently pop the air bubbles and then smooth out with a smoother tool.
Do you have any tips for full length wallpaper? I’d love to hear!
Stay tuned, I’ll be sharing how we are refreshing the bedding in this room next!
Follow along for my latest projects and sneak peaks on Instagram, YouTube, Pinterest, and Facebook!