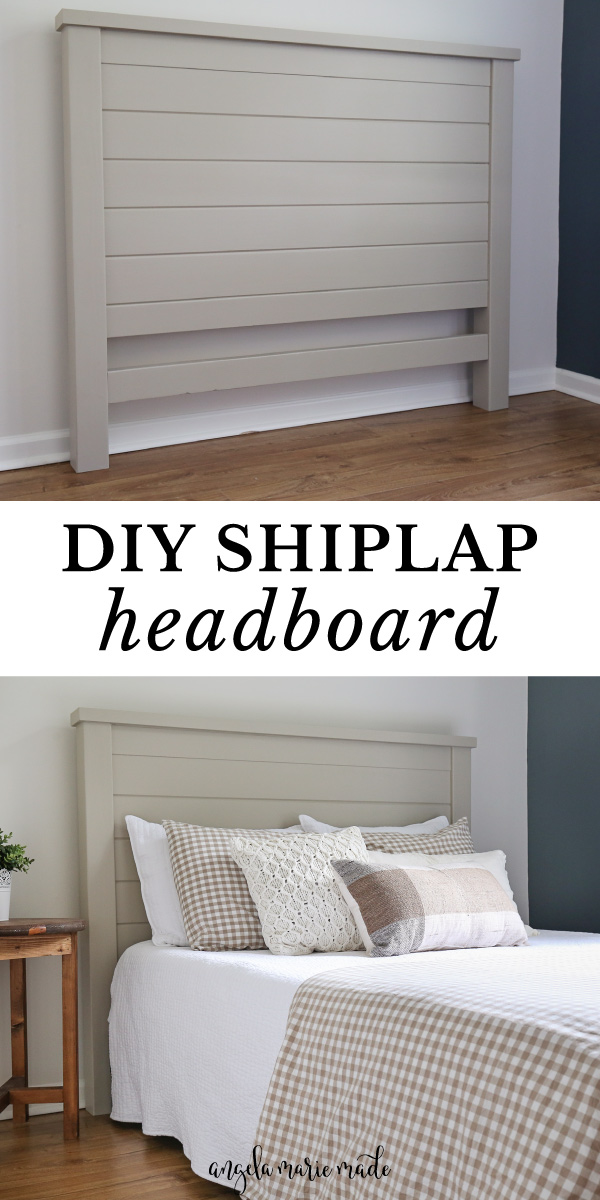
Learn how to make a shiplap headboard DIY for less than $100 in lumber!
We are working on my son’s bedroom makeover. He is transitioning to a full size bed and I wanted to make him a DIY shiplap headboard for his new bed!
A headboard is one of the easiest and cheapest ways to update any bedroom and add style! Plus, shiplap adds a ton of character!
A headboard is an easy way to incorporate the shiplap look without having to install any shiplap on your walls!
But, if you are interested in a shiplap wall too, make sure to check out our cheap and easy DIY vertical shiplap wainscoting, DIY shiplap accent walls, and DIY vertical shiplap from floor to ceiling!
You could also turn this headboard into a bed frame too if you want! Check out my DIY bed frame tutorial to see how to build side rails, a footboard, and slats.
Note, this post contains some affiliate links. For more info see my disclosures here.
I may build a bed frame or metal bed frame cover in the future. But for now I just stuck with the headboard to save time and money and to easily attach to a standard metal bed frame.
Design inspiration for this shiplap headboard DIY
When I was trying to determine what I wanted my shiplap headboard to look like and headboard design, I took a look at Pottery Barn Kids bed frames because I love the look of almost everything they do!
I saw this shiplap style bed frame from Pottery Barn Kids and I fell in love with the look, it was just what I wanted, except for the $1200 price tag! And I knew I could make a similar looking headboard for a small fraction of that price!
Type of wood to use for a DIY shiplap headboard
The main type of wood to use for the shiplap for a shiplap headboard DIY would be real shiplap boards. I’ve used these boards several times for many projects like for our vertical shiplap wall, DIY shiplap ceiling, and IKEA Billy bookcase hack with shiplap.
It’s best to use a board that’s at least 1/2″ thick and interlocks with a tongue and groove joint or overlapping joint, since there won’t be a wall behind it. So doing a faux shiplap with plywood, like I did for our super cheap vertical shiplap wall, won’t work well for a headboard.
After studying the shiplap style bed frame from Pottery Barn Kids closely, it looks like their shiplap boards are more of a v-groove style board than actual shiplap boards.
I’ve always wanted to try out v-groove board, so I decided to use v-groove for this shiplap headboard, which gives a very similar look to shiplap, it’s really just a different type of tongue and groove joint.
Learn about the difference between shiplap vs. tongue and groove here!
For the rest of the headboard, I used framing lumber, including furring boards, 2x4s and a 4×4 to make this project very cheap and sturdy!
DIY Shiplap Headboard Cost
For a full size headboard, this project cost me about $90 in lumber. It won’t change much for a different size bed though. You would just need a few more or less shiplap boards and 2x4s.
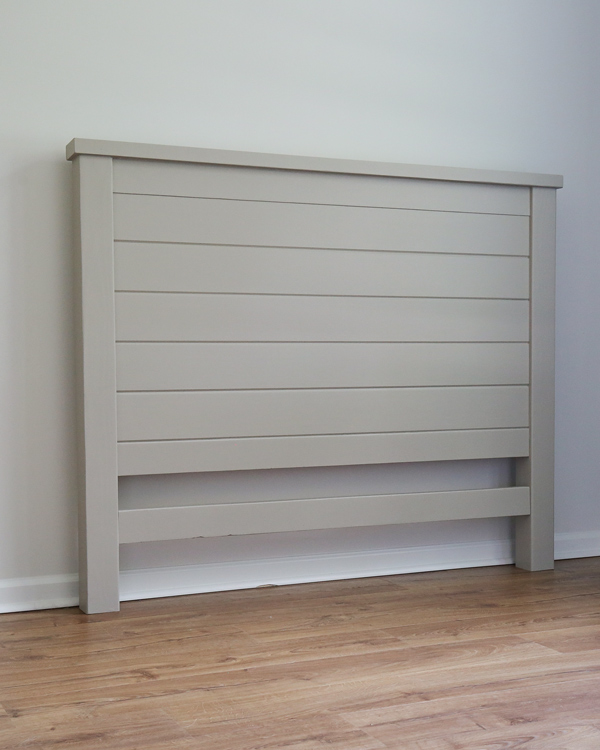
Final Dimensions the Shiplap Headboard:
The final dimensions for this full size shiplap headboard are 48″ tall x 59″ wide x 4″ deep. If you convert this to a twin, queen, or king, the width will change.
How to Make a Shiplap Headboard DIY
Materials
- (1) 4×4 @ 8ft*
- (3) 2×4 @ 8ft (or 1 @10ft and 1 @ 8 ft)
- (1) 2×6 @ 8ft
- (2) 1×4 @ 8ft furring boards
- (2) 1×6 @ 12ft and (1) 1×6 @ 8ft Shiplap or Tongue and Groove boards**
- Wood Glue
- 1-1/4 and 2-1/2″ Kreg screws
- 2″ and 1 1/4″ brad nails
- 2 1/2″ wood screws (for attaching to a bed frame)
- Spackle or wood filler
- Paint & Primer (or wood stain)
Tools
- Miter Saw
- Circular Saw or Table Saw
- Kreg Jig
- Drill
- Brad nailer
- Clamps (48″ clamps are helpful too but optional)
- Tape Measure
*Make sure to use all UNTREATED wood, not pressure treated boards
**Use real shiplap boards or a similar look, tongue and groove board. I used these v-groove boards as explained above.
Video Tutorial:
Subscribe to my YouTube Channel here!
Watch me build this headboard in Part 1 video of our bedroom makeover!
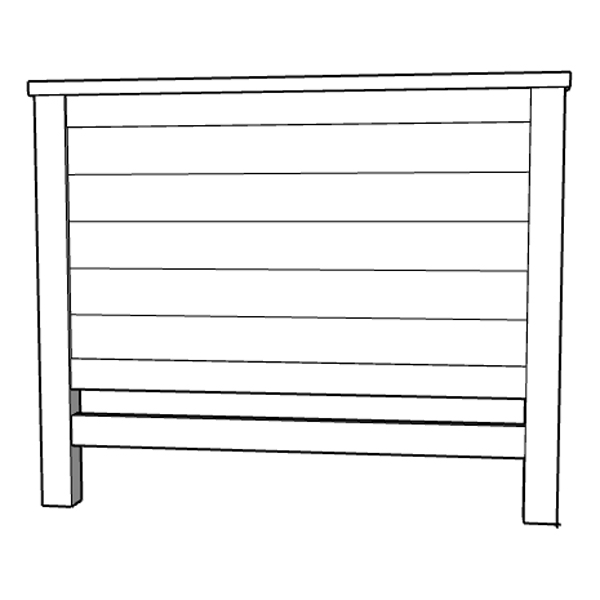
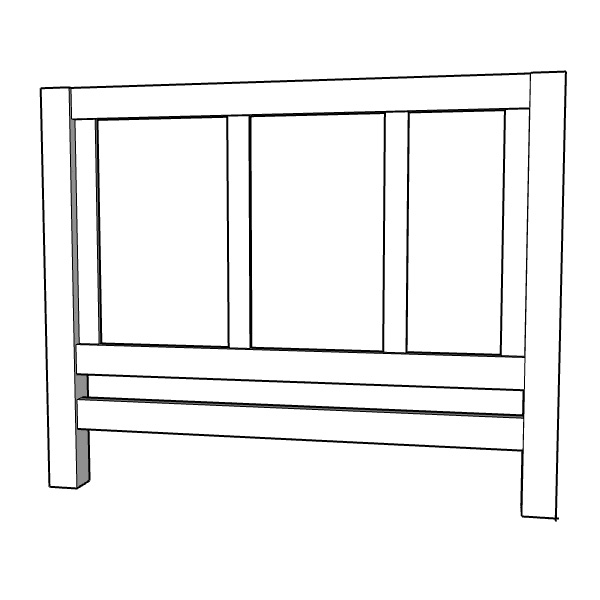
Before starting the tutorial here, I just want to show a quick diagram of what the frame of the shiplap headboard will look like once built. And the shiplap rests on top of the four vertical furring boards. However, the way it gets constructed is a bit different as you will see in the tutorial.
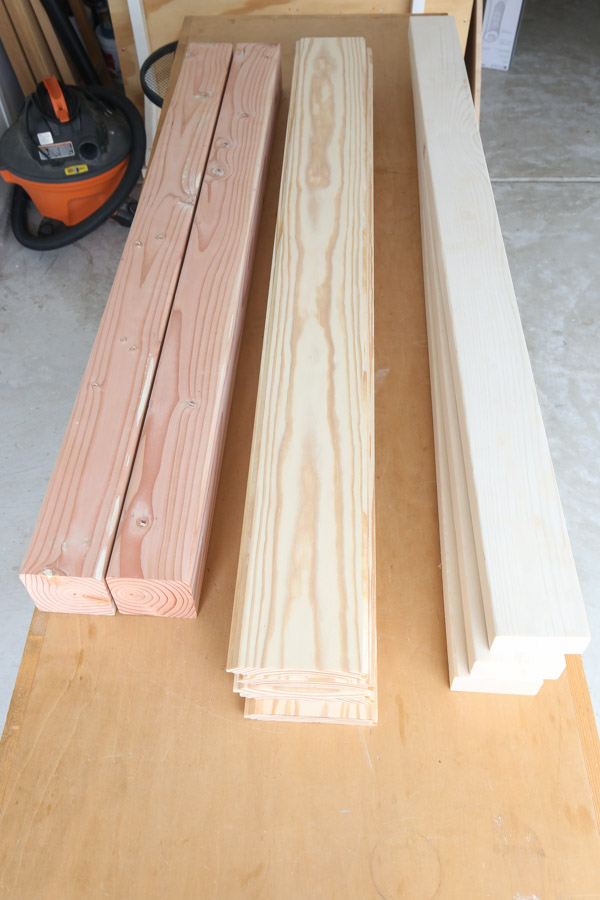
1. Make initial lumber cuts for the shiplap headboard
Use a miter saw and make the initial cuts listed below for the headboard:
Note, the below cuts are for a full size headboard. Adjust the below width cuts for a twin, queen, or king size bed headboard.
- (2) 4×4 @ 46 1/2″ (headboard posts)
- (3) 2×4 @ 51″ (headboard frame supports)
- (5) 1×6 Shiplap boards @ 51″
- (1) 2×6 @ 59″
Note, I bought 12 ft shiplap boards and had them cut in half at the store for easy transporting. Then, I cut them to size at home!
2. Prepare the shiplap part of the headboard
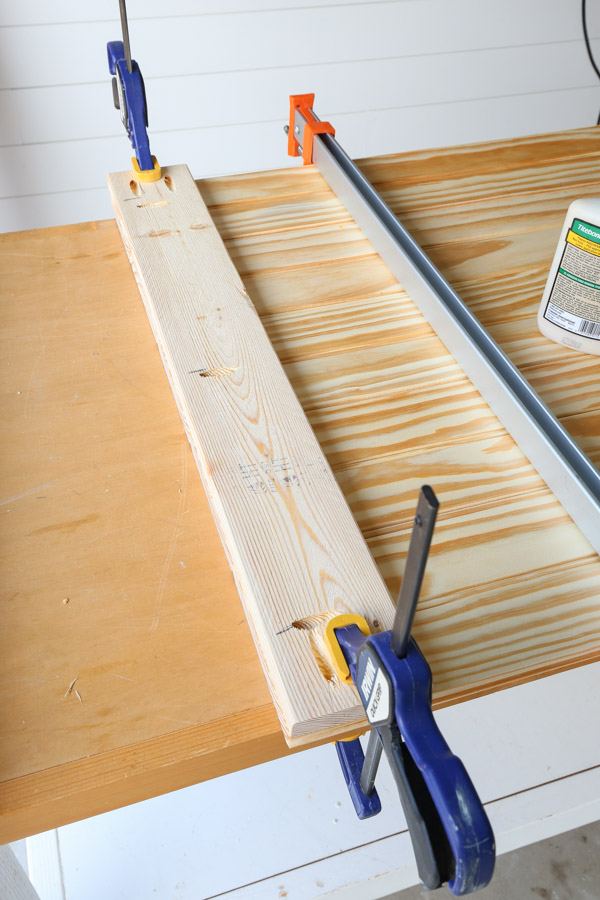
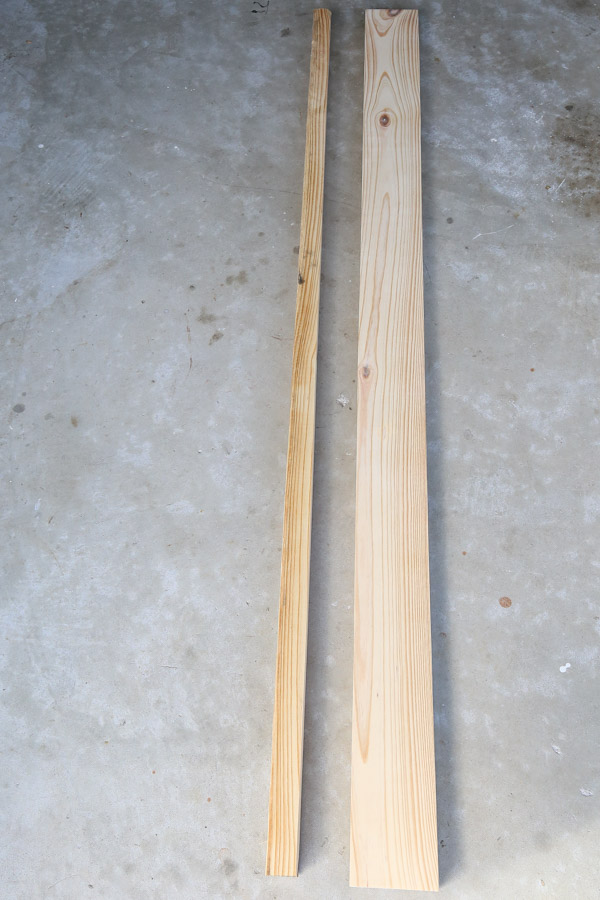
Use a table saw or circular saw and straight edge guide and rip off about a 1/2″ off the tongue side of one of the shiplap boards.
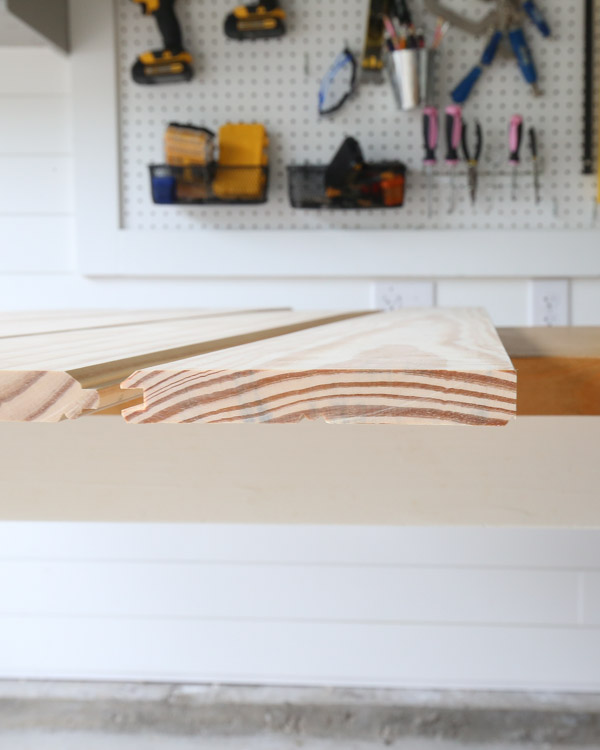
Then, join the five shiplap boards together, with the ripped edge board at the top (but do not attach anything together yet) to determine the exact height of the 5 shiplap boards joined.
Tip: Use 48″ clamps to help hold the boards together tightly!
Since all types of shiplap and tongue and groove boards can vary slightly in their width dimensions and joint size, it’s best to get an exact measurement of them joined together.

The height of our 5 shiplap boards joined together, with the ripped shiplap board at the top, was 25 5/8″.
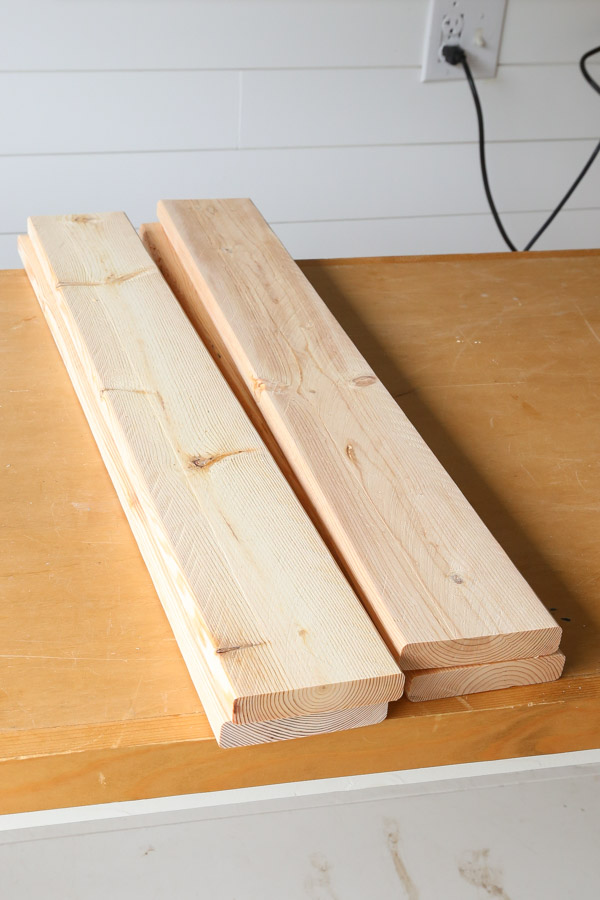
For the next step, cut (4) 1×4 furring boards to your exact shiplap height measurement. For example, we cut (4) 1×4 furring boards to 25 5/8″.
3. Add pocket holes to headboard lumber
Use a Kreg Jig and add pocket holes on each side of the (4) 1×4 furring boards. Also, add three pocket holes along one side of two of the 1×4 furring boards (as two of these will attach to the 4×4 posts).
Make sure your Kreg Jig is set to 3/4″ thick wood.
Next, add pocket holes on each side of the (3) 2×4 @ 51″. Make sure your Kreg Jig is set to 1 1/2″ thick wood.
*Tip: See my How to Use a Kreg Jig tutorial and video for an easy how to guide on the Kreg Jig!

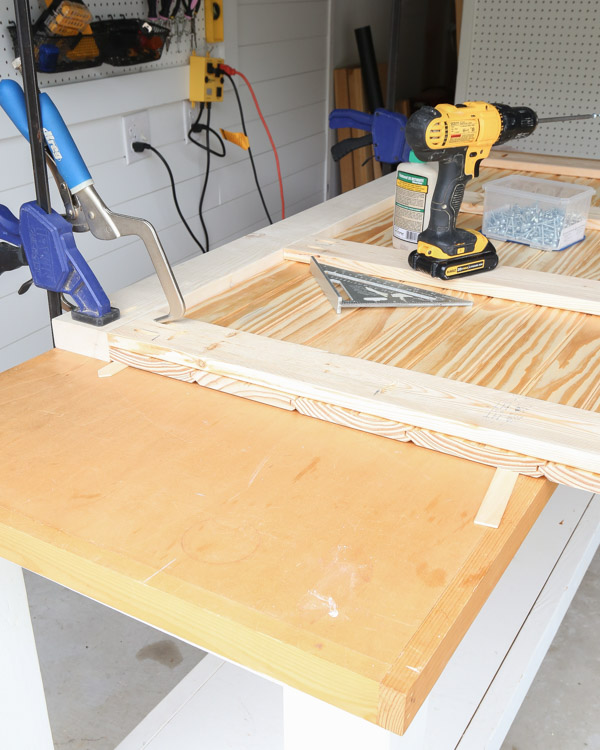
4. Assemble the shiplap together
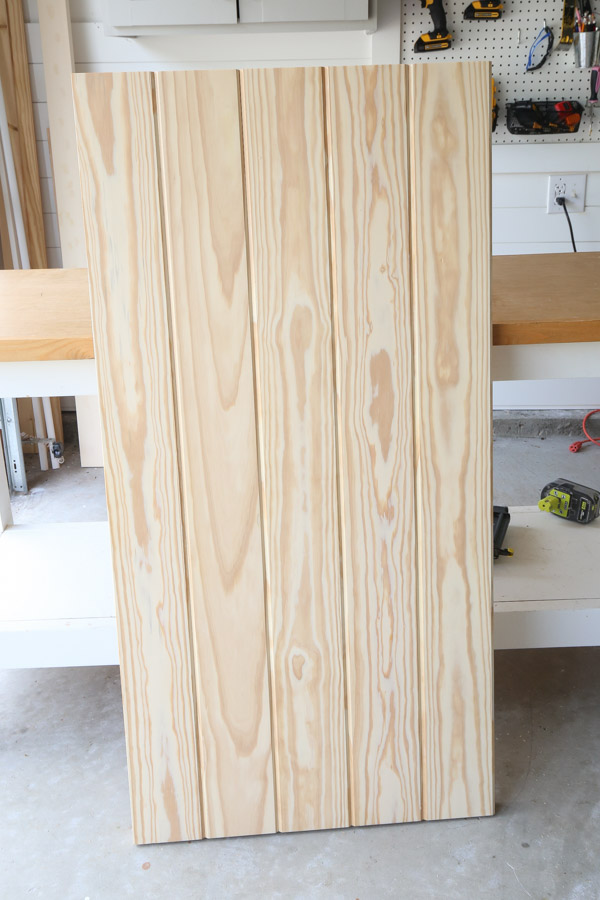
Join the five shiplap boards together, with the ripped edge board at the top again, for the first piece of shiplap, and with the shiplap part facing down on your work table.
Make sure the edges are perfectly aligned! Use clamps to help keep everything secured while assembling together.
The back of our shiplap boards have a beadboard pattern so that made it easy to tell which side was the back!
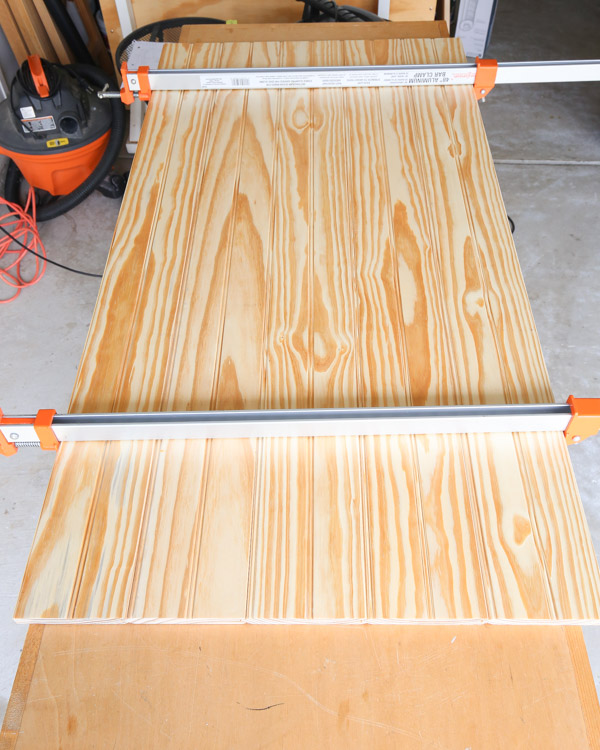
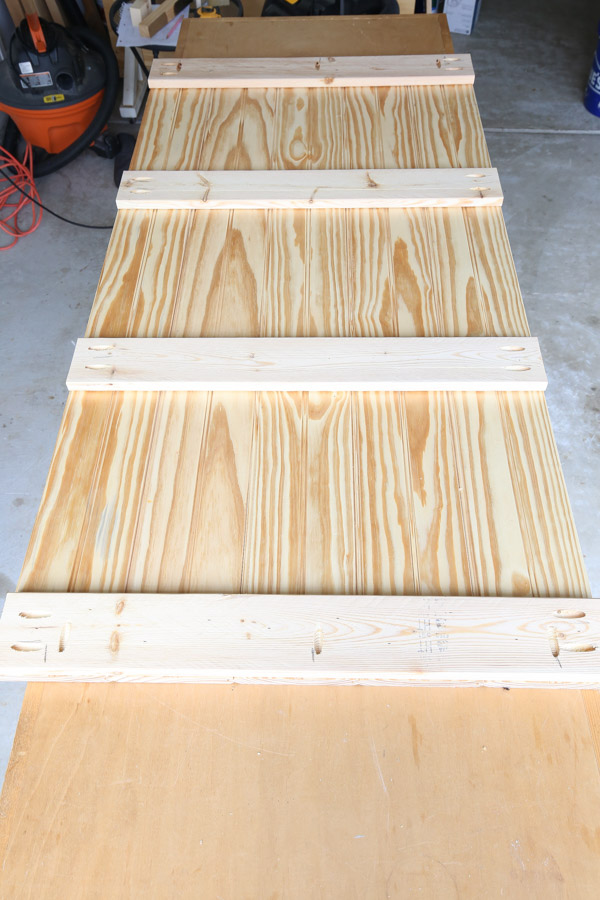
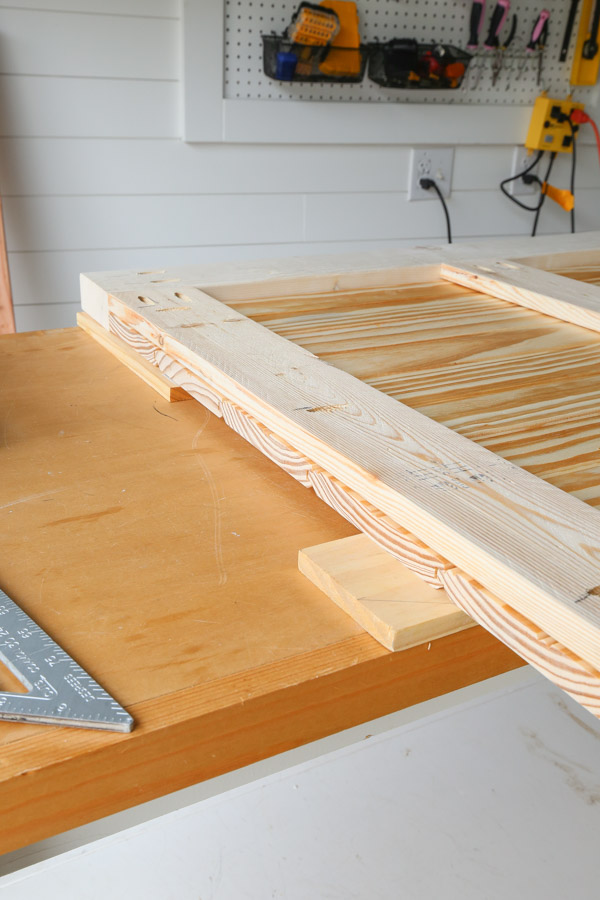
Begin attaching the shiplap together by attaching one of the furring boards with 5 pocket holes on each side of the shiplap edges. Again make sure to align all edges flush with each other.
And make sure the longer side of the furring board (with 3 pocket holes) is facing the outer edge of the shiplap since these will attach to the 4x4s.
Use wood glue and 1 1/4″ brad nails with a brad nailer to attach the furring boards to the shiplap.
Repeat the above step for the two furring boards. Except for these, place them in the middle, spaced out about 12″ from each other.
📩 Want to Save This?
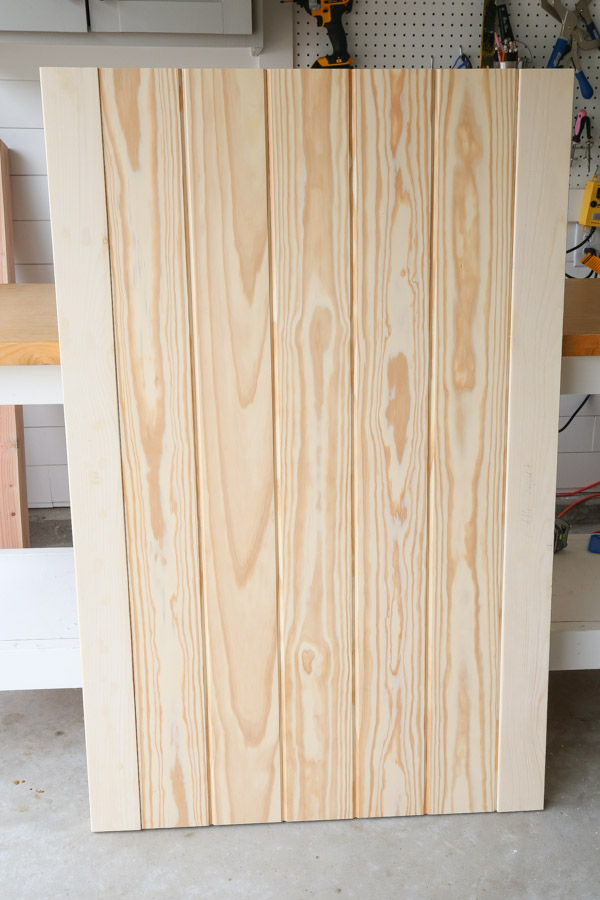
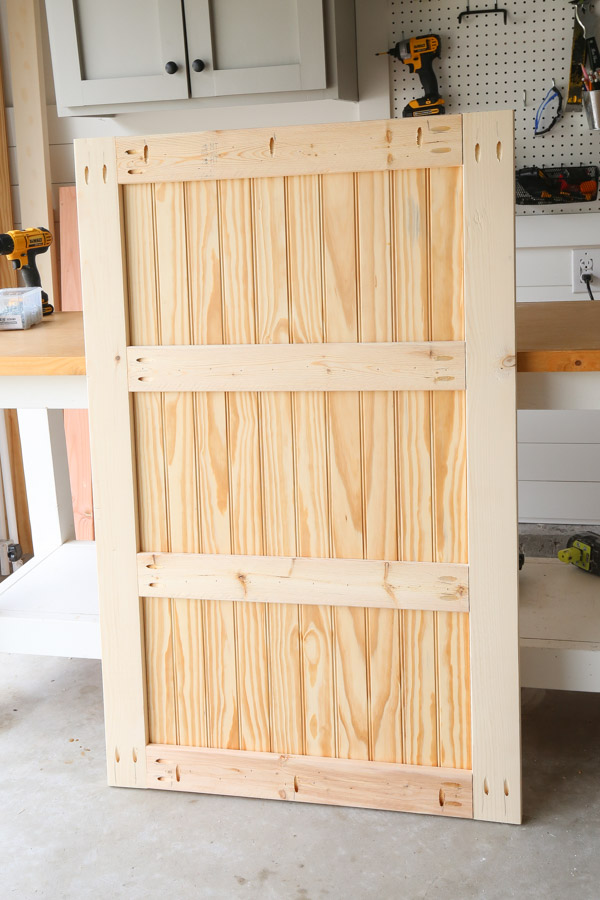
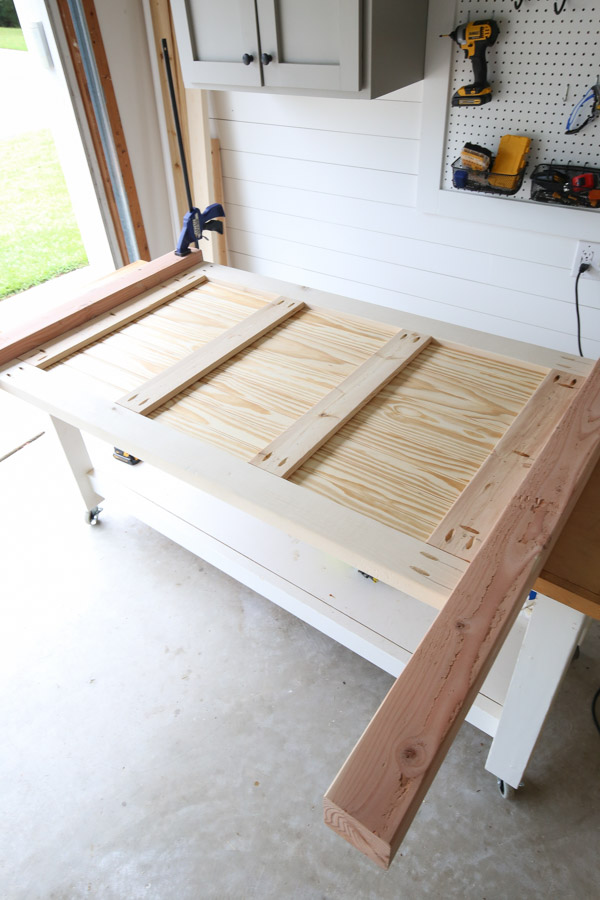
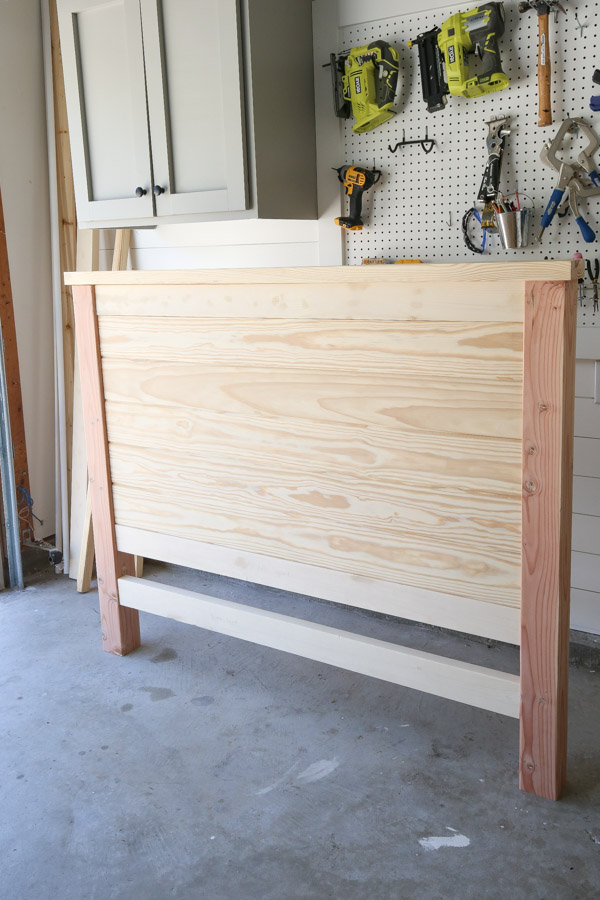
After attaching together, here is what the shiplap panel will look like from the front and back:
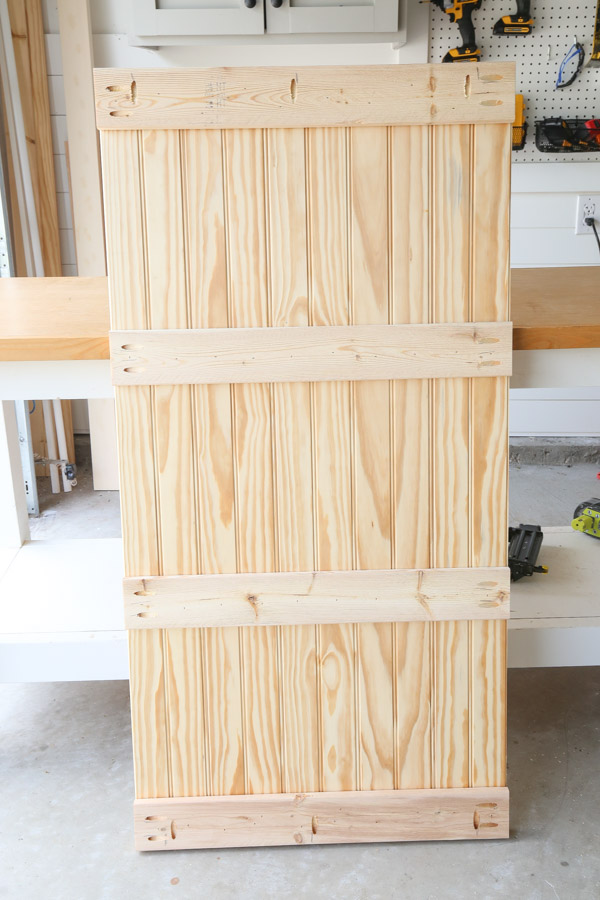
5. Attach the shiplap panel to the the top and middle support board
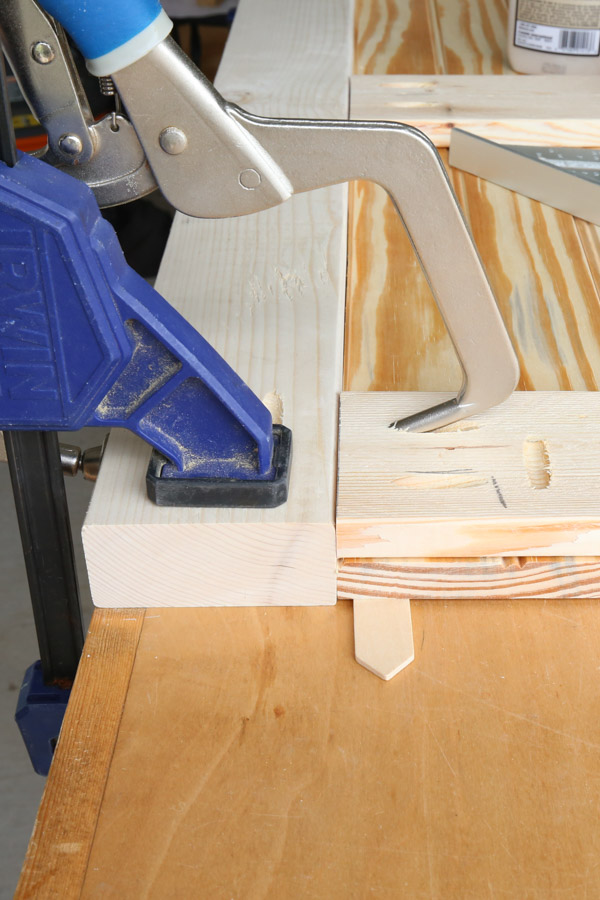
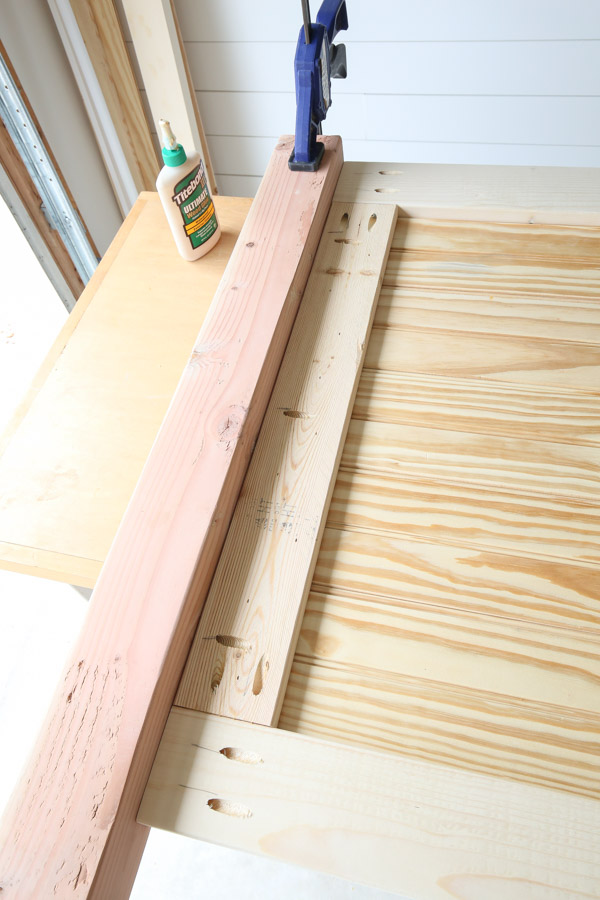
Turn the shiplap face down again. Place 1/8″ thick scrap wood under the top edge of the shiplap so the shiplap will be inset some once attached to the 2×4 frame. I used some 1/8″ thick wood stakes, but paint sticks or wood shims may be used too!
Note, this is only needed if using shiplap boards that are 5/8″ thick (which ours was) or 1/2″ thick. Otherwise, if your shiplap is 3/4″ thick, you do not need to do this!
Attach a 2×4 @ 51″ to the top edge of the shiplap using wood glue and 1 1/4″ Kreg screws.
Repeat this again with another 2×4 @ 51″ on the bottom edge of the shiplap.
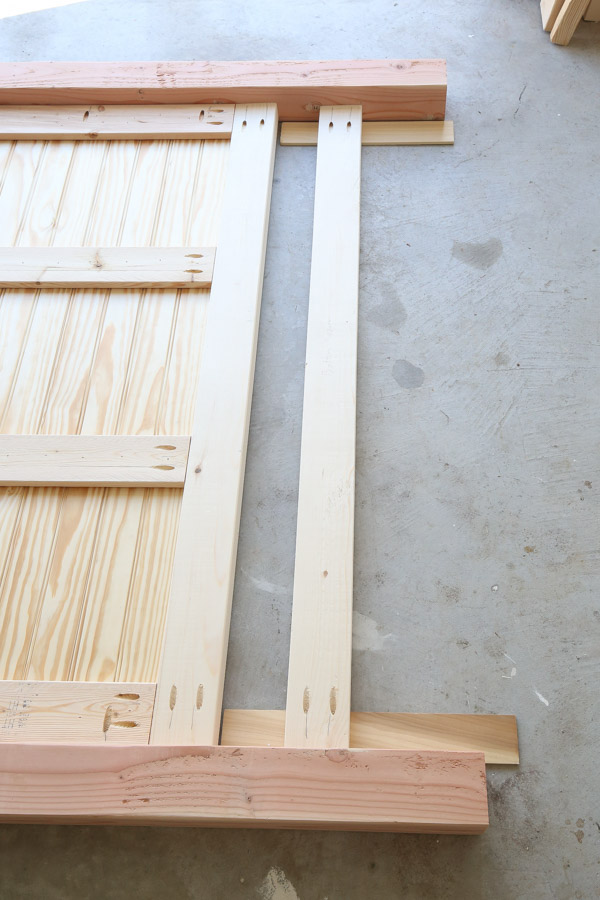
6. Attach the 4×4 side posts to the shiplap headboard DIY
Just like with the DIY bed frame I made, I am using 4x4s again for the sides of the headboard because they are super sturdy and cheap!
Turn the shiplap headboard face down again. Place 1/2″ thick scrap wood under the top and bottom edges of the shiplap on the headboard so that the shiplap will be inset 1/2″ once attached to the 4x4s.
Attach one 4×4 to the left side of the headboard with wood glue and Kreg screws.
Use 1 1/4″ Kreg screws into the furring board pocket holes and 2 1/2″ Kreg screws into the 2×4 pocket holes.
Also, make sure the top of the 4×4 is flush with the top edge of the headboard.
Repeat the above steps again on the right side of the headboard.
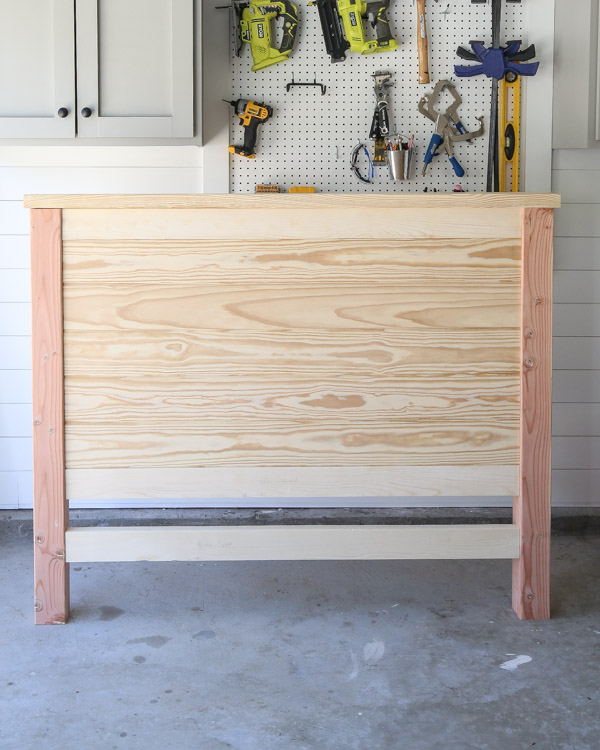
7. Attach the bottom support frame to the headboard
Measure and mark 7″ up from the bottom of the 4x4s on each side. Place the bottom edge of the last 2×4 @ 51″ at these marks.
Tip, you may need to use a rubber mallet or hammer to gently tap it into place.
Attach with 2 1/2″ Kreg screws.
Also, because of the rounded edges of the 2×4 and 4×4 meeting each other, you can place 1/8″ thick wood under the 2×4 so it’s flush from the front. Otherwise the 2×4 may slightly protrude past the 4×4. Not a huge deal since it will all be covered by the mattress.
Note, we used 1/4″ thick wood (as shown in below photo) instead of 1/8″ thick wood and it was a little too inset, so that’s why I recommend the 1/8″ thick wood here!
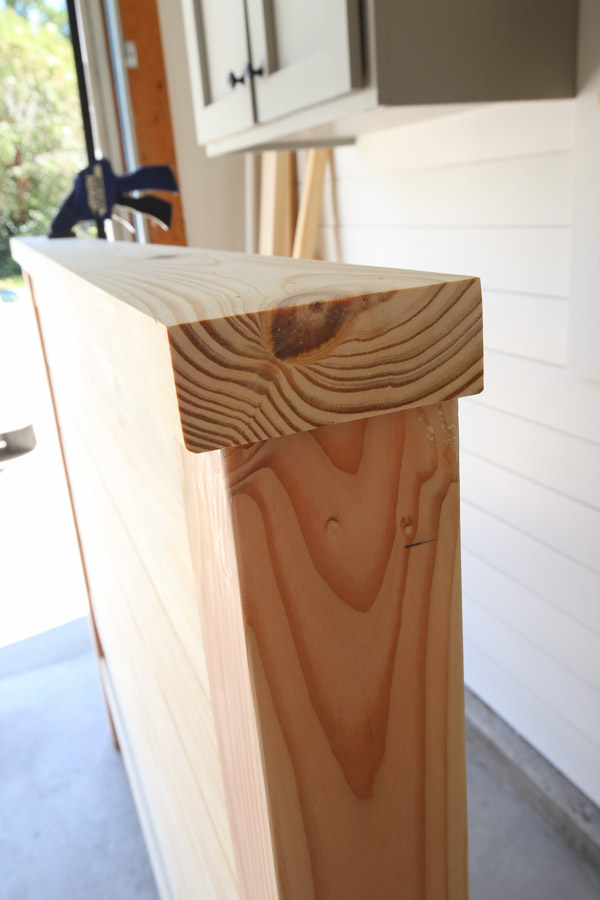
8. Attach the top trim board to the DIY shiplap headboard
Use a table saw or circular saw and straight edge guide and rip the (1) 2×6 @ 59″ to 4″ wide.
Center it on the headboard with 1/2″ overhang on each side and align the back of the 4″ board with the back of the 4×4.
Attach it to the top of the headboard with wood glue and 2″ brad nails and your nail gun.
Note, if your top trim board is a bit warped like ours was, it may not sit perfect on top. That’s ok, you can caulk any small gaps at the end!
9. Prep the headboard for paint
Fill any small nail holes or knot holes with spackle or wood filler and sand flush.
And caulk any needed areas if painting. We had to caulk under our top trim board and under the top 2×4 board.
10. Prime and Paint the shiplap headboard DIY
Prime the boards if they aren’t pre-primed.
Also, the wood grain really rose on our shiplap after priming so I hand sanded with 120 grit sandpaper after priming to help get a smooth finish.
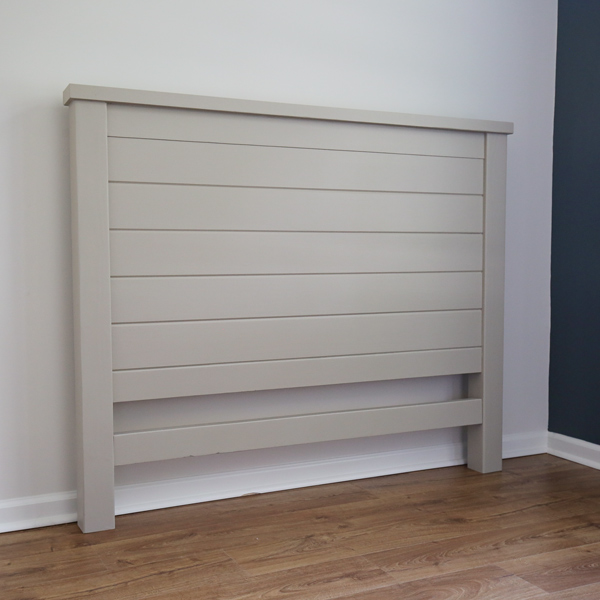
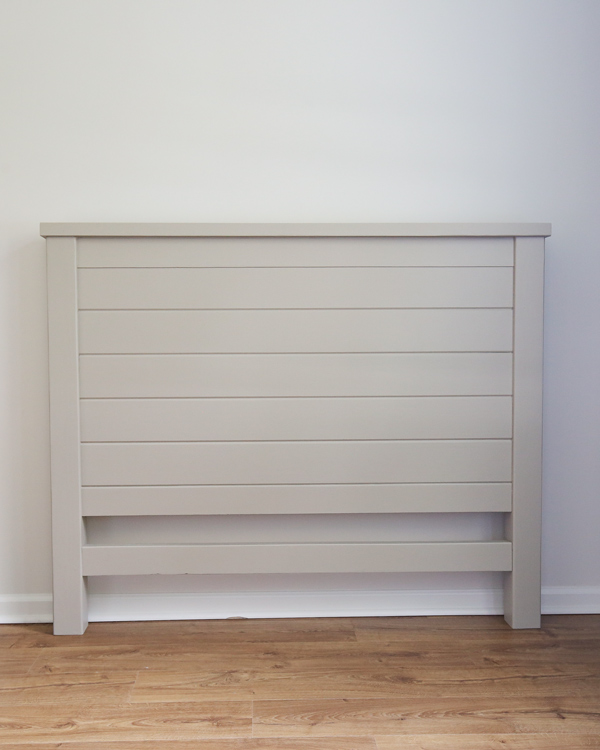
Next, paint the shiplap headboard DIY. Let it dry and apply a second coat of paint. I used Pashmina by Benjamin Moore in eggshell rather than the traditional white paint used for a lot of shiplap!
Note, you can alternatively stain the headboard instead of painting it. I think a dark stain would make a beautiful, rustic headboard!
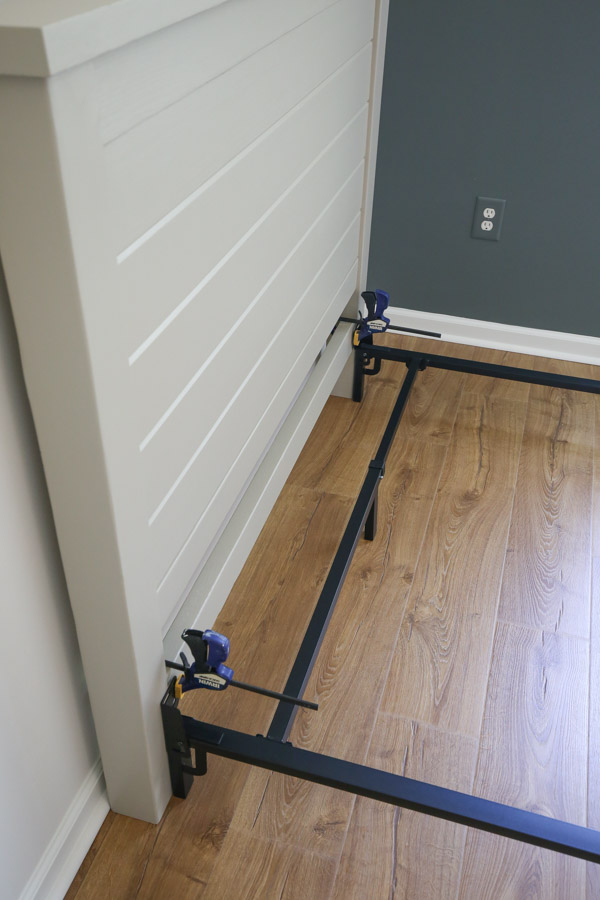
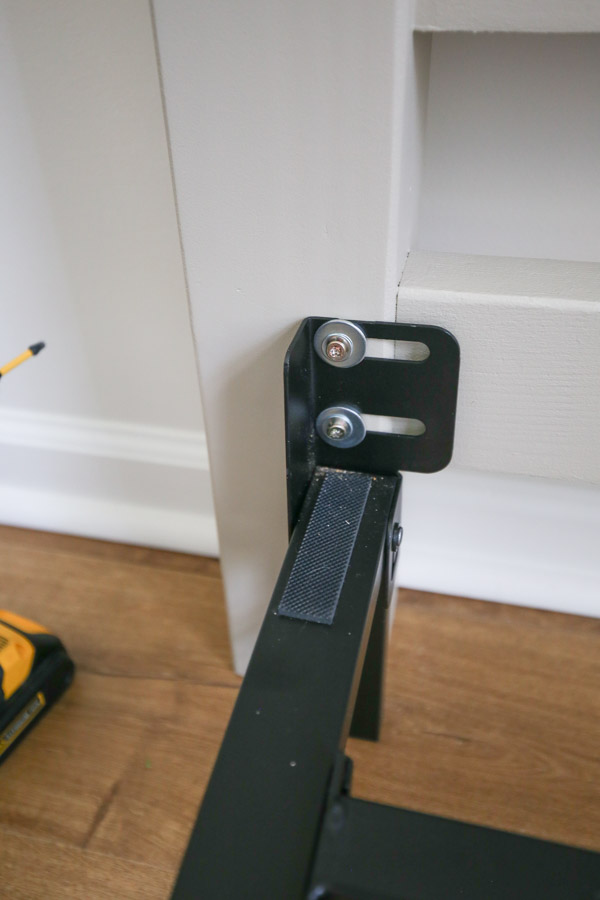
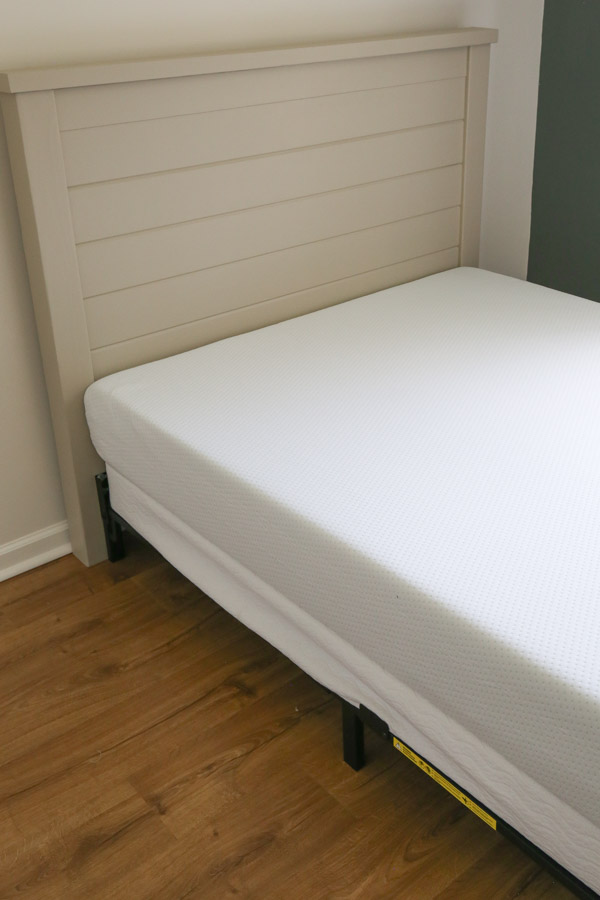
11. Attach the DIY shiplap headboard to a bed frame
To attach the headboard to our metal bed frame, we used 2 1/2″ wood screws with a #10 size hole washer stacked on top of a 3/8″ size washer. Make sure the bed frame is centered on the headboard when attaching!
We used this metal bed frame, this box spring, and this new mattress! The mattress is super budget friendly! We all find it comfortable and think it’s a great value for the price!
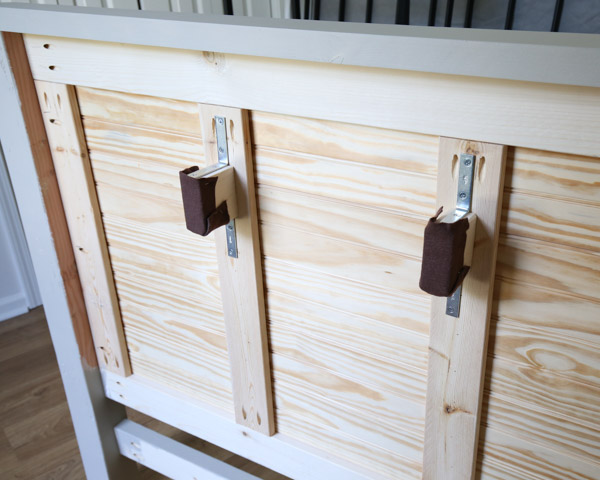
12. Optional – Add wood blocking to the back of the headboard
This step is totally optional!
If you are attaching your headboard to a standard (wobbly) metal bed frame like us, and not a sturdy, wood bed frame, like our DIY wood bed frame, then the headboard is not as stable when you are leaning against it while sitting in the bed.
This can happen with any headboard and cheap bed frame.
To fix this, simply add some wood blocking behind the headboard by cutting two scrap 2x4s to the distance between the back of the headboard and your wall. Attach the wood blocks to the headboard with metal brackets like these.
Also, we had some scrap felt on hand we stapled to the blocks as well to prevent scuffing up our freshly painted walls!
This worked like a charm to stabilize the headboard against the wall when leaning against it in bed with no movement at all!

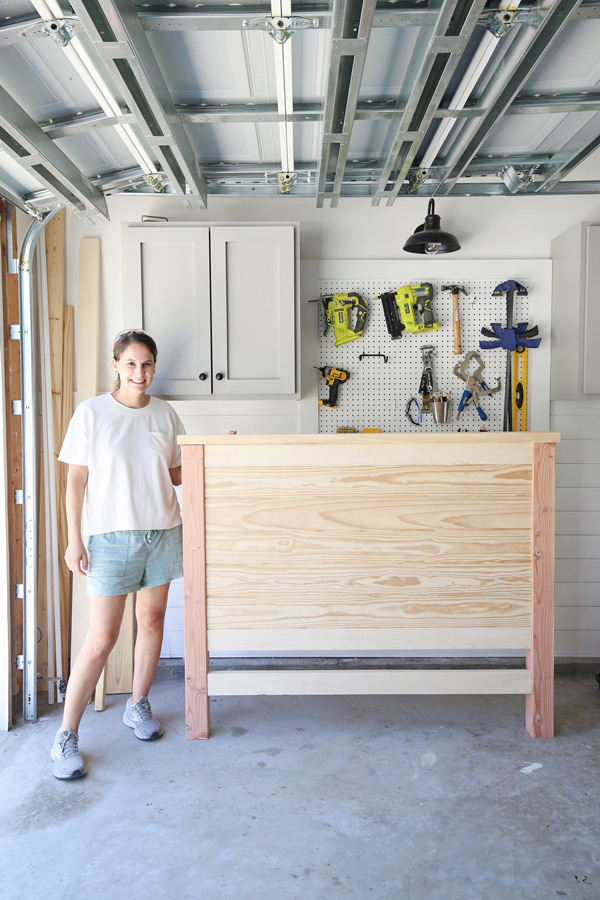
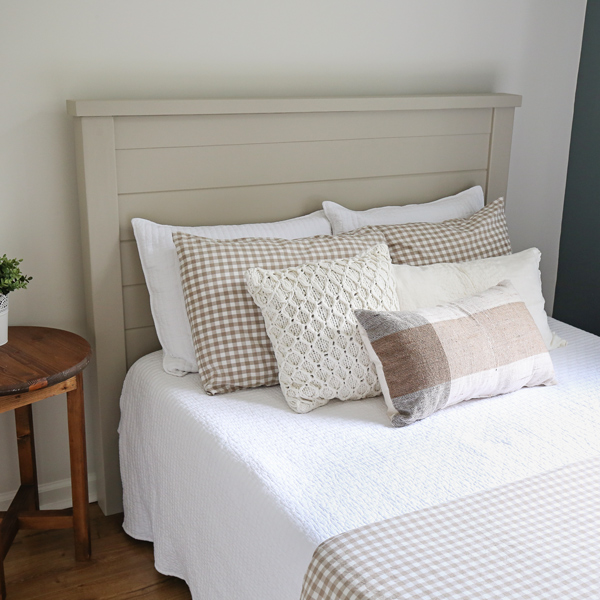
How cute is this shiplap headboard DIY?! Although I used it for my toddler’s room, it would work great in a master bedroom or guest room too!
And it’s even cuter with our new bedding! You can see the final layered bedding here! And you can shop all of the bedding used here in the above photo for our DIY shiplap headboard!
Follow along for the next DIY project for this room makeover on Instagram, YouTube, and Pinterest!
And for more DIY shiplap projects, check out these projects:
Mary E
Thursday 2nd of October 2025
Love this headboard! I wonder if we could attach it to the wall rather than the bed frame.
Angela Marie Made
Friday 3rd of October 2025
yes!
Patrick Woessner
Wednesday 29th of November 2023
Thank you so much for sharing this project! My daughter wanted a shiplap headboard for Christmas, so we built one together over Thanksgiving using your plans. Douglas fir for the posts, cedar for the 2x lumber,select pine for the 1x boards, and primed shiplap. We made one small change and used a 1/4" roundover bit on the lumber and a 1/8" roundover on the back boards to give everything clean edges and avoid splinters down the road. Our next project is to make the dog bed so she and her puppy can sleep in style!
Angela Marie Made
Wednesday 29th of November 2023
Oh I love hearing that and I'm so happy you made it! I also love that you're going to make the dog bed to match, that is too cute!