

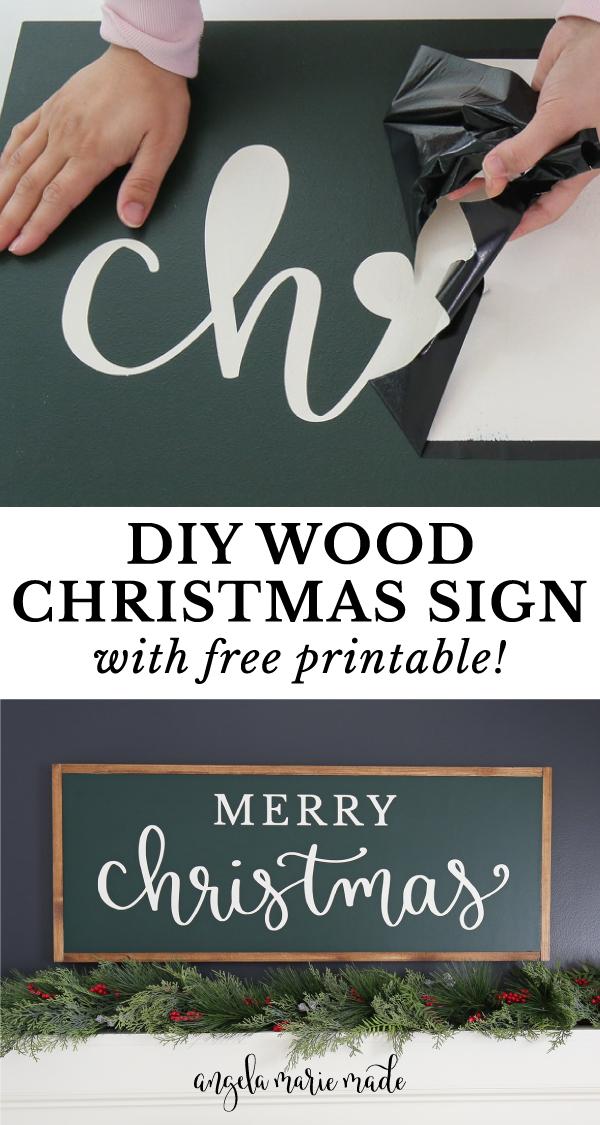
One of my first holiday projects this year is a Christmas sign DIY and I have a FREE Merry Christmas printable file available too that I hand lettered and designed so you can make this sign!

DIY wooden Christmas signs are so cute and their rustic vibes are perfect for cozy Christmas decor!
***
This is our Day 1 project for the 10 Days of DIY Challenge & Giveaway going on right now, don’t forget to enter the giveaway here!
***
Note, this post contains some affiliate links. I may earn a commission if you shop those links (at no cost to you). Thank you for supporting my small business. For more info see my disclosures here.
I used my Silhouette Cameo to make a vinyl stencil to make this wood sign. I’m sharing my FREE Silhouette Studio file (and an SVG file and a JPG file) of the design below so you can make the same sign too!
You can also use a Cricut (and make the vinyl stencil in two sections), or you can use the Cricut Explore 3 that can cut up to 12 ft long with no cutting mat!
See my DIY wood sign post for how to make a vinyl stencil with a Cricut in two sections and see my how to make a large DIY wood sign with Cricut tutorial using the Cricut Explore 3.
Or If you don’t have a cutting machine, the pencil transfer method for sign making works great too for an easy design transfer onto wood.

How to Make a Christmas Sign DIY:
Materials:
- “Merry Christmas” Printable file (FREE printable available here)
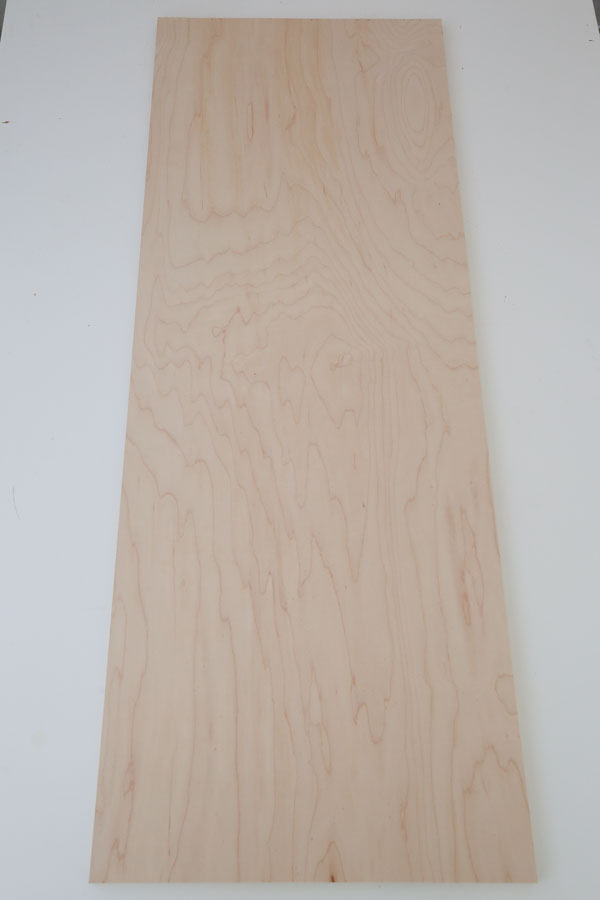
- 1/2″ thick plywood panel at 2ft x 4ft
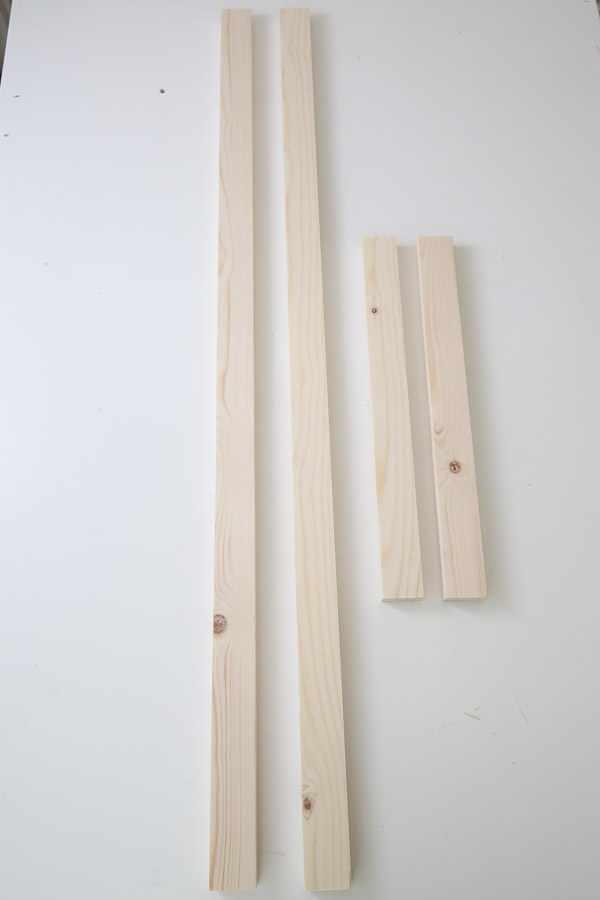
- (2) 1×2 @ 8ft
- 1 1/4″ brad nails
- Primer
- Paint for the the sign background (I used Essex Green by Benjamin Moore)**
- Paint for the lettering (I used Ivory White by Benjamin Moore)**
- Paint rollers
- Wood Stain (I used this stain)
- Wood glue
- Cricut, Silhouette Cameo, or other cutting machine
- Vinyl (I used Oracal 631 vinyl)
- Vinyl weeding tool
- Transfer tape (I use Oratape HT55)
- Vinyl Application Squeegee
- Masking tape or Painter’s tape
- Craft razor blade cutter
Tools:
- Miter Saw (or have your home improvement store make the cuts)
- Brad Nailer
- Clamps
**Paint – For details on painting signs and the best type of paints to use for DIY wood signs, see the best paint for wood signs.
Video Tutorial:
Subscribe to my YouTube Channel here!
1. Cut the wood sign boards to size
Cut the 2ft x 4 ft board to 14″ tall x 38″ long. You can have the cuts made at your local home improvement store or use a table saw or a circular saw and straight edge guide.
Make sure the plywood or wood is sanded well. My plywood was pre-sanded already which saved me a step! See my how to sand wood tutorial for sanding tips!
For the 1x2s, make the following cuts using a miter saw:
- (2) 1×2 @ 15 1/2″
- (2) 1×2 @ 38″
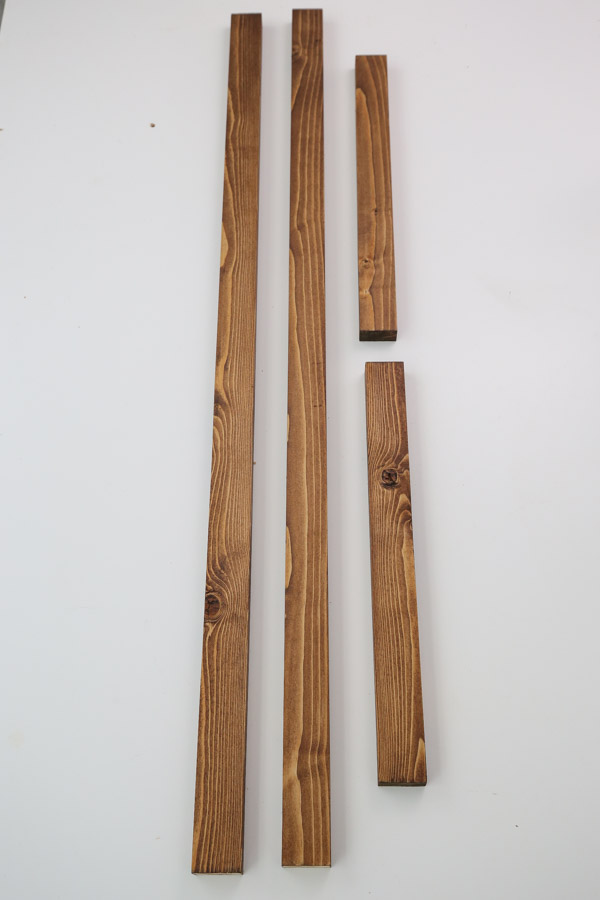
2. Stain 1×2 wood sign frame boards
Stain your 1×2 wood frame pieces. For tips on how to stain wood for a beautiful finish, check out my tutorial on how to stain wood.
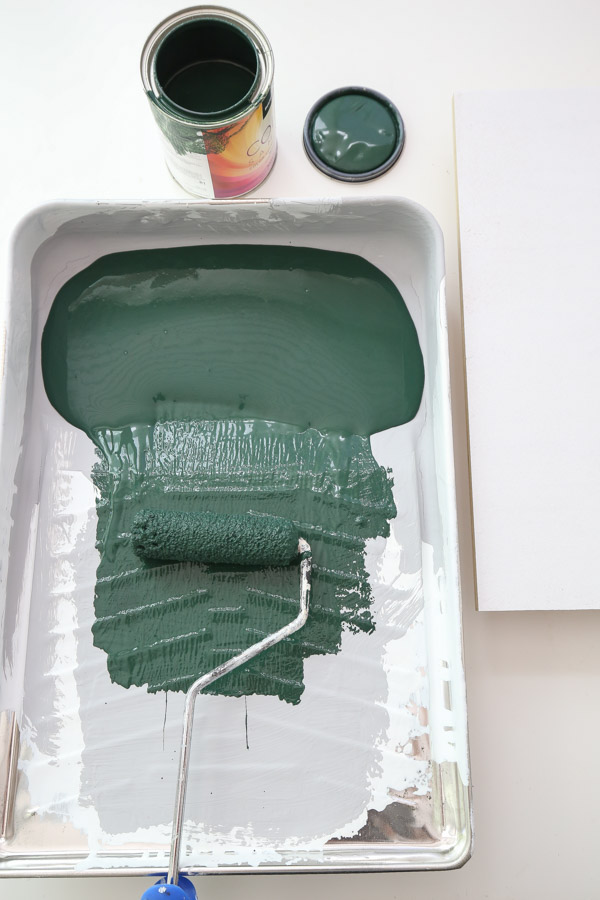
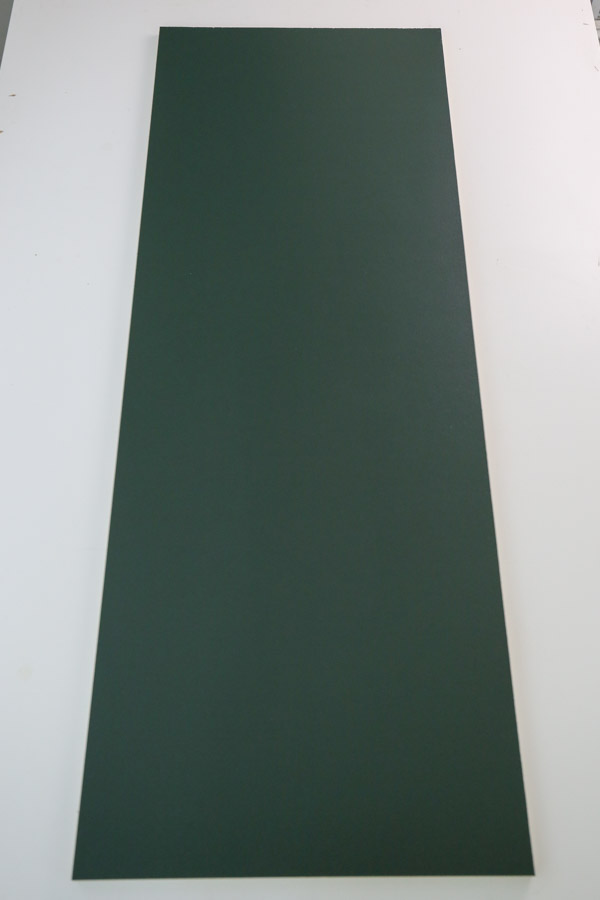
3. Paint the wood sign base color green
Prime the wood board first.
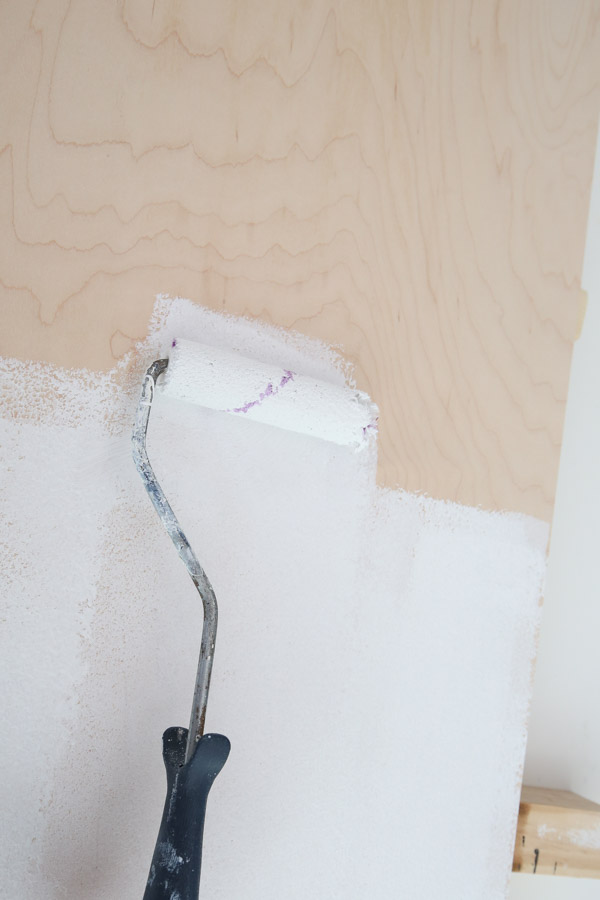
Then add two coats of paint, and let it dry for at least 24 hours. For tips on priming and painting, see how to paint DIY wood signs.
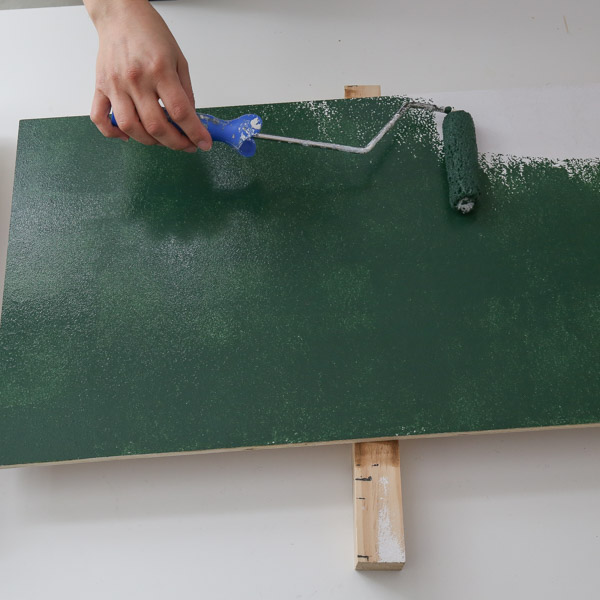
I used Essex green by Benjamin Moore in eggshell for my green color (it’s the perfect Christmas green), but you can use any color you want! And I used a sample size of the paint.
4. Apply Christmas vinyl stencil to the wood sign
Let the paint dry and cure for 24 hours before adding the vinyl stencil.
📩 Want to Save This?
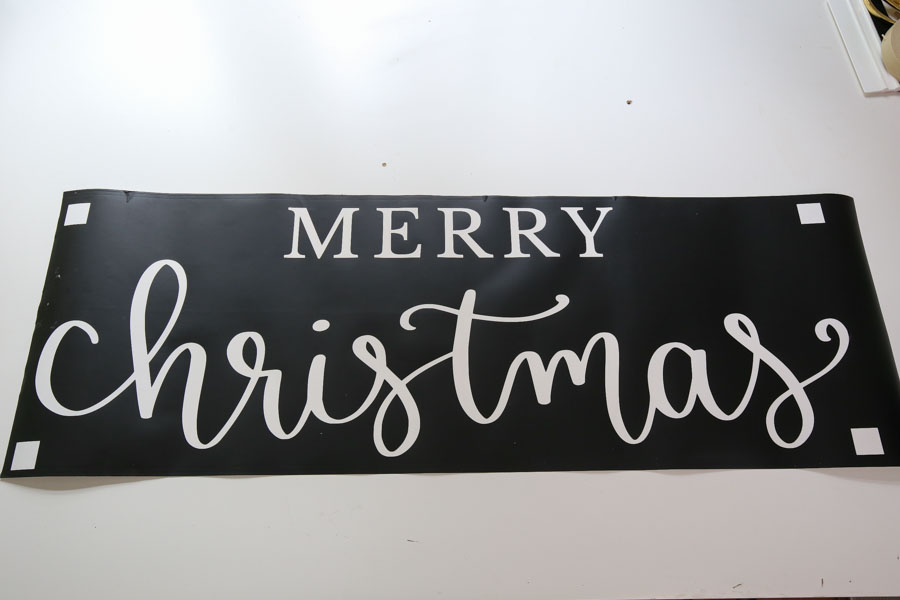
To apply the “Merry Christmas” design that’s available in the free printable library, I used my Silhouette Cameo to create a wood sign vinyl stencil of the design.
You can also use a Cricut, see my how to make a wood sign with a Cricut tutorial and see my large DIY wood sign with Cricut. Or if you don’t have a cutting machine, you can use the pencil tracing method.
Check out my DIY Christmas sign video to see a step by step of how to easily print this decal using Silhouette Studio and a Silhouette Cameo. You can just open the free Silhouette Studio file (after downloading from the free printable library) and it’s ready to send to your machine to cut!
After printing the design out as a vinyl stencil, on Oracal 631 vinyl, I applied it to the sign using the same steps that I did in this how to make a vinyl stencil tutorial. You can also see these steps in my Christmas sign video tutorial too!
First, I weeded the vinyl. Make sure to remove the lettering part and leave the surrounding vinyl, to make a vinyl stencil.
Then, apply transfer tape and apply it to the sign. Since this is a larger design, I used my transfer tape roller which is amazing for applying transfer tape and makes it super easy!
I used masking tape and my vinyl squeegee to smooth out the transfer tape over the vinyl stencil.
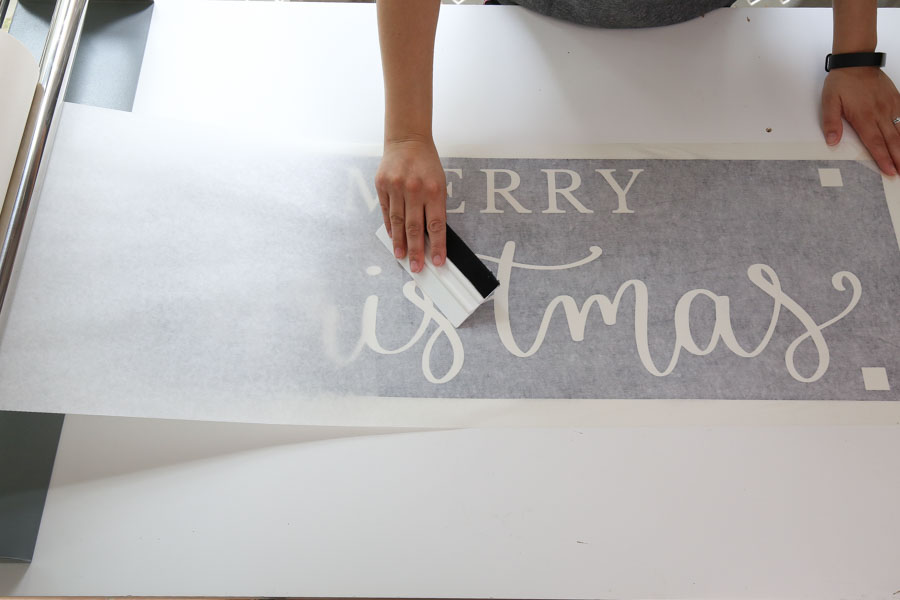
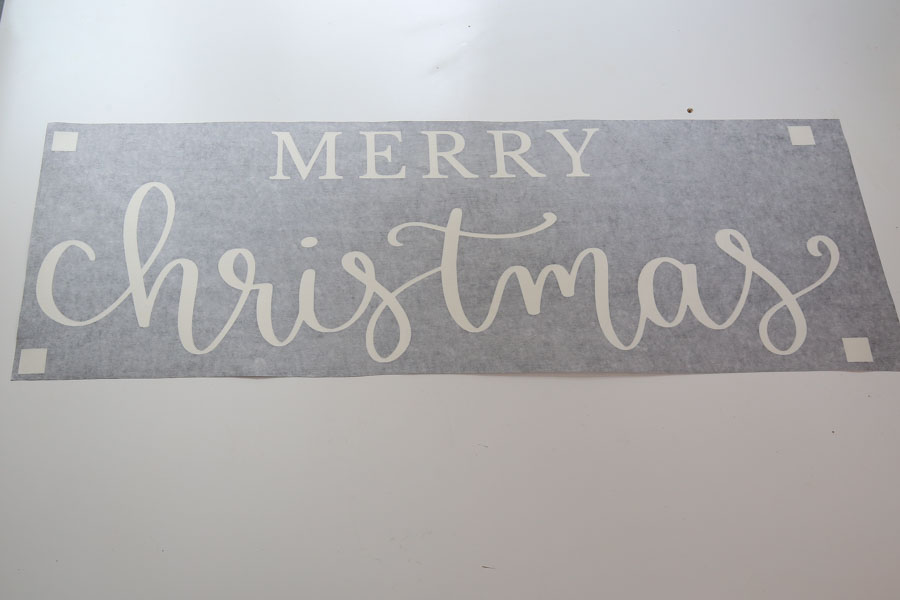
Then, I used the squares I included in the design to help me measure and center the decal correctly on the wood.
Next, I applied the decal to the sign using my squeegee to help smooth it down. Again you can see all of these steps in action and more detail in the Christmas sign video tutorial!
I did mess up the application at the end and part of my vinyl ripped but I was able to fix it afterwards and just stick it in the correct place.
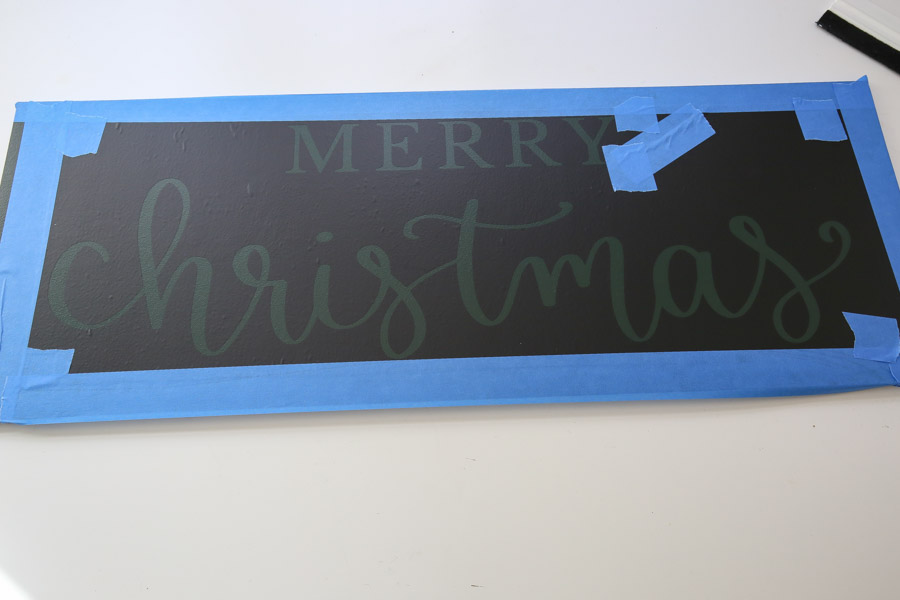
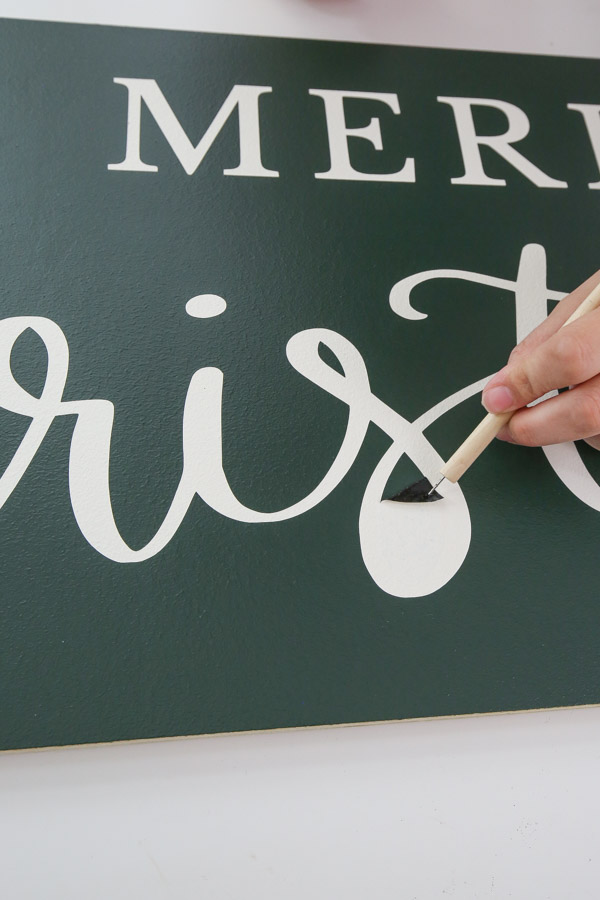
5. Apply white paint over vinyl stencil to transfer design for DIY wooden Christmas sign
After my vinyl stencil was applied to the green painted wood sign, I taped the edges off with painter’s tape to protect the non-covered parts of the sign.
Then, I rolled one coat of the same background paint over the stencil. This helps to avoid bleed-through.
Finally, I applied a few, light coats of white paint with a roller (I used ivory white by Benjamin Moore).
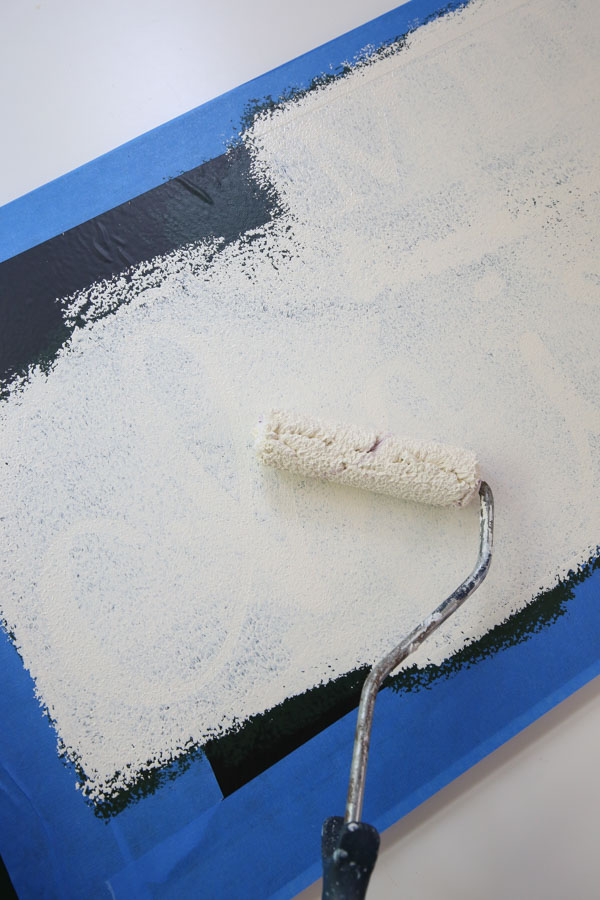
You can also use light coats of white spray paint instead of paint. Again, check out the how to paint wood signs post for more painting details!
Once the paint has dried, remove the vinyl stencil and painter’s tape to reveal your Merry Christmas design transfer for your Christmas sign DIY! *It’s important to not let the vinyl sit a long time adhered to the painted sign, be sure to remove it as soon as the paint is dry.


6. Attach wood frame boards to Christmas sign DIY
I used two scrap 1/2″ thick boards stacked under each side of the sign so the 1×2 frame boards line up perfectly with the sign backing board for attaching.
Use wood glue and a brad nailer with 1 ¼” brad nails and attach the frame boards to the sign. Start with the 38” pieces along the top and bottom sides.
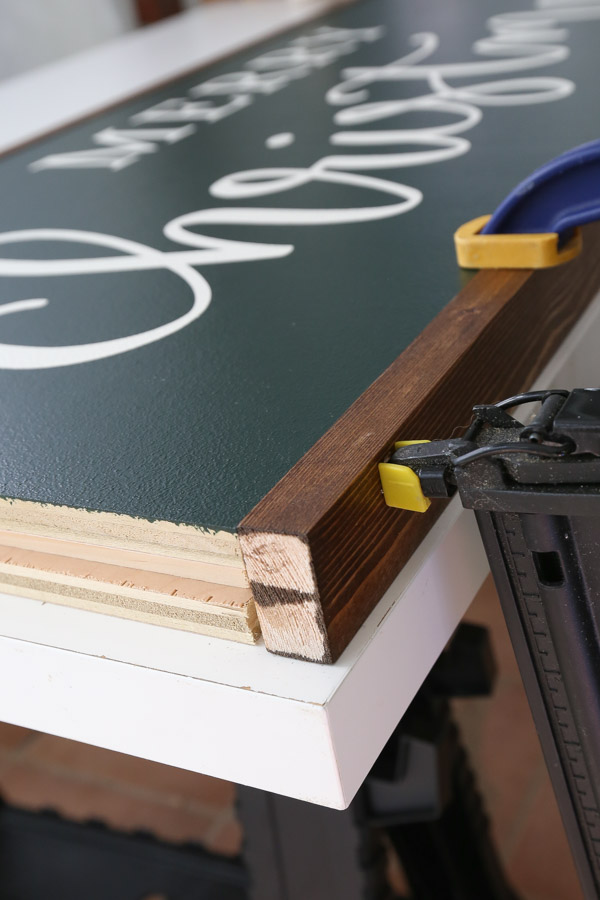
Then add the 15 1/2” boards on the two sides. Make sure to wipe any excess wood glue away immediately with a damp paper towel.
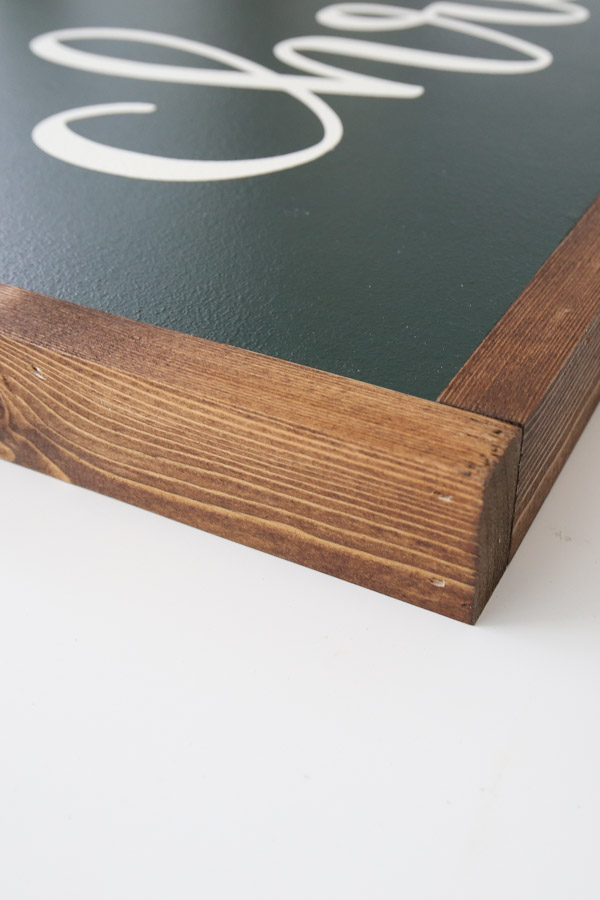
You can fill the nail holes with wood filler and then stain if you prefer. I opted not to fill mine for this sign because I wanted a more rustic look.

I am just in love with this Christmas sign DIY! It think it turned out gorgeous!


What do you think of this DIY wooden Christmas sign?! Let me know below in the comments! If you make this sign, please share it with me on social media @angelamariemade or #angelamariemade!
Don’t forget to enter our holiday giveaway and check out all of the other fun projects in our 10 Days of DIY Challenge & Giveaway!
Follow along for my latest projects and sneak peaks on Instagram, YouTube, TikTok, and Facebook!
Want to save for later?! Pin it here:
Lynne
Sunday 30th of October 2022
Hi Angela, I just found your blog and am loving it! I know this is an older post so I hope you get this message. I was wondering what the font is on this sign and your blog post name is in, I love them! I am going to try the sign, I love it with the green background. Your blog is a wealth of information for someone new to sign making and wood working, thank you for all of it!
Lynne
Monday 31st of October 2022
@Angela Marie Made,
Wow you have great handwriting, thanks for answering so quickly!
Angela Marie Made
Monday 31st of October 2022
Thank you so much for your kind words! They are actually my hand lettering - it isn't a font! I wish it was and I could share it haha.
WILLETTE GLOVER
Friday 4th of December 2020
I prepare my Christmas decorations in July, so I know what's on my list for July 2021. Thanks Angela
Angela Marie Made
Monday 7th of December 2020
That's awesome, thanks!