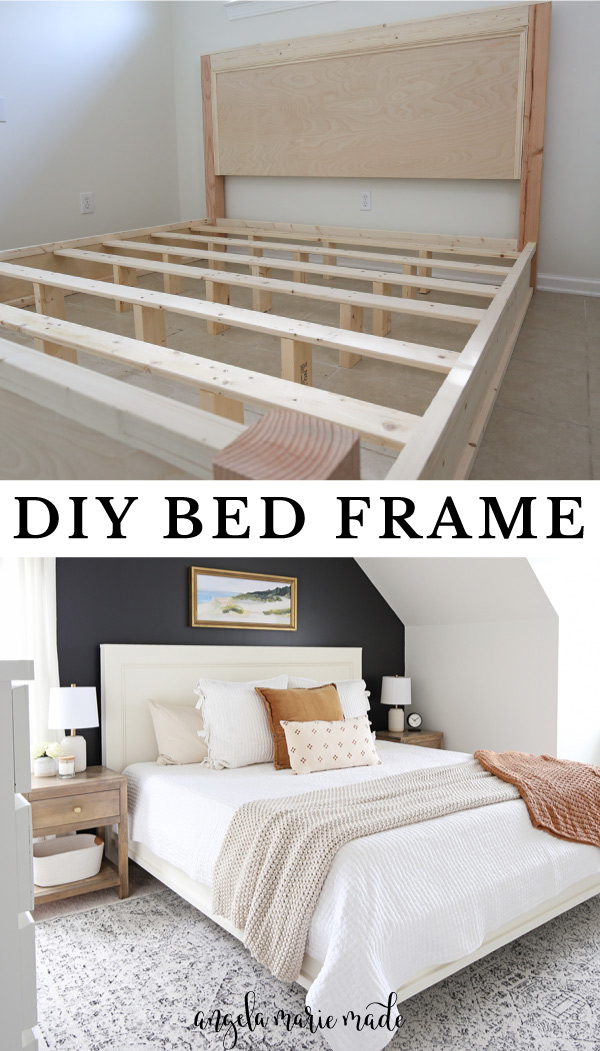
Learn how to easily build a pretty and affordable DIY bed frame!
A major feature of our DIY bedroom makeover is our DIY king size bed frame! It was one of the largest pieces of furniture that Brandon and I have ever built, but it was really easy to build!
This bed cost us about $140 in lumber plus $35 in paint and primer, for a total of $175 to build. We used 2×2 furring boards instead of premium 2x2s, which saved a lot of money!
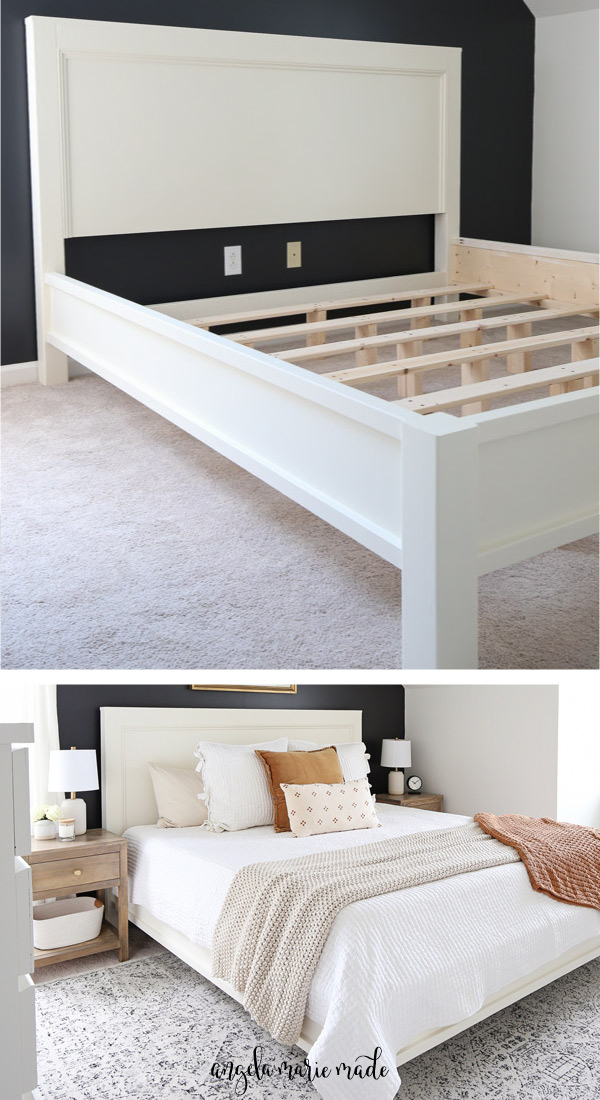
MATTRESS SIZING: The mattress opening for this DIY king bed frame is 77″ x 80″ which left a little extra room around our specific king mattress and box frame. Adjust measurements as needed if your box spring/mattress is a different size.
Also, this DIY wood bed frame can be built in other sizes like queen, twin, and full, the cuts and dimensions just need to bed adjusted.
Note, if you are interested in other DIY bed frame ideas, check out our DIY shiplap headboard too!
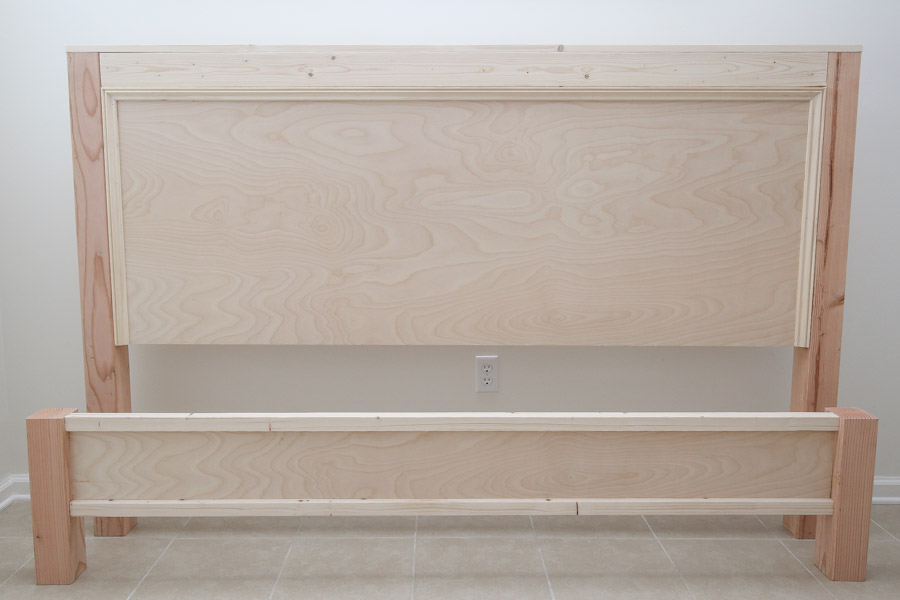
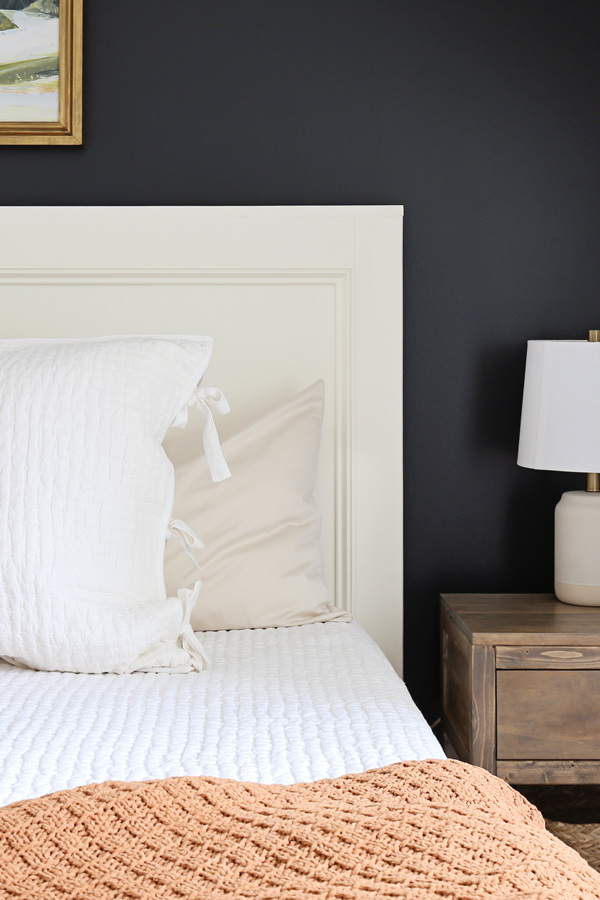
Final DIY King Size Bed Frame Measurements: 52″ tall x 81″ wide x 87″ long
Note, this post contains some affiliate links. I may earn a commission if you shop those links (at no cost to you). Thank you for supporting my small business. For more info see my disclosures here.
How to Build a DIY Bed Frame:
Materials:
- (2) 4×4 @ 8ft**
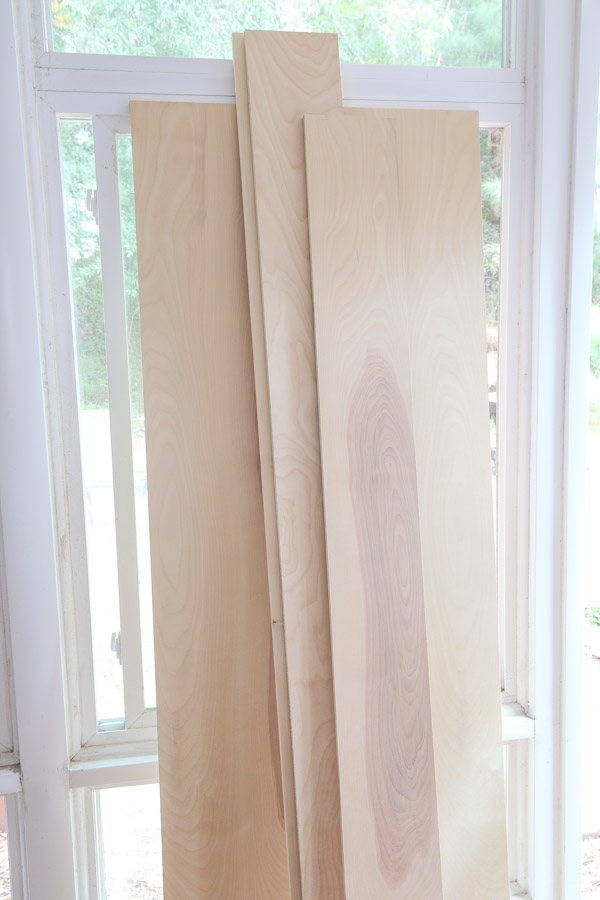
- (1) 4ft x 8ft plywood @ 3/4″ thick*
- (5) 2×4 @ 8ft
- (6) 1×4 @ 8ft furring strip
- (1) 1×4 @ 8ft
- (8) 2×2 @ 8ft (furring or premium)
- (2) 3/4″ thick molding x 8ft (I used this molding)
- Wood Glue
- 1-1/4 and 2-1/2″ Kreg screws
- 1 1/4″ self tapping wood screws
- 2″ and 2 1/2″ wood screws
- Spackle
- Paint & Primer (or wood stain)
- 1″ and 1 1/4″ brad nails
Tools:
- Miter Saw
- Circular Saw (optional)
- Kreg Jig
- Drill
- Speed Square
- Level
- Brad nailer
- *I used this formaldehyde free plywood that was also pre-sanded
- **Make sure to use all UNTREATED wood, not pressure treated boards
Video Tutorial:
Subscribe to my YouTube Channel here!
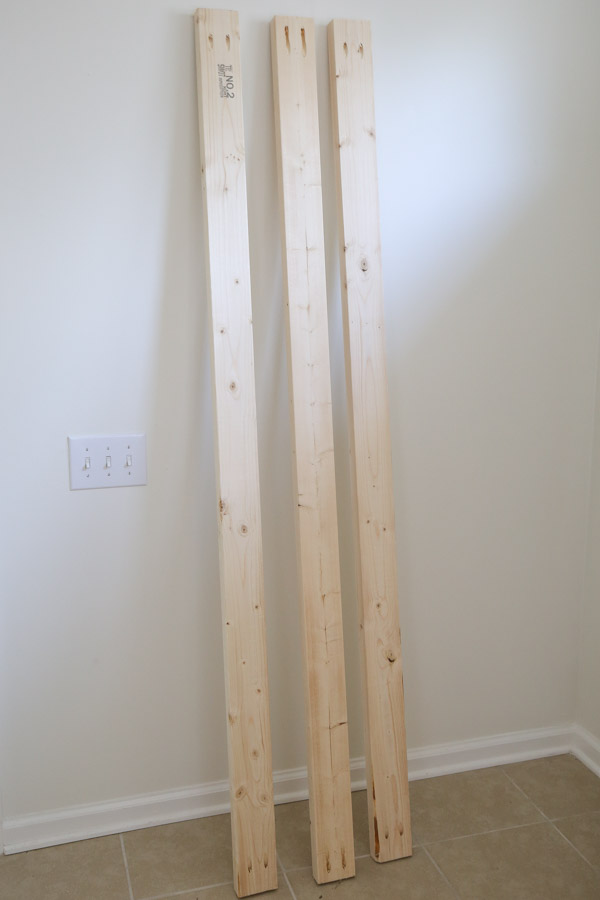
1. Make initial lumber cuts for the DIY Bed Frame
We had our plywood rip cuts done at the home improvement store, but you can also use a table saw or circular saw and straight edge guide.
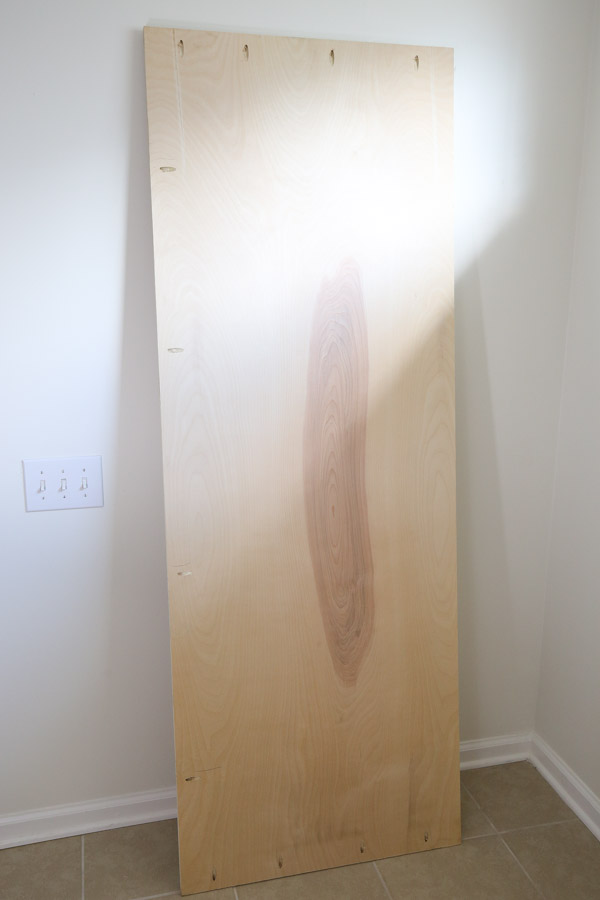
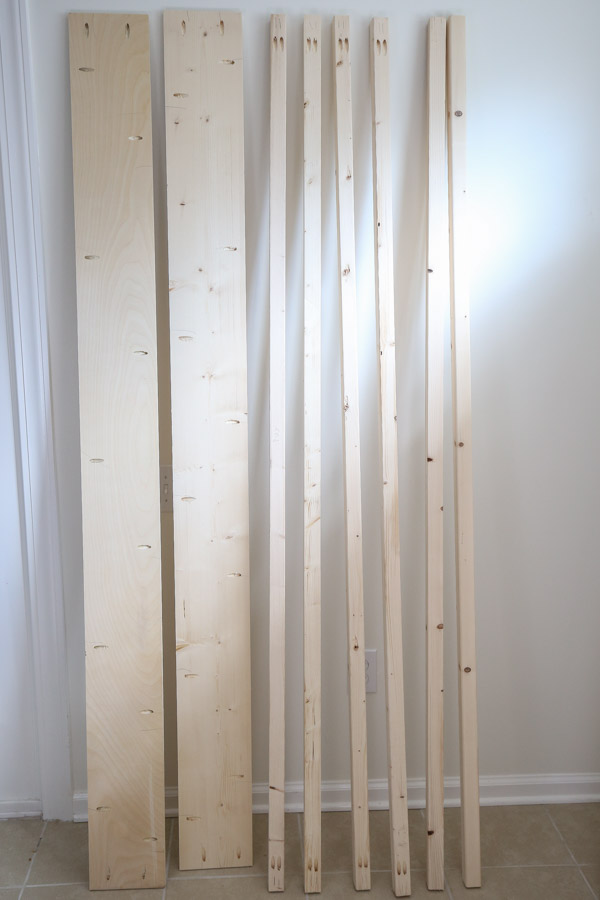
Make the following cuts from the 4ft x 8ft plywood:
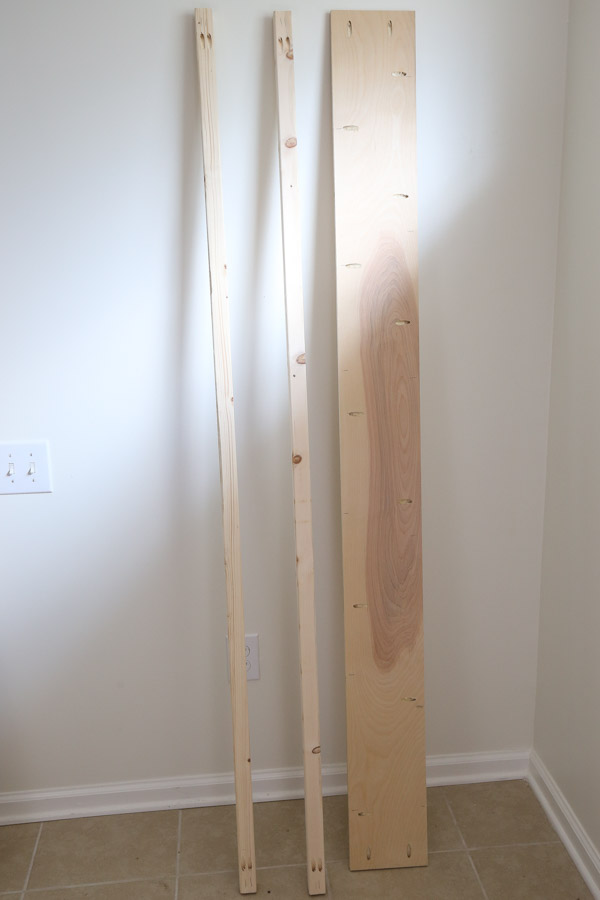
- (2) pieces @ 7″ x 80″ (for the side rails)
- (1) piece @ 7″ x 74″ (for the footboard)
- (1) piece @ 27″ tall x 74″ (for the headboard – this will be what remains after first 3 board cuts)*
*Note, after cutting the first 3 plywood rip cuts at 7″, a little less than 27″ will remain of the plywood since we have to account for the blade width during cuts.
Use a miter saw and make the cuts listed below for the headboard, footboard, and side rails:
- (2) 4×4 @ 52″ (headboard)
- (2) 4×4 @ 16 1/2″(footboard)
- (3) 2×4 @ 74″ (headboard)
- (1) 1×4 @ 81″ (headboard)
- (2) 2×2 @ 74″ (footboard)
- (6) 2×2 @ 80″ (side rails)
- (6) 1×4 @ 77″ (slat boards)
- (18) 2×4 @ 8″ (slat boards)
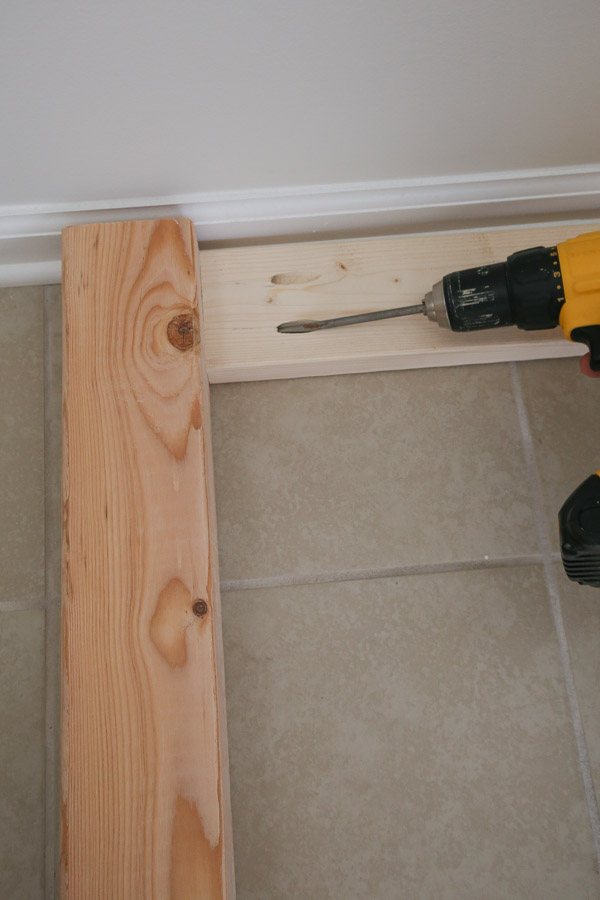
2. Add pocket holes to headboard lumber
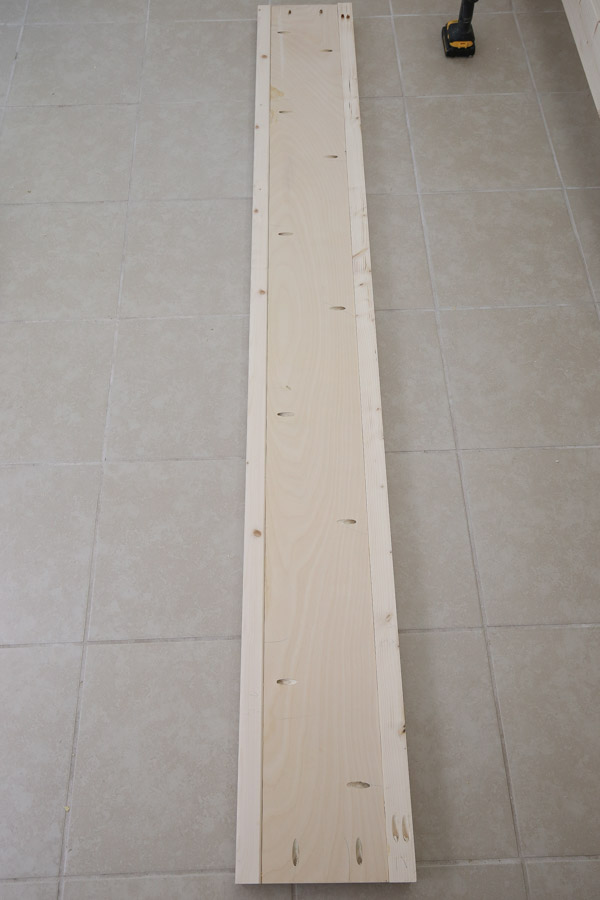
Use a Kreg Jig and add 4 pocket holes along each of the two sides and along the top edge of the 27″ tall x 74″ plywood headboard piece. Make sure your Kreg Jig is set to 3/4″ thick wood. Also, it helps to have a helping hand holding the large plywood board while drilling the holes!
*Tip: See my How to Use a Kreg Jig tutorial and video for an easy how to guide on the Kreg Jig!
Then, add pocket holes to each end of the (3) 2x4s @ 74″. Make sure to adjust the Kreg Jig for 1 1/2″ thick wood!
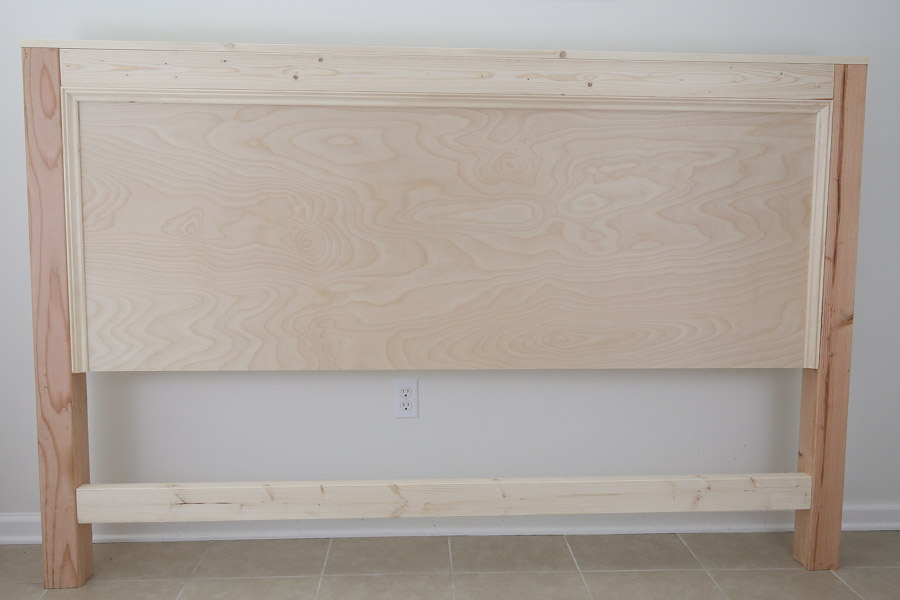
3. Assemble the DIY king headboard
Attach one 2×4 @ 74″ to the top of the 4x4s @ 52″ with with wood glue and 2 1/2″ Kreg screws.
Next, we are going to attach our 27″ tall x 74″ plywood board and we want it to be inset by 3/4″ for our molding. So, we used scrap 3/4″ wood under the plywood to make sure it was inset evenly.
Attach the plywood board with wood glue and 1 1/4″ Kreg screws.
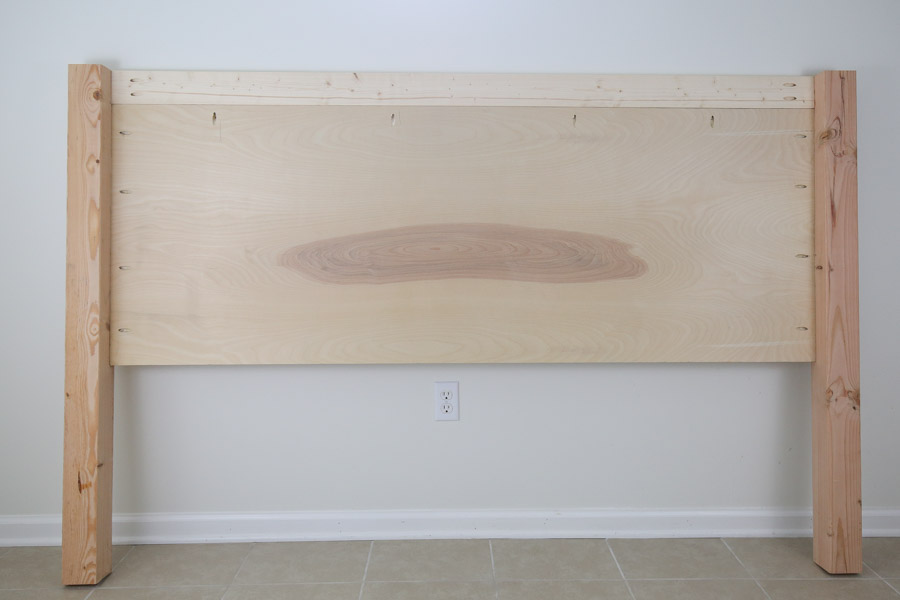
Attach a second 2×4 @ 74″ behind the plywood board, towards the center of the headboard. First use 2″ wood screws along the 2×4. Then attach the 2×4 with wood glue and 2 1/2″ Kreg screws into the 4x4s.
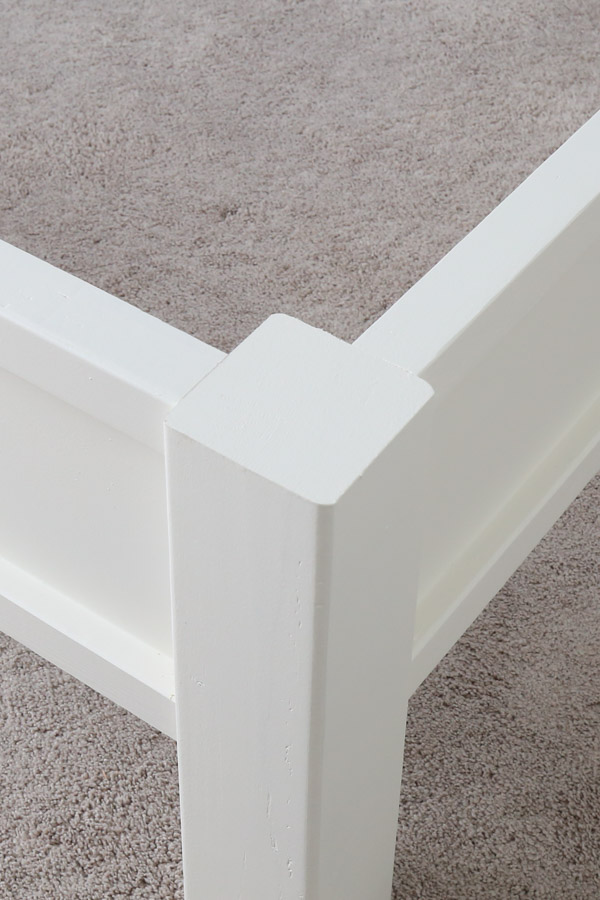
Mark 6 1/2″ up from the bottom of the 4x4s on each side. Attach the third 2×4 @ 74″ at these marks so that the bottom of the 2×4 is aligned with the mark. Again, use wood glue and 2 1/2″ Kreg screws.
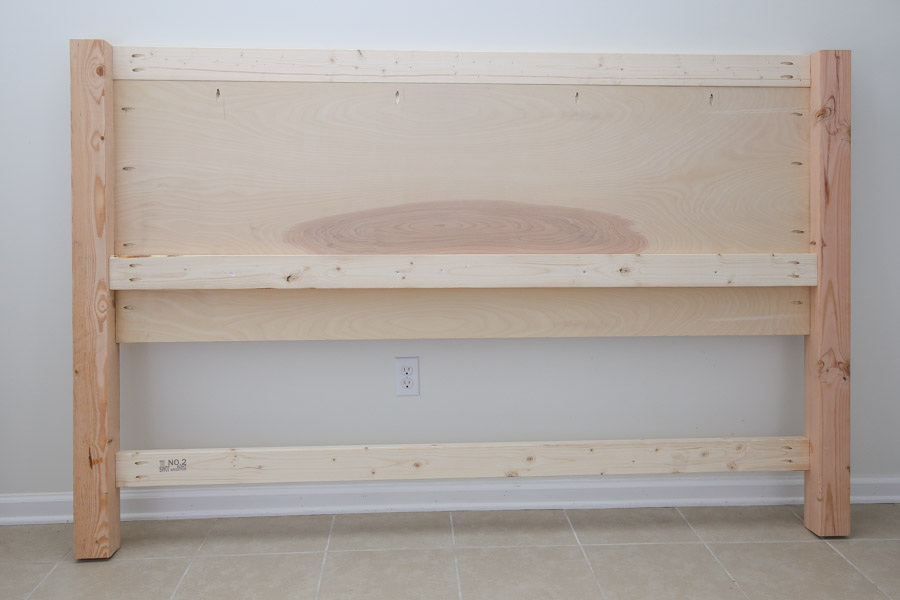
Here’s what the front of the headboard looks like at this point:
I love using 4x4s for headboards, just like we did for our DIY shiplap headboard, they are sturdy and cheap!
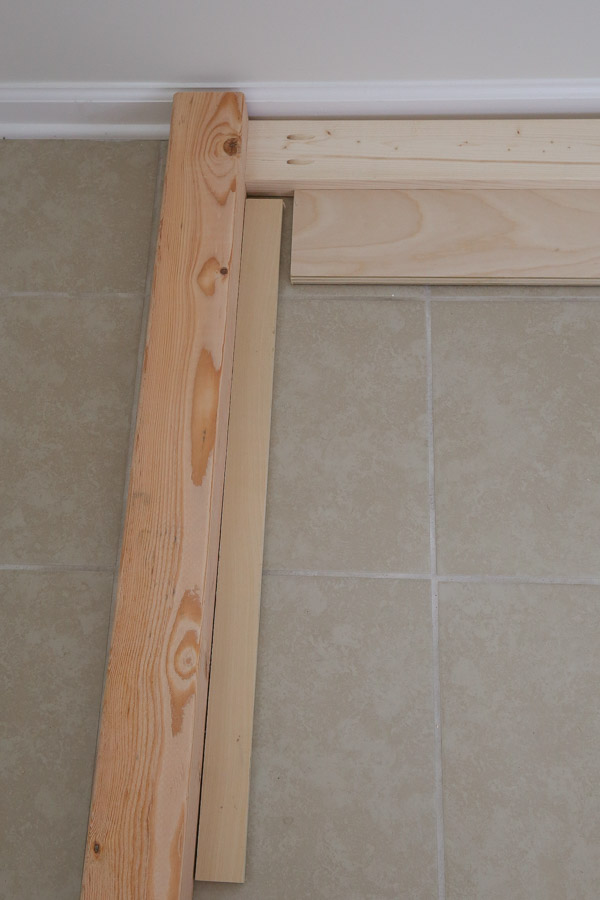
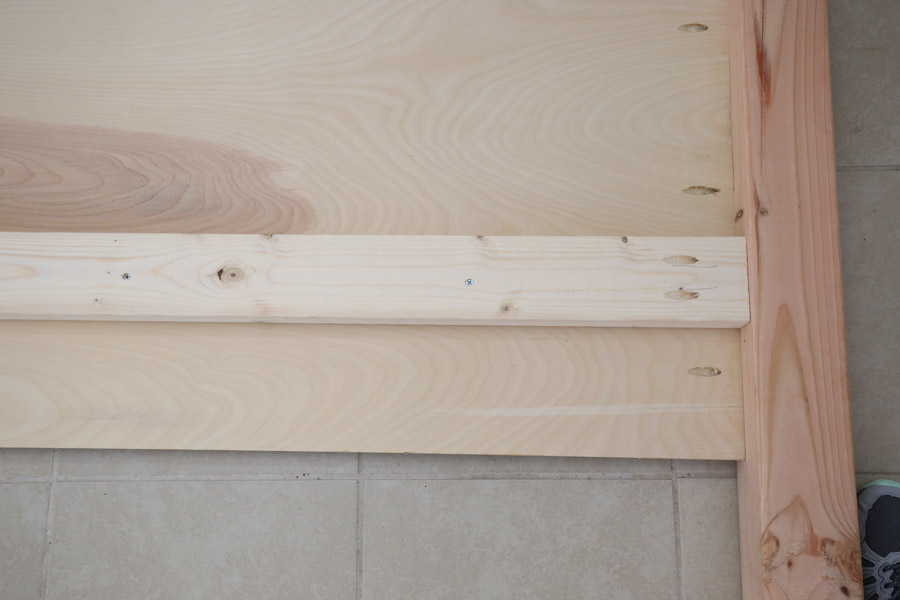
4. Attach trim to the headboard
Now it’s time to add the trim to the headboard! Double check the measurements on your actual build in case there are any slight differences, but the molding trim cuts for inside the headboard should be:
- (1) piece @ 74″ from long point to long point (with 45 degree angle cuts)
- (2) pieces @ 27″ from long point to straight edge (with one 45 degree angle cut and one 0 degree cut)
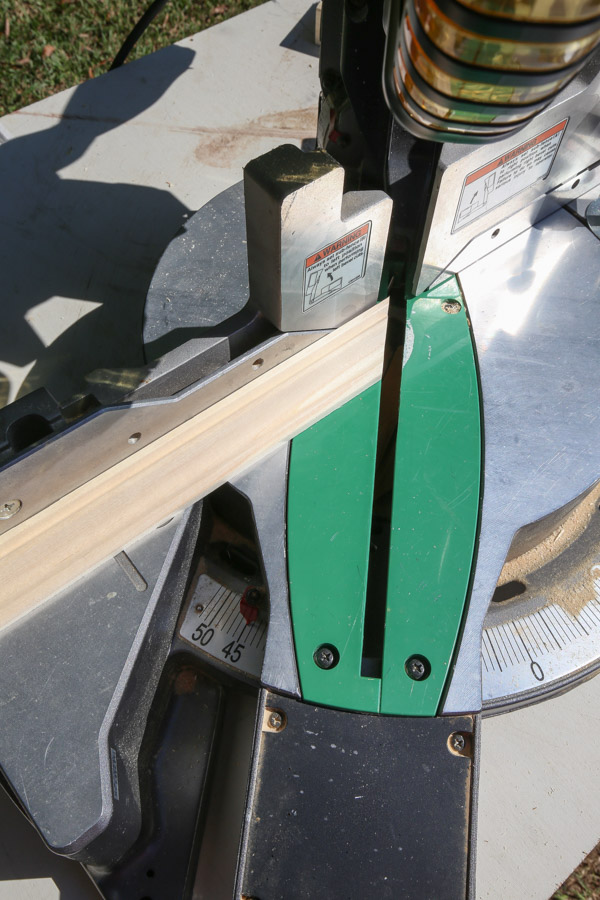
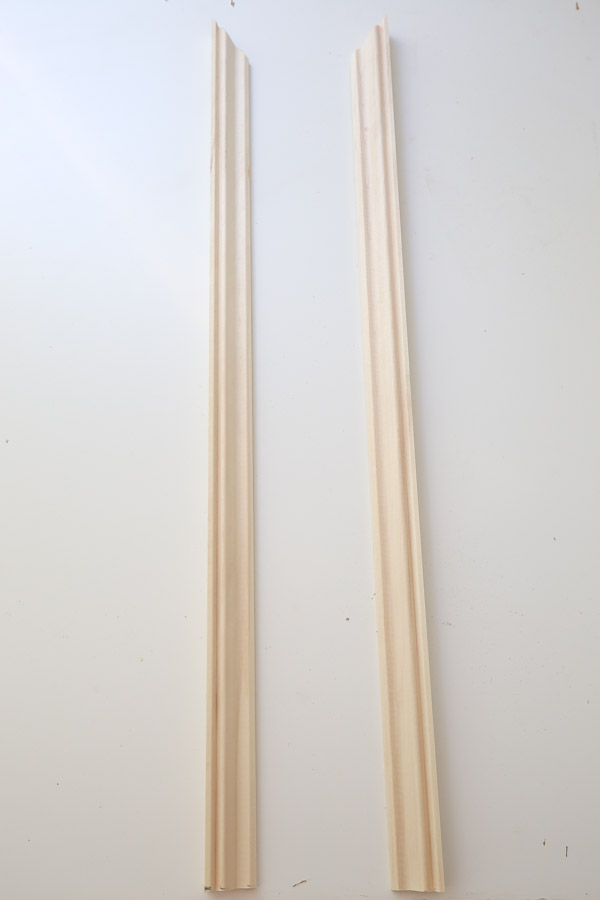
Install the molding along the inside edges of the headboard with wood glue and 1″ brad nails.
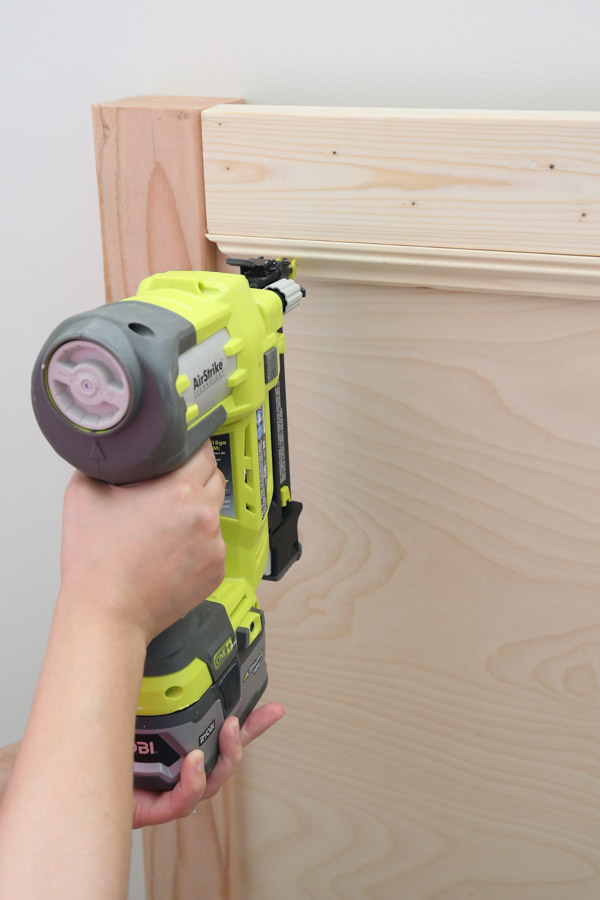
Then, for the top trim, add the 1×4 @ 81″ with wood glue and 1 1/4″ brad nails to the top of the headboard.
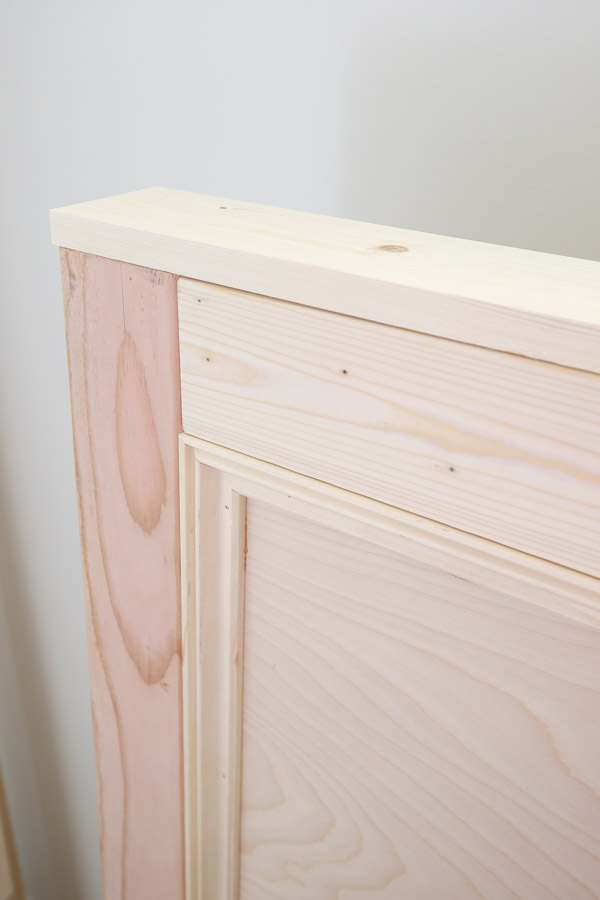
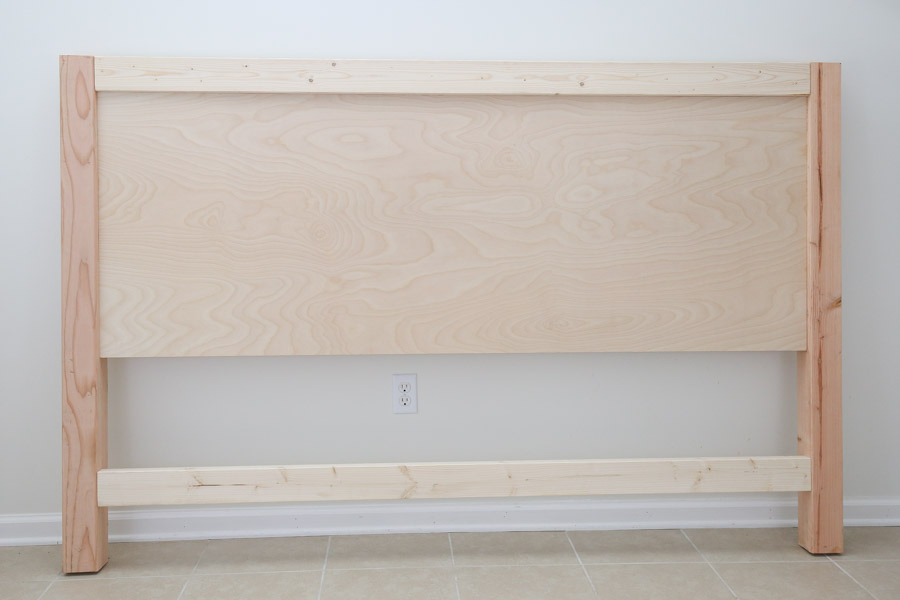
Now your headboard is built!
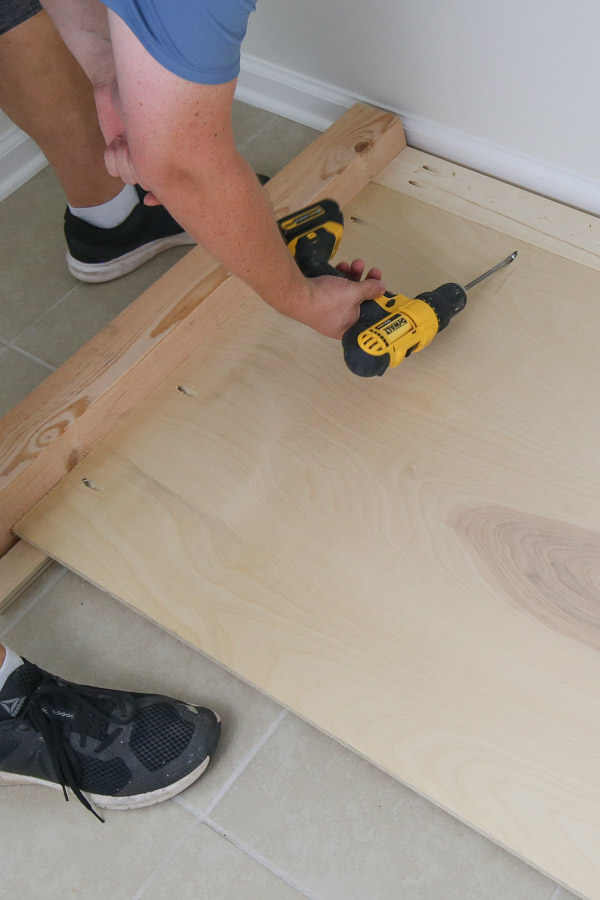
5. Add pocket holes to footboard lumber
Use a Kreg Jig and add pocket holes along all 4 sides of the 7″ tall x 74″ plywood footboard piece. Make sure your Kreg Jig is set to 3/4″ thick wood.
Then, add pocket holes to each end of the (2) 2x2s @ 74″. Make sure to adjust the Kreg Jig for 1 1/2″ thick wood!
📩 Want to Save This?
6. Assemble the king footboard
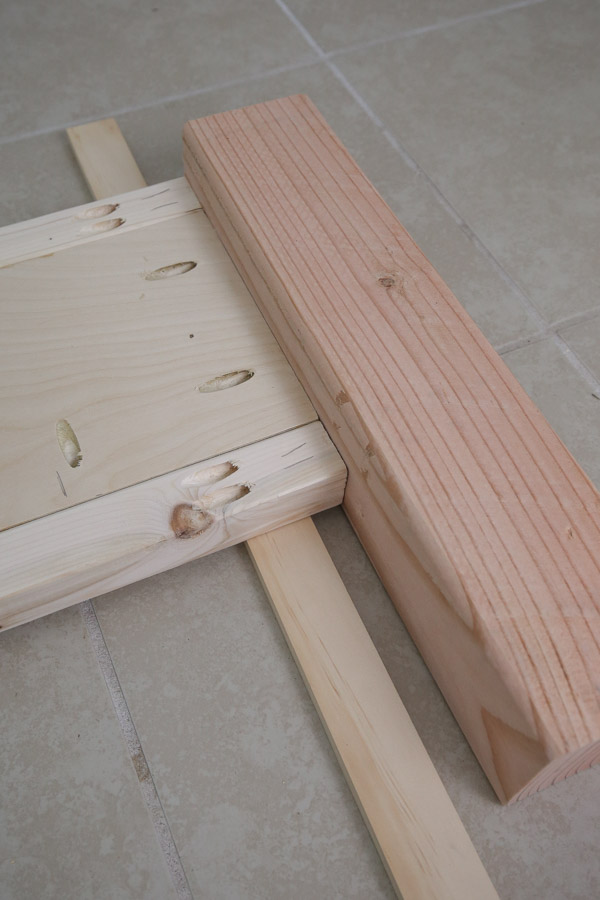
Add the 7″ tall x 74″ plywood between the (2) 2x2s @ 74″ and make sure all of the pocket holes are facing up. The plywood needs to be attached flush with the back edge of the 2x2s, so use some scrap 3/4″ thick wood underneath of the plywood to help with this step.
Attach the plywood to the 2x2s with a generous amount of wood glue and 1 1/4″ Kreg screws. Use clamps to help hold everything in place.
Next, attach the plywood and 2x2s between the (2) 4×4 @ 16 1/2″ so that the tops edges are aligned with each other. We attached the 2x2s with a 1/2″ inset on the 4x4s using scrap 1/2″ wood (you can also use wood shims).
Use 2 1/2″ Kreg screws in the 2×2 pocket holes and 1 1/4″ Kreg screws in the plywood pocket holes. And don’t forget the wood glue too!
Now your footboard for the DIY bed frame is complete!
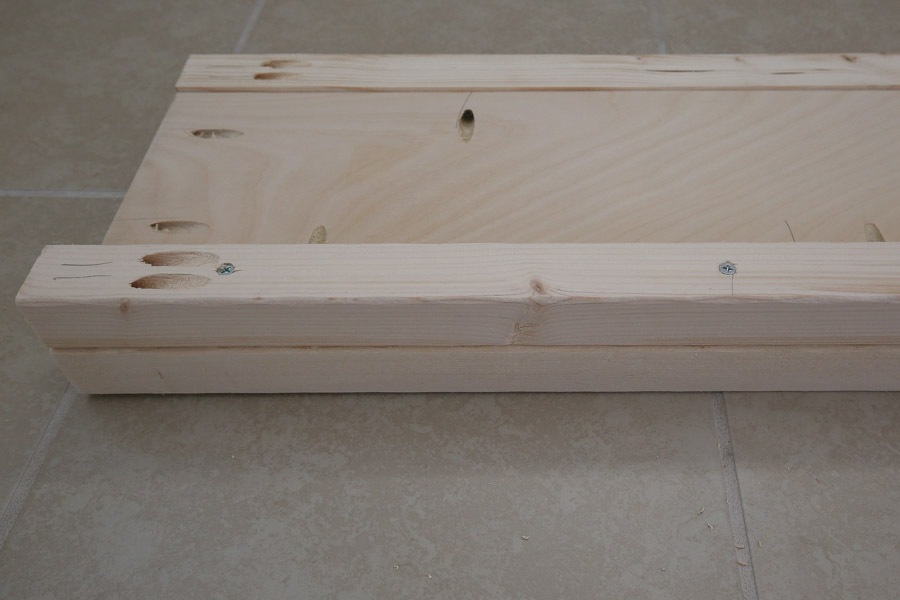
7. Add pocket holes to the side rail lumber
Use a Kreg Jig and add pocket holes along all 4 sides of the two 7″ tall x 80″ plywood boards. Make sure your Kreg Jig is set to 3/4″ thick wood. Add pocket holes every 8-10 inches along the top and bottom edges.
For four of the 2x2s @ 80″ add two pocket holes to each end. For the other two 2x2s @ 80″ don’t add any pocket holes.
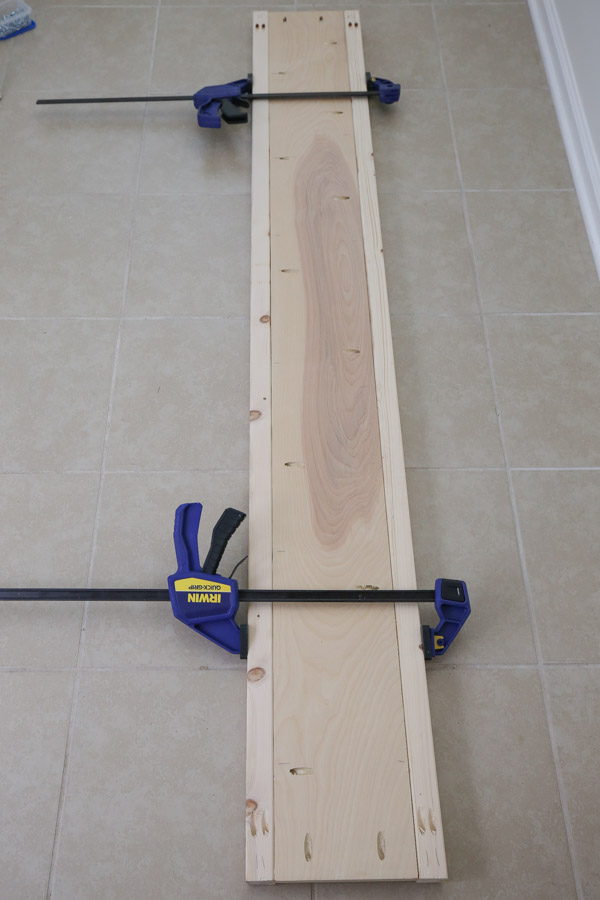
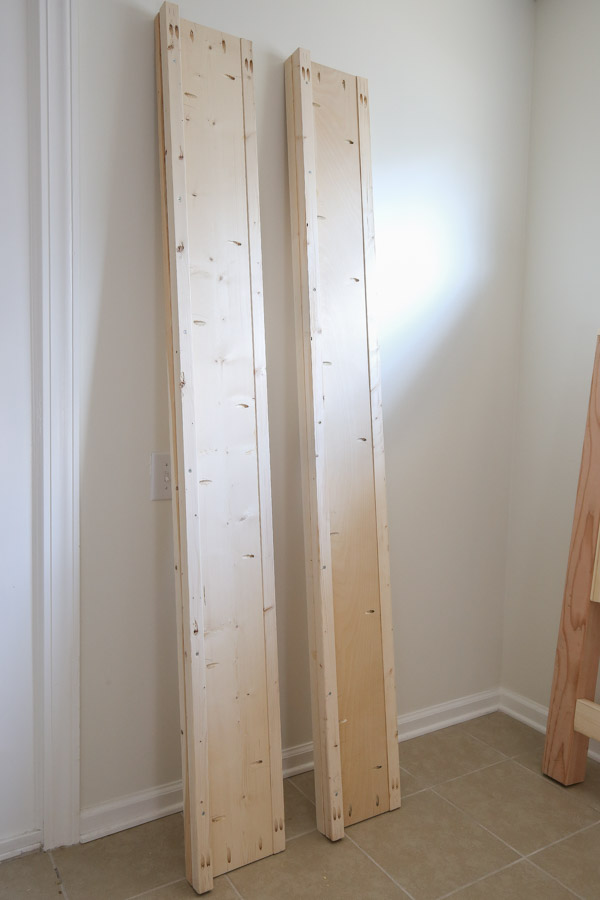
8. Assemble the two side rails
Place the 7″ tall x 80″ plywood between the one 2×2 @ 80″ with pocket holes on the end and one 2×2 @ 80″ with NO pocket holes. Make sure all of the pocket holes are facing up.
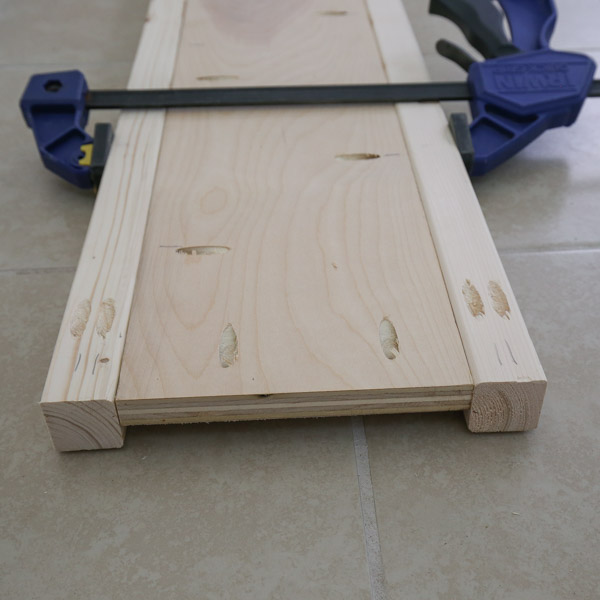
Attach the boards the same way as the footboard, with the plywood flush with the back edge of the 2x2s, so use some scrap 3/4″ thick wood underneath of the plywood again to help with this step.
Attach the plywood to the 2x2s with a generous amount of wood glue and 1 1/4″ Kreg screws. Use clamps to help hold everything in place.
Now it’s time to add the 2×2 slat support board to the side rail board. Attach the other 2×2 @ 80″ with pocket holes on the ends on top of the 2×2 with NO pocket holes. Attach using a generous amount of wood glue and six 2 1/2″ wood screws along the 2×2.
Repeat the above steps for the second side rail board. You can see all of these building steps in detail in the DIY bed frame video on YouTube!
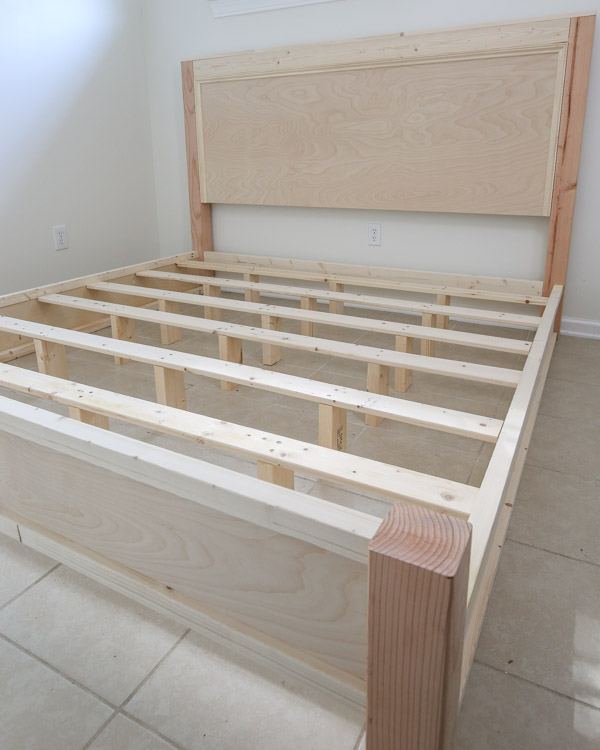
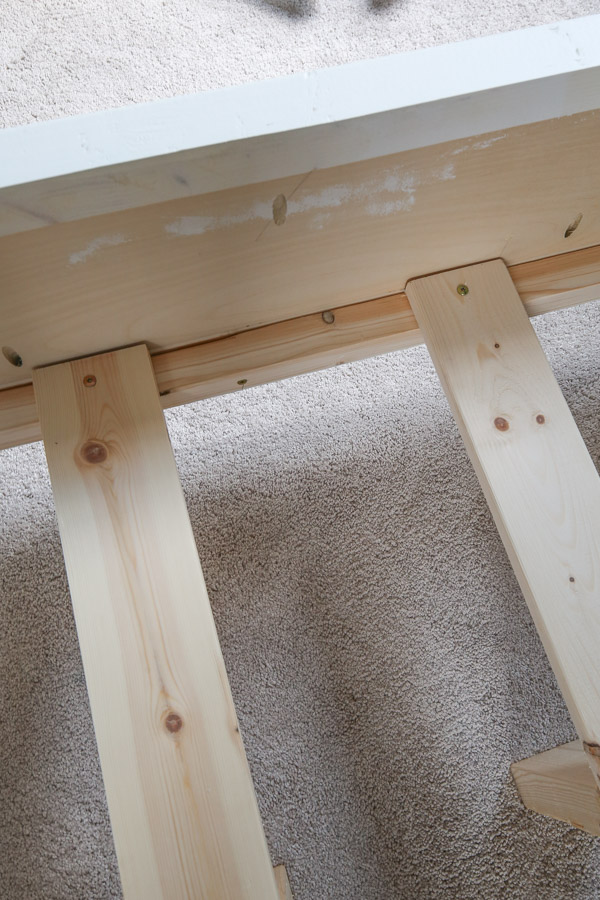
9. Build the middle slat boards
For each of the six 1x4s @ 77″ (for the slat boards), mark 19″, 38″, and 57″. Then, add a 2×4 @ 8″ under the 1×4 at these these points with wood glue and 1 1/4″ self tapping wood screws for all six slat boards.
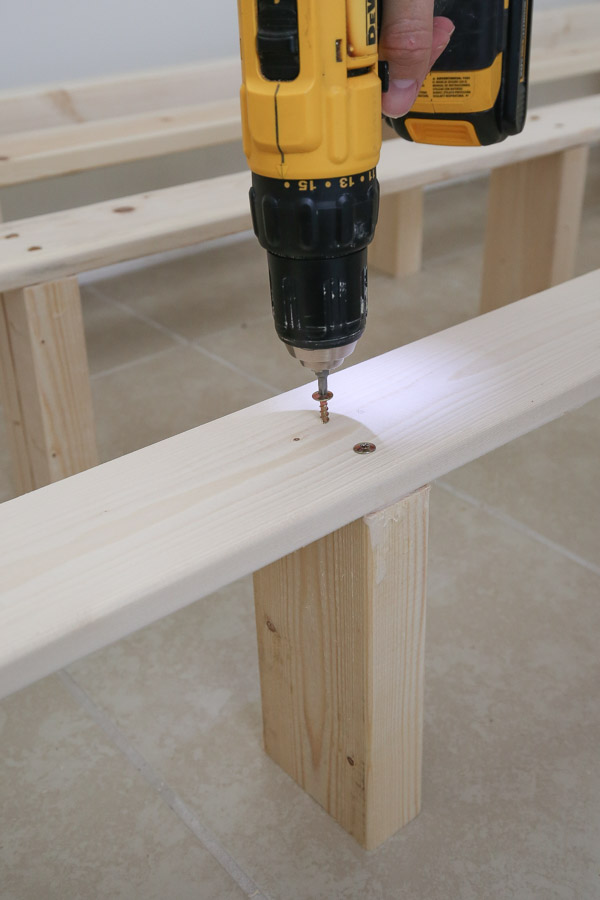
If you are going to be using a mattress only and no box spring, then I would add a few more slat board supports.
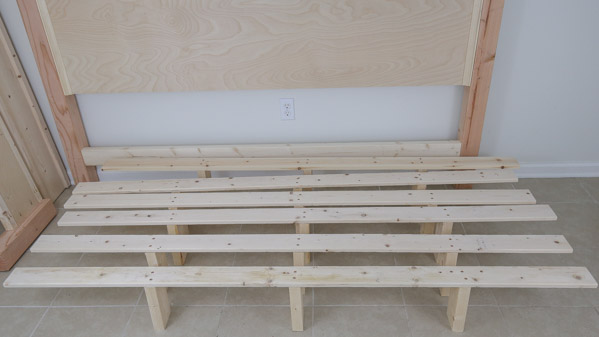
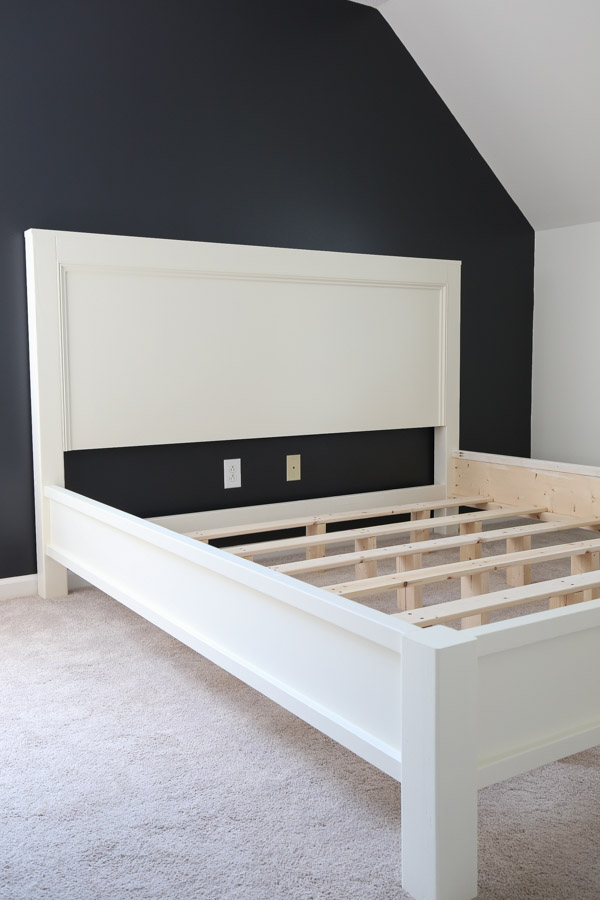
Yay now all of the pieces for your DIY king bed frame are built! At this point it’s best to paint or stain before assembling all 4 parts.
10. Paint or Stain the DIY king bed frame
You can stain or paint the headboard. If staining, fill all nail holes with a stainable wood filler. If painting, you can use a lightweight spackle for the nail holes and lightly sand them. And if painting like us, make sure to caulk all the gaps and seams with a paintable caulk.
If painting, make sure to prime first and go over the wood knots with a second coat of primer. Let the primer dry.
Then, add two coats of paint. We used Ivory White by Benjamin Moore in eggshell.
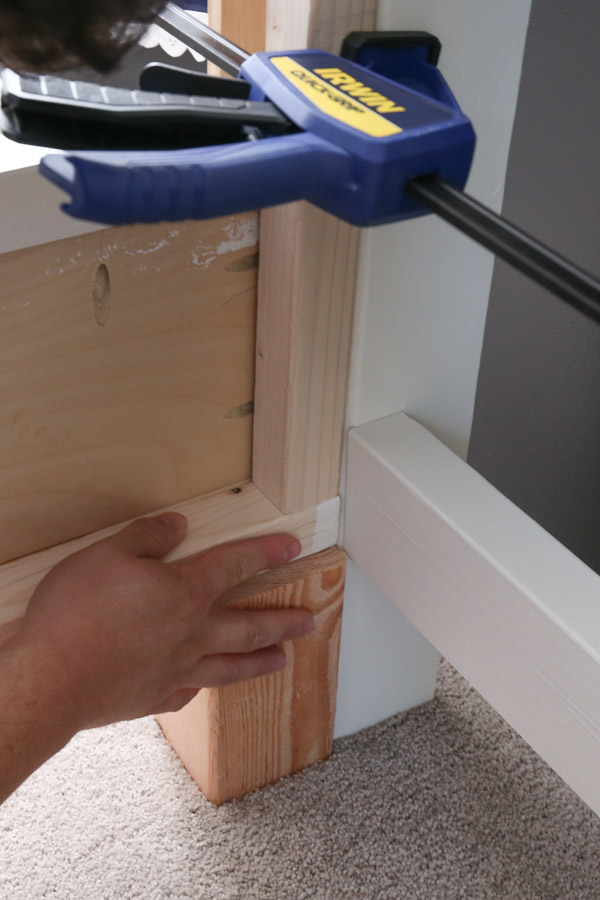
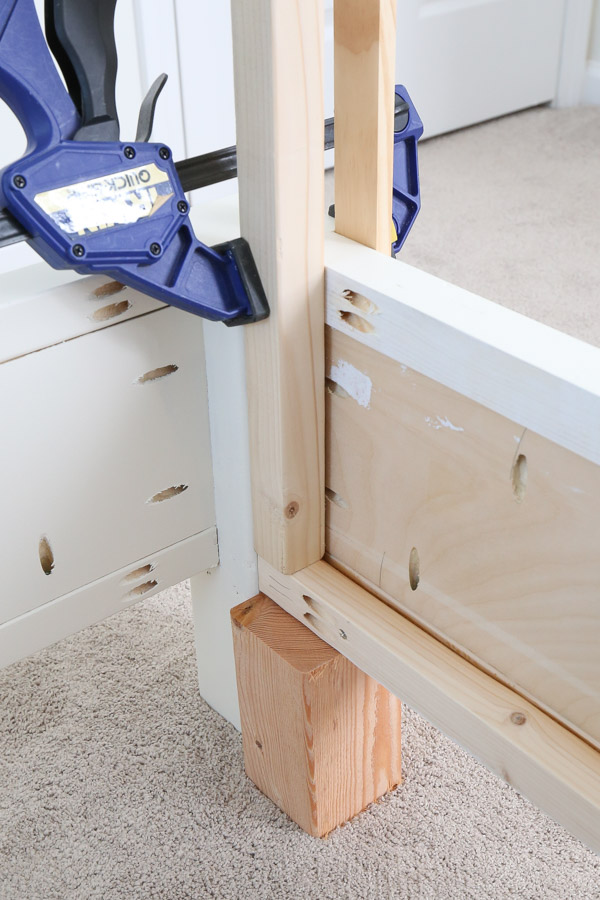
11. Assemble the DIY king size bed frame
Move the bed frame in place where you want it.
Then use some scrap 2x4s cut to 6 1/2″ to hold up the side rails in place and attach them to the headboard and footboard with 1 1/4″ Kreg screws in the plywood pocket holes and 2 1/2″ Kreg screws in the 2×2 pocket holes.
We used some scrap 2x2s and 1/2″ thick wood to help hold things in place with clamps while screwing everything together.
*Make sure the 2×2 slat board edges are aligned flush with the inside 4×4 edges. There should be 6 1/2″ clearance under the side rails. **Do NOT use wood glue so you can move the DIY bed frame easily in the future if needed.
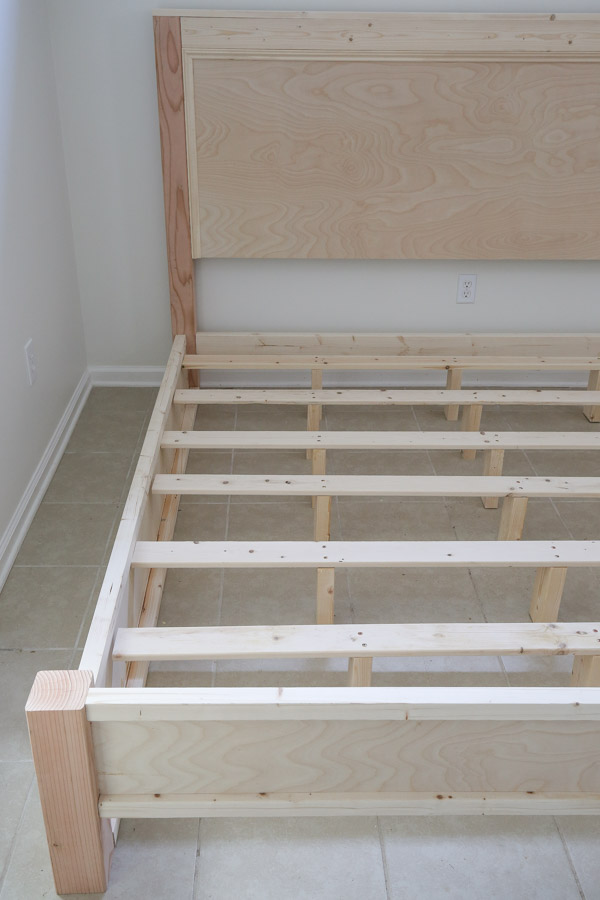
12. Attach slat boards to side rails
Finally, attach the six, middle, slat boards to the side 2×2 slat support boards on the side rails with 1 1/4″ self tapping wood screws. Space them about 10-12″ apart.

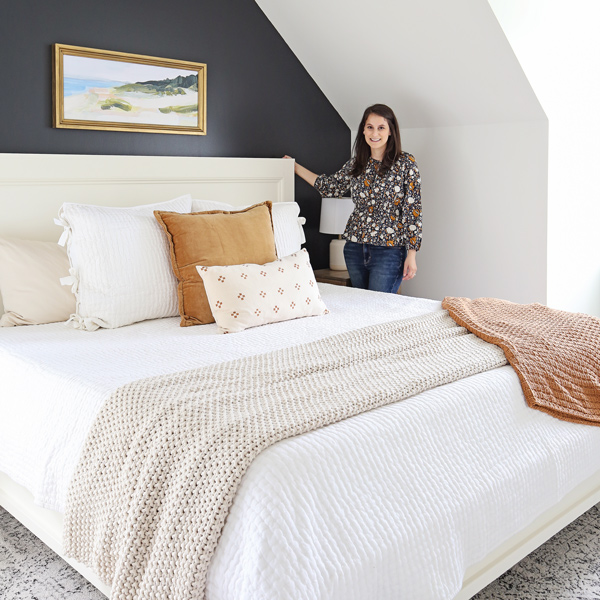
Now your DIY king bed frame is complete and you can add the mattress, box spring and bedding!! Get my 7 quick tips on how to layer bedding!
Well that’s a wrap on this DIY bed frame and my last DIY bedroom makeover project post! I am so relieved that this room is complete and I love how it all turned out!
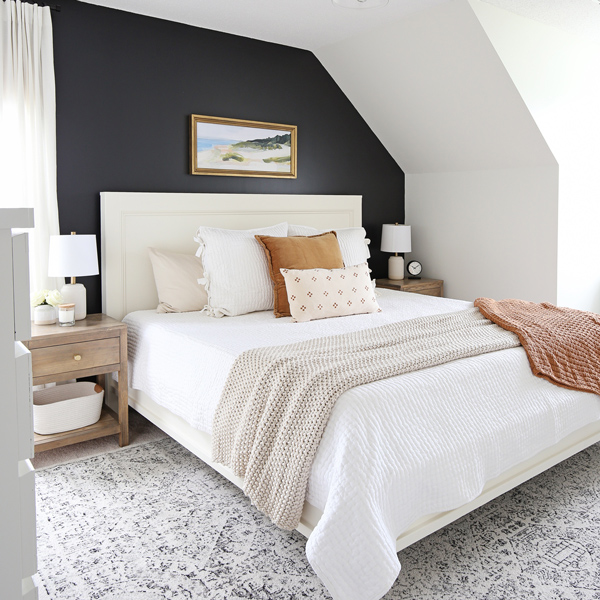
What do you think?! It’s a lot of steps, but all easy steps! Would you paint or stain your bed build?!
Make sure to check out our DIY shiplap headboard for more DIY bed ideas!
I hope this DIY king size bed frame tutorial has been helpful! If you build this, please share with me on social media, I’d love to see, @angelamariemade.
Follow along for my latest projects and sneak peaks on Instagram, YouTube, and Pinterest!
Want to save for later?! Pin it here:
Georgette
Sunday 24th of May 2026
This is a gorgeous bed! I want to make this bed, but I want to make it for an adjustable bed, I just need to slip it into the frame. Is there something that needs to be modified? Thank you so much in advance
Aanu
Monday 5th of January 2026
I was able to complete this project. The steps are so easy to follow. I will maybe group the kregg holes in a single step
Sam
Monday 20th of May 2024
Love it! Only question I have is, what is the height from the top edge of the frame to the top of the mattress?
Our bed doesn't use a box spring but I want to make the final product look the same. Thanks in advance!
Dennis Heesch
Wednesday 13th of September 2023
Do you have other plans such as for a twin or queen?
Angela Marie Made
Thursday 14th of September 2023
I do not, but you could modify these plans to make it into a twin or queen.
Kim T.
Monday 28th of August 2023
The Kreg pocket hole jig that your reference works with material up to 1 1/2” thickness. What jig did you use for the 2x2’s and 2x4’s?
Angela Marie Made
Friday 1st of September 2023
I adjusted it for 1 1/2″ thick wood!