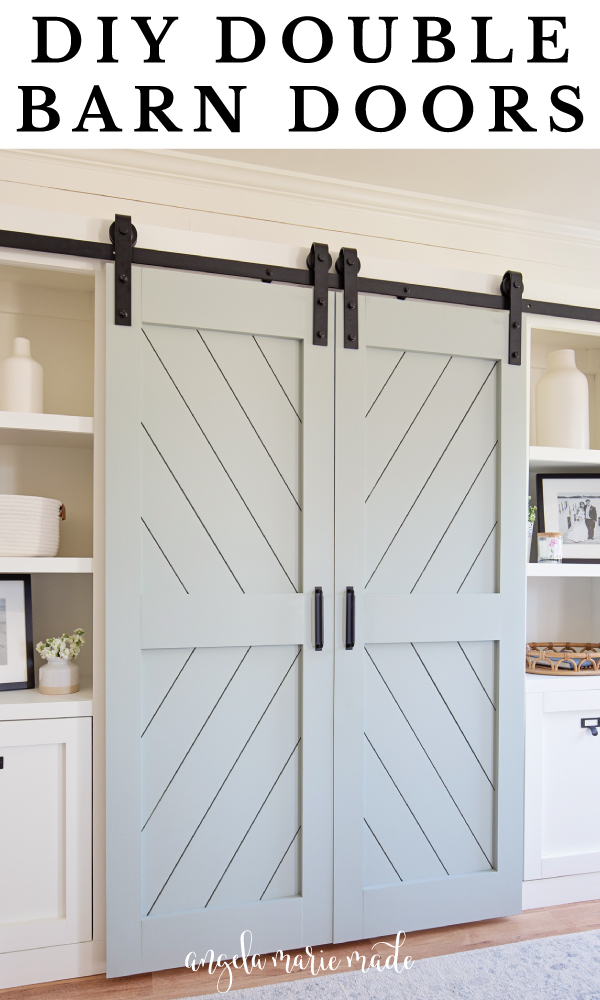
Learn how to build custom DIY double barn doors with shiplap!
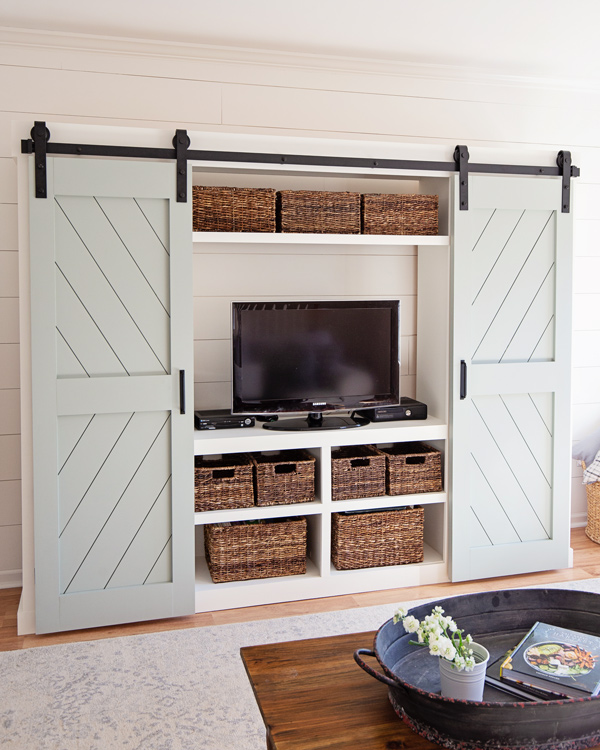
Wow, I can’t believe this barn door entertainment center DIY project is complete! I’m super excited to share all the details about it including how to build the custom DIY barn doors!
The double sliding barn doors design would also be great on a wall or as a double barn door closet too!
I have to admit that its been awhile since I’ve been this excited about a project! I LOVE how this sliding barn door entertainment center turned out!
It is now the focal feature of our living room and I am so happy I can easily hide the TV out of sight! Brandon is convinced that we need a bigger TV now to fit it better haha!

The DIY Barn Door Entertainment Center Plans
For this project, I used these barn door media cabinet build plans from Shanty 2 Chic. The plans were so helpful and it was nice to take a break from coming up with my own plans especially for such a huge project!
Instead, I used my own design plans for the double barn doors and I’m sharing the DIY barn door tutorial below!

Since you can get the full plans for the entertainment center from Shanty 2 Chic, I’m just going to share a few in progress photos of the barn door entertainment center DIY build and then share the full step by step tutorial for my DIY double barn door.
Also, I modified their plans to make the entertainment center smaller, so 8ft x 76 inches instead of 9.5ft x 87 inches. And we used 1/2″ thick plywood instead of 3/4″ to save money and make it less heavy.
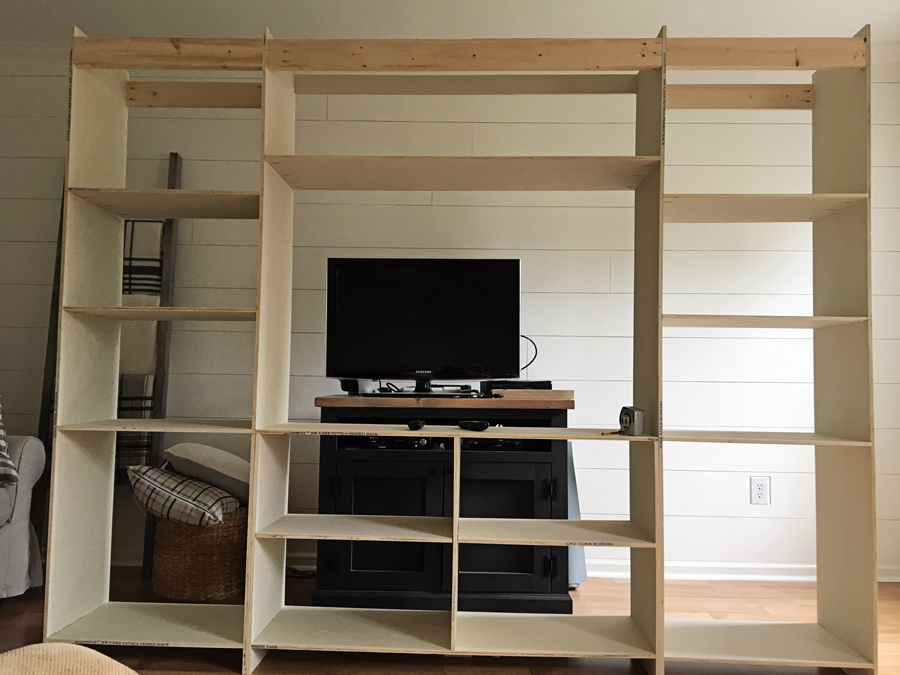
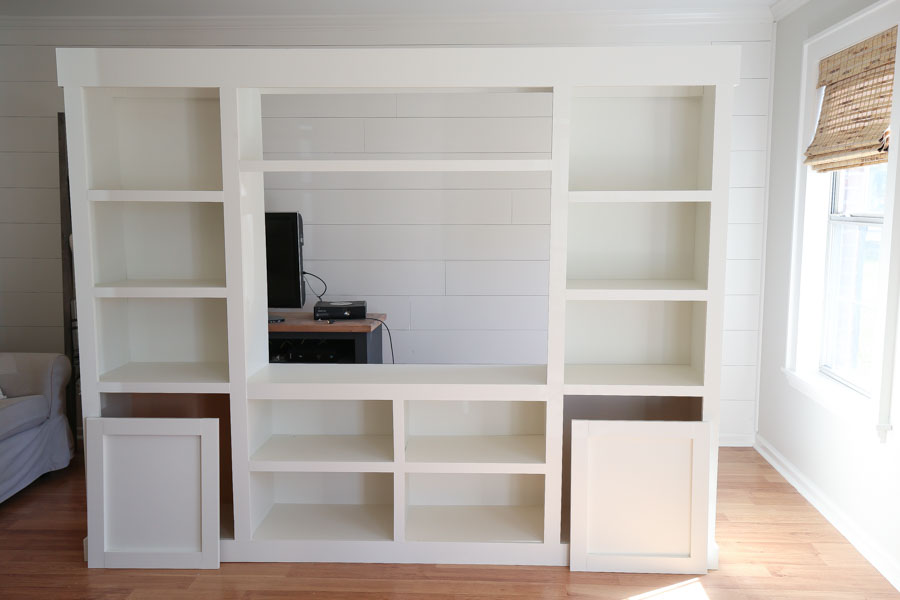
At this point, it was time to add the 2 barn doors!
Note, this post contains some affiliate links. I may earn a commission if you shop those links (at no cost to you). Thank you for supporting my small business. For more info see my disclosures here.
How to Build a DIY Double Barn Door:
Materials:
- (4) 1x2s @ 8ft
- (4) 1x4s @ 6ft
- (1) 1×6 @ 10ft
- (6) 5.3″ wide x 8ft Shiplap boards – similar here
- 1 1/4″ and 1″ brad nails
- 1 1/4″ Kreg screws
- Wood glue
- Paint or stain (I used Oyster Bay by Sherwin Williams)
- Double sliding barn door hardware
- Barn door handles
Tools:
- Kreg Jig
- Miter saw
- Dremel Saw-max tool or Jig Saw
- Drill
- Brad nailer
- Clamps
- Tape Measure
Important Notes:
- Materials listed above are enough to build two barn doors at 71.5″ tall x 24″ wide. Modify material amount and cuts as needed for your barn door size.
- 5 1/4″ wide shiplap boards may be used instead of 5.3″ wide, but you will need to use more of them in step #3.
- Pre-primed shiplap boards make this project easier as explained in how to paint shiplap.
- I used these cabinet door hinges and these cabinet door pulls on the entertainment center.
Double DIY Barn Door Video Tutorial:
Subscribe to my YouTube Channel here!
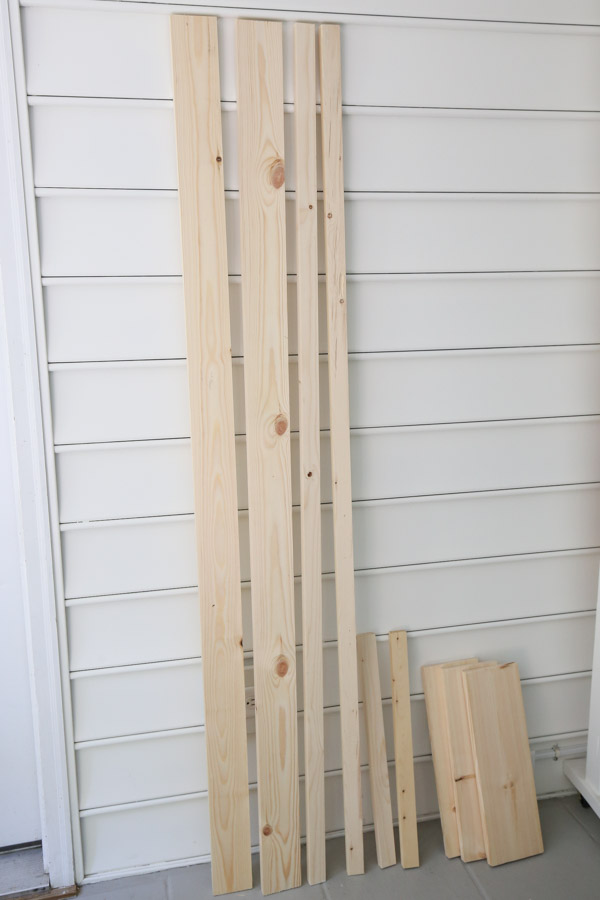
1. Make cuts for barn door frame
The following cuts and steps are for the first barn door (left door).
Make the following cuts from the 1x4s:
- 2 pieces @ 71 1/2″
Make the following cuts from the 1x2s:
- 2 pieces @ 71 1/2″
- 2 pieces @ 21″
Make the following cuts from the 1x6s:
- 3 pieces @ 17″
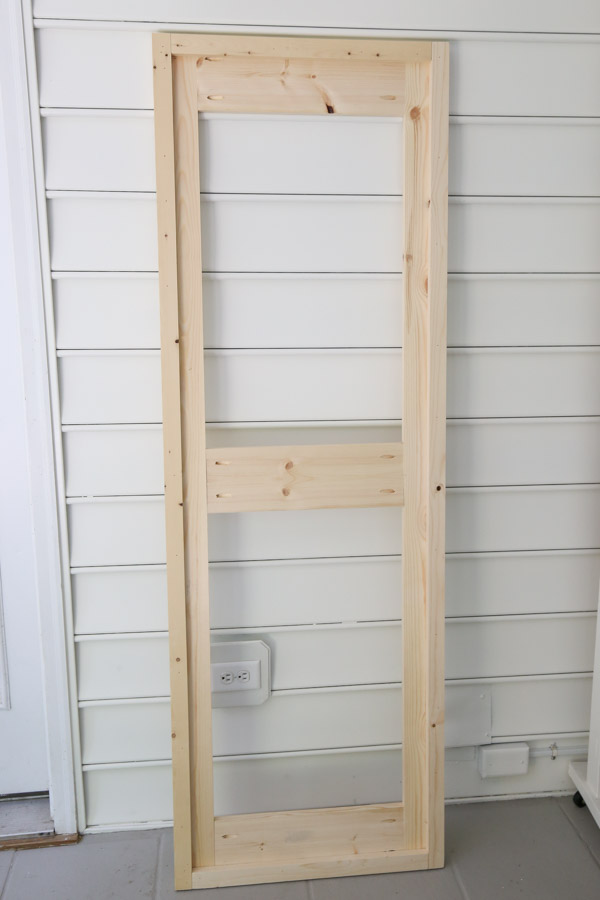
2. Assemble DIY barn door face frame
Add two pocket holes with the Kreg Jig to each side of the three 1×6 pieces. Check out my how to use a Kreg Jig tutorial for help with using the Kreg Jig!
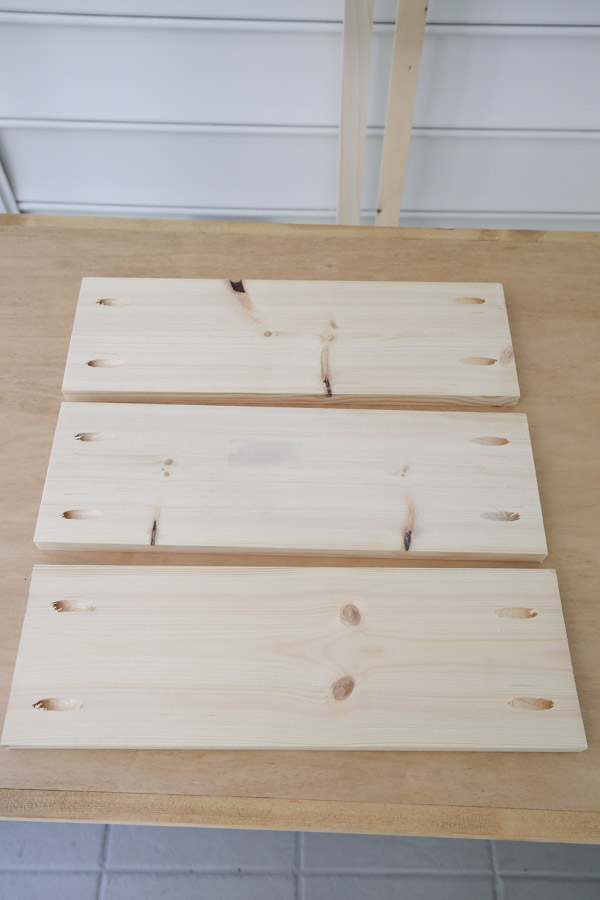
Then, attach to the top, middle, and bottom in between the two 1×4 pieces using 1 1/4″ Kreg screws.
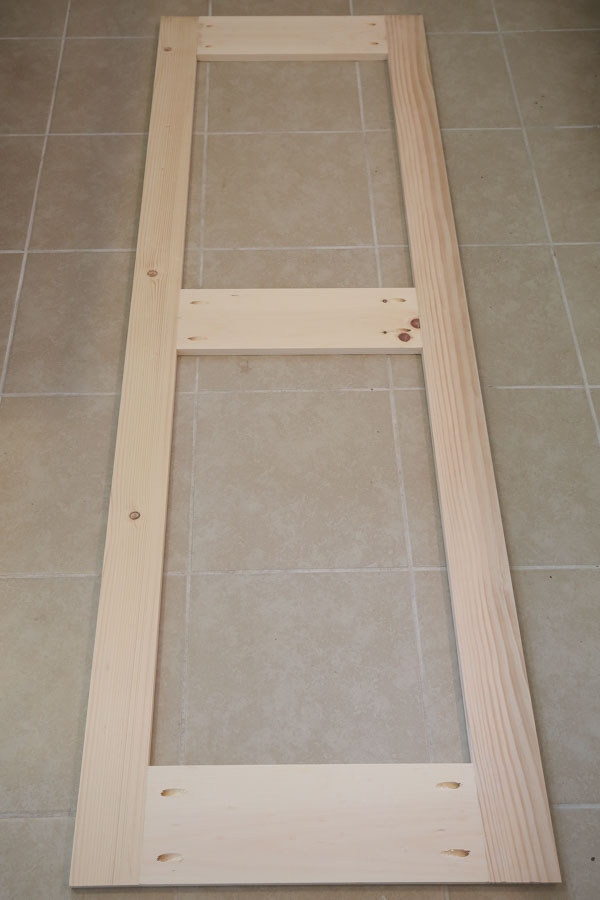
Next, attach the 1×2 pieces on the backside of the frame, starting with the longer end pieces, flush with the edges. Attach with 1 1/4″ brad nails and a brad nailer and wood glue.
Then, add the two 21″ pieces on the top and bottom.
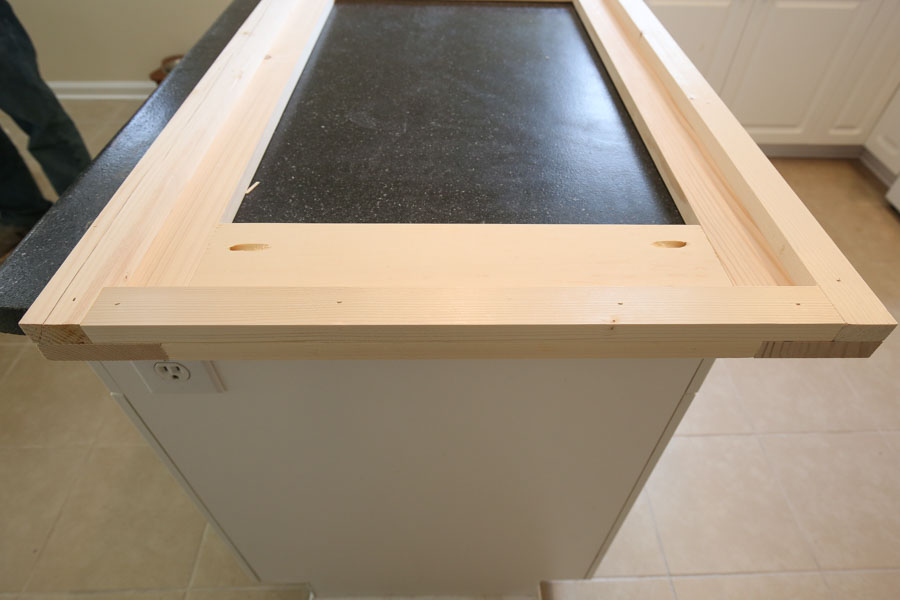
Here is what the barn door looks like all framed out:
3. Cut shiplap boards to fit the DIY barn door frame
Now it’s time to add the shiplap boards!
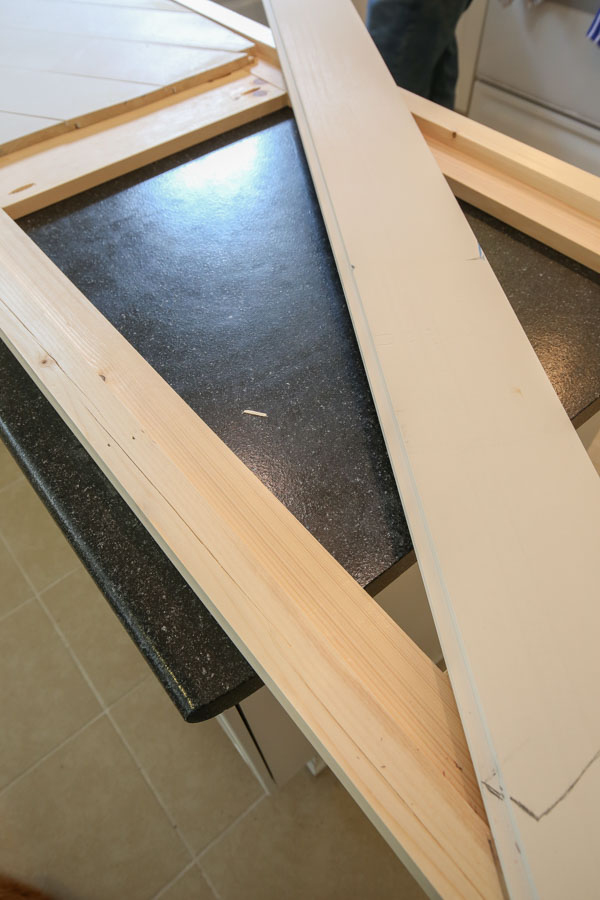
Determine where the barn door handle is going to be located as you want the shiplap boards to be at an angle coming out of the handle corner. Since this is the left door the handle is going to be on the middle, right side (since this is the back of the door).
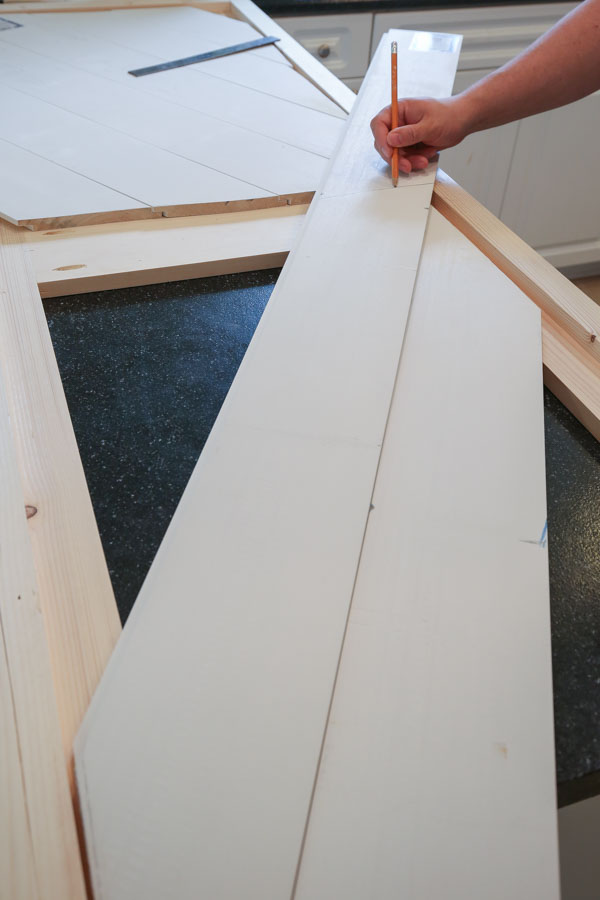
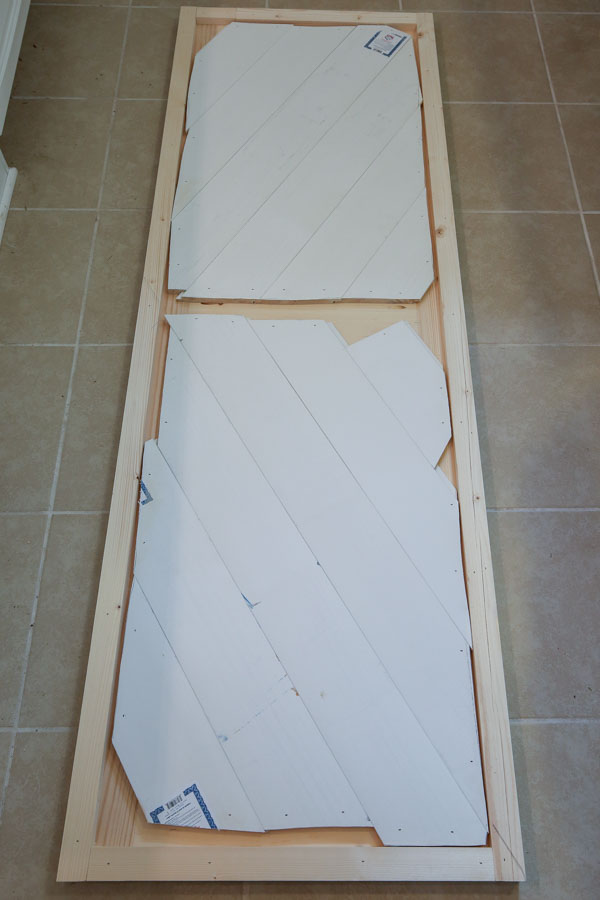
Line up the end of one of the shiplap boards (face down) from the corner where the barn door handle will be to the opposite corner as shown in the below photo:
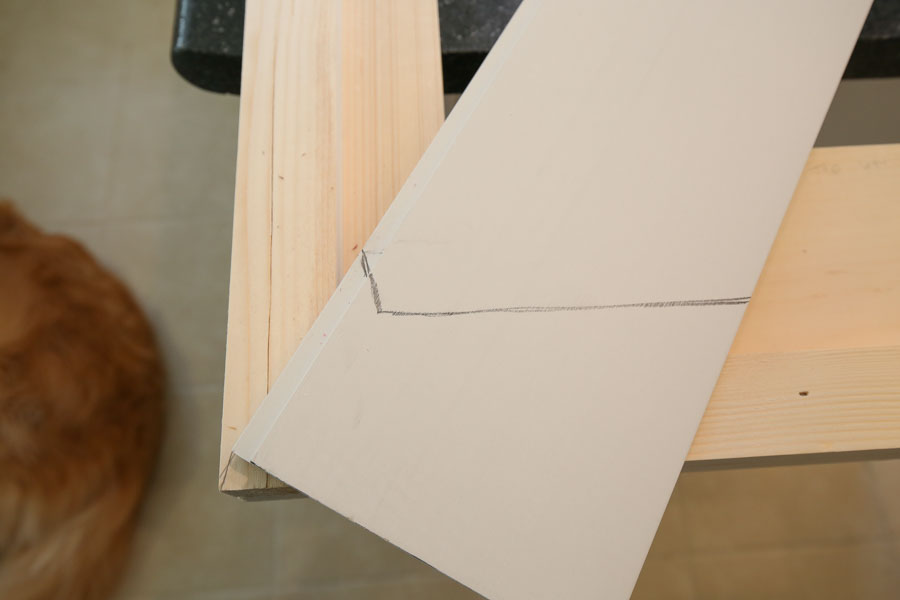
Then, mark with a pencil the angle where the board needs to be cut so it fits over the face frame opening. Make sure to allow for a 1-2 inch overhang of the board over the opening as the board ends will be nailed down to the face frame.
Note, you can see all of this in action in my DIY double sliding barn doors video tutorial!
Here is the cut line mark we made for the first corner:
And for the second corner:
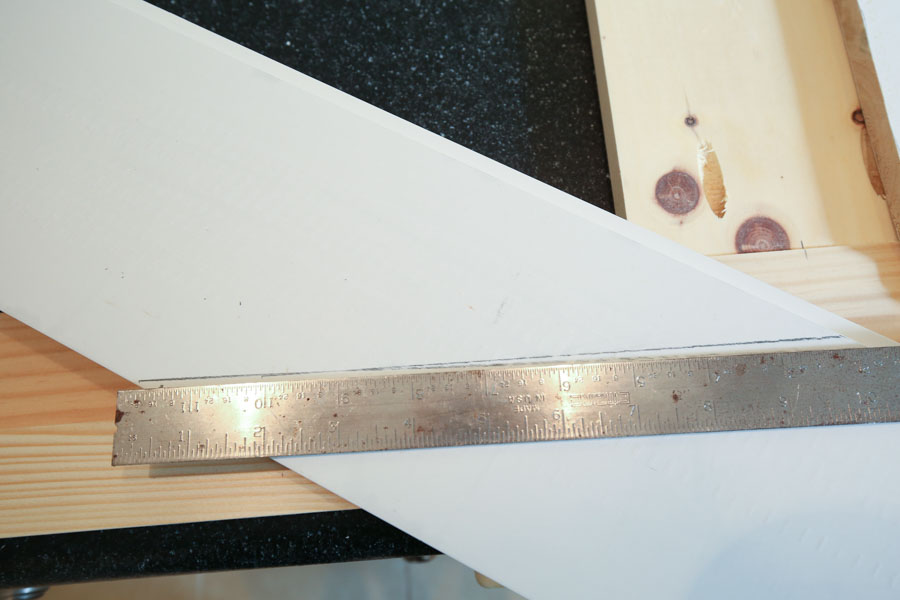
Next, use a Dremel Saw-max tool or jig saw to cut the boards to size. We love our Dremel tool and it worked awesome for this project!
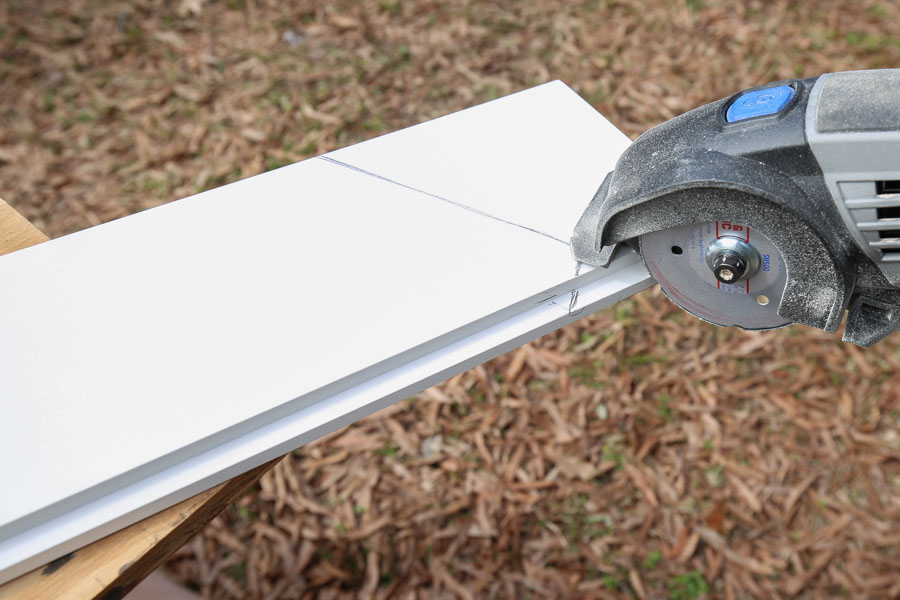
Lay the board in place to ensure it fits correctly.
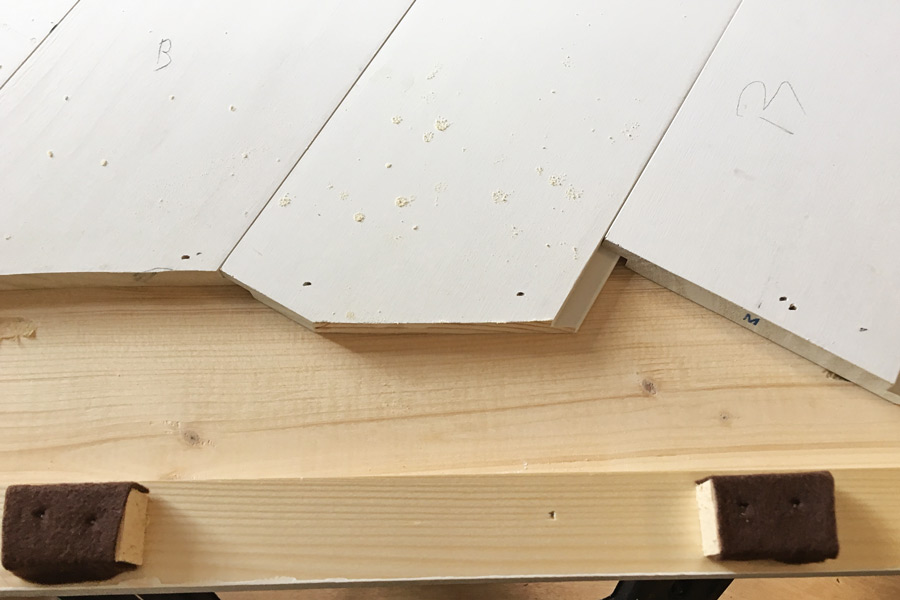
Then, repeat the same step for the next shiplap board, making sure the tongue and groove edges are lined up correctly with the two boards next to each other.
Also, make sure to lay the shiplap board face down, so the back of it is facing up! This is very important to make sure the shiplap gaps will be exposed correctly on the front side!
Continue the above process until the face frame opening is complete. We had a total of 5 boards cut to size to cover the opening.
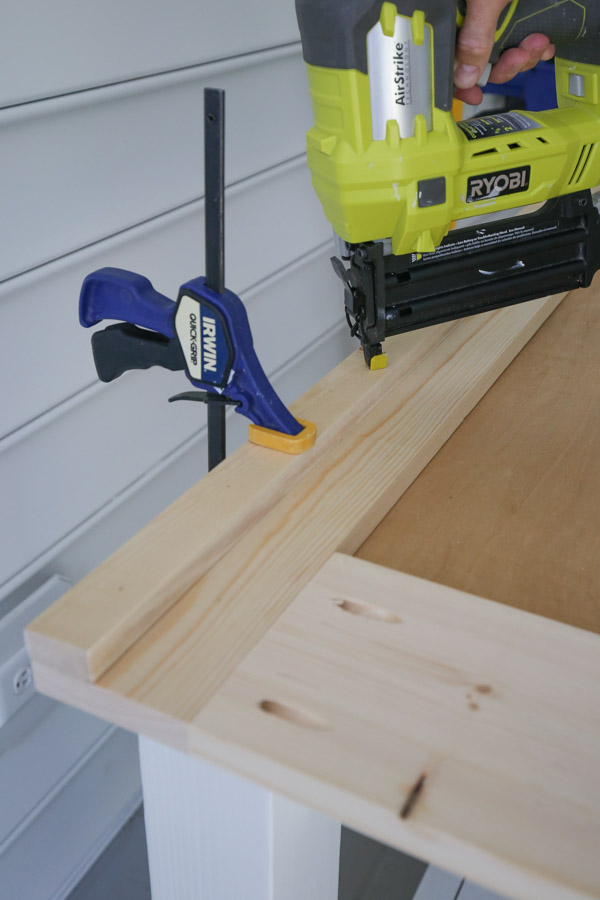
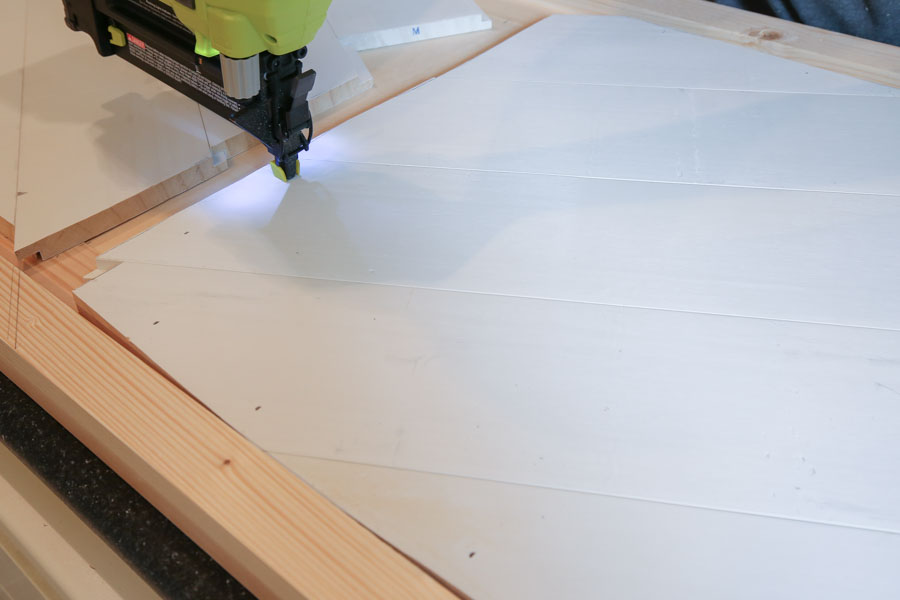
4. Install shiplap boards to barn door frame with a brad nailer
Using 1″ brad nails and a brad nailer, secure the shiplap boards to the barn door frame by nailing along the edges of them. The best part about these DIY barn door build plans is that no nail holes will need to be filled since they are all on the back, yay!
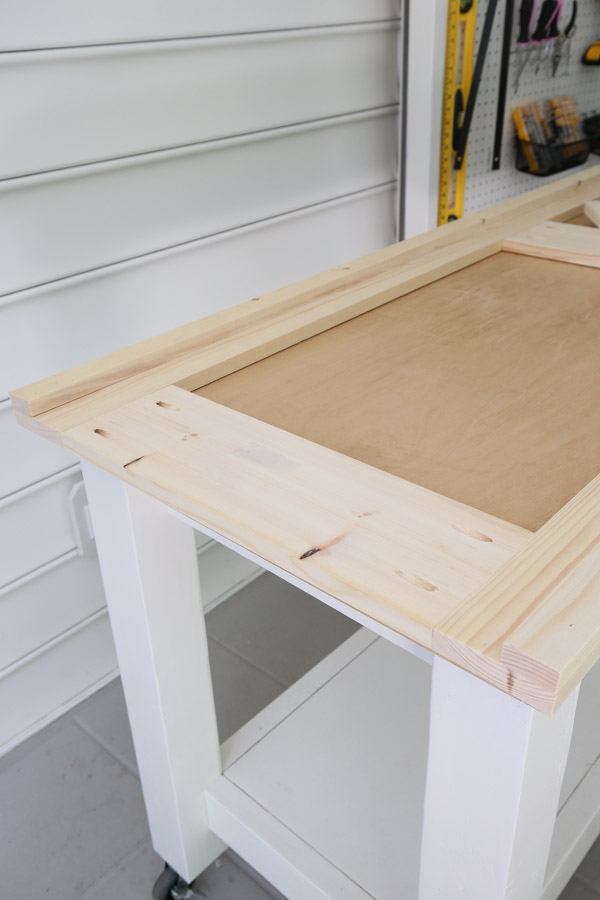
Repeat the above steps for second barn door frame opening, with the angles going the flip side direction. So, once complete, the back of your DIY barn door should look similar to this:
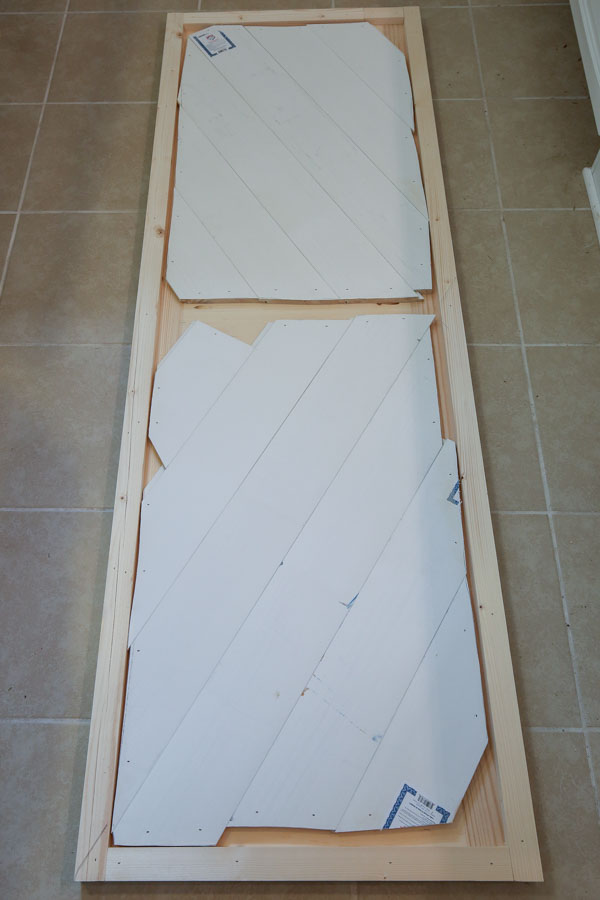
Ok, now it’s time to do the opposite door, the right door! Repeat all of the above steps, except this time you want the angles coming out of middle left corner.
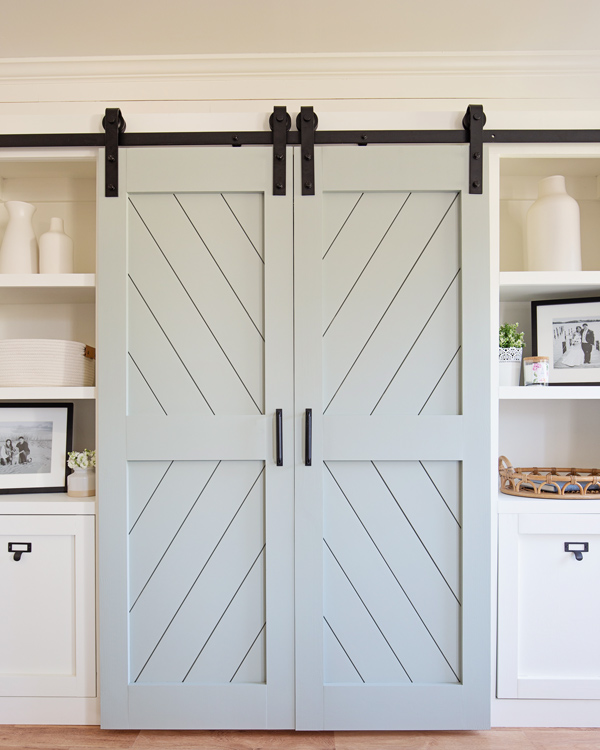
Once complete, flip your doors over and check out those awesome angles!

How to cover the back of the double sliding barn doors if needed:
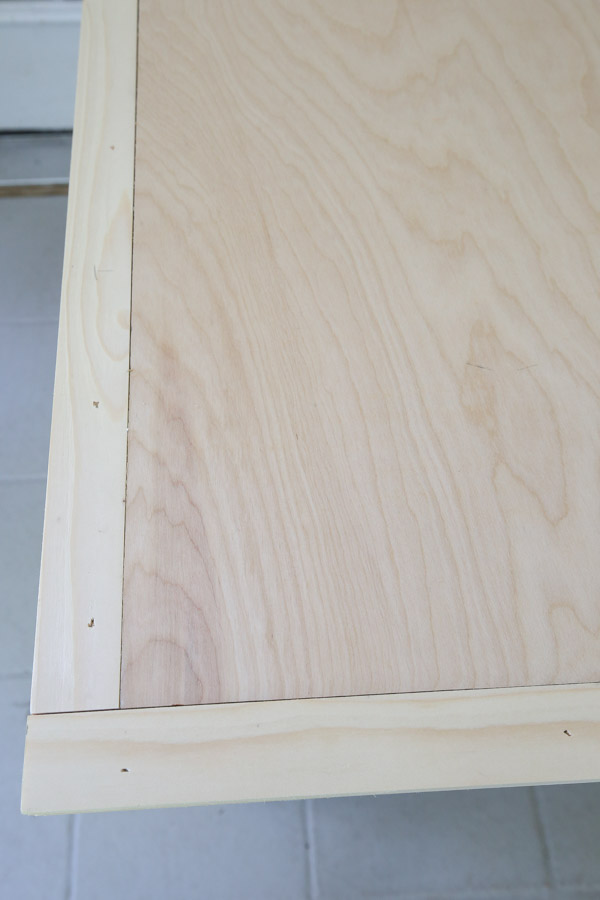
If you are going to use these barn doors on a wall or somewhere where the back of the door will be visible, I would hide the shiplap board angle cuts with a piece of 1/4″ plywood cut to the size of the door less the 1×2 frame on the back that’s along the edges.
So, for example, my door is 71.5″ tall x 24″ wide. So, I would cut a piece of plywood that is 68.5″ tall x 21″ wide and install it on the back of the door over the shiplap boards with brad nails and a brad nailer.
The shiplap boards are about 1/2″ thick and the 1×2 boards on the back that frame out the door are 3/4″ thick, so the 1/4″ plywood will sit level with the 1×2 boards. Then, you still have a clean edge along the sides and a covered door back!
5. Prime, paint, and install hardware for DIY double barn doors
Now it’s time for the finishing touches! Prime the raw wood on the doors, the shiplap boards are pre-primed so they don’t need primer.
Then, paint the doors. We used Oyster Bay in eggshell by Sherwin Williams. I am in love with this paint color, I think it’s so beautiful! Also, we used White Dove by Benjamin Moore for the white paint on the cabinet part.
See my how to paint shiplap tutorial for more details on painting shiplap!
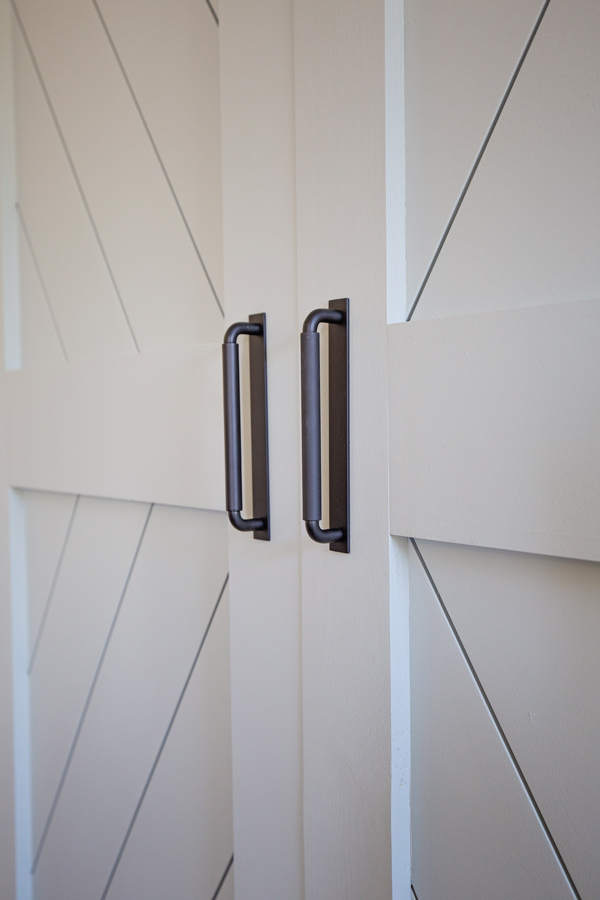
Finally, install your barn door handles (I splurged on these gorgeous handles in the 6″ size) and install your sliding double barn door hardware.
How to create a DIY barn door floor guide:
Note, because the double sliding barn doors aren’t attached to a floor track, they will lean in at the bottom. To fix this problem and to help them slide easily, we attached two small blocks of wood (a 1×2 cut to 1″ wide) wrapped with felt at the bottom of each door.
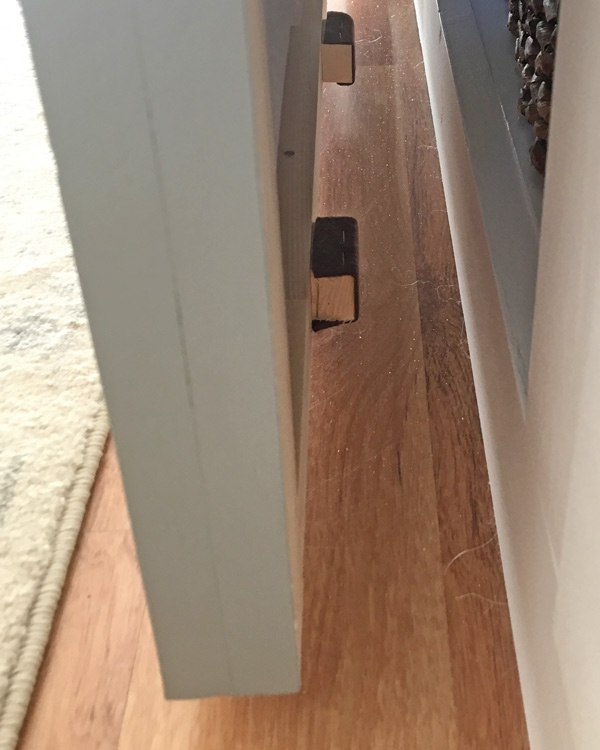
We used a staple gun to secure the felt on the blocks and brad nailer to attach it to the doors. It slides super smooth now!
That was the last step! And your all finished! Enjoy your DIY double barn doors!!

How much does it cost to install a double barn door?
One of the most common questions I’ve received about these doors is how much does it cost to install and build these double barn doors? If you are DIYing both, the installation is just the cost of the sliding double barn door hardware, which ranges from about $75 – $100, depending on the size of the hardware.
For the cost of the doors, the lumber cost me about $100 and the quart of paint was $15. I already had the primer and other supplies on hand. So, a total of about $115 for the doors, plus the barn door handle, which can vary depending on what you use. This is a pretty cheap DIY barn door considering the custom look that you get!
The whole project, for both the doors and the entertainment center build, cost around $600 including the paint, hardware, and lumber.
Note, lumber prices can fluctuate based on location and other factors.
Overall, I really love how this barn door entertainment center DIY turned out! It looks amazing in our living room and has added some much needed extra storage, so it was totally worth it! I love that it’s basically like custom built ins except totally removable!
What do you think?! I think the DIY double barn doors totally elevate it and add that wow factor!
Also, if you are interested in doing a faux barn door look to an already existing door, make sure to check out my DIY faux barn door!
If you make these DIY barn doors, please share with me on social media @angelamariemade or #angelamariemade! *You can also share your build in our Woodworking for the Home facebook group, be sure to join!
Follow along on my latest projects and sneak peaks on Instagram, YouTube, and Facebook!
Want to save for later?! Pin it here:
Janey Adams
Wednesday 14th of December 2022
We built these barn doors for our guest room which has two separate closets with 42” doors. They look amazing!! Thank you for your inspiration!
Angela Marie Made
Wednesday 14th of December 2022
That sounds amazing!! So glad you found the tutorial helpful!
Melanie
Tuesday 15th of February 2022
I just wanted to say a huge THANK YOU for this post! I built a 7'x5.5' door for my laundry room and you made it so easy to follow your directions. It turned out beautifully!
Angela Marie Made
Wednesday 16th of February 2022
You're welcome Melanie! I'm so happy to hear that!
Deepa
Sunday 14th of March 2021
Hi Angela, This is a great piece. I am planning to use your idea for my media room. You said the width of the door is 24 inches. But in all your measurements, you have used 25 inches ( 21+ 2 + 2, 17+ 4+ 4) . Is there a reason why to have added an inch? Thanks.
Angela Marie Made
Monday 15th of March 2021
Hi Deepa, the 1 x 2's and 1 x 4's are actual width of 1.5" and 3.5" respectively so it ends up being 24" wide.
Jena Bontrager
Tuesday 28th of July 2020
I absolutely LOVE this unit!! Would you mind sharing what your overall cost for materials was for this project?
Angela Marie Made
Tuesday 4th of August 2020
Thank you!The whole project cost around $600 including the paint, hardware, and lumber.
Grace
Thursday 14th of May 2020
I love what you have done! I am getting ready to get my project going! Thank you for sharing!!!
Angela Marie Made
Thursday 14th of May 2020
Thank you! I'm excited to hear that!