Learn how we built our DIY range hood cover with molding!
I love DIY custom range hood covers, they really make a statement in a kitchen.
A few years ago we built a DIY range hood cover for our budget kitchen makeover in our previous home and I knew I needed to build one for our current home kitchen makeover!
For our current kitchen, I wanted a similar look and kitchen hood design to the previous range hood cover, but I wanted to add pretty molding along the base and paint the entire cover whereas last time, I did a combo of paint and stained wood trim for our range hood cover.
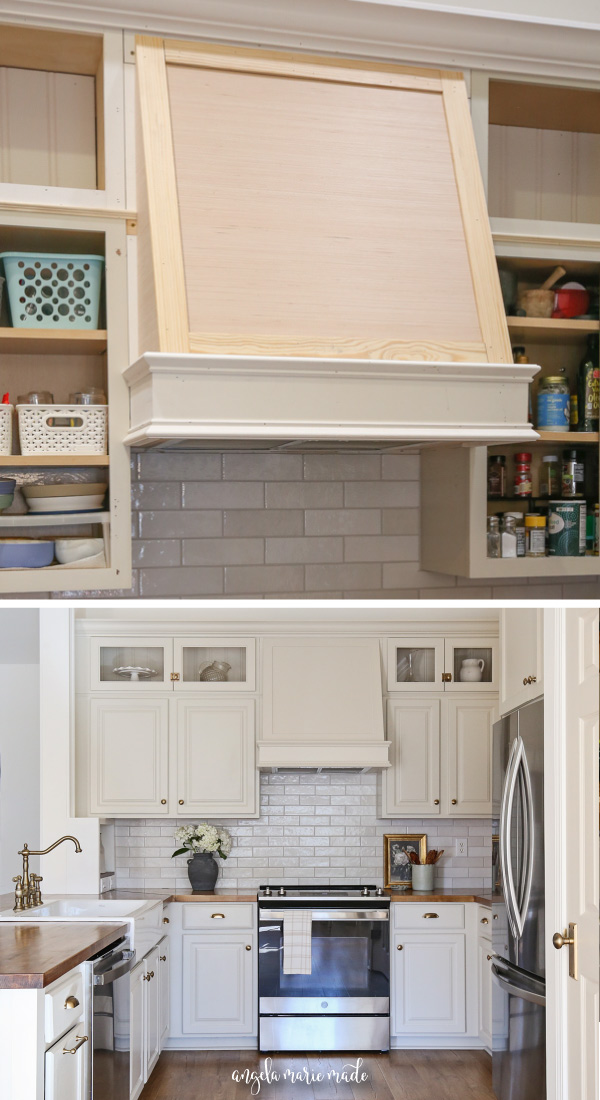
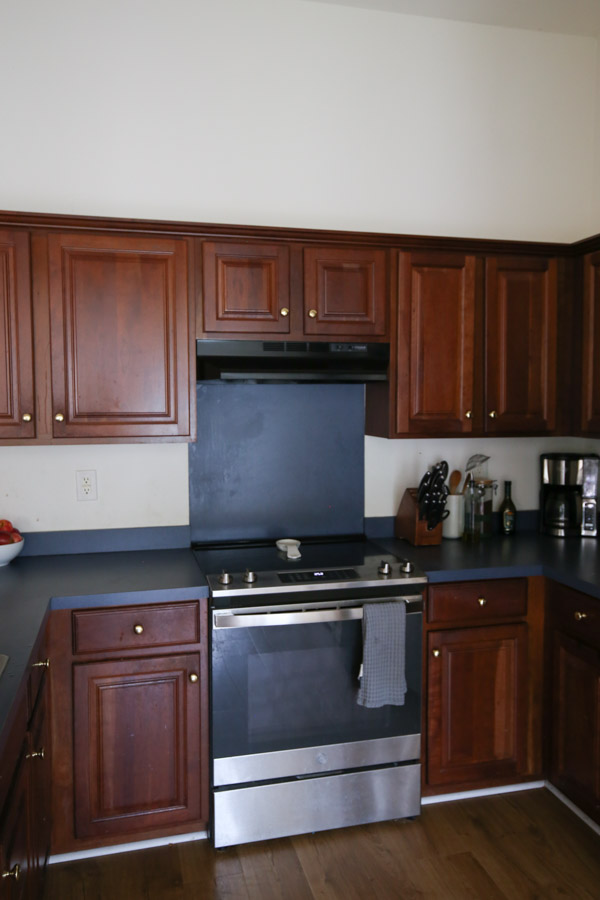
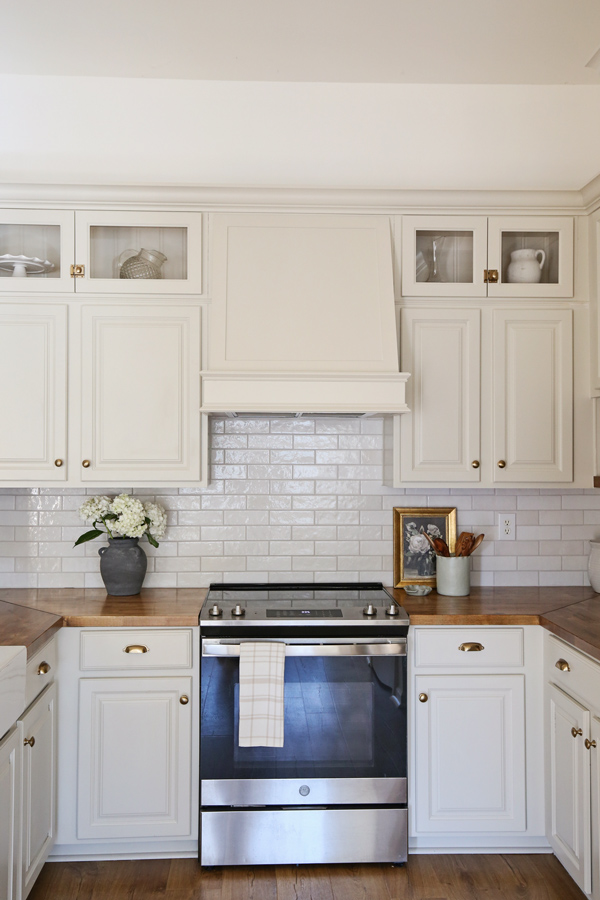
Here is our BEFORE & AFTER!
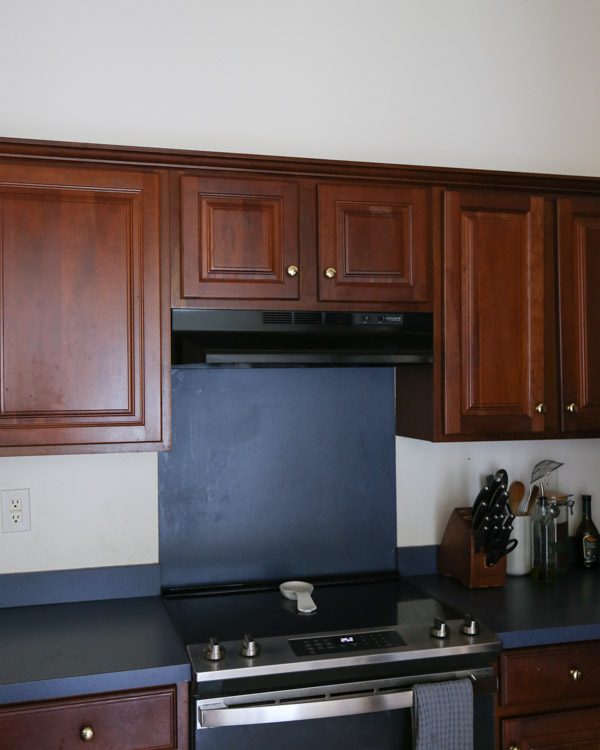
Such a huge difference and custom look! And the tile backsplash is also a lovely replacement over the blue laminate backsplash!
I received several questions about how we built this range hood cover. And it’s very similar to our last DIY range hood cover tutorial. So, I am not going to repeat the entire tutorial, make sure to check out that tutorial for a step by step tutorial!
However, I will provide an overview of the build process and what we did differently for this range hood cover! I also have the material list included below as well!
Note, this post contains some affiliate links. I may earn a commission if you shop those links (at no cost to you). Thank you for supporting my small business. For more info see my disclosures here.
Range Hood Used
The key to this DIY range hood cover is to use a range hood with buttons on the underneath side! I replaced our old range hood with this white, new range hood with buttons on the bottom!
It’s the same range hood I used in our previous home and it comes in multiple color/size options including stainless steel. I also love the quality of it too!
How to Build a DIY Range Hood Cover with Molding:
Materials
- Base Cap Molding
- 1×6 @ 8ft
- 8ft x 4ft @ 1/4″ thick plywood (we used this plywood)
- 1×2 @ 8ft**
- 2×2 @ 8ft **
- 2 1/4″ x 8ft lattice board @ 1/4″ thick
- 1×4 @ 3/8″ thick boards(optional)
- 1″ and 1 1/4″ brad nails
- 2 1/2″ wood screws
- 2 1/2″ Kreg screws
- Paintable Caulk
- Lightweight Spackle or Wood filler
- Paint
- Range Hood Insert (I used this range hood with bottom buttons)
Tools
- Brad nailer
- Miter saw
- Circular Saw or Table saw
- Kreg Jig
- Measuring tape
- Clamps
- Level
**Note, the amount of boards you will need depends on the measurement of your range hood size.**
1. Install a new range hood
As explained above, we replaced our old range hood with this new range hood with buttons on the bottom! Although our old range hood was 30″ we went with the 24″ size to allow space to build the range hood cover, just like our last DIY range hood cover.
Note, we had to attach a 2×4 to the wall studs to secure the range hood since there were no upper cabinets to attach it too. We moved our upper cabinets around to create stacked kitchen cabinets.

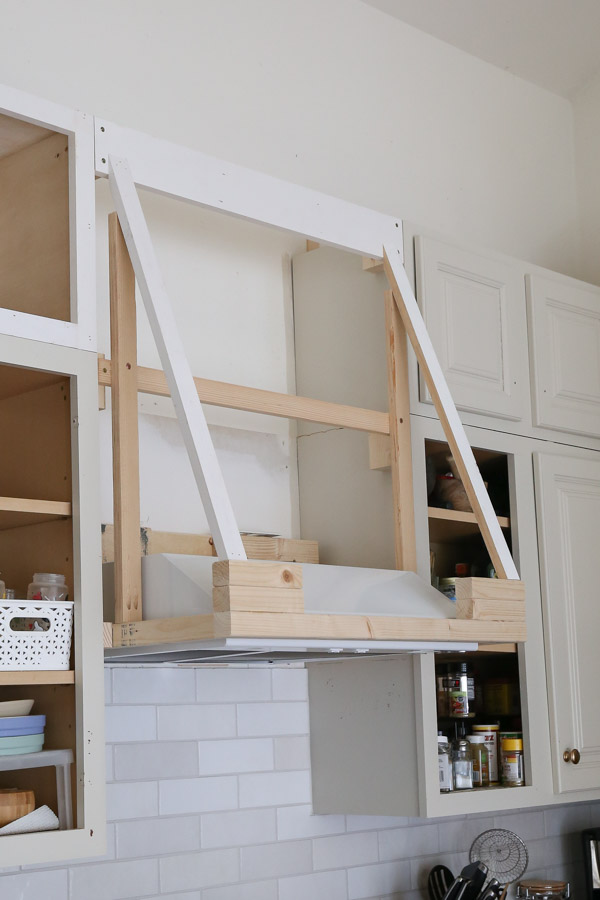
2. Build the frame of the range hood cover
For this step, make sure to refer to my previous DIY range hood cover tutorial for specific details. We followed the same steps, but here is where we had to do things differently…
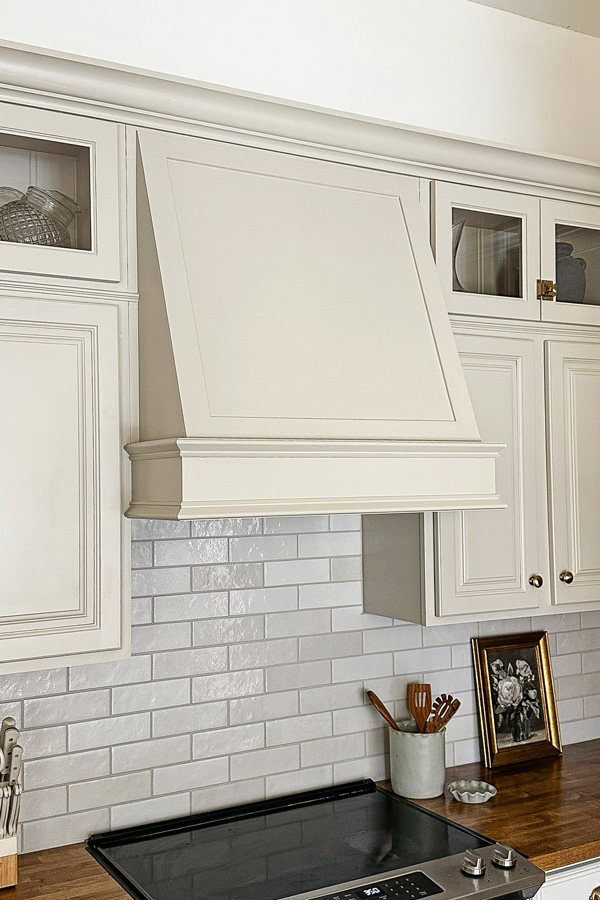
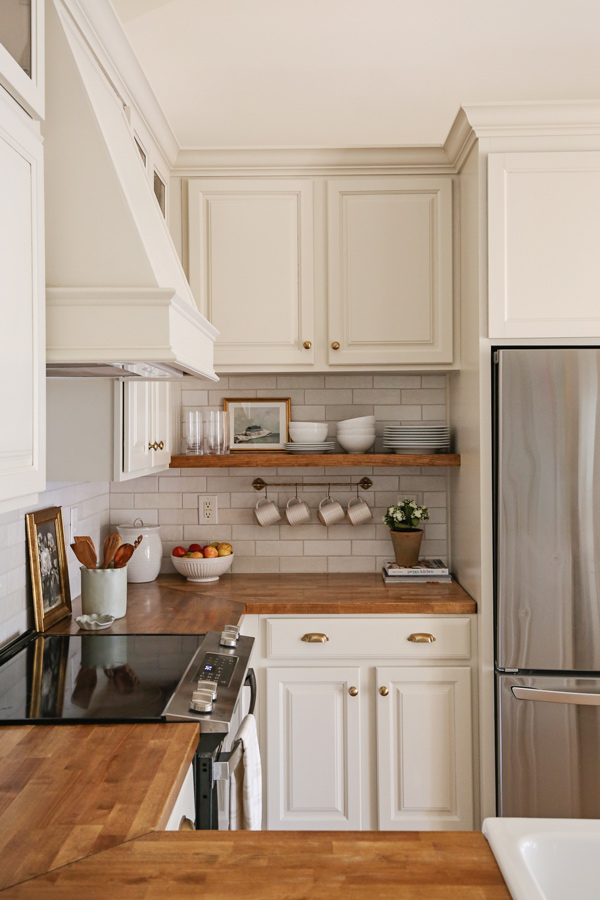
In our last home, we had frameless cabinets on each side of the range hood, but in this home we have face frame cabinets. So, we had to ensure our cabinet doors didn’t overlap the trim where the base cap molding was being installed (you can see this in the below photo).
Also, before we had an upper cabinet above the range hood to attach everything to, but this time it was all open above it and we had upper cabinets on the sides rather than an enclosed space above the cabinets.
So, this time we had to add additional support boards with 1x2s and 2×4 blocks secured to the side cabinets. We also did this along the top with a 1×4 board attached to our top tier stacked cabinets using the 2×4 blocks again.
I would have made this frame build better looking back due to these differences, but we just figured it out as we went!
📩 Want to Save This?
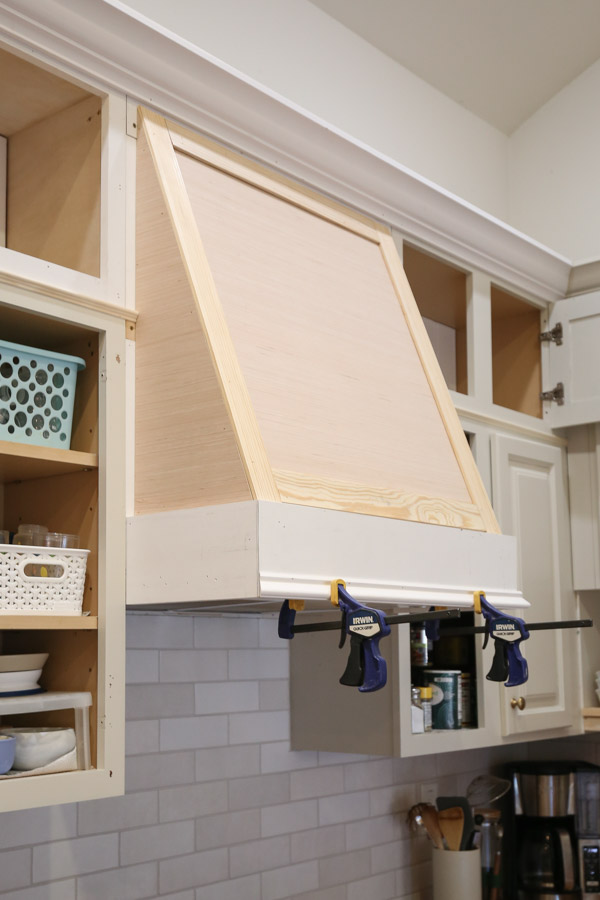
3. Attach the plywood and trim to the DIY range hood cover
Cut the 1/4″ plywood to size for the front cover and the sides of the hood cover. Then, secure with 1″ brad nails and a brad nailer to the 1x2s to create the front of the hood cover.
Then, add the 1×6 board around the base of the frame and the lattice boards on top of the front panel board. Again check out my previous DIY range hood cover tutorial for more how to details!
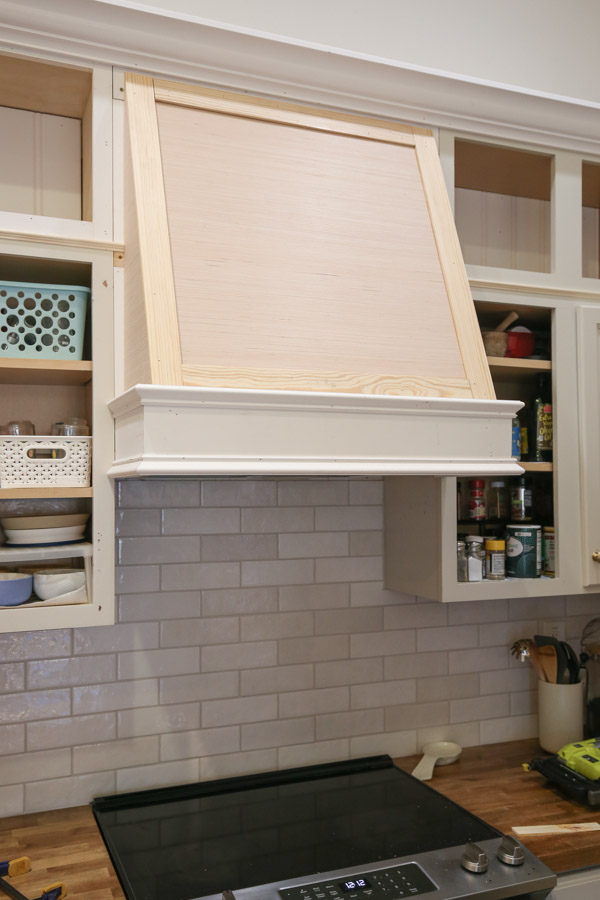
4. Install the molding to the range hood cover base
Now for the fun part, adding the molding!
Cut the Base Cap Molding to size for the front and side pieces with a 45 degree mitered corners.
Then, attach along the top and bottom of the 1×6 board on your range hood cover frame using brad nails and 1″ brad nails.
5. Paint the DIY range hood cover
Caulk, fill holes with spackle/wood filler, and paint the custom hood cover.
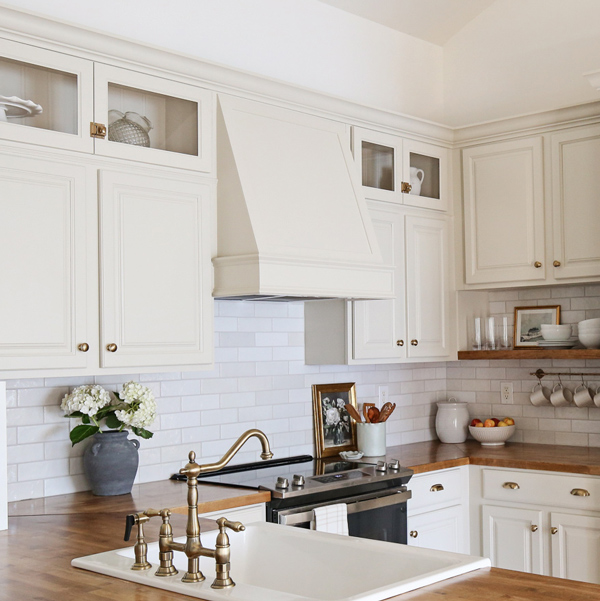
We used the same paint color as our painted kitchen cabinets, Edgecomb Grey by Benjamin Moore. We used the best paint for kitchen cabinets!
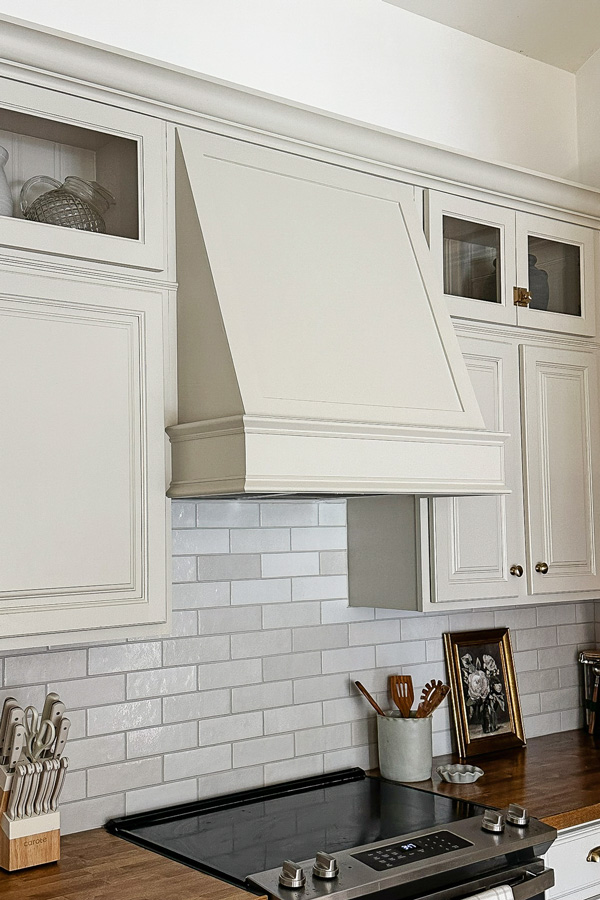
I love the molding on our DIY range hood cover, I think it really elevates the look and it was the perfect addition for our final kitchen makeover!
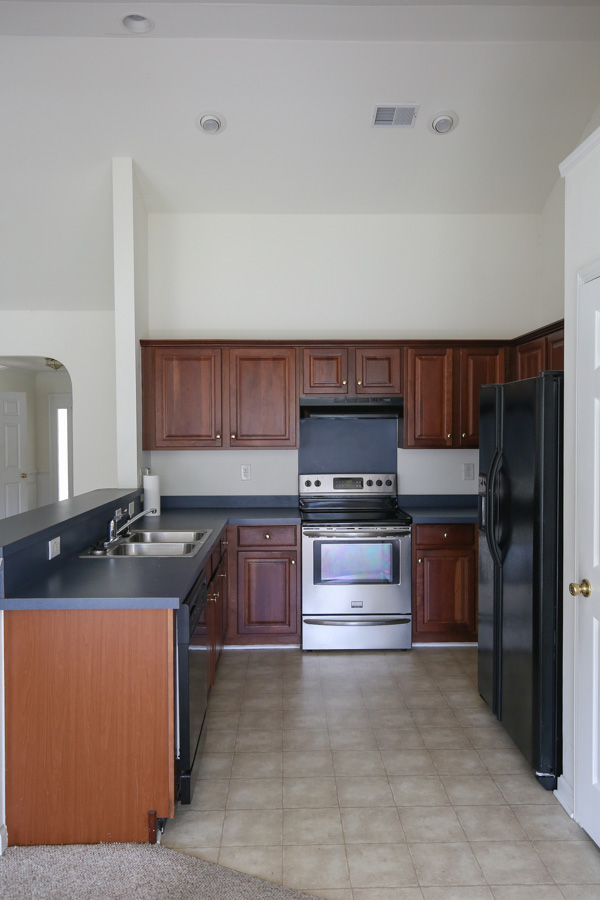
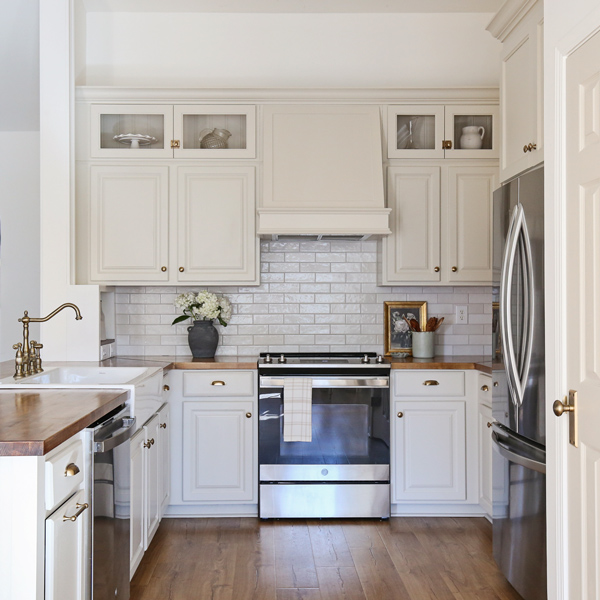
Here is another before and after!
And before and after another!
Follow along for my latest projects and sneak peaks on Instagram, YouTube, TikTok, and Facebook!