
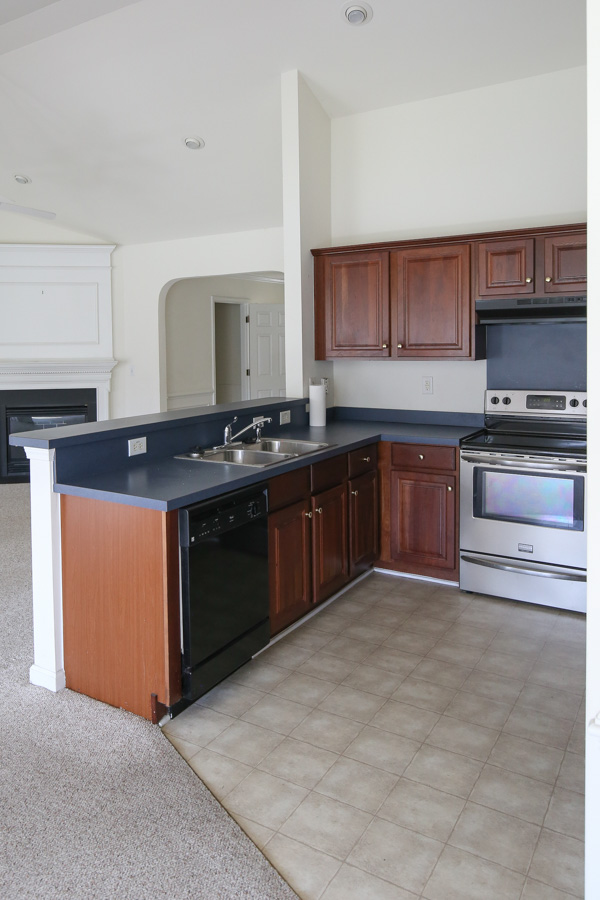
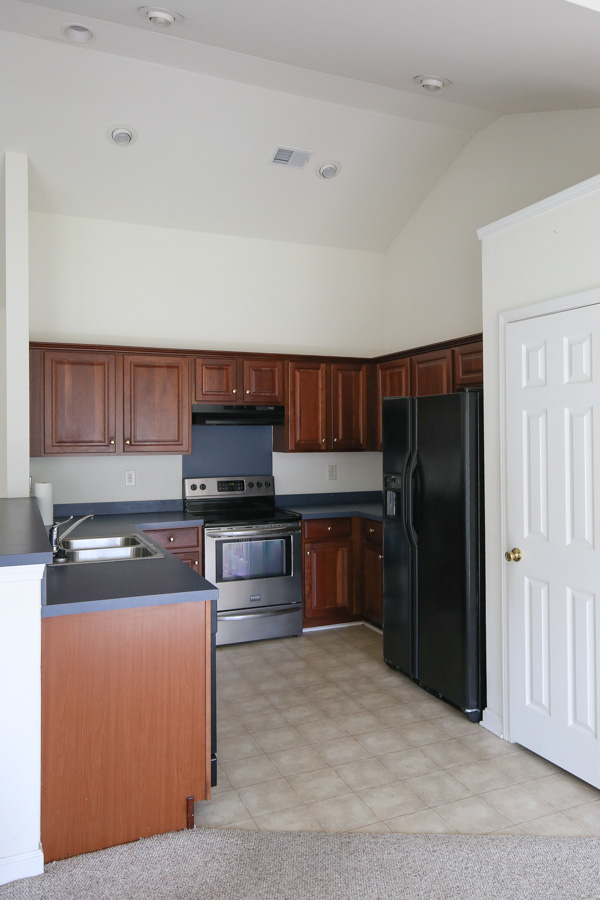
When we first moved into this house a few years ago, I knew the kitchen was going to be a big project to tackle, but very necessary due to the outdated look, extreme lack of kitchen storage space, and limited counter space.
We estimated this kitchen would take us about 3 months to renovate. But, after project delays, other work obligations, everyone getting sick, the holidays, and the loss of our sweet golden pup Chance at the end of January, this renovation took us 7 months to complete.
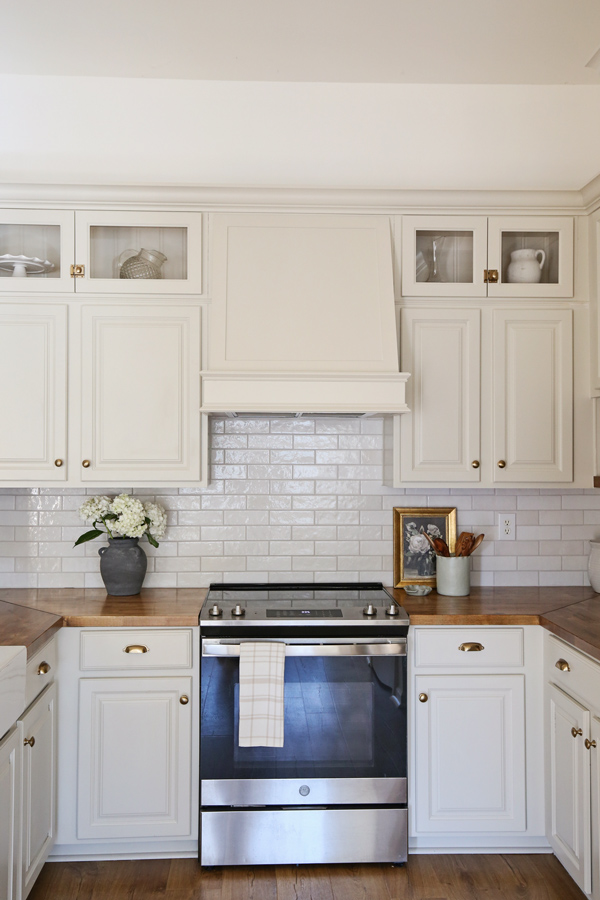
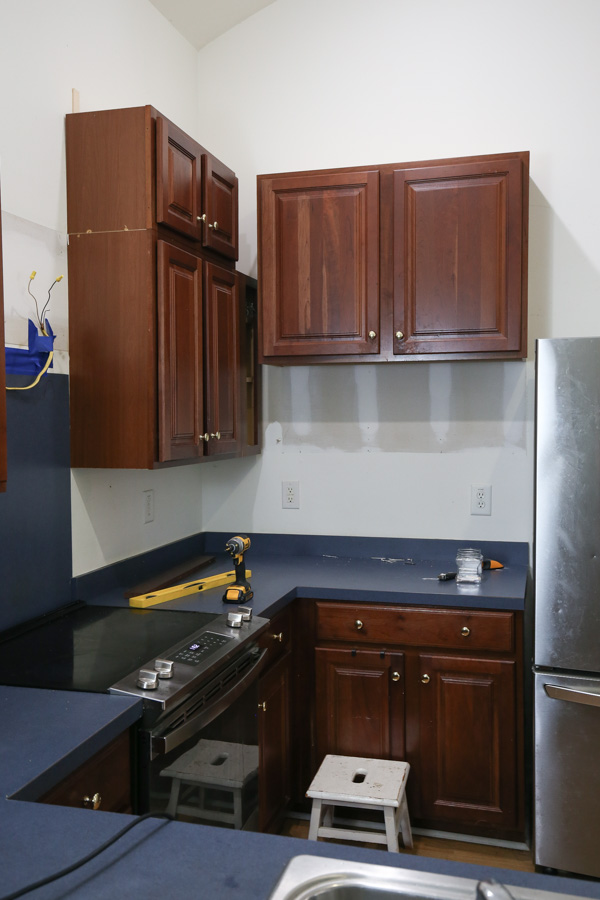
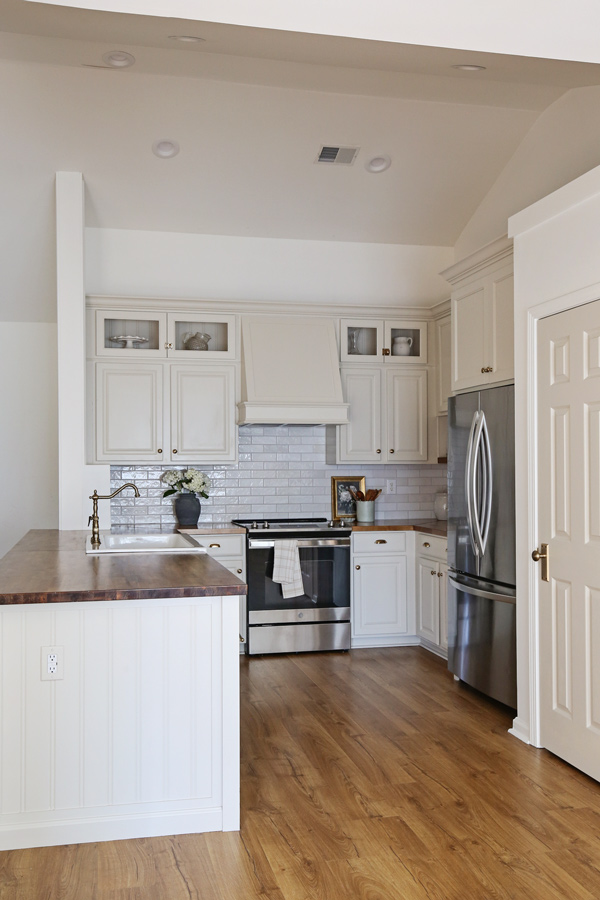
The wait and the weeks of DIY were well worth it, here is our BEFORE and AFTER!
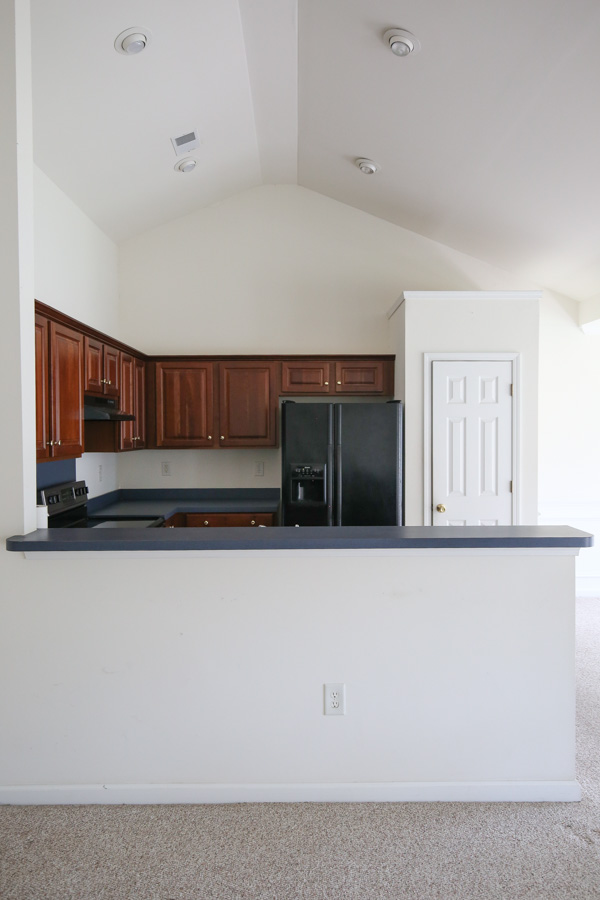
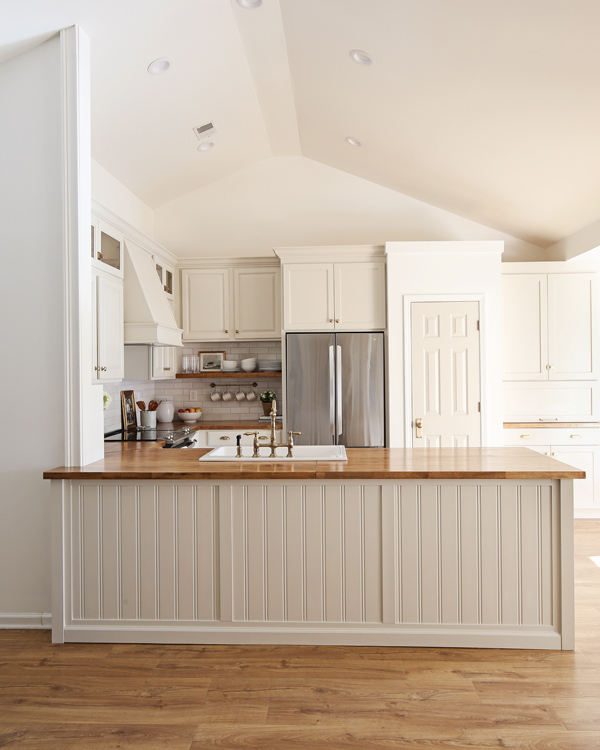
Another angle:
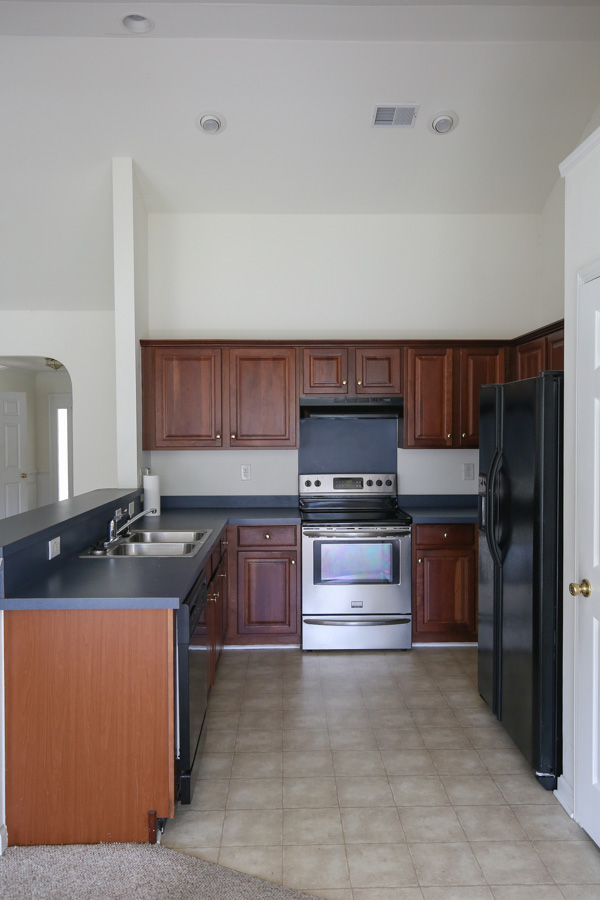
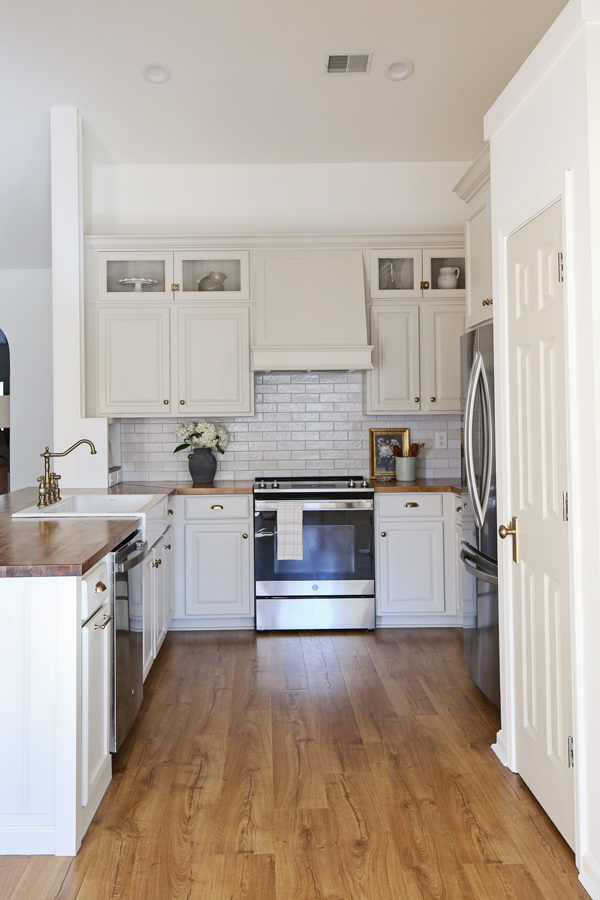
And one more:
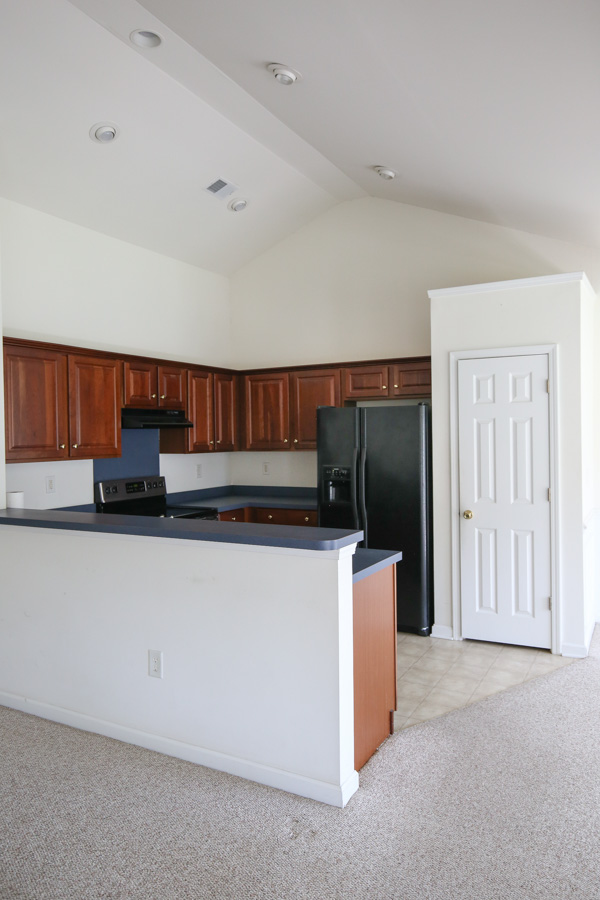
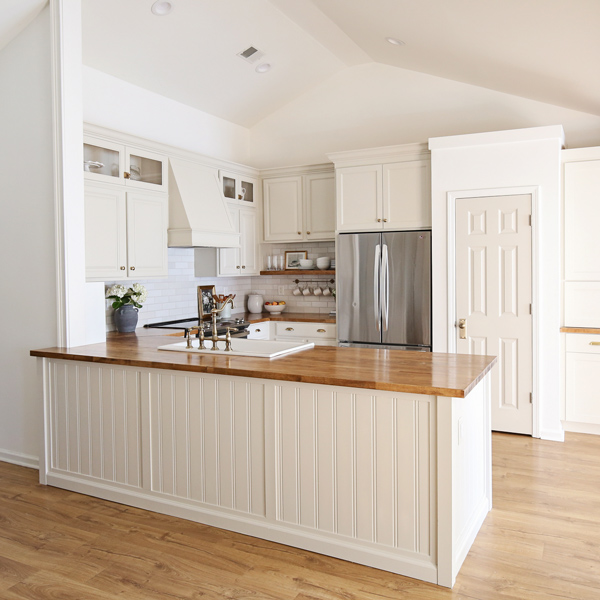
I have more before and afters at the end too!
I am quite smitten with how this kitchen makeover turned out, it's the nicest kitchen we've ever had, and certainly the most custom too!
Brandon and I DIYed the entire renovation ourselves, except for the electric which we hired out. For that, I am quite proud of ourselves!
Here are all of the details and the story of our kitchen transformation! I am also sharing the budget and how much we spent on this renovation too!
NOTE: I have a full product and project source list for everything in this bathroom makeover at the bottom of this post!
Flooring and Appliances
When we first bought the house, we did have new flooring installed throughout the house including the kitchen. And we had all of the appliances replaced as well.
Note, this post contains some affiliate links. I may earn a commission if you shop those links (at no cost to you). Thank you for supporting my small business. For more info see my disclosures here.
DIY Kitchen Built In Cabinets with an Appliance Garage
We technically started the reno the year we moved in, when we really needed more kitchen storage space. The first project we tackled was adding a DIY kitchen built in with a ton of closed cabinet storage from floor to ceiling in a nook on the other side of our pantry.
I also designed the built in to have an appliance garage so we could store away our microwave and toaster oven. I love hiding these away, but it also helps clear up precious countertop space too that we need!
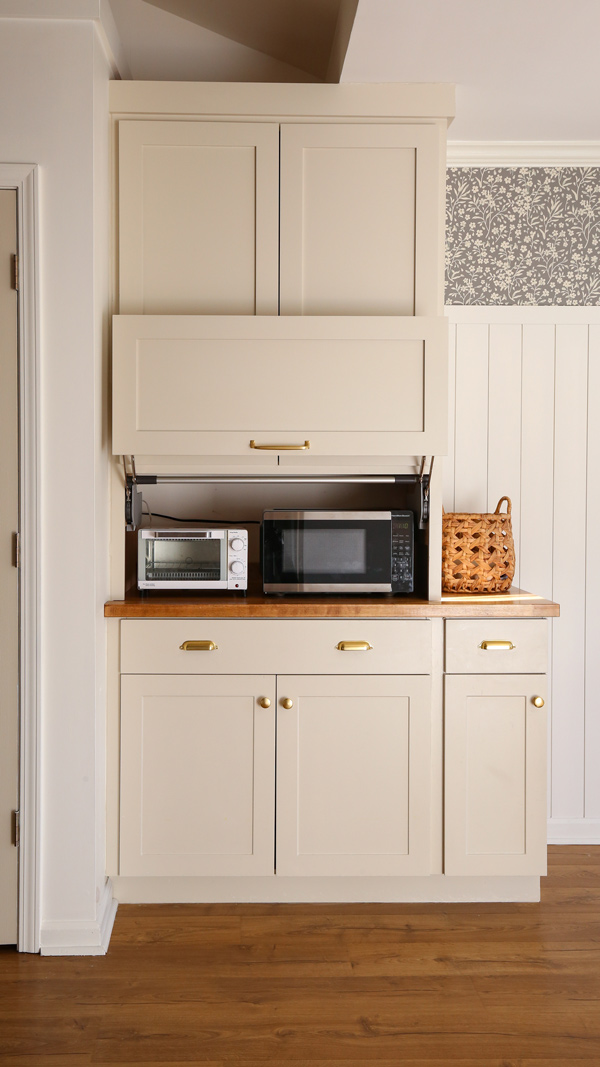
Once this project was complete, it took us a few years to finally start on the rest of the kitchen reno projects below!
Rearranging Cabinets & Refrigerator Cabinet Built In
This past summer, we started our kitchen renovation off by moving around our cabinetry. We stacked the cabinet above our range hood over the cabinet to the right of it to create a two tier, stacked cabinet.
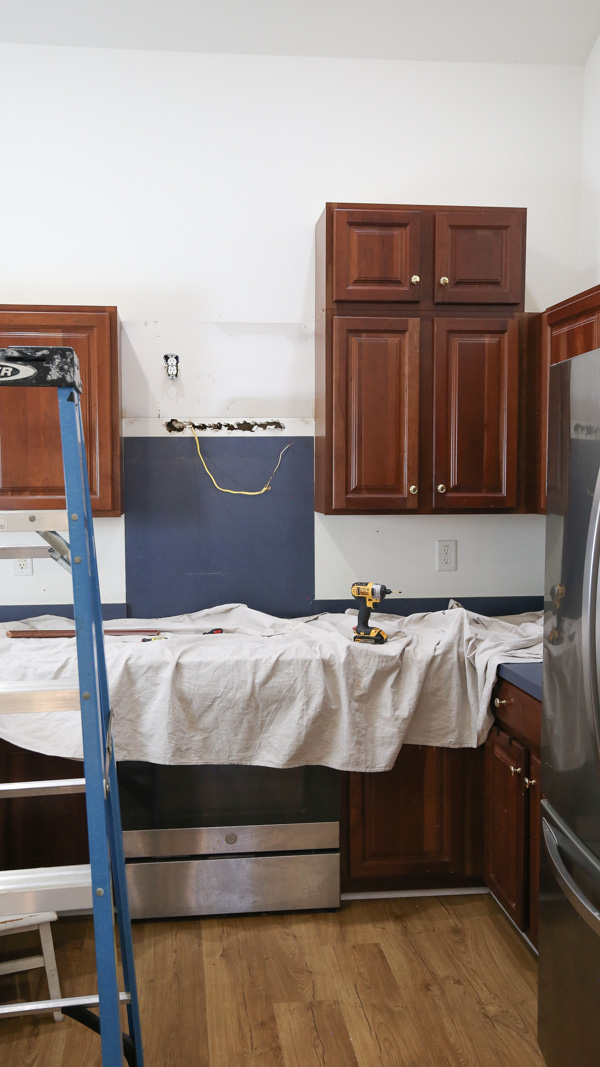
Then, we moved our cabinet next to our refrigerator up to be aligned with the top of the stacked cabinet.
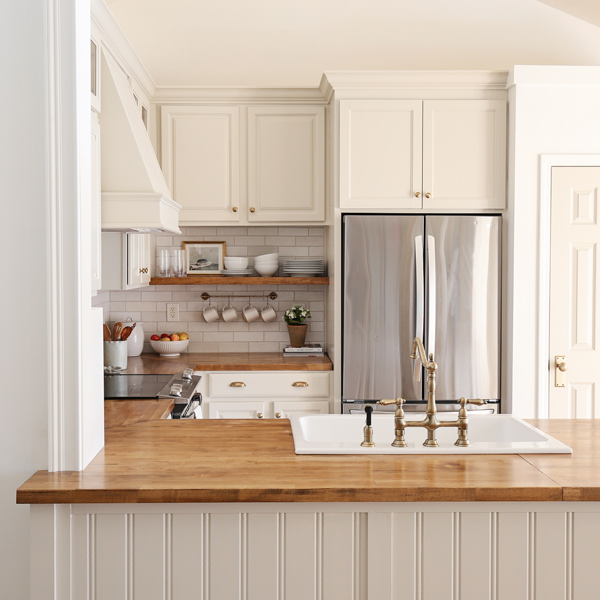
The next step was building a DIY built in refrigerator cabinet.
This made the cabinetry look more custom, hid the refrigerator better, and it tripled the amount of storage we had above our refrigerator. It also made it easier to access that space.
Painting Kitchen Cabinets & Cabinet Hardware
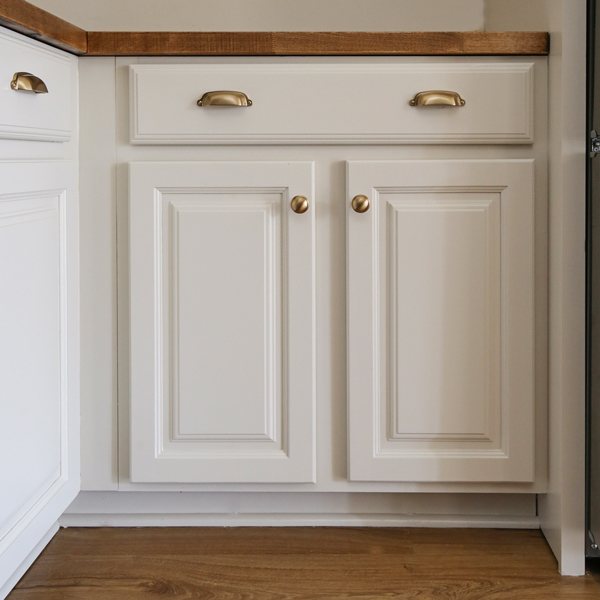
We tackled this kitchen makeover in sections. Once the built in refrigerator cabinet was completed, we painted the cabinets in Edgecomb Gray by Benjamin Moore, using the best cabinetry and trim paint!
For a tutorial on how we did this, check out my how to paint kitchen cabinets tutorial. We followed this same process, except we also lightly hand sanded after priming the cabinets.
The finishing touch after painting the cabinets, was installing beautiful new cabinet hardware! Check out my guide for how to choose kitchen cabinet hardware for more details.
Butcher Block Countertops
At this point we also installed the first set of new kitchen countertops! We used this birch butcher block. For our wider peninsula, we used this island size butcher block.
You may be wondering why butcher block...well of course I would have loved to do marble or quartz. But, this house isn't our long term home, we plan to move in the near future. And our budget was limited.
Those two factors led me to chose a very budget friendly countertop. I can't stand laminate. And I just love the warmth and character that butcher block provides. Plus, I knew we could install it ourselves and save a lot of money!
I plan to share a post soon on how we finished our butcher block countertops. Honestly, there are a lot more things I can share about butcher block countertops, let me know if you have any questions in the comments below!
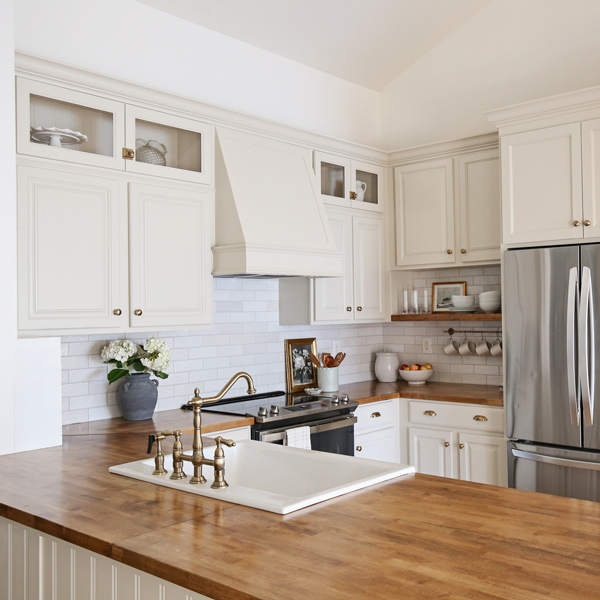
Removing a Two Tiered Kitchen Island Countertop & Adding Space
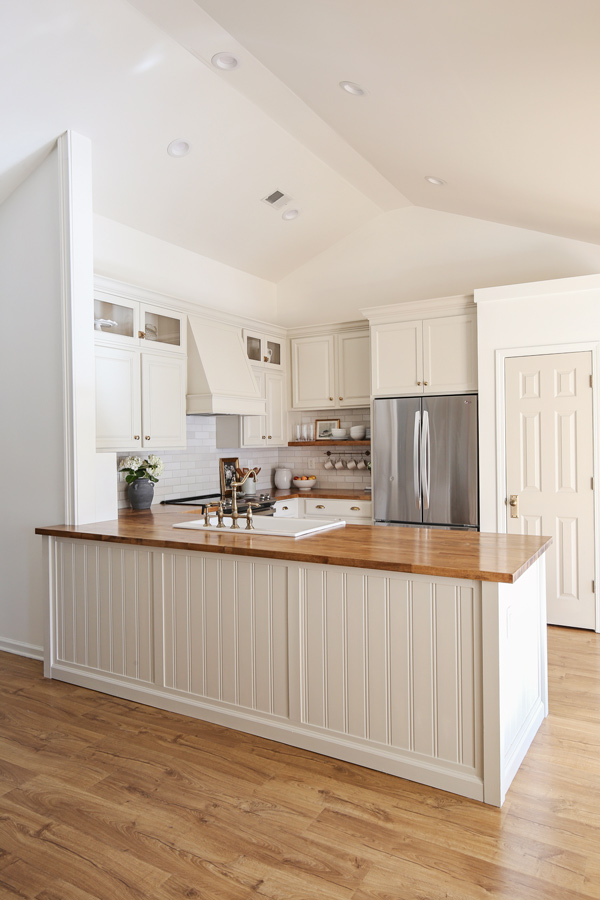
One of the most dramatic changes we made to our kitchen was removing our two tiered kitchen countertop.
It gave us so much more counter space and I love having a flat, one level countertop. Best decision ever! Check out my post on how we removed the two tiered countertop and all of the details.
We trimmed the peninsula out with a wide beadboard and trim. I LOVE how it looks, it adds a ton of charm and character!
As part of this kitchen peninsula project, we added a 15 inch base cabinet at the end.
By removing the two tiered countertop, installing a new base cabinet, and new island size countertops, we added a lot more needed storage and countertop space!
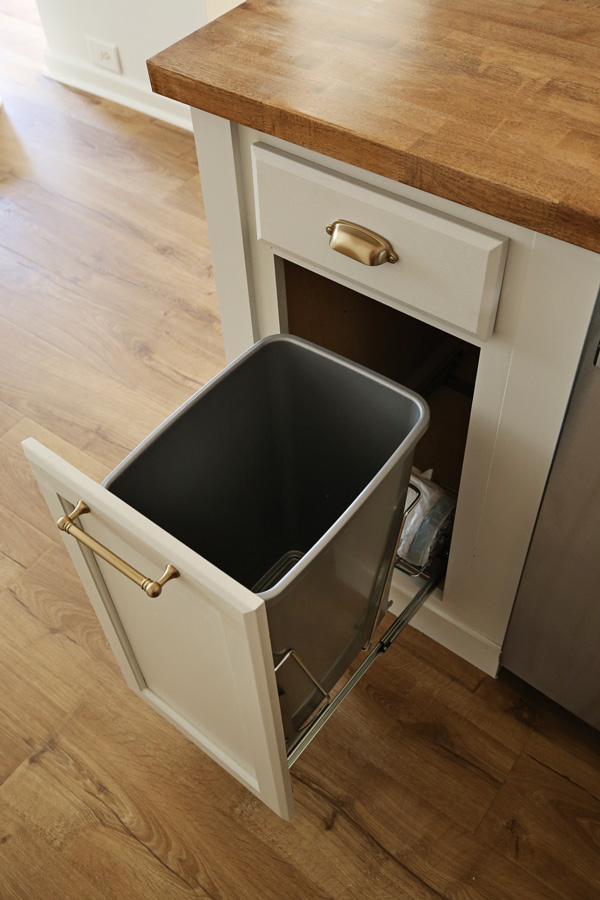
Trash Can Cabinet Pull Out
In our newly installed base cabinet, we installed a pull out trash can cabinet, another feature I love!
Farmhouse sink and Vintage Look Faucet
We replaced our outdated stainless steel sink with this gorgeous new farmhouse sink and brass, vintage look faucet, both I've always dreamed of having and I love them so much!
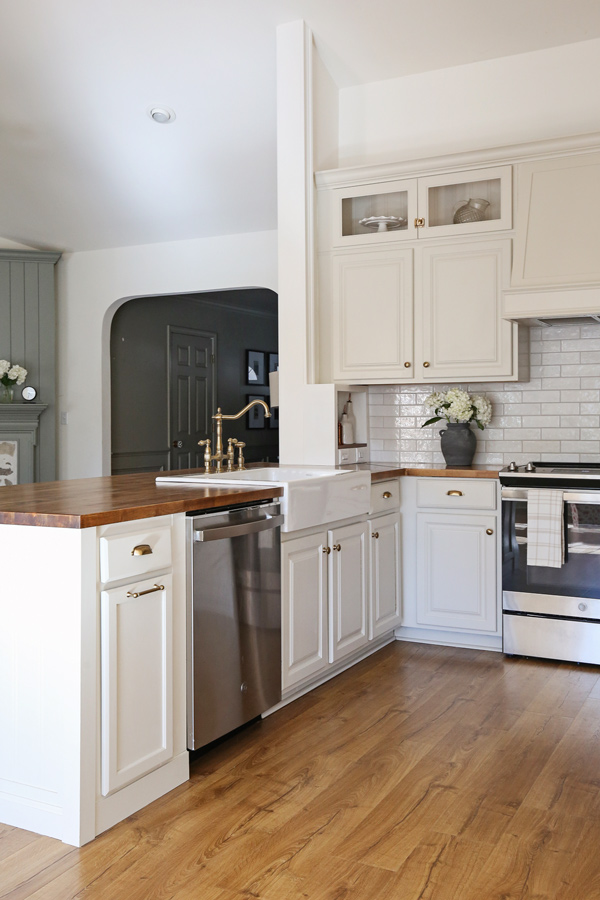
Backsplash Tile
For the backsplash, we used this handcrafted, subway tile. I love the shimmer and light it adds to our kitchen that's a bit dark.
I have more details coming in a future post on the installation of this and a cool product we used to make it easier!
📩 Want to Save This?
Adding Stacked Kitchen Wall Cabinets with Glass
By rearranging our existing cabinetry, we were able to create upper, stacked cabinets.
We did have to build one additional stacked cabinet from scratch on the upper left side. See my tutorial on building wall cabinets here for how we did this!
I tried to add extra charm to these by adding leftover beadboard to the back of them and glass doors with brass cabinet latches that matched our other hardware.
To save time, we ordered the doors for them from the Cabinet Door Store online. The quality was great!
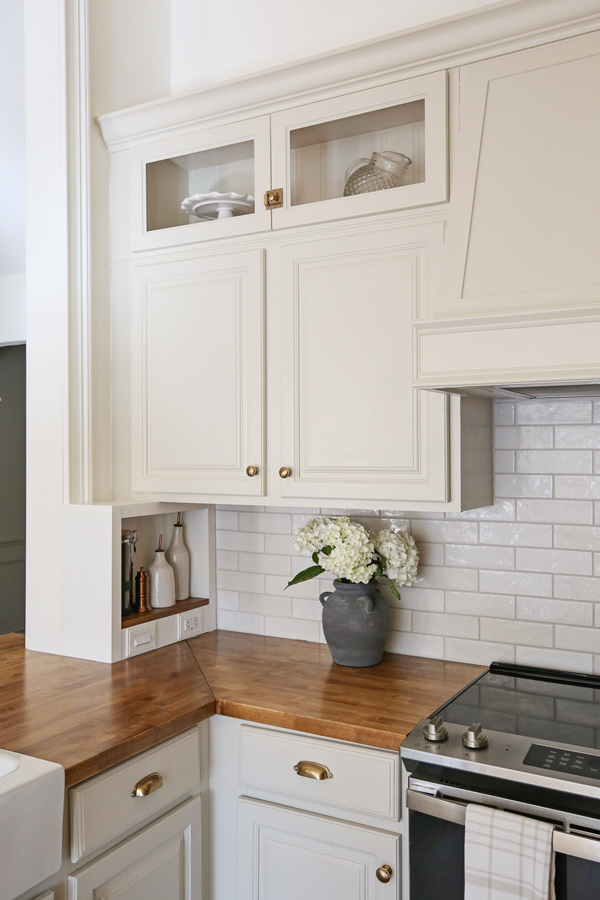
We actually had to use plexiglass that we cut ourselves for the "glass" doors because our local home improvement store no longer makes custom glass cuts. I may switch the plexiglass out in the future with glass, but it's hard to tell the difference visually I think!
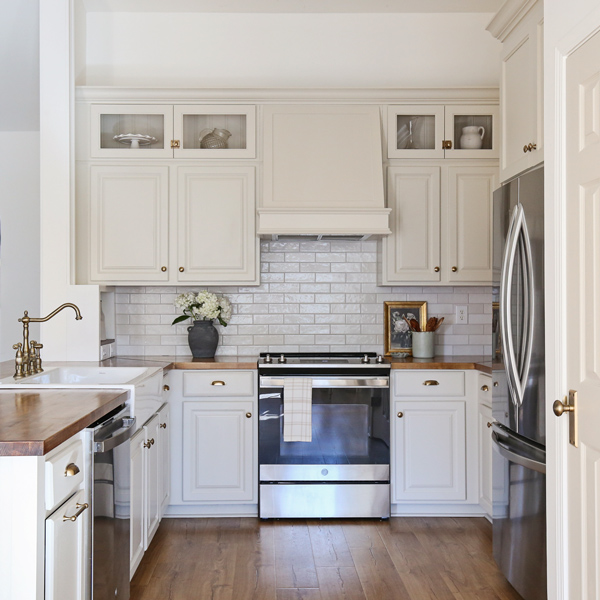
These stacked cabinets make the kitchen look so custom, add additional storage space, and are great for displaying my pretty dishware.
I love how they really maximize the space from our 12 foot ceilings too. Our kitchen no longer looks out of scale for the ceiling height!
Range Hood Cover
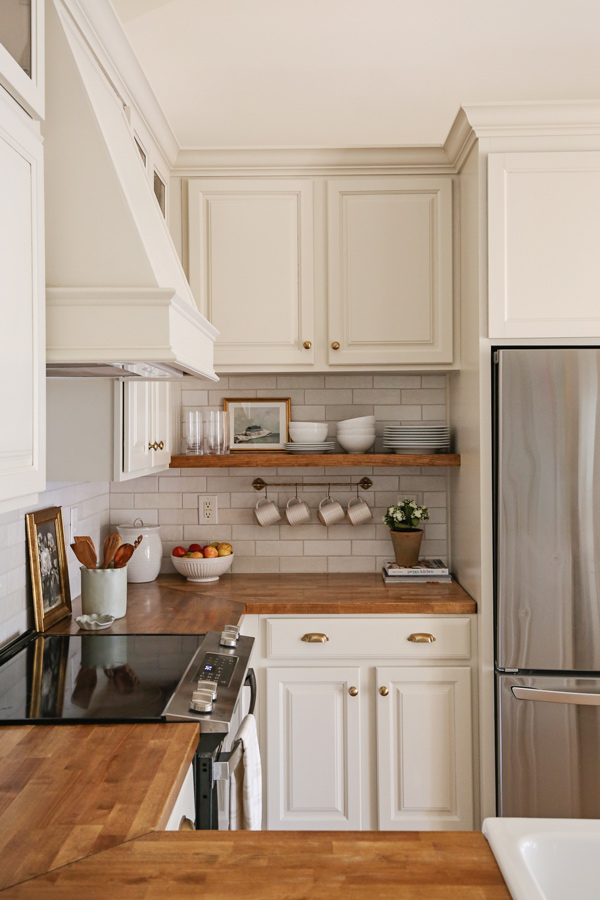
We built a very similar range hood cover to the DIY range hood cover in our last home. Except, we added trim and painted this one entirely.
More DIY details coming soon on this project! But, it was the perfect custom, focal feature on this side of the kitchen.
Moldings, Trim, & Casing
We added new trim on our pantry door wall, crown molding along the upper cabinetry, and beautiful casing on our side wall opening. These little details really helped to add that custom, character look!
Kitchen Floating Shelf
I missed our kitchen floating shelves from our previous DIY kitchen makeover in our last home so much that I was determined to make one happen in this kitchen even though there was no good spot at first.
It's one of the reasons I came up with the idea to stack cabinets! It allowed me to move our cabinet next to the fridge up to make room for this lovely floating shelf!
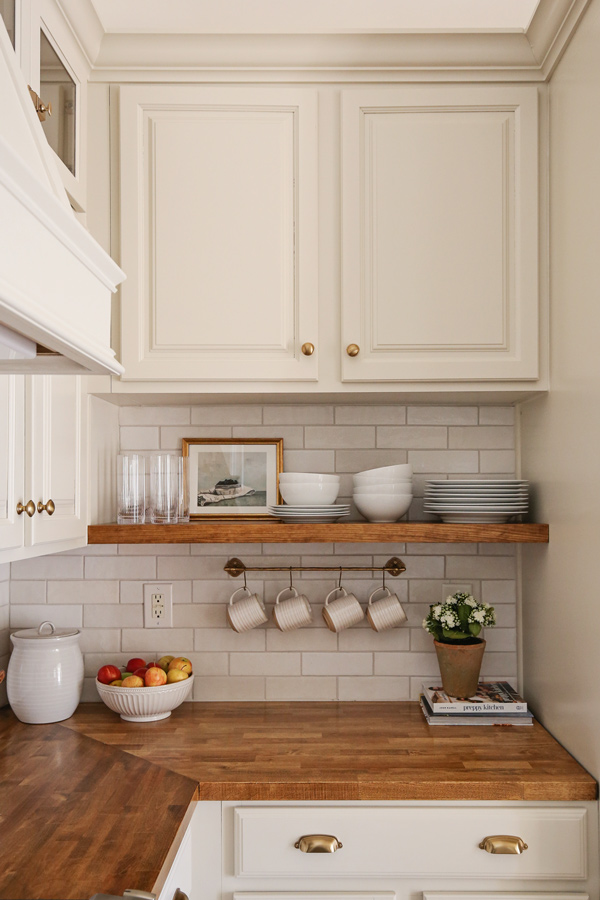
A tutorial is coming soon on it! But, it's another feature I love for both the look and functionality!
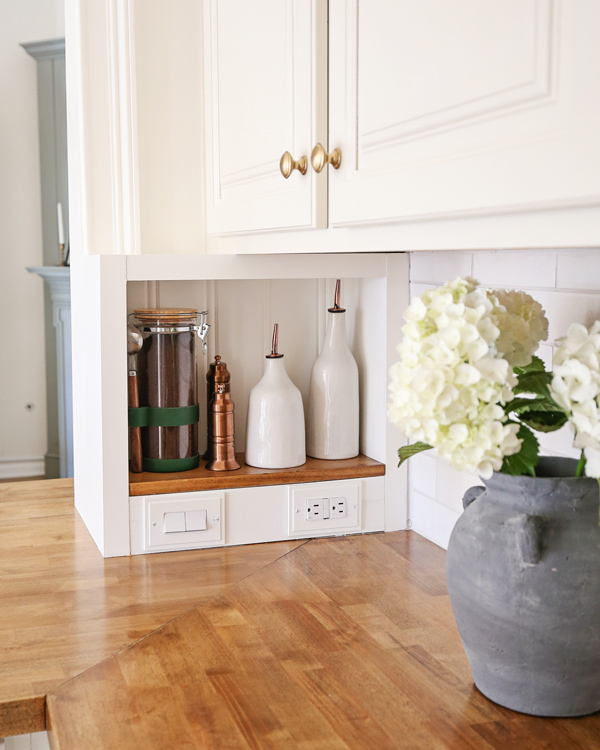
Built In Alcove Storage Box on Countertop
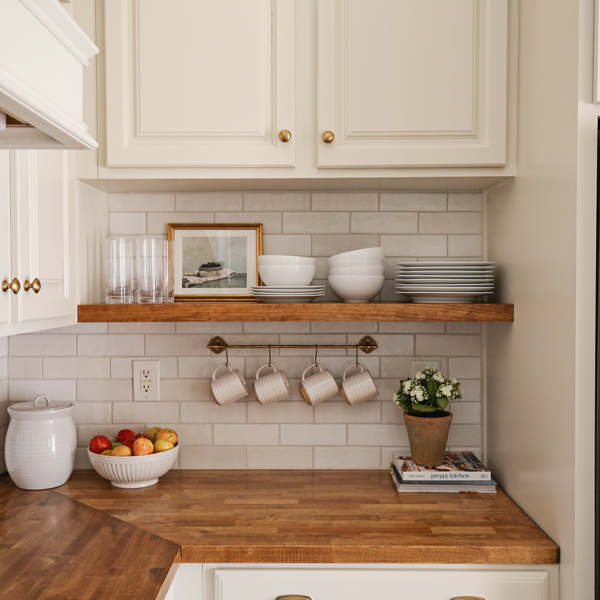
When we removed our two tiered island countertop, we had quite a bit of electric to move. When trying to determine where to put it so that it wouldn't be visible, I came up with the idea to hide it in a built in box in the corner of our kitchen.
Not only did this hide the electric, but it provided an alcove area to store commonly used kitchen items we tend to leave out on the countertop like olive oil and vinegar.
Pantry Door Refresh
With all of our kitchen renovations our pantry door needed a little makeover too! Check out the details of our pantry door refresh here! This brass doorknob was the perfect detail for it!
Flat Recessed LED Lights
Our ceiling needed an update too. I couldn't stand the look of our bulging, outdated recessed lights and the bright blue light color they cast.
We replaced them with these flat, recessed LED lights that have 5 light color settings! I went with a nice warm 3000K! They are super easy to install!
Painting the Walls
I know it's hard to tell, but we also painted a fresh coat of white paint on all of the kitchen walls! We used Simply white by Benjamin Moore in eggshell and for the trim we used the same color in satin.
Charming & Functional Details
After all of the designing, DIY, and renovations, it was finally time to start adding in all of those little decor details and accessories that provide beauty and function!
Honestly, I am still working on adding these details, I just ran out of time here, but I will continue to share more!
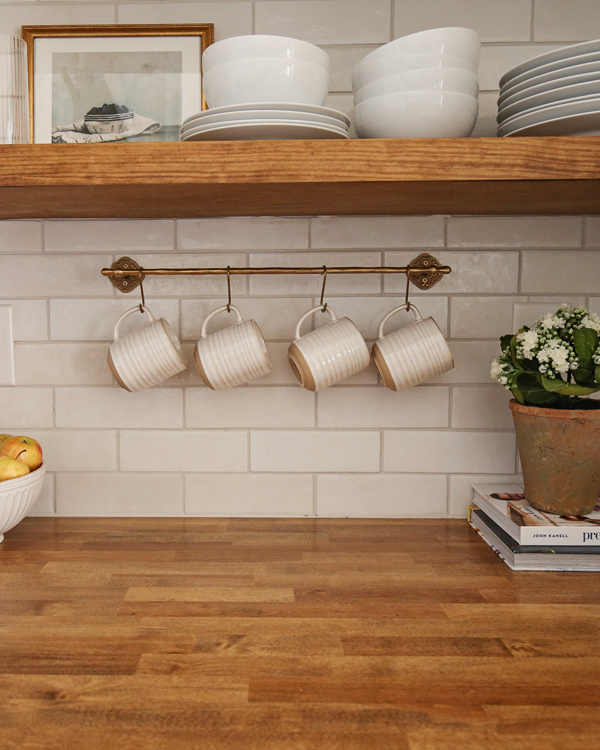
One detail we did get added was this gorgeous kitchen rail with a vintage look! I love how charming it is and it breaks up the wood of our shelf and countertop! It also is very handy for grabbing our daily mugs.
We had to drill into our new tile to install it and it was nerve wracking but totally worth it!
And on our shelf I added this beautiful berry painting from Miss Mustard Seed's Society 6 shop!
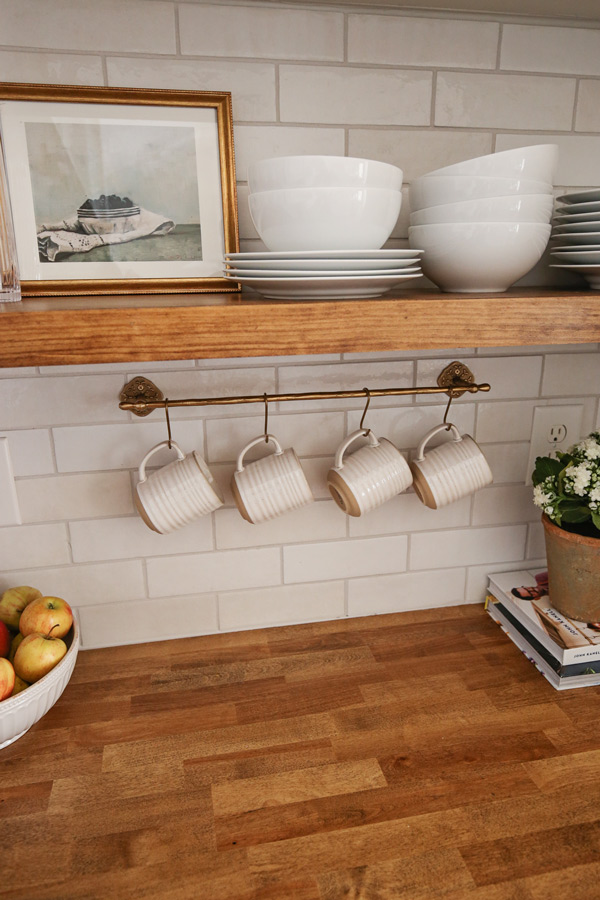
I also added a new oil and vinegar dispenser set, scalloped utensil holder and matching spoon rest, and distressed vase! More details on all of this coming soon!
Here are two more before and after views!
Budget
In our previous home, we renovated our last kitchen for just $1,000! This time, we planned on a budget of $4,000.
I'll be honest, I didn't keep a good track of expenses, but I estimate our total budget came in around $5,000-$5,500 total.
If we had hired this renovation out, it would have been many thousands or tens of thousands more, I know we saved a ton by DIYing this kitchen!
This total above does not include the new flooring and appliances since that was part of our moving in expenses. But, those cost about another $6000 for this space.
We still have a few unfinished details, like some caulking/filling and updating the wall outlets and covers. And I have a lot more organizing to do inside of our cabinets and pantry!
But overall, this kitchen makeover is complete! Wow!
Although, I would love to hire more out in the future for another kitchen makeover, as this was truly a lot to do ourselves, I am truly proud of it all and what we accomplished!
Thank you for following along on this journey and if you've made it this far in this post! I'm excited to share our next room makeover very soon!!! I'll be sharing with our newsletter subscribers first!
Follow along for my latest projects and sneak peaks on Instagram, YouTube, TikTok, and Facebook!
Kitchen Makeover Sources & Projects:
Products
- cabinet hardware
- brass cabinet latches
- birch butcher block
- island size butcher block
- farmhouse sink
- vintage look faucet
- subway tile
- recessed LED lights
- kitchen rail
- berry painting from Miss Mustard Seed’s Society 6 shop
- oil and vinegar dispenser set
- scalloped utensil holder
- distressed vase
- stoneware canister
- 11"x14" gold framed artwork
- short copper salt & pepper grinder
- tall copper salt & pepper grinder
- plaid cotton kitchen towels
- 8"x10" gold frame
- ceramic mugs
- wooden utensil set
- ruffle spoon rest
It’s absolutely beautiful! Great job!
Thank you so much!
Beautifully Done ~
Thank you so much!
This was seriously so helpful! I'm just starting to plan out my kitchen remodel, so it was perfect timing that I found this. I love the idea of having butcher block as the countertop because I'm the same way, I really dislike laminate countertops. This gives me so many ideas! Thanks so much for sharing!
Very helpful! We have high ceiling as well and are installing a hood, this will work perfectly! Do you mind sharing where you purchased your cabinet molding? I’m having a hard time finding a decent size.
All the molding came from Lowe's!