Learn how to build a DIY built in refrigerator cabinet surround that has cabinet storage above it that extends to the front of the refrigerator!
We are starting our budget kitchen makeover and the DIY refrigerator cabinet surround is the first big project for the space!
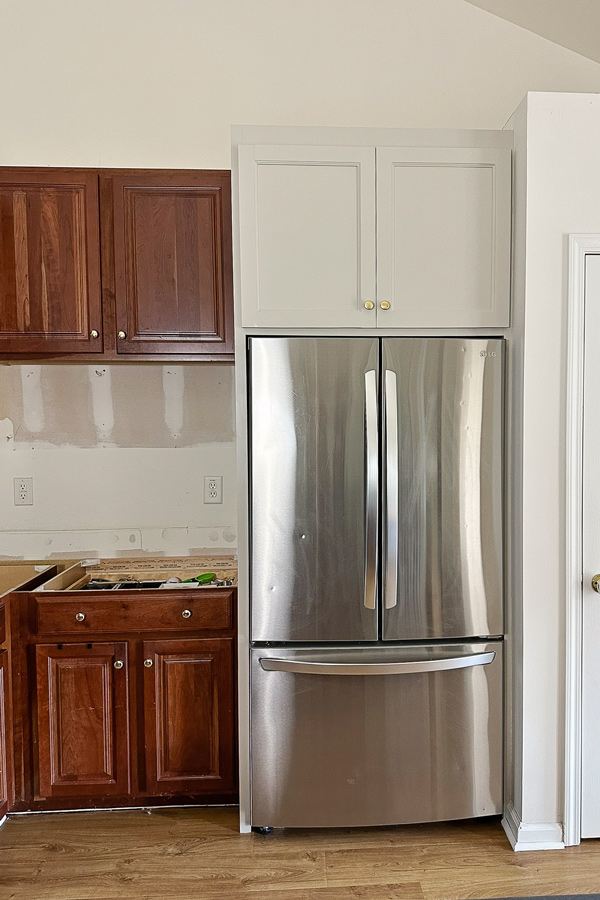
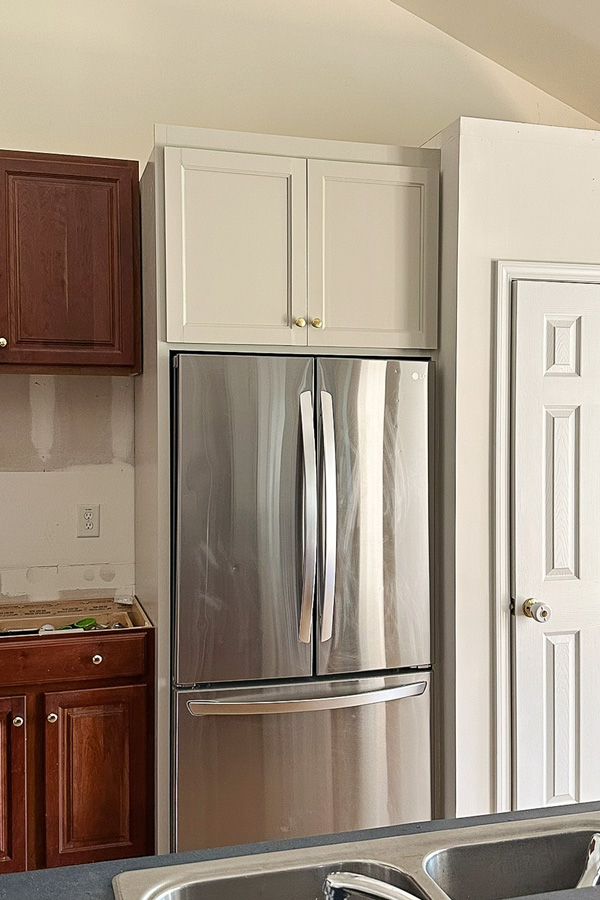
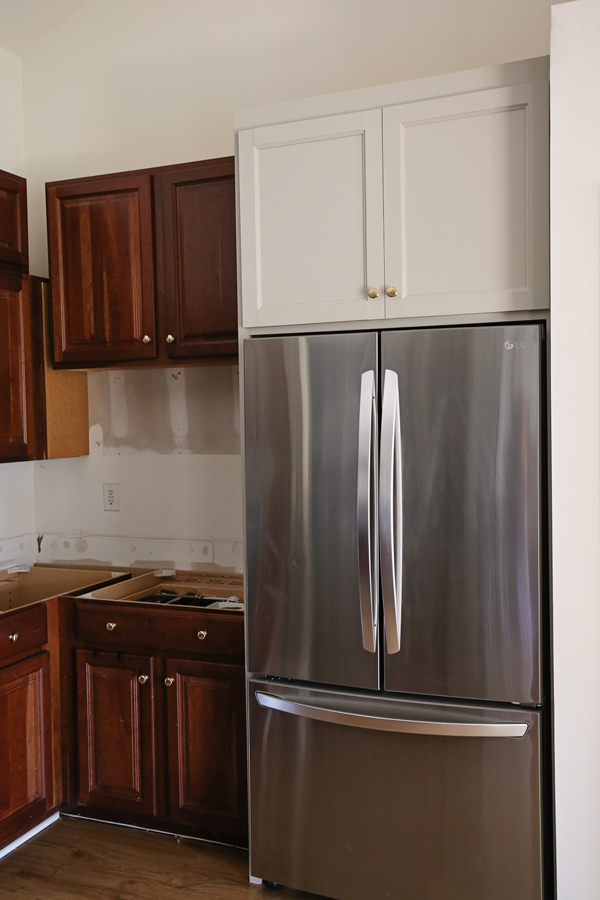
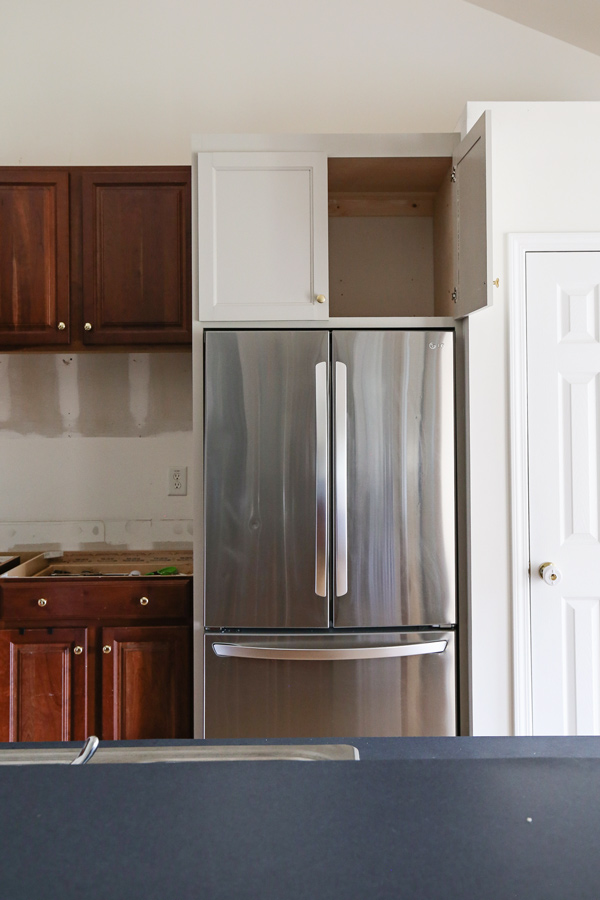
Not only does this DIY refrigerator cabinet provide that custom built in refrigerator look, but it provides a lot of extra deep and tall cabinet storage that’s easy to access.
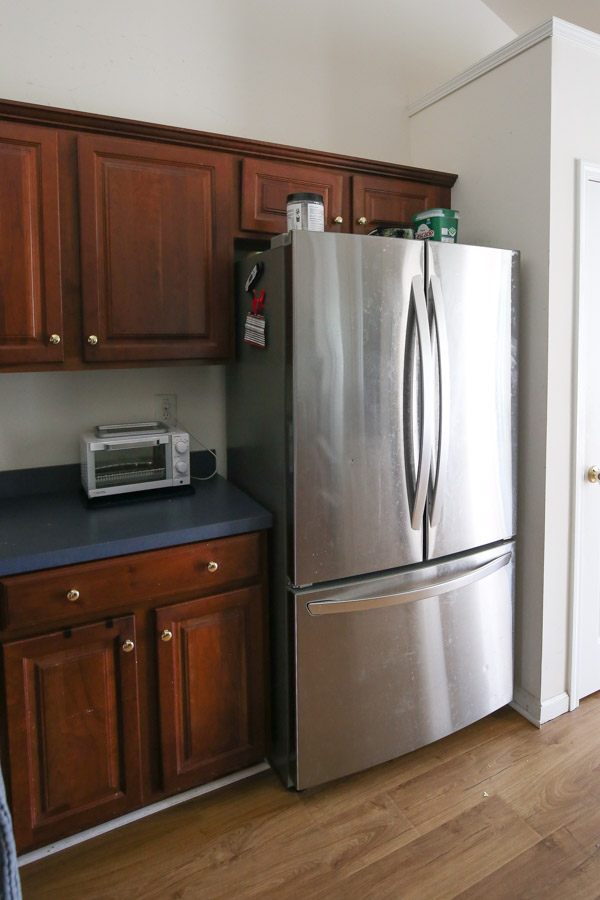
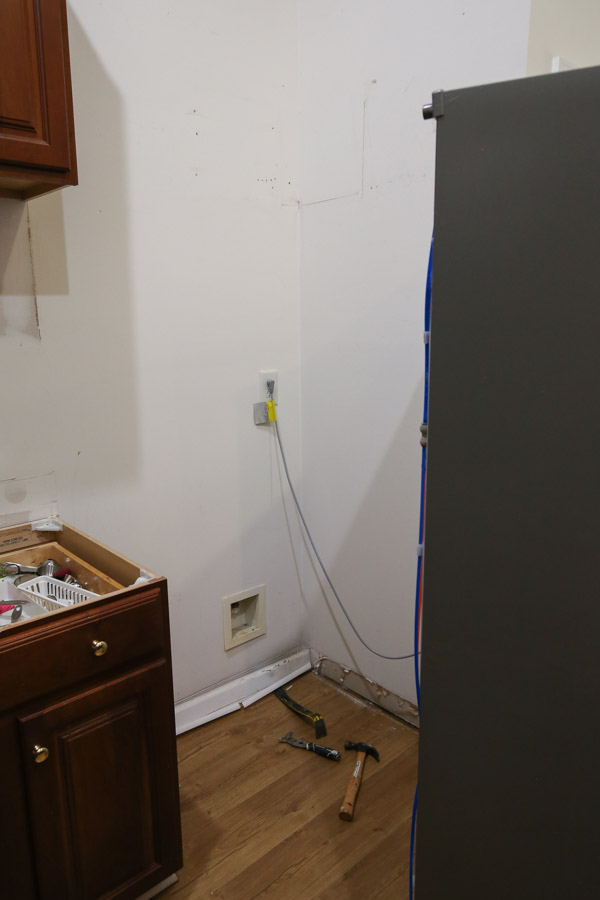
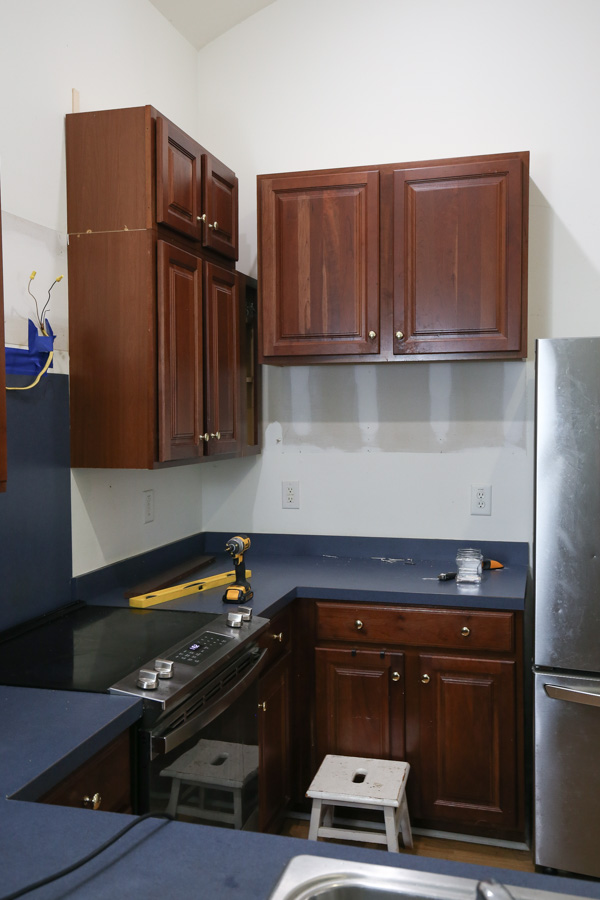
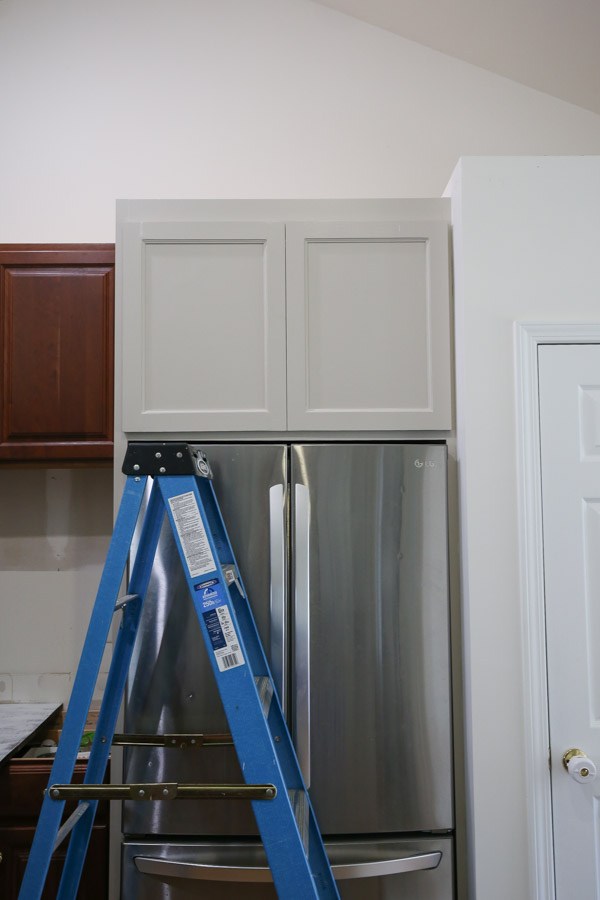
Here is a before and after! Keep in mind it’s not 100% finished, we still need to add crown molding and finish the rest of the kitchen updates on this side!
BEFORE:
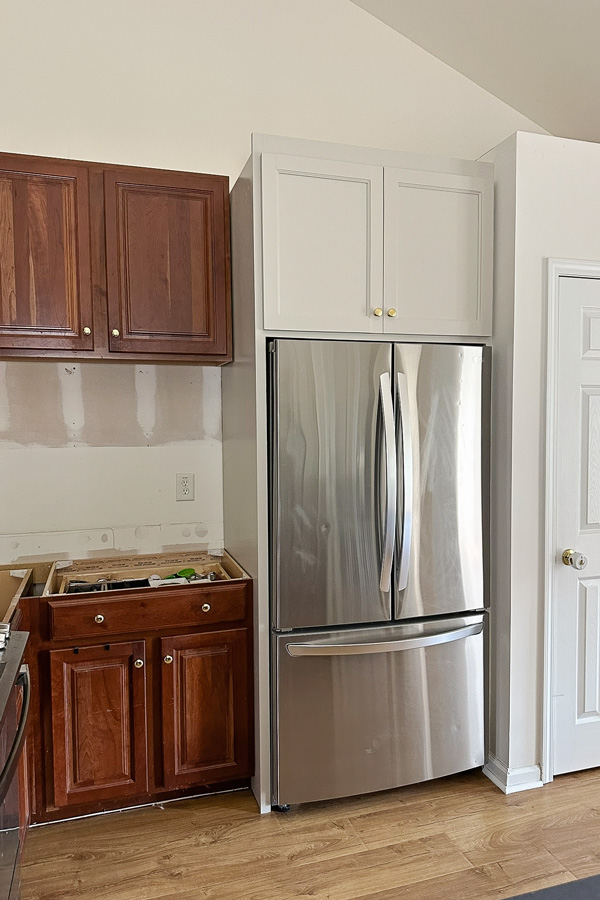
Here are all of the details on how to build a DIY built in refrigerator cabinet surround!
Cabinet Paint
When we painted our kitchen cabinets and our DIY kitchen cabinet built in, we used a paint specifically formulated for painting kitchen cabinetry, Benjamin Moore Advance.
It’s extra durable and self leveling. It works great and I highly recommend using it for any kitchen cabinetry or high traffic cabinets! Check out my best paint for cabinets and trim for more details!
DIY Refrigerator Cabinet Dimensions
Just like our DIY built in kitchen cabinets, the built in measurements can vary based on your actual space and refrigerator. So, I won’t be including exact measurements, but I will be sharing how I built it step by step!
For reference, the final size of our kitchen DIY refrigerator cabinet built in is 99″ tall x 28″ deep x 39 1/4″ wide.
Note, this post contains some affiliate links. I may earn a commission if you shop those links (at no cost to you). Thank you for supporting my small business. For more info see my disclosures here.
How to Build a DIY Refrigerator Cabinet Surround
Note: Material quantities will vary based on your actual built in refrigerator cabinet dimensions!
Materials
- 4ft x 8ft @ 3/4″ thick plywood
- 1×4 @ 8ft unfinished (for back supports)
- 1×4 @ 8ft primed (for face frame)
- 1×2 @ 8ft primed
- 3″ self tapping screws (or wood screws)
- 1 1/4″ Kreg screws
- Wood shims (optional)
- Wood Glue
- 1 1/4″ brad nails
- Paintable caulk
- Primer
- Paint
- Wood filler or spackle
- Cabinet Doors, hinges, and hardware (see step #10 for more details)
Tools
- Brad nailer
- Miter saw
- Circular Saw or Table saw
- Kreg Jig
- Drill
- Clamps (48″ clamps work great too!)
- Pry bar
- Utility blade
- Tape Measure
- Stud finder
1. Determine Measurements and Cuts
First, determine what size refrigerator cabinet you need to fit your space and refrigerator. Here are a few key points to keep in mind during this process:
- The opening of your refrigerator surround (with the face frame) should be 1/2″ wider than your refrigerator width.
- It helps to make the width of the refrigerator cabinet frame 1/4″ less than the actual width measurement between the wall/cabinet (this is to provide wiggle room to make sure the cabinet fits in case your walls are a bit wonky). The extra space can be caulked at the end!
- Make sure to include the thickness of the face frame (3/4″) in your final refrigerator depth. You want the face frame to stop before the refrigerator door edge so the refrigerator can still open fully.
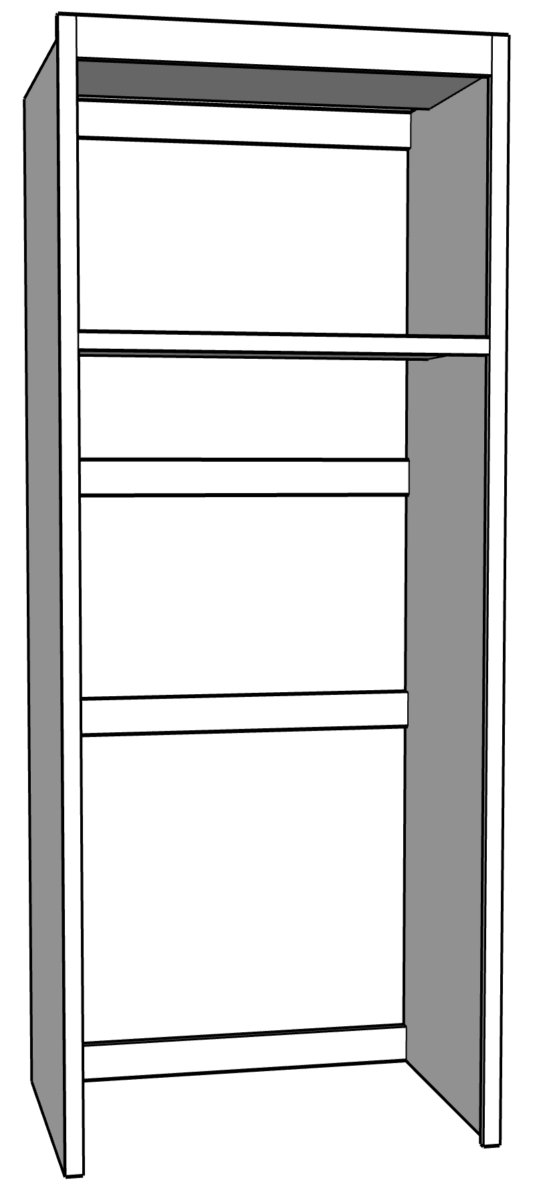
- Allow a 1/2″ clearance gap between the middle cabinet shelf and the top of the refrigerator (make sure to account for the face frame that’s 1 1/2″ wide)
Here are the boards that I cut for my DIY refrigerator cabinet frame:
From the 3/4″ Plywood:
- 2 boards for the sides of the cabinet
- 2 boards for the top & middle
From the 1x4s:
- (4) 1x4s for the back supports
Note, we wanted our upper refrigerator cabinet to be the full depth of the refrigerator surround for extra storage. But, with two sheets of plywood there wasn’t enough material.
Extra plywood or 1x8s:
Rather than buying another sheet of plywood, we used a 1×8 ripped to the correct width to make up the difference so we could save money and not have to buy a 3rd sheet of plywood. You will see how we attached these boards in step #5!
2. Prep the space for the cabinet
Prep the space by removing the baseboard and any other trim or cabinetry that’s in the way. Use a prybar and utility blade.
We also had to remove our countertop since we are going to be replacing it.
Finally, because we are adding double cabinets in our kitchen, we raised our upper cabinet next to the refrigerator so the top of everything will be aligned. We also had to move it over about 1/2″ as well to align with our new countertop edge.
3. Cut the wood to size
Cut the wood to size as determined in step #1 for the refrigerator cabinet frame.
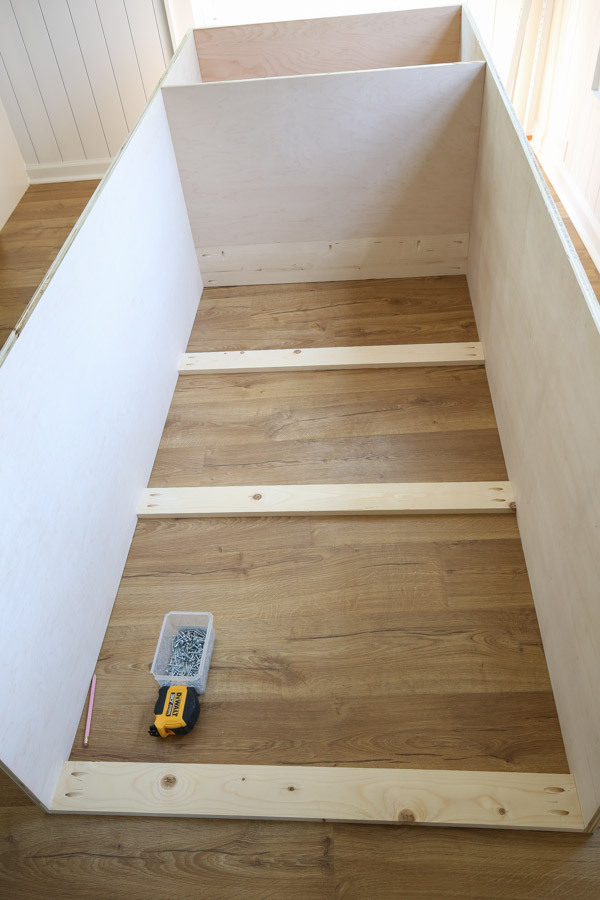
4. Add pocket holes
Add pocket holes to the 4 back support boards and the top and middle boards on each side. Make sure the Kreg Jig is set for 3/4″ thick wood!
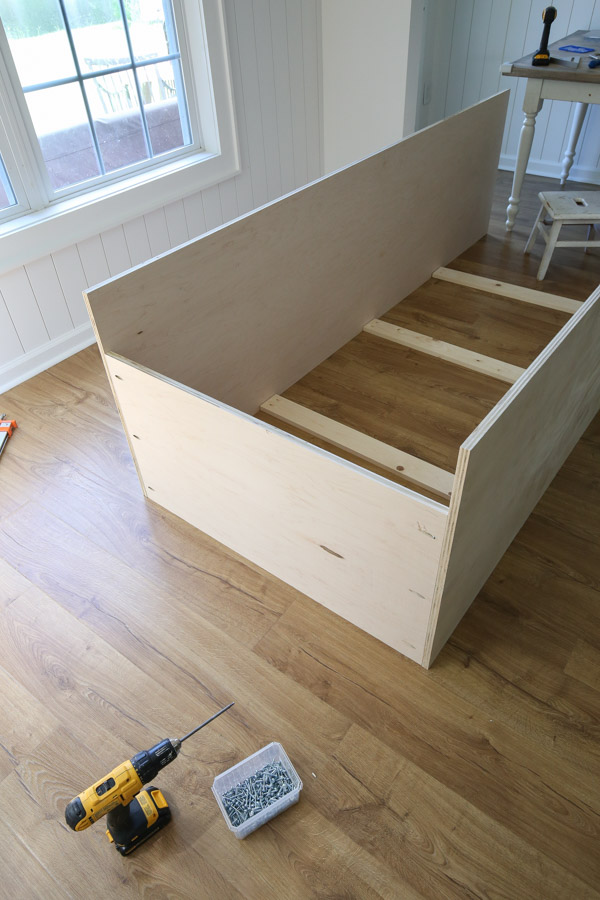
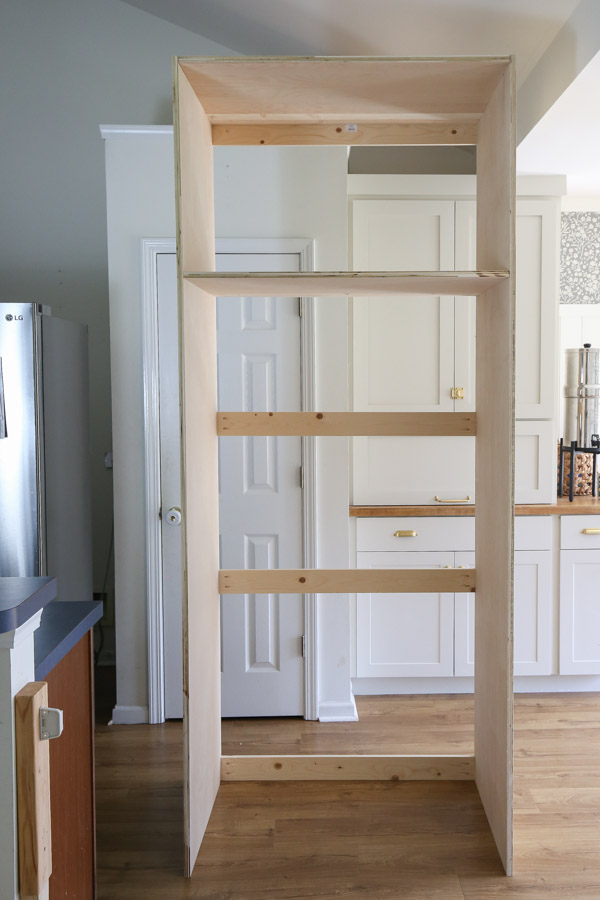
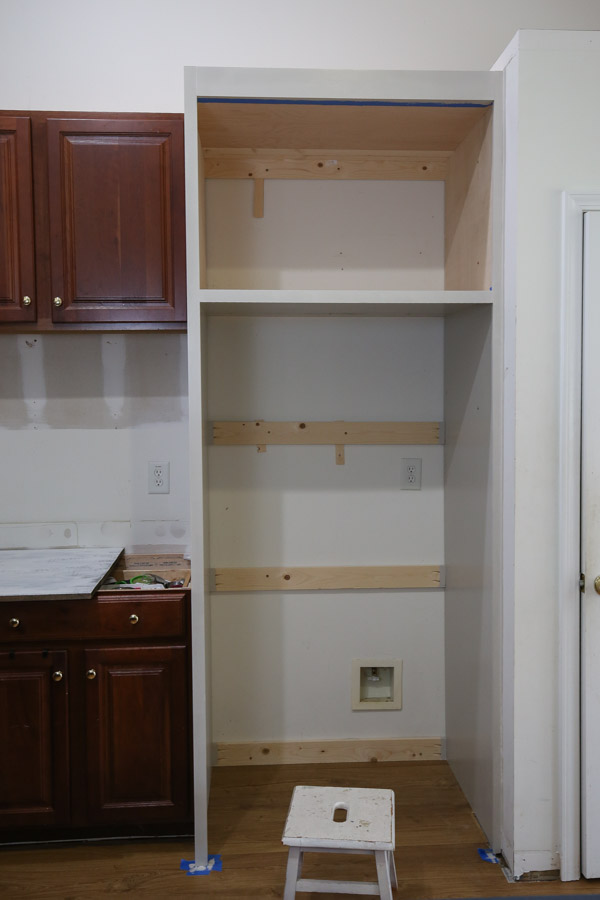
5. Build the cabinet frame
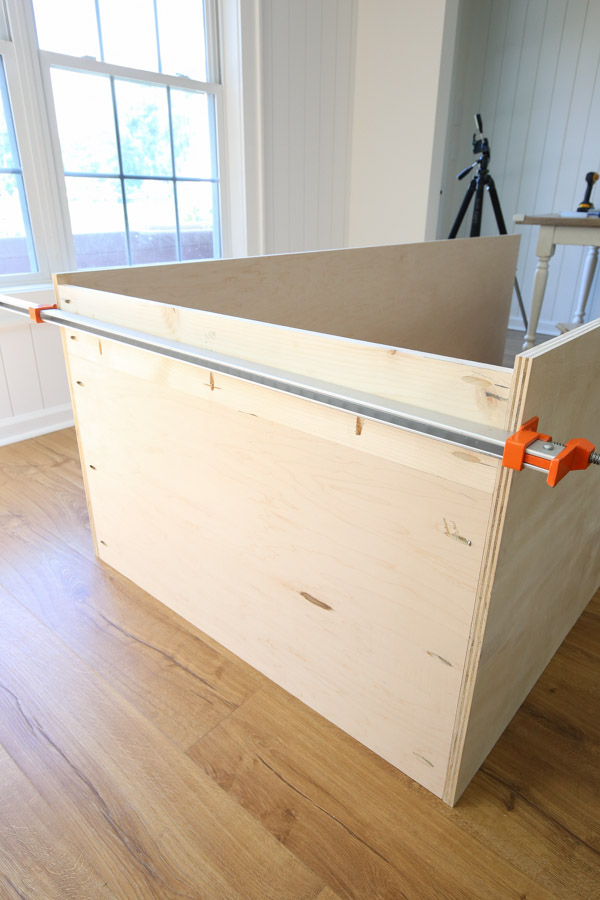
Begin by attaching the two cabinet sides to the top board with wood glue and 1 1/4″ Kreg screws. We used our 48″ clamps to help with this.
Next, we used our 1×8 board that we ripped to size as explained in step #1, to cover the gap in the top board.
Then we installed the top 1×4 back support board too as shown in the photos below.
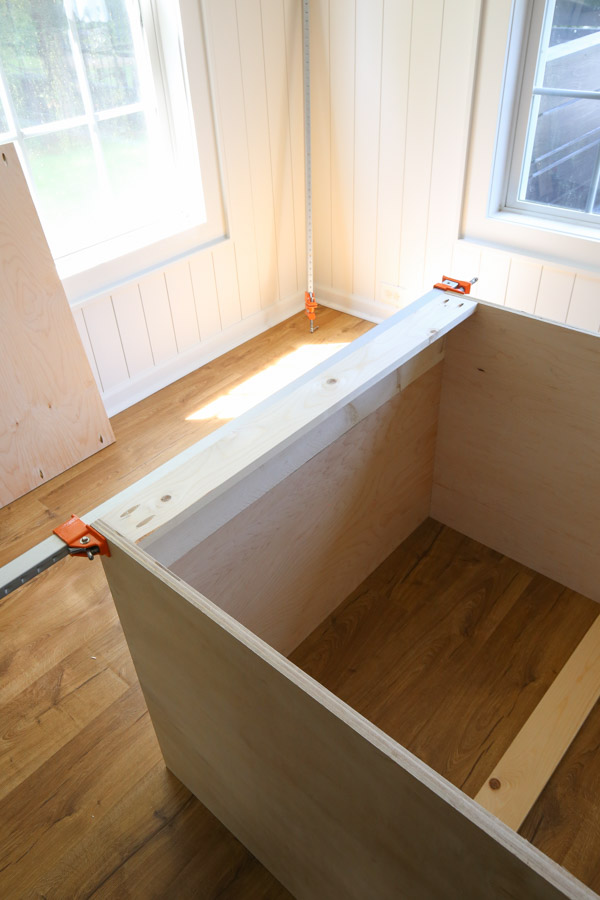
Moving on, the middle shelf was attached to the sides. Make sure you attach it at the correct height in relation to your refrigerator and face frame.
We added a 1/2″ extra clearance to our refrigerator height and we accounted for the face frame. Because the face frame is 1 1/2″ wide, you want the top of the face frame to align with the top edge of the middle cabinet shelf.
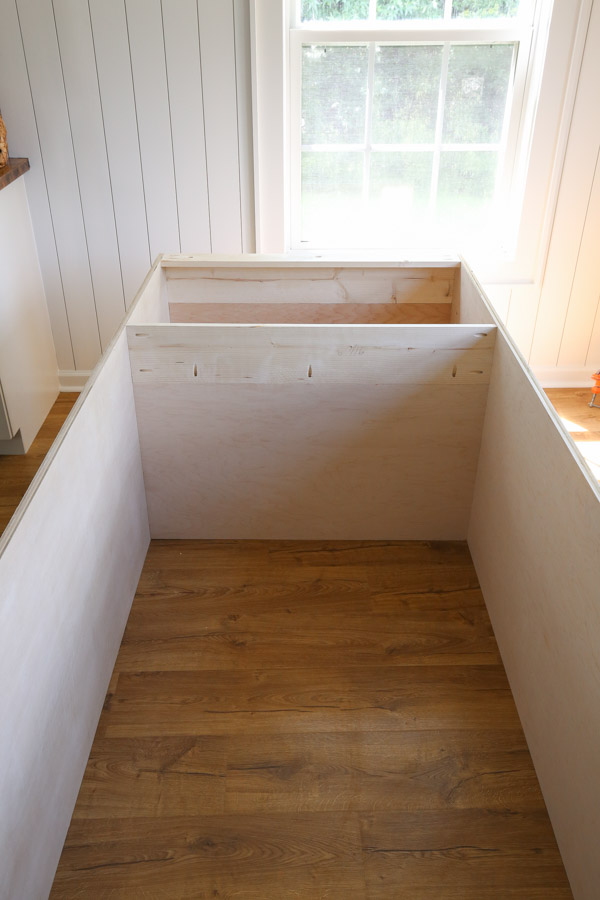
Attach the remaining three 1×4 back support boards to the cabinet sides, evenly spaced out. Make sure to leave a space for where your plumbing comes through the back!
Stand your cabinet up!
📩 Want to Save This?
6. Paint the DIY built in refrigerator cabinet frame
At this point, it’s easiest to prime and paint the DIY refrigerator cabinet sides that will show in the end. Also, we painted the inside of the surround to protect the plywood.
Note, in the photos below you will see we have a face frame attached, but it’s best to wait to attach it as explained in step #8. We made the mistake of attaching it too soon here!
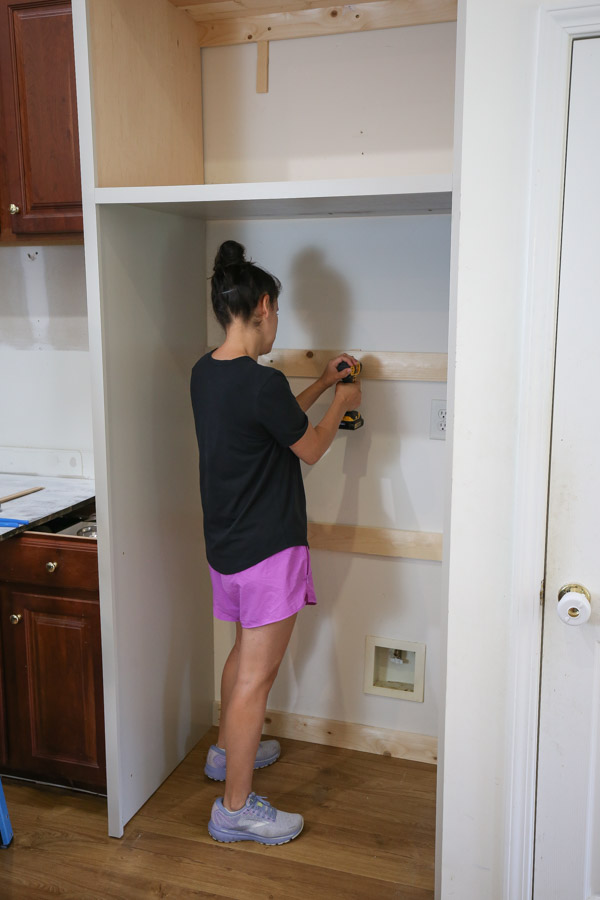
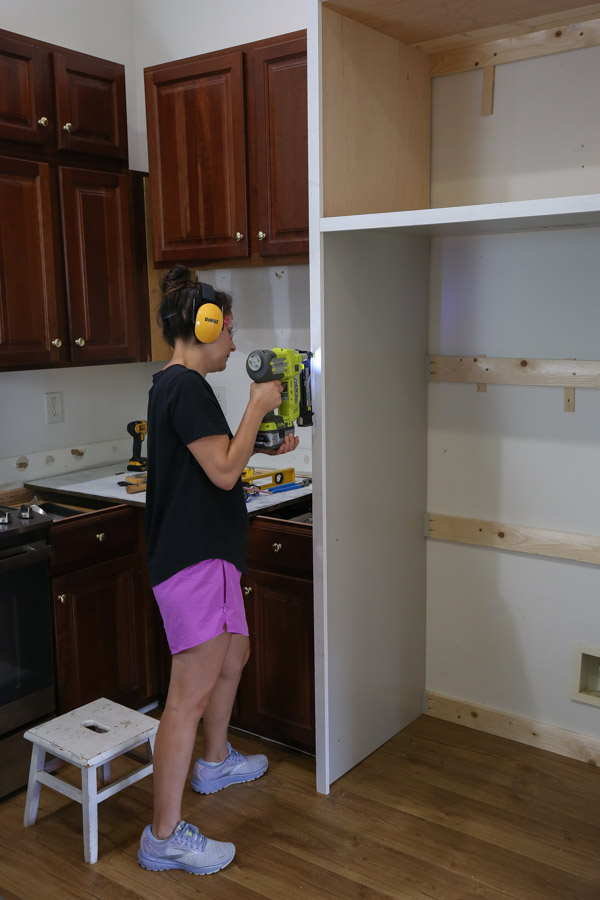
7. Secure the DIY refrigerator cabinet to the wall
Attach the DIY built in refrigerator cabinet frame to the wall studs with 3″ screws and wood shims to help if needed.
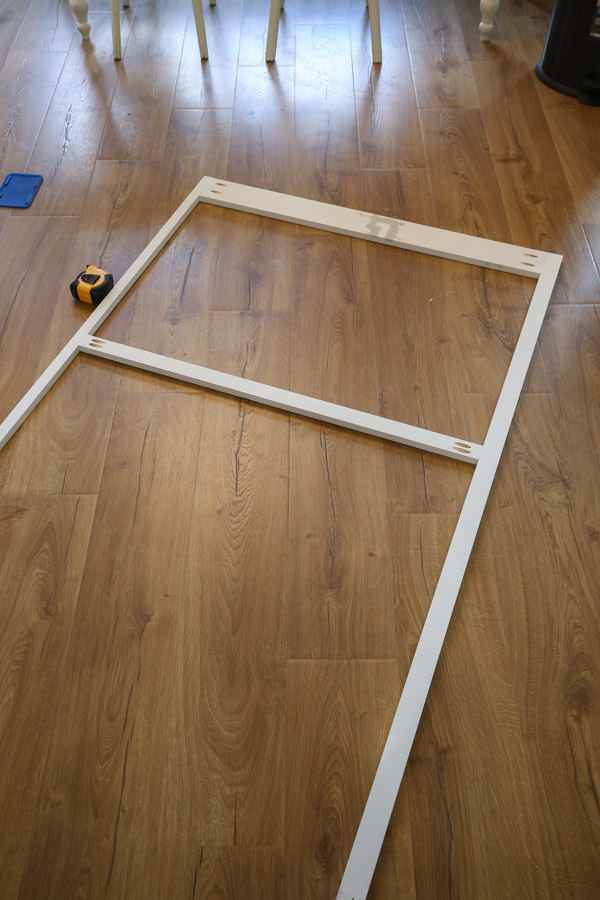
8. Build and attach the face frame
With the cabinet installed, measure the height and width measurements for the face frame which will cover the plywood edges.
Make the following cuts for the face frame:
- (2) 1×2 for the face frame sides
- (1) 1×4 for the face frame top
- (1) 1×2 for the face frame middle
Add pocket holes on each end of the following boards:
- (1) 1×4 for the face frame top
- (1) 1×2 for the face frame middle
Tip: make sure that the face frame measurements for the inside width will have 1/2″ extra width compared to your refrigerator width so your refrigerator will fit easily!
Attach the face frame top and middle boards to the side 1×2 boards as shown in the photo below using wood glue and 1 1/4″ Kreg screws.
Next, attach the face frame to the DIY refrigerator cabinet frame with wood glue and 1 1/4″ brad nails.
Note, for most face frames the top of them will align with the top of your cabinet frame. However, we had to make our face frame a little taller than the cabinet frame so it will align with our double cabinetry. We are going to cover the gap with crown molding at the very end!
9. Caulk and paint the face frame for the DIY built in refrigerator cabinet
Fill nail holes with wood filler or spackle. Caulk all of the seams.
Then, prime/paint the face frame.
We used two coats of Benjamin Moore Revere Pewter in Satin.
See my how to paint kitchen cabinets for more details on painting.
Then, go ahead and push your refrigerator into place!

10. Attach the cabinet doors
For the doors you can buy custom size doors or build them.
Check out my DIY built in kitchen cabinets for more details on buying custom cabinet doors.
And if you want to build doors, see my tutorial on 3 ways to build cabinet doors from beginner to pro.
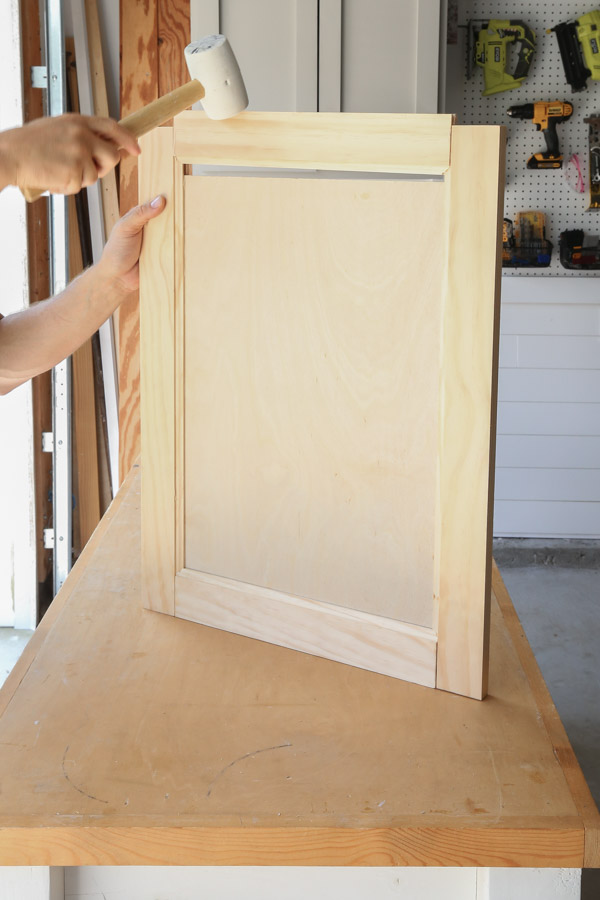
We decided to build our doors using the pro method from the tutorial I linked above.
If you look closely, our current cabinet doors have a decorative angled/curved edge on the inside of the door frame (called an ogee door profile) and they have a raised middle panel.
We could have bought custom size doors with these special features to save time, but it would have been well over $200. And we need 4 more doors for another project in this space, so we didn’t want to spend $700+ on cabinet doors with shipping.
Instead, I bought the ogee profile router bit to make the door and save a lot of money! We made doors earlier this year with our router table for our IKEA PAX hack and DIY built in office cabinets, so this process went faster this time!
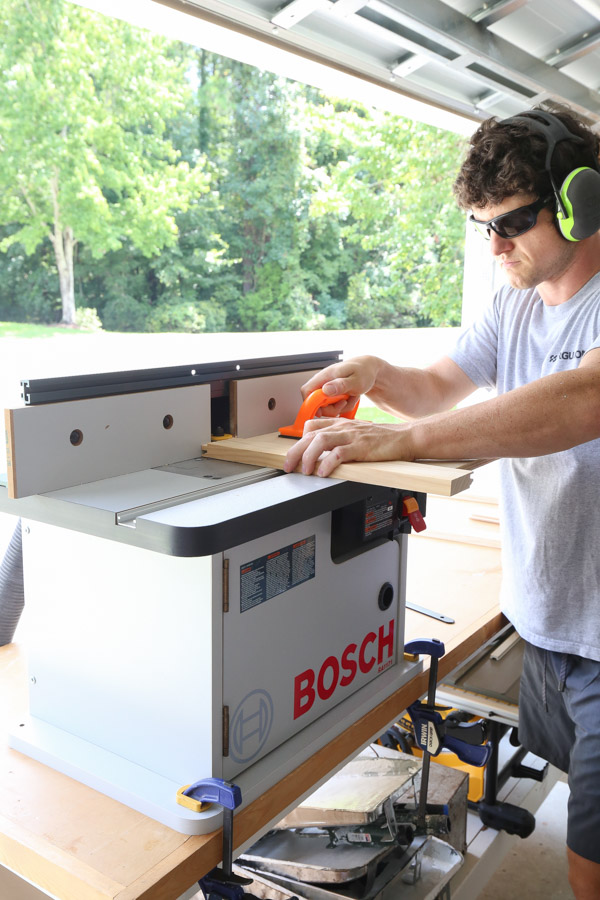
I also can’t stand the look of the middle raised panel, so we skipped that part. I think the ogee profile edge will give them a close enough look that most people won’t notice once everything is painted and trimmed out.

Again there are many ways to make cabinet doors, make sure to check out my 3 construction techniques for cabinet doors here!
To install the doors, we used these slow close hinges with a 3/8″ overlay.
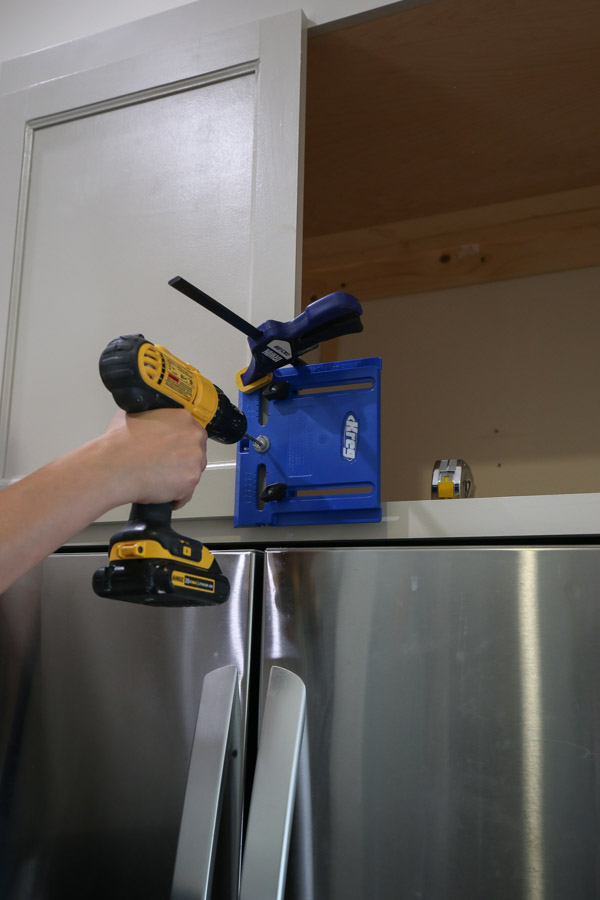
11. Add hardware to the DIY refrigerator cabinet built in
The last step is to drill holes for the cabinet hardware. We used this Kreg hardware jig to make this easier.
Tip: It’s easier to drill these holes before painting and installing the doors!
12. Add trim or crown molding to the DIY refrigerator surround
The last step is to add trim or crown molding if desired to the DIY built in refrigerator cabinet along the top. As I said earlier, we will be adding crown molding soon! It’s going to connect to the rest of our wall cabinetry.
I will add final photos once it’s complete!
And that’s it for how to built a DIY refrigerator cabinet built in! What do you think?!
I just love the enclosed look of our refrigerator now! It looks much more custom.
But, what I love the most is all of that extra deep and tall storage above the refrigerator! And I can actually easily reach it now, yay!
Follow along for my latest projects and sneak peaks on Instagram, YouTube, Pinterest, and Facebook!
Melissa
Sunday 23rd of March 2025
It looks great. Wondering if you needed tosecure the unit to the floor as well? Or did you simply secure it to the back wall only?
Angela Marie Made
Tuesday 25th of March 2025
We secured it to the back wall and side wall, it's very sturdy!