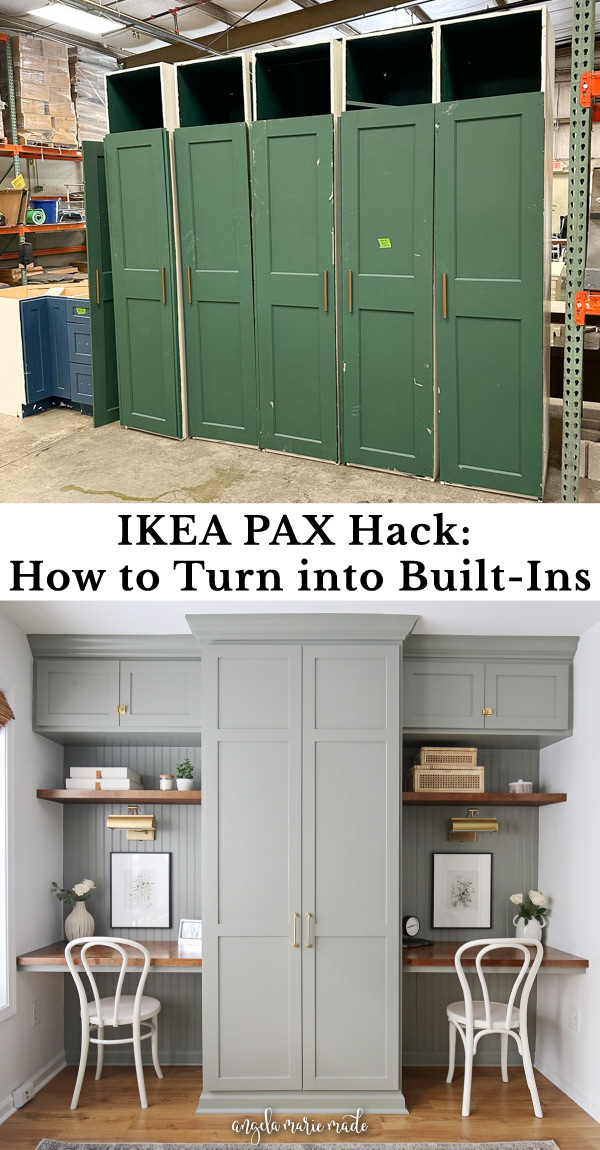
Learn how to create a built in cabinet or closet with this IKEA PAX hack!
If you need to create a built in cabinet or closet, one of the easiest ways to do it with DIY is using an IKEA PAX closet hack or IKEA PAX built in hack with the IKEA PAX wardrobes or IKEA PAX closet system.
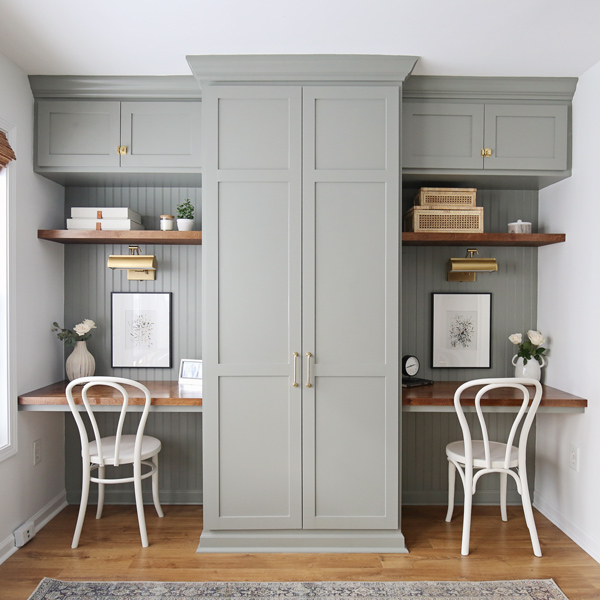
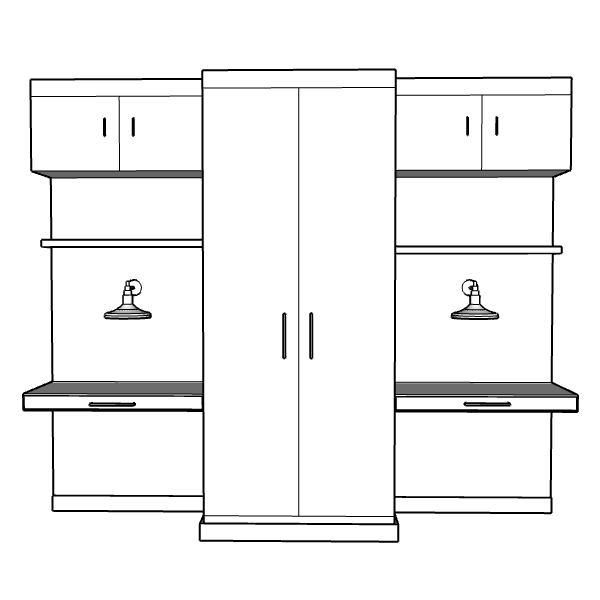
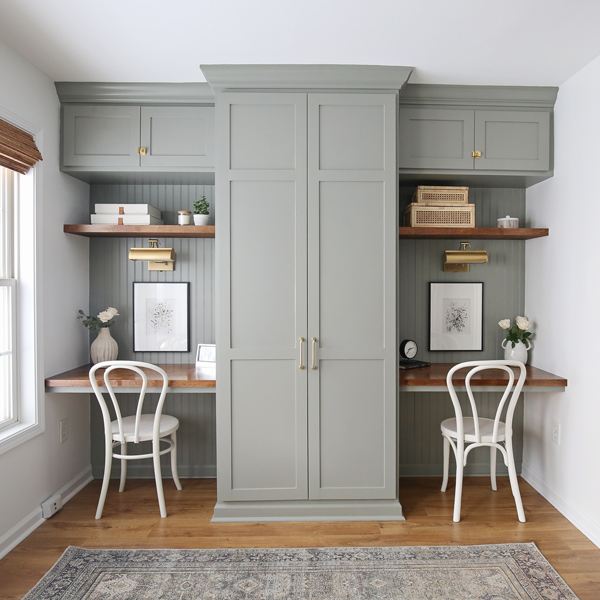
We recently built DIY office built in storage cabinets for our small DIY home office makeover for two and the main feature of the built ins was the IKEA PAX hack! Today I am sharing step by step how to we did it!
Note, this post contains some affiliate links. I may earn a commission if you shop those links (at no cost to you). Thank you for supporting my small business. For more info see my disclosures here.
I’ve done many IKEA hacks in the past with IKEA products, but this one is different because it’s using the IKEA PAX to create a built-in look!
But you can also use the same steps to create a dream closet, whether it’s an open closet or if you want to create built ins in a walk-in closet.
IKEA hacks are a great way to get a custom look using DIY and more affordable materials that are easier to assemble than traditional building methods.
Plus, the IKEA PAX wardrobe provides a ton of storage space or closet space!
Where to get IKEA PAX cabinets for IKEA PAX Hacks
The obvious place to get IKEA PAX system cabinets is IKEA, as well as all of the matching parts that go with it!
But, sometimes you can find IKEA PAX cabinets for a good deal second hand, either by checking out your local furniture thrift stores or Facebook Marketplace or Craigslist. Especially if you live in a city near IKEA! I have found so many IKEA pieces this way for a discount!
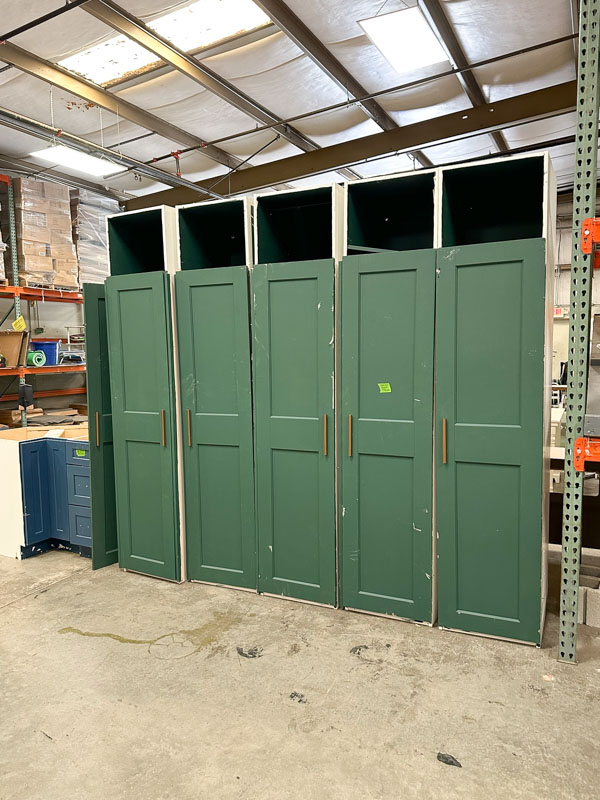
I got super lucky and found our two IKEA PAX cabinets for this project at our local thrift store, similar to a Habitat for Humanity ReStore, for just $50 each, already assembled, and with multiple shelves and baskets in them.
There was five of them at the store and we picked the best two! I wish we could have bought more, but they are huge!
This is the exact model of the IKEA PAX cabinets we found.
They did need a little extra fixing up which you can see in action in our thrifting adventure video and our office makeover with built ins part 2 video!
IKEA PAX HACK How To:
Note: Material quantities and final dimensions will vary based on your actual built in dimensions and which IKEA PAX model you are using! Some of the materials are optional and depend on your final design (I included all materials that I used in this tutorial)
Materials
- IKEA PAX cabinet(s)
- 2×3 @ 8ft
- 1×3 @ 8ft
- 2×2 @ 8ft furring board
- 1×4 @ 8ft
- 1×2 @ 8ft
- Crown Molding (or top trim)
- Baseboard
- 1 1/4″, 2 1/2″, and 3 1/2″ self tapping screws (or wood screws)
- 1 1/4″ Kreg screws and 2 1/2″ Kreg screws
- 1 1/4″ brad nails
- Wood Glue
- Cabinet doors (see step #10)
- Door hinges (I used these overlay hinges)
- Cabinet knobs or pulls
- Primer and Paint for cabinets
- Degreaser (for painting)
- Paintable caulk
- Wood filler or spackle
Tools
- Kreg Jig
- Brad nailer
- Miter saw
- Kreg Concealed Door Hinge Jig
- Drill
- Clamps
- Tape Measure
- Stud finder
- Utility blade
- Hammer
- Prybar
DIY Office Makeover Videos:
You can watch us create this IKEA PAX hack built in, in the DIY built ins Part 2 VIDEO and DIY office built ins and makeover reveal Part 3 VIDEO!
1. Plan the built in or closet location, dimensions, and style
When it comes to doing an IKEA PAX hack, for either an IKEA PAX closet hack or an IKEA PAX built in hack, the first step is to make a plan about the exact location you want to create the built in or closet, as well as the final design style and dimensions.
For example, I knew I wanted to install our IKEA PAX cabinets together in the middle of our blank office wall, as the center of our built ins. Our ceiling height is the standard 8 feet tall, so our 92 7/8″ PAX cabinets had a gap of about 3″ from the ceiling.
Bottom and top trim considerations
To make any cabinet look built in and professional, trim it out with baseboard at the bottom and trim at the top.
For top trim you can do either crown molding like we did for our entryway DIY built in cabinet and bathroom built ins. Or you can do top trim with a simple 1×4 board like we did with our DIY built in kitchen cabinet.
Note, if your IKEA PAX model is much shorter than the ceiling you can skip the top trim, but it is a nice finishing touch!
Face Frames
Another trim element that looks beautiful is a face frame. I add face frames to all of my DIY cabinets like our DIY garage cabinets, DIY office storage cabinets, DIY wall cabinet in our laundry room, and DIY living room built in cabinets and shelves using stock cabinets.
In order to fit a face frame and a standard size baseboard which matched our existing baseboard in the room, which is 3 1/4″ tall, I had to plan on building a base support for the IKEA cabinets to sit on so that they would be raised off the ground and everything would line up properly.
I will share exactly how we did this in the next few steps!
Another face frame consideration, is it may interfere with other parts of the PAX system, like the slide out baskets. You can plan around this in the design if needed.
Cabinet doors
Also, if you are adding a face frame, you will need to use a custom door, the doors from IKEA won’t fit right with the face frame since they are frameless cabinets, unless you do an inset look door. You can either buy or build a cabinet door. See Step #10 for more details on the doors!
But, if you want to keep this project simple, skip the face frame and use a door from IKEA! Or don’t use a door if you don’t need one!
Wall studs and attaching to the wall
Finally, in this planning step, use a stud finder to locate where your wall studs are located. It’s best to plan the built in location over at least one wall stud if possible for the best security to the wall.
The planning stage is also when you should determine how you will attach the cabinets to the wall. See more details on all of this in step #4!
By planning everything out first, you can proceed with getting the right materials and building plans!
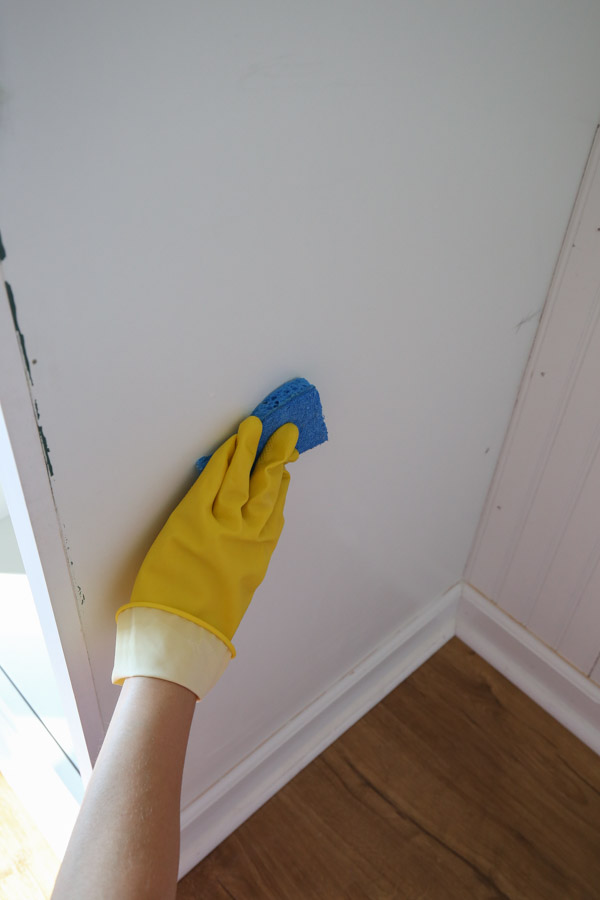
2. Prep the wall and remove the existing baseboard
To make any cabinet built in, the existing baseboard needs to be removed from the wall, so you can attach the cabinet to the wall.
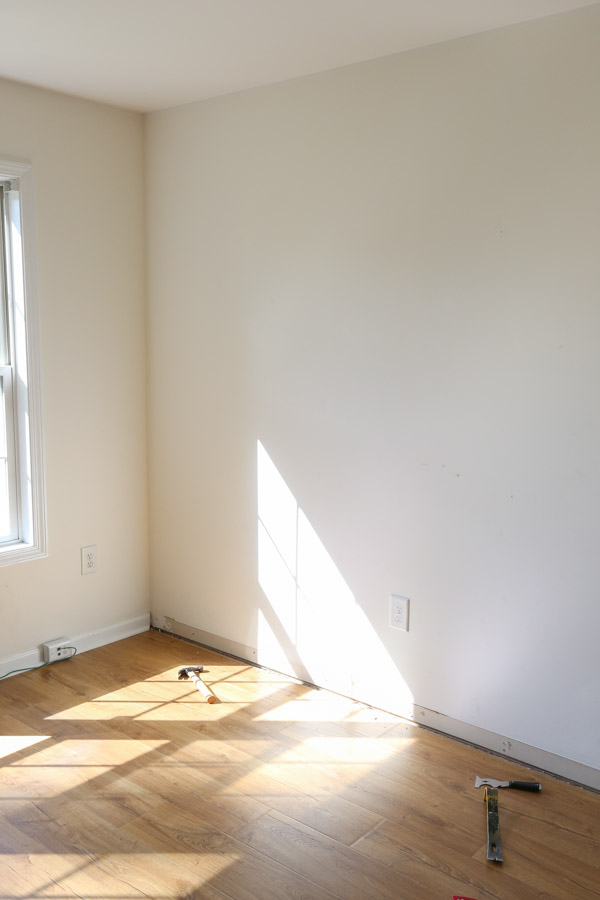
To remove the existing baseboard, score the top and corner caulk lines with a utility blade. Then, use a prybar and hammer to remove the baseboard from the wall.
Tip: if you don’t want to remove your entire baseboard from your wall, you can use an oscillating tool, like a Dremel, to cut the baseboard where you want to install the built in cabinet.
3. Assemble the IKEA PAX cabinet
Begin by assembling the IKEA PAX cabinet per the IKEA instructions.
I was lucky that mine were already assembled since we found them thrifting! But, as I said before, I did have to fix them up a bit.
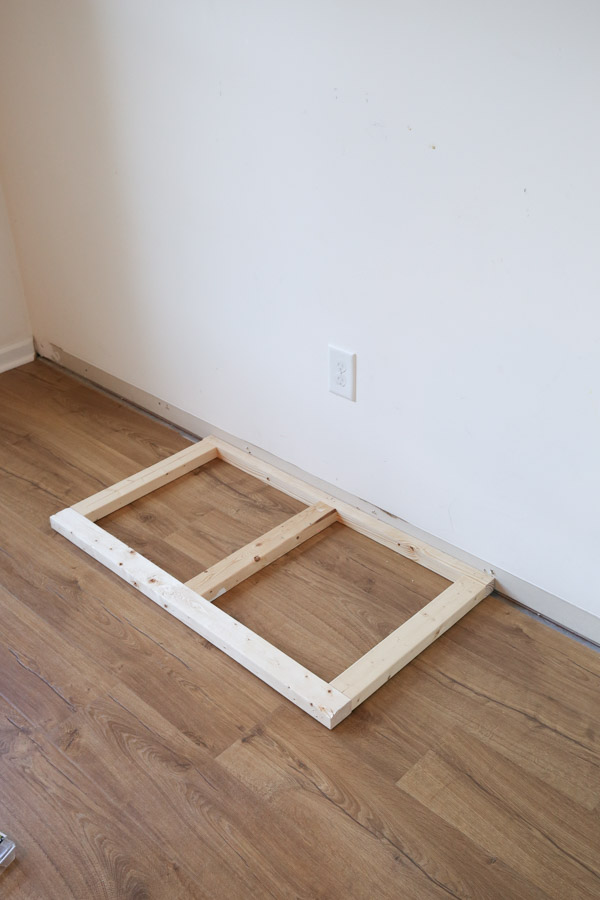
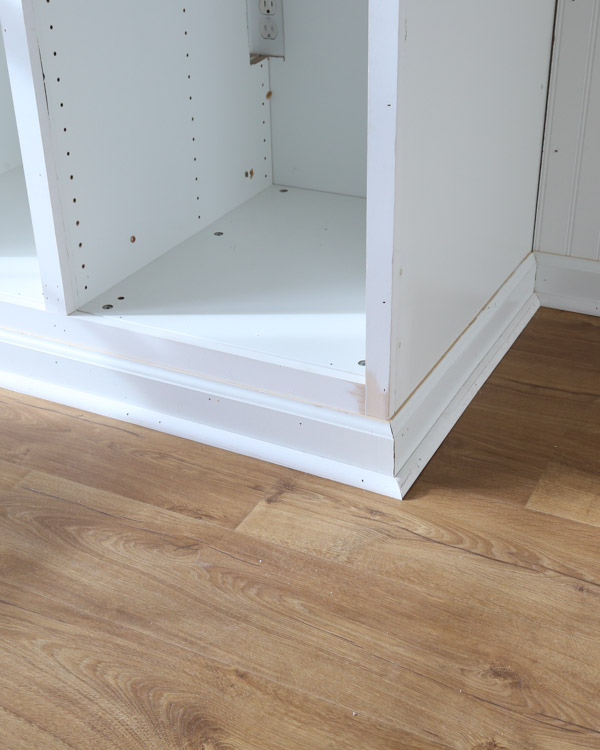
4. Build a base support (if needed) and attach it to the wall
As described in step #1, we built a base support for the IKEA cabinets to sit on to create the built in look with trim.
To do this, we built a support frame with 2x3s and a 2×2 to equal the width and depth of two IKEA PAX cabinets together (39 1/2″ x 22 3/4″). We cut the boards to size with our miter saw.
To attach the boards, we used our Kreg Jig to drill pocket holes and we used 2 1/2″ Kreg screws. We made sure that the 2×2 was on the back side for easy wall attaching, while the 2x3s were used on the rest of the frame (the front, sides, and middle support boards).
Next, we attached the support base frame to the wall, with the 2×2 on the back wall side. We used 3 1/2″ wood screws through the 2×2 into the wall studs.
See all of this in action in the Part 2 office built ins video!
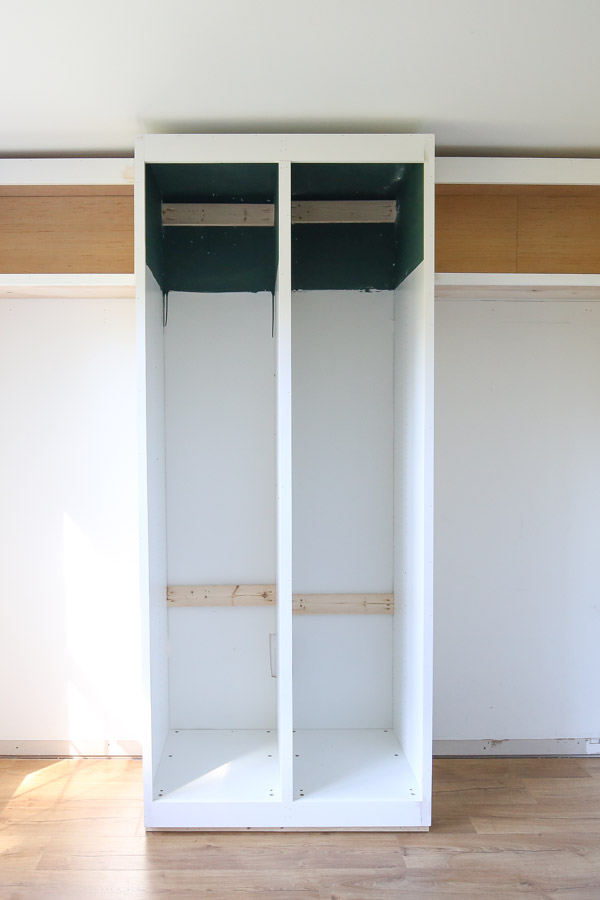
5. Attach the IKEA PAX to the wall
There are many ways to attach the IKEA PAX to the wall.
How to attach the IKEA PAX to the wall
There is a “wall fastener” or hardware that comes with the IKEA PAX cabinet, however they don’t provide the screws or plugs to go with that hardware since according to IKEA, all wall materials can vary.
Most walls are drywall though. If you have a wood wall or concrete wall they you can just use the right screws for those materials and drill right through the fastener into the wall.
If you have drywall though, like most people do, there are a few ways to do it.
Ideally, you want to attach the fastener with screws into a wall stud for the best security.
But, you may not have a wall stud where the fastener holes are located and where you want to install it. In that case, you can use some heavy duty wall anchors like toggle bolts to secure it the drywall.
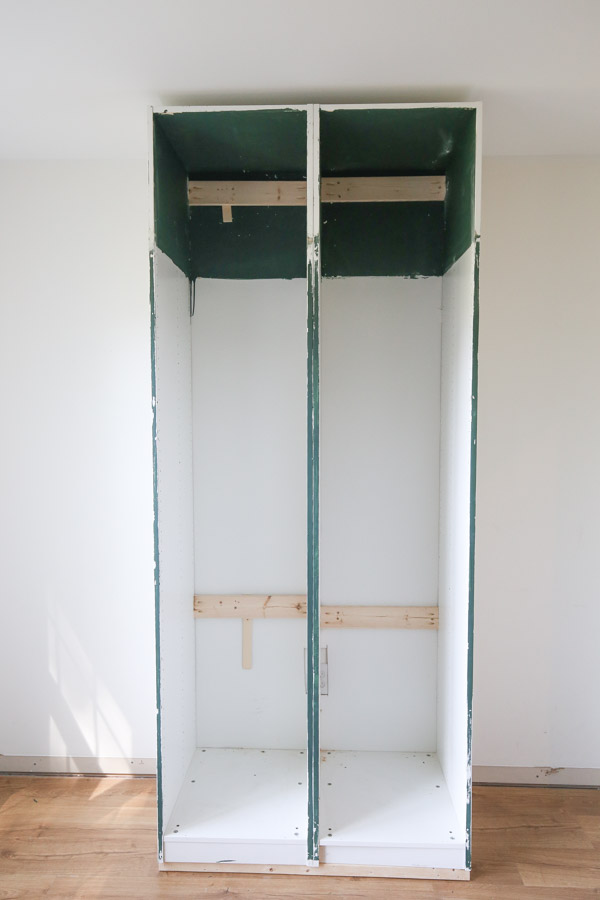
However, we wanted these massive cabinets to be super secure and toggle bolts can be annoying. So, we cut a 1×3 to size to fit on the back of our IKEA PAX cabinets on the inside (18 3/8″ inside length).
Then, we used our Kreg Jig to add pocket holes on each end and secure it with 1 1/4″ Kreg screws to each side of the cabinet on the inside. We did this on the top and the bottom of each IKEA PAX cabinet over the fastener holes.
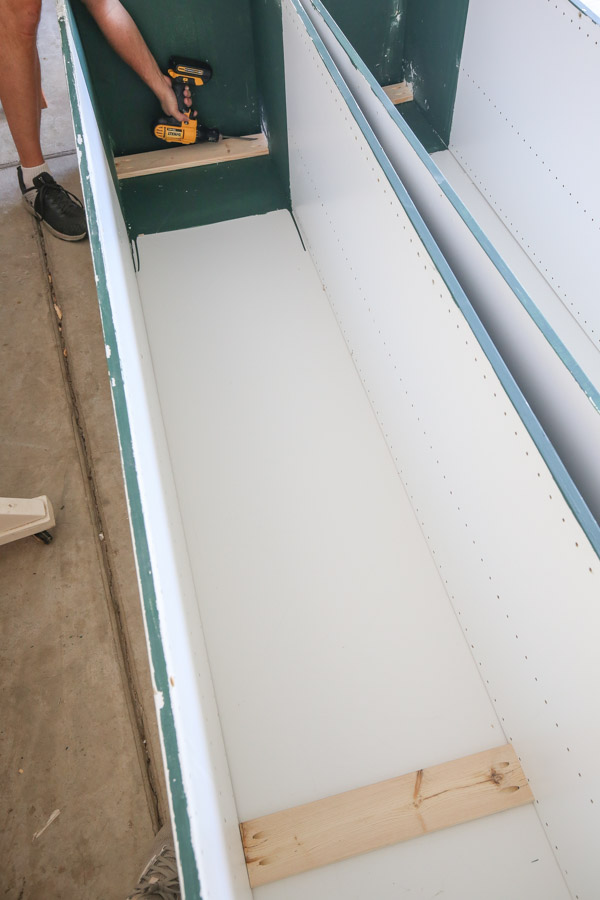
Next, we attached the cabinets to the wall studs this way as an IKEA PAX cabinet is large enough to hit at least one wall stud (as most wall studs are located every 16 inches on center on a wall).
We used 2 1/2″ wood screws to go through the 1×3 into the wall stud.
Also, we had to use wood shims in a few areas too behind the 1x3s.
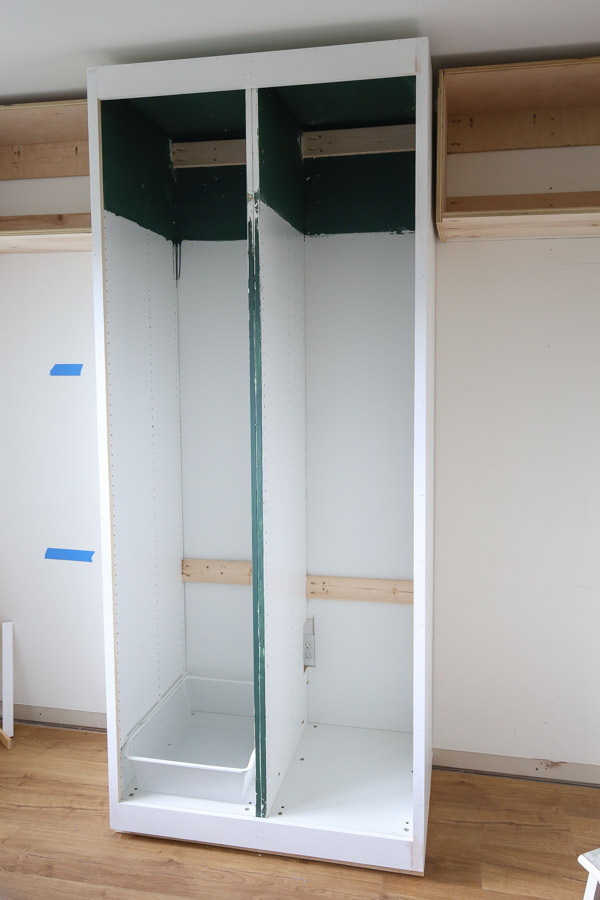
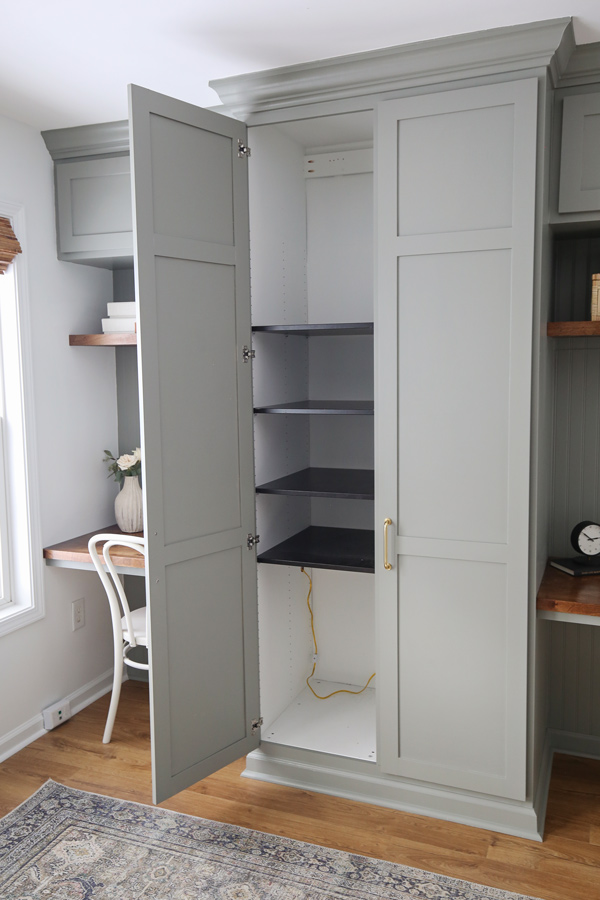
Wall outlet considerations
One issue we ran into when installing our IKEA PAX cabinets which we miscalculated in our planning phase in step #1 was the wall outlet!
Our wall outlet was located right between the center of the two IKEA cabinets together and the cabinet side panels covered it! We needed access to our wall outlet in order to hide the cords from our DIY built in desks.
So, we had to use our Dremel to cut a hole out of the cabinet side panels to access the outlet. This is not ideal!
If you have a wall outlet, try to plan your built in location so the thin backing board that comes with the IKEA cabinet is all you need to cut since it’s only 1/8″ thick.
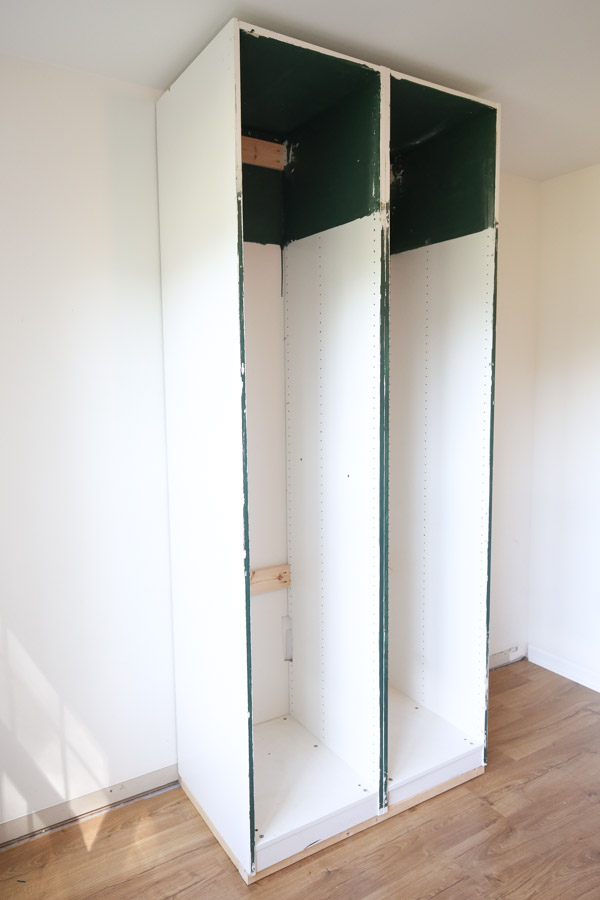
6. Attach the IKEA PAX cabinets together (optional)
If you have more than one IKEA PAX cabinet and they are placed next to each other, like ours, secure them together.
To do this, it’s best to use the instructions and actual hardware from IKEA. Here are there directions with part numbers for screws to use.
But, if you are like us and don’t have easy access to these parts and in a time crunch, you can just use 1 1/4″ screws and screw them together!
We didn’t even try to line up holes, we just clamped them together and drilled on both cabinets on the insides at the top, middle, and bottom to complete our PAX wardrobe frame!
7. Build and attach the face frame for the IKEA PAX hack
I always add a face frame to my cabinets because it’s such a nice, finishing look! Examples where I have done this are our DIY kitchen built in cabinets, DIY built in cabinet in our entryway, DIY living room built in cabinets and shelves using stock cabinets, and DIY built in office storage cabinets.
📩 Want to Save This?
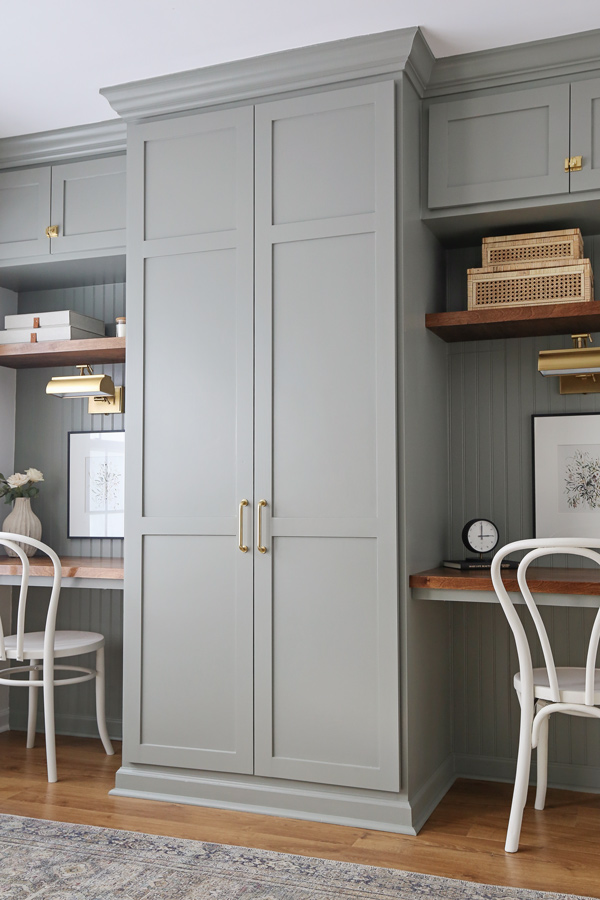
Since I did this for our upper office cabinets, I made sure to do the same style face frame on these IKEA PAX cabinets so that the DIY office built in cabinets for our office makeover would all look cohesive, built in, and professional!
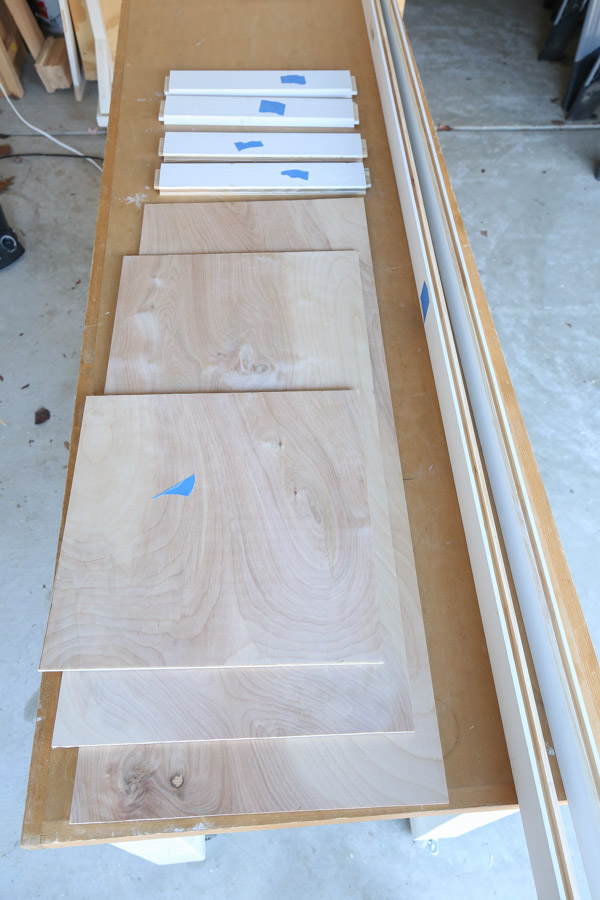
Build the face frame for the cabinet(s)
For the face frame, we used a primed 1×4 for the top of the frame and primed 1x2s for all of the other sides. We used 1×4 on the top so it would work well with our crown molding.
Measure the exact height and width of your cabinet frame to determine your face frame measurements.
Note, we made one large face frame for our two joined PAX cabinets. And I made the edges of the face frame line up with the side frame edges of the PAX cabinets.
This meant we could not use our slide out baskets that came with our cabinets. Originally, we trimmed the 1x2s down on the side to make the baskets work, but after installing the custom door on the face frame in step #10, they rubbed against the door.
To avoid this, you could line up the face frame inside edges with the inside edges of the PAX cabinets. However, this is only going to work when you are next to walls or other cabinets on each side to avoid overhang of the 1x2s.
Use a miter saw and make the following cuts for the face frame:
- (2) 1×2 for the cabinet face frame sides
- (1) 1×4 for the cabinet face frame top
- (1) 1×2 for the cabinet face frame bottom
- (1) 1×2 for the middle of the cabinet face frame
Just like with our laundry room DIY wall cabinets, our kitchen built in cabinet, and our DIY garage cabinets, we built the face frame separately before attaching it to the cabinet frame.
However, we did not add the middle 1×2 board on the initial face frame build, I attached it at the end.
Add pocket holes to the top and bottom face frame boards.
Use wood glue and 1 1/4″ Kreg screws again for attaching the face frame together.

Install the face frame to the IKEA PAX cabinet(s)
Install the face frame to the IKEA PAX cabinets with wood glue and 1 1/4″ brad nails and a nail gun.
After this step, I used wood glue and brad nails to attach the middle 1×2 face frame board to the joined IKEA cabinets so that I could get the perfect alignment of it on the cabinets when attaching.
Tip: If any of your face frame joints don’t sit flush with each other you can sand them flush with some 120 or 150 grit sandpaper!
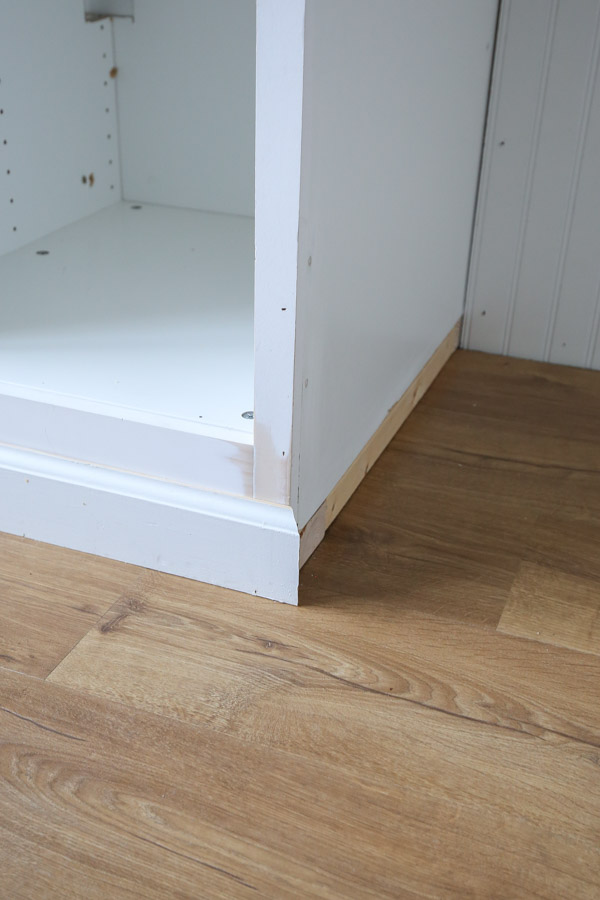
8. Attach the top and bottom trim to the IKEA PAX built in hack
Now, it’s time to really transform this IKEA PAX hack into built ins with the top and bottom trim which can make a huge difference in the look.
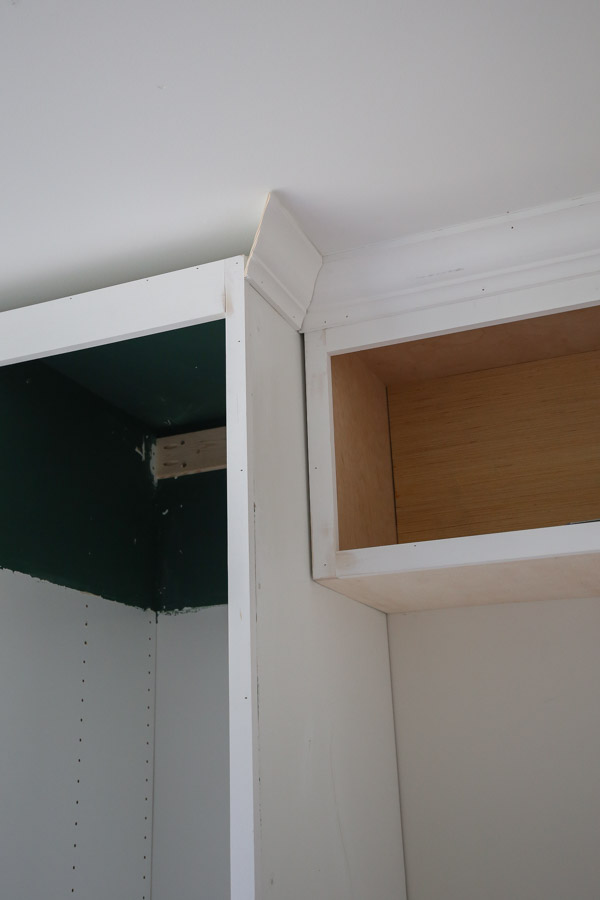
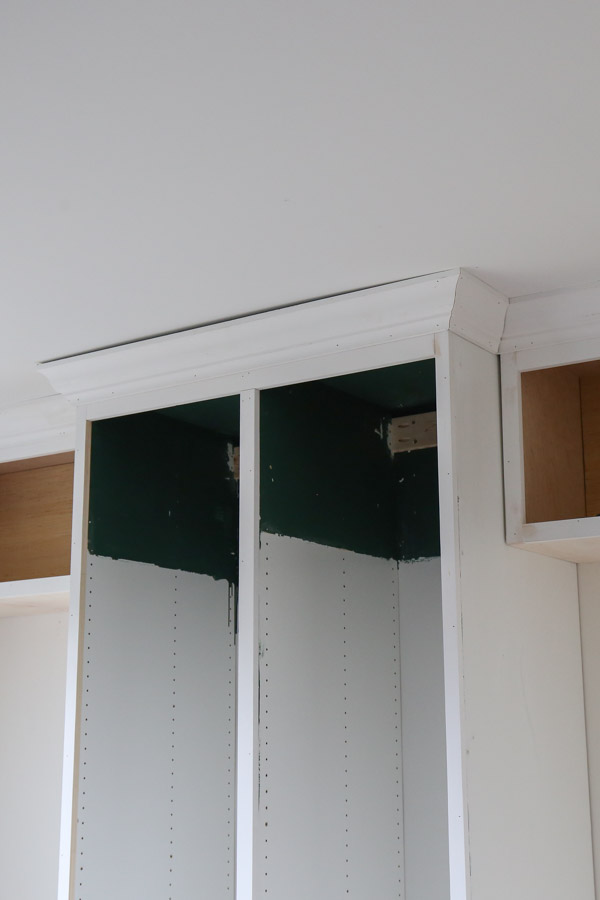
As I said in step #1, for the top trim, you can keep it simple and use 1×4 or 1×3 board and trim it out. But, I designed my built ins to have crown molding at the top for a beautiful, custom built in look!
For cutting the crown molding, we had to cut two outside corners for the front of our IKEA PAX hack cabinets. Then two inside corners where the IKEA cabinets met our two upper built in office cabinets.
Check out my DIY wall cabinets tutorial for more details on cutting crown moulding and outside corners.
For the inside corners, Brandon used a coping method. You can see it in action in our part 3 DIY office built ins and makeover video!
For the bottom, we used the same molding as our existing baseboard and quarter round (shoe molding).
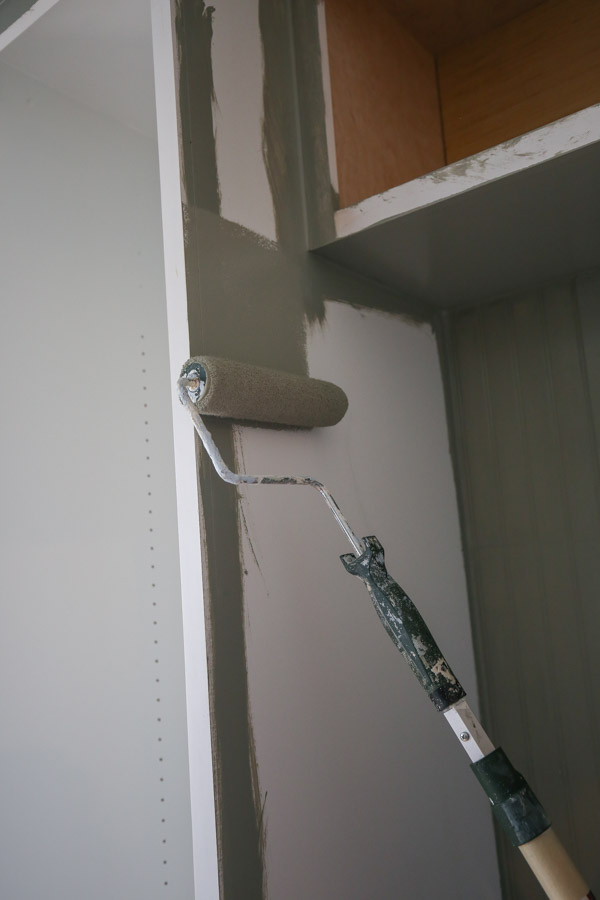
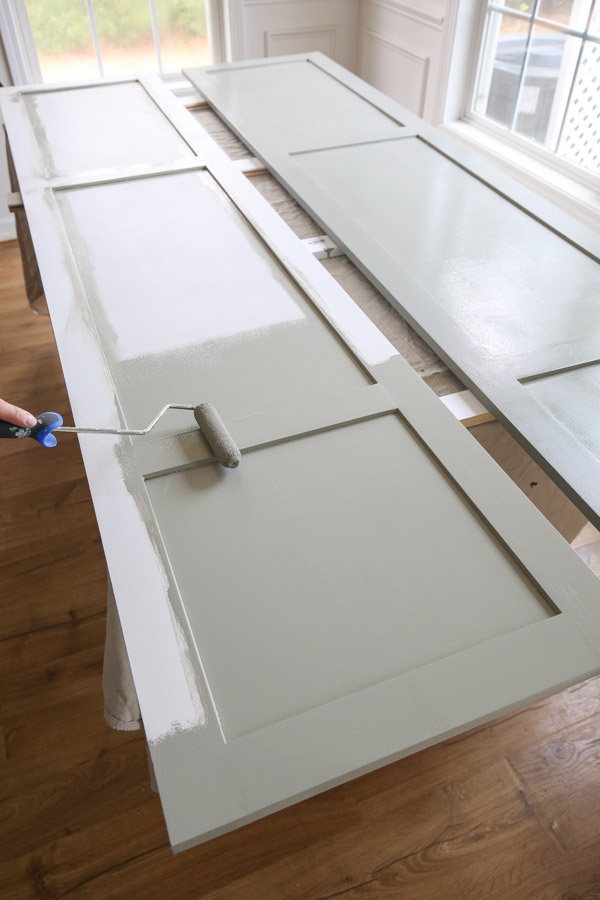
9. Paint the DIY IKEA PAX cabinet(s)
Next, prep for paint by caulking where needed and filling nail holes with spackle or wood filler.
How to paint IKEA furniture
When it comes to painting IKEA furniture or any furniture with a laminate finish, you need to take a few extra steps to avoid peeling.
I have tested many ways of painting IKEA furniture on past IKEA hacks, like our IKEA BILLY bookcase hack and on laminate furniture like our laminate kitchen cabinets.
I have found the best way to do it is prepping properly and using a high quality water based primer and a high quality cabinet and trim paint. I have found that shellac based primers don’t help much.
It’s the exact same method I used for how to paint laminate kitchen cabinets.
However, for this project I tried this water based primer and I used a different brand of cabinet paint, Sherwin Williams, Emerald Urethane Trim Enamel, instead of the Benjamin Moore Advance paint, since my paint color was Cornwall Slate by Sherwin Williams.
All other steps were the same though as my painting laminate kitchen cabinets. I wiped the cabinets down with a degreaser first.
Then, we primed, and then painted two coats of paint on the whole thing! These steps, especially the cabinet paint, will help to ensure a smooth finish.
Make sure to check out the best paint for cabinets and trim for more details on paint for cabinets and IKEA furniture!
10. Build or buy the cabinet door for the IKEA PAX hack
Let’s talk about doors for the IKEA PAX cabinet if you want to add one or more of them.
IKEA sells different doors that fit the PAX unit. However, these doors can’t easily be used with a face frame. You could do a very advanced design and make the doors appear inset with your face frame as an alternative option.
Alternatively, you can either buy or build the door to fit the cabinet with the face frame and door style you want.
Buying custom cabinet doors
There are many places to buy custom size doors both online and locally, but it is pricey especially with shipping for such a large door. Even buying locally, a large door is going to likely cost several hundred dollars.
That being said, I have bought premade doors before when we built our DIY kitchen built in cabinets. Check that post out for more details and photos. But I bought my doors from Barker Doors.
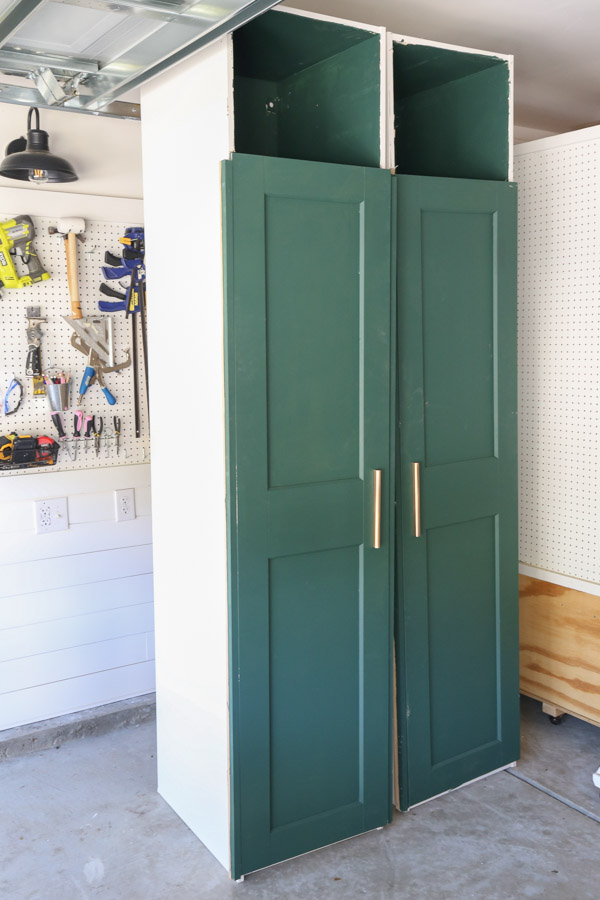
In my case, my IKEA cabinets came with doors from IKEA, but I didn’t like the look of them and they didn’t cover the full cabinet. So, I decided to build my cabinet doors to fit the full size of the PAX cabinet and with a face frame and a partial overlay style door.
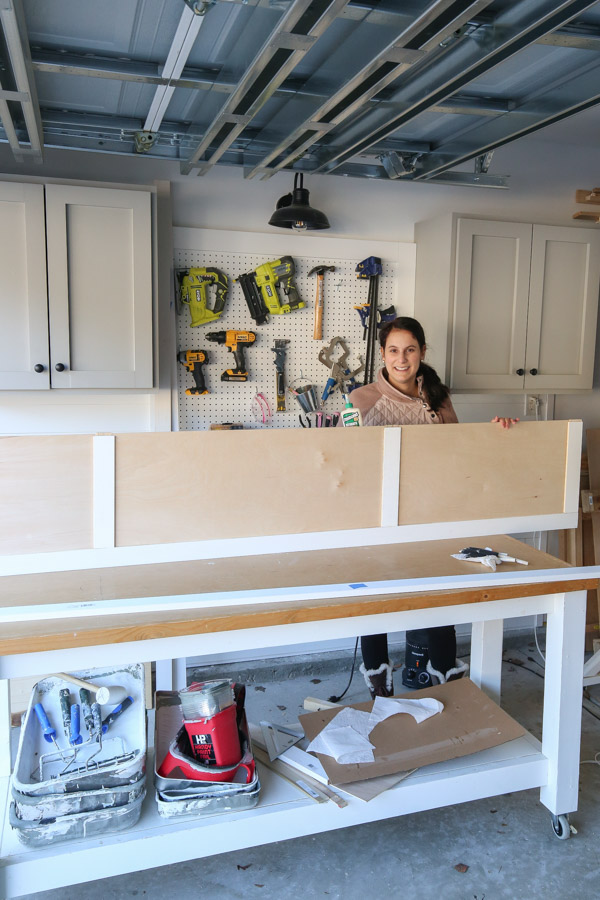
Building the doors for the IKEA PAX hack
Check out my tutorial to learn all about how to build doors and 3 construction techniques for building DIY cabinet doors! If you want to build your door and you are more of a beginner, definitely use method #1 from that tutorial with screwing plywood to a frame!
I don’t recommend the intermediate DIY cabinet door construction method for large, 3 panel DIY doors or any large door. I used it for our DIY custom built in cabinet in our entryway and it didn’t work great.
For this project, I used the advanced DIY cabinet door construction method using a router, router table, and a rail and stile router bit set to basically create a tongue and groove connection for the door frame and panels.
You can see all of this in action in the part 3 DIY office built ins and makeover video!
Everything attached together with wood glue.
The biggest difference with making a DIY three panel cabinet door versus a standard one panel door, is that there are two middle rail boards (horizontal) boards.
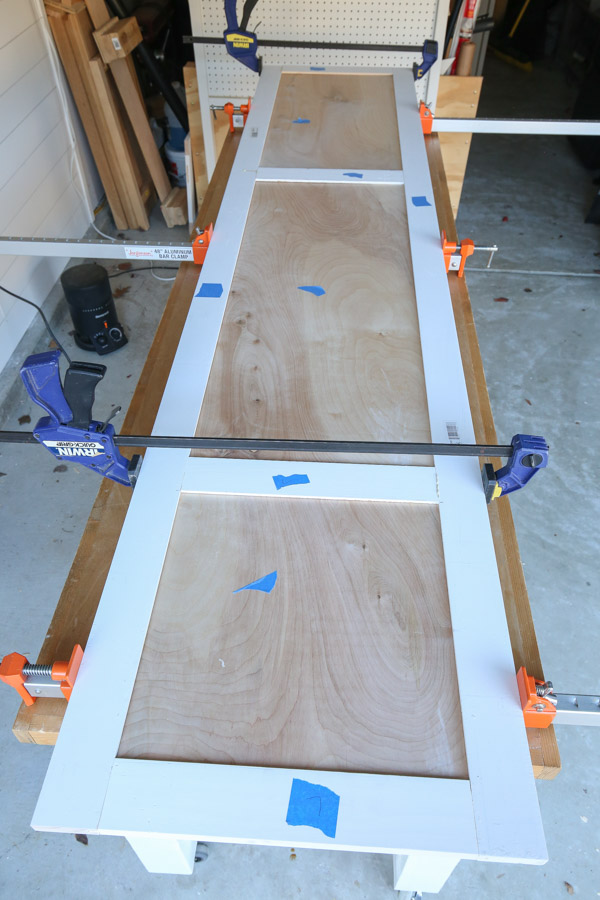
For the construction method we used with the router, we had to add grooves on each side of those boards to fit the extra panels.
Finally, after building the cabinet doors, we primed and painted them the same color as the built ins, Cornwall Slate by Sherwin Williams!
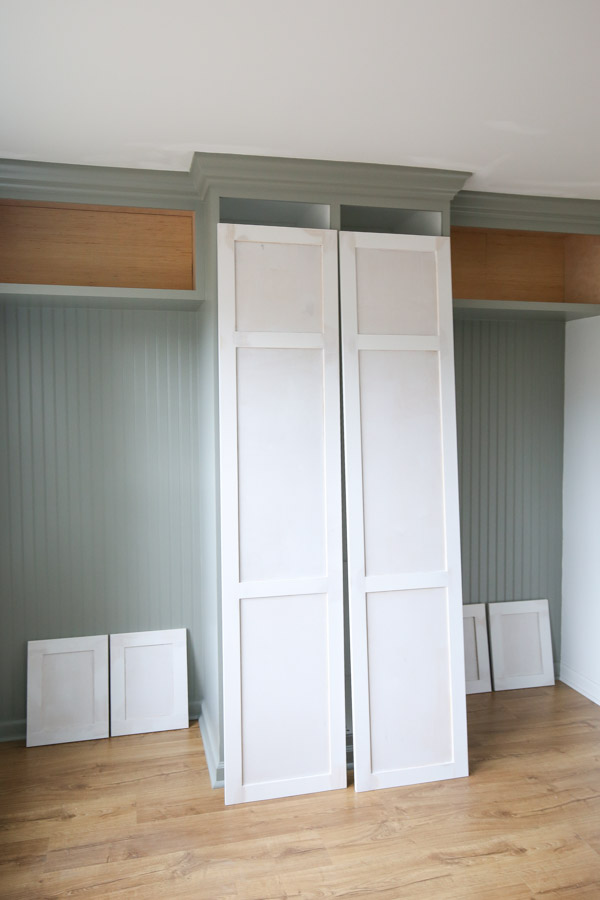
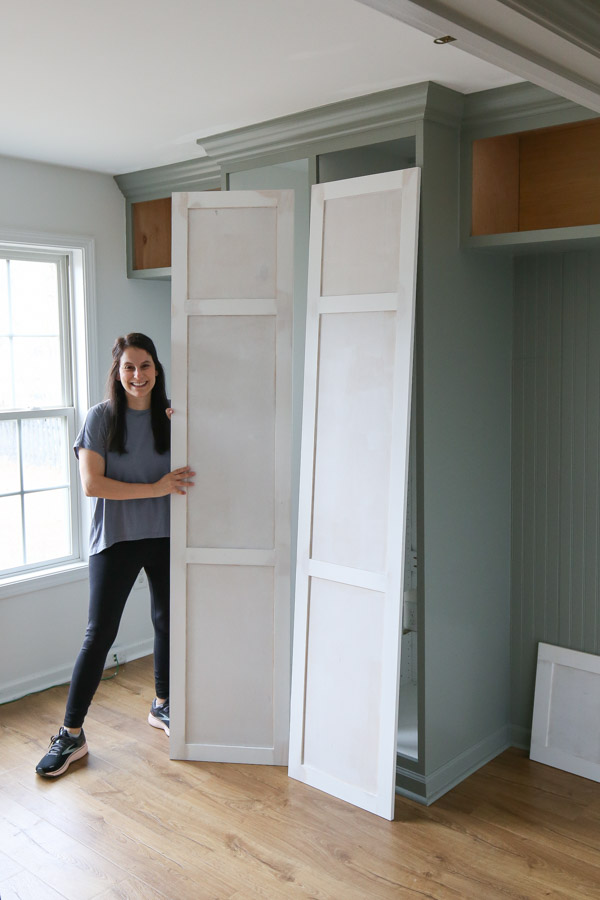
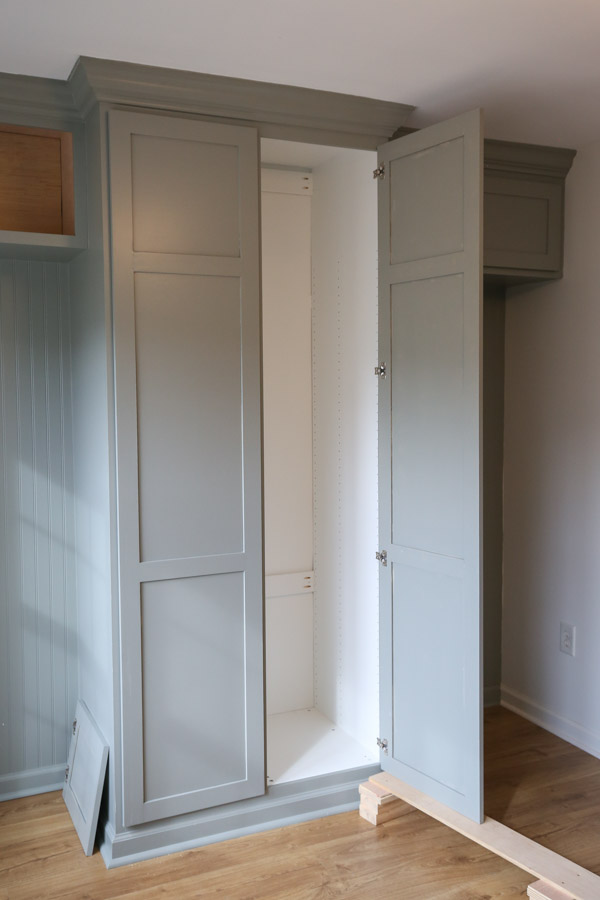
11. Install the doors on the built in IKEA PAX hack
To install the door, we used the same method as our DIY wall cabinets and our DIY garage cabinets. We used our Kreg Concealed Door Hinge Jig and overlay, concealed, European style hinges.
I used four of these 3/8″ overlay soft close European hinges. We also had to use a jig to help hold the door in place while we installed the hinges to the face frame.
12. Install the cabinet hardware and any other final IKEA PAX wardrobe system accessories
The last finishing touch is to install cabinet hardware! We used these brass cabinet pulls in the 6 inch size, I absolutely love them!
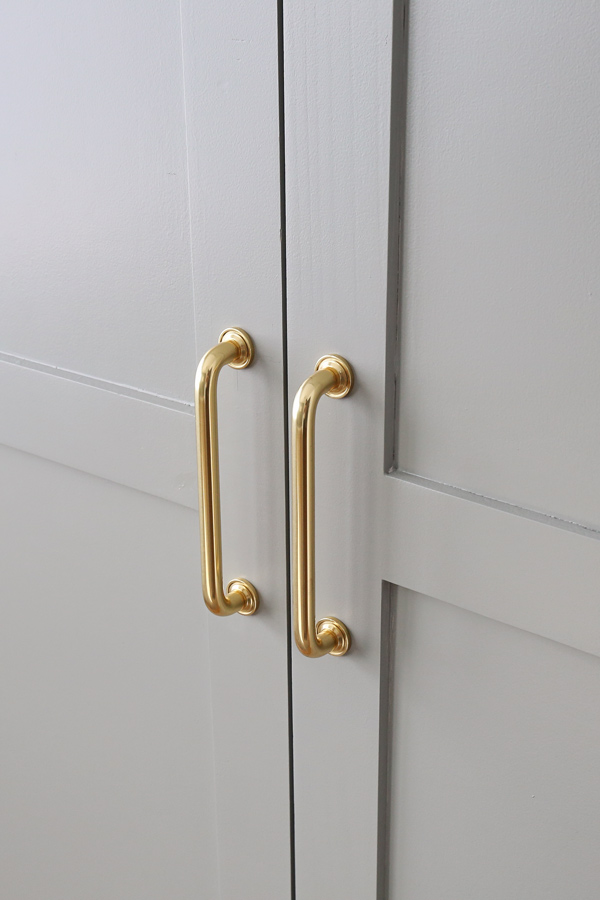
Ta da!
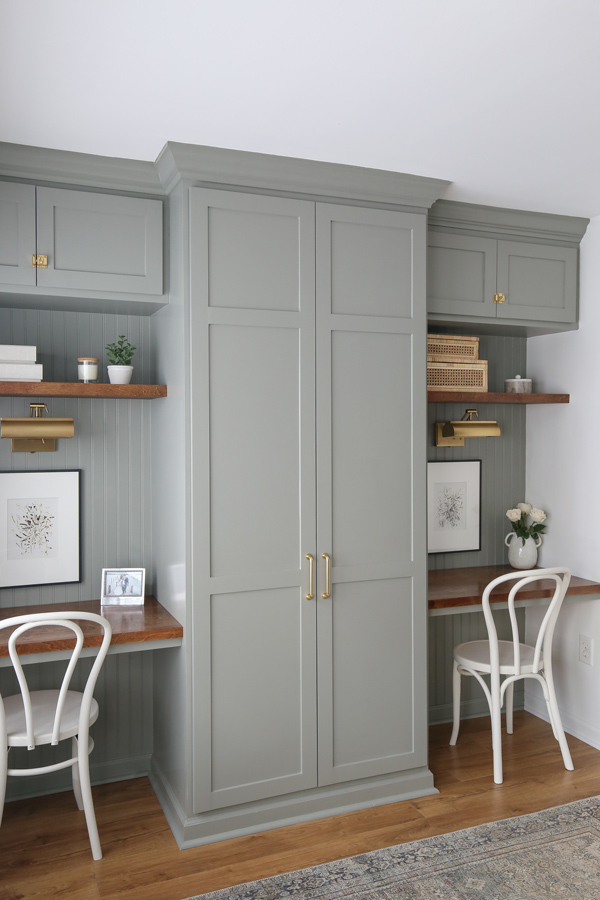
What do you think of this IKEA PAX hack for an IKEA PAX closet hack or IKEA PAX built in hack? I used it for built ins but it could have been done the same way to create a custom closet or built-in wardrobe, just without all of other other built in features for our office makeover for two!
Make sure to check out our other IKEA hacks too!
Follow along for my latest projects and sneak peaks on Instagram, YouTube, and Pinterest!
Kerry
Sunday 25th of May 2025
Hi there - just curious about the dimensions of the space
Gareth
Thursday 19th of September 2024
This color is gorgeous. Can I ask what it is please?
Angela Marie Made
Friday 20th of September 2024
Thanks! It's Cornwall slate by Sherwin Williams