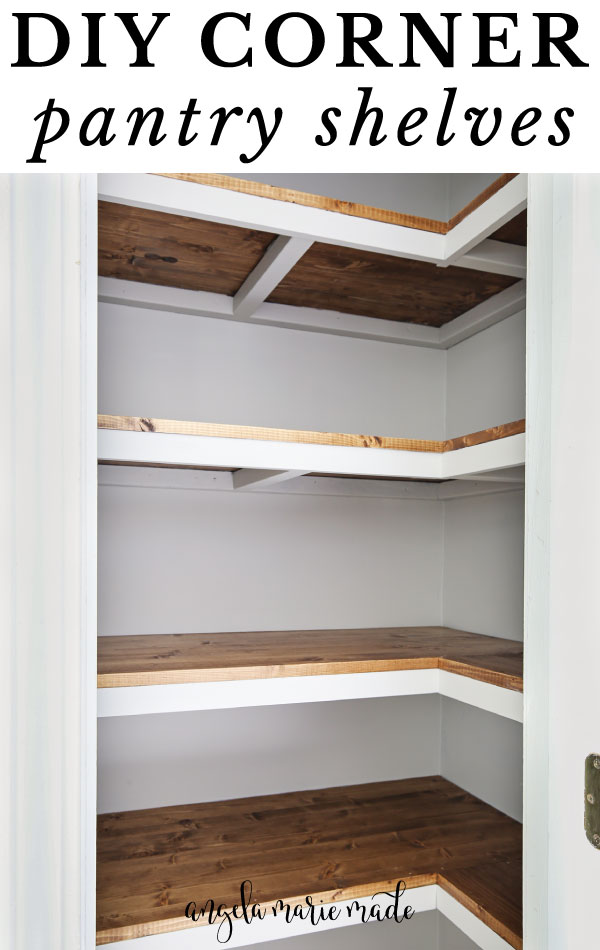
Learn how to build corner pantry shelves that are functional and beautiful!
We are making over our pantry closet and I knew I wanted to add wooden DIY corner closet shelves.
We actually have two pantry closets. We gave our other pantry closet a makeover two years ago along with new wood DIY pantry shelves!
With this second pantry closet though, it’s deeper and larger, so that’s why we are doing DIY corner pantry shelves!
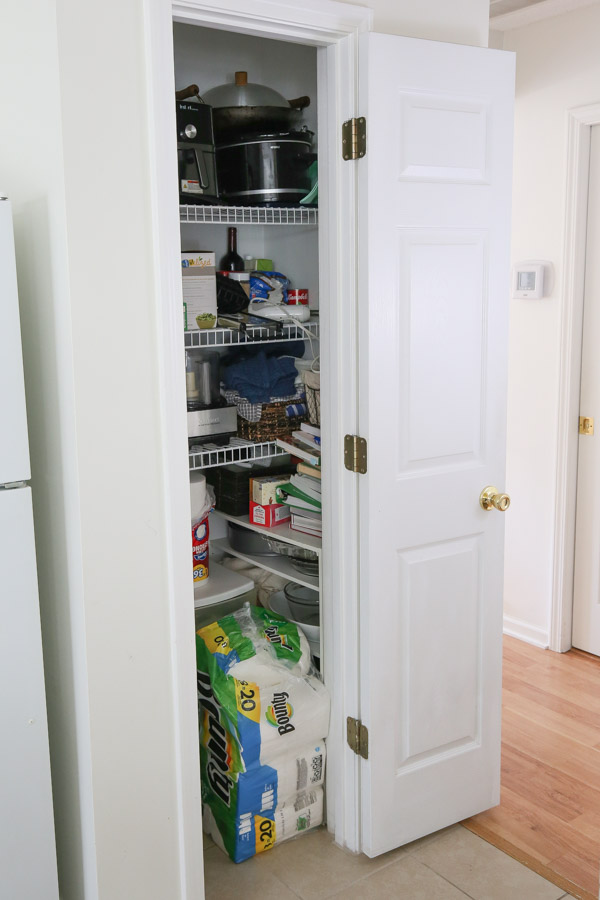
Currently our pantry is a disorganized mess with ugly wire shelving:
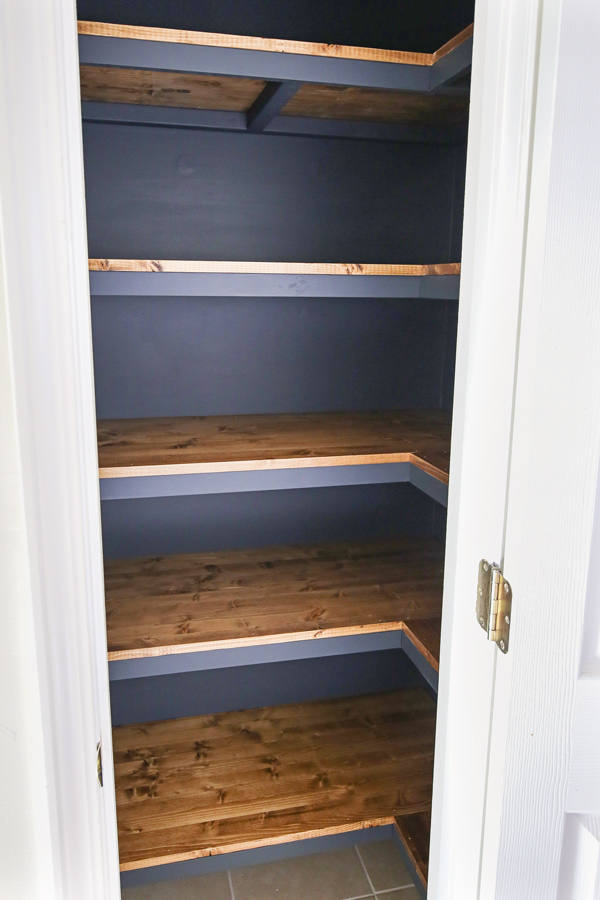
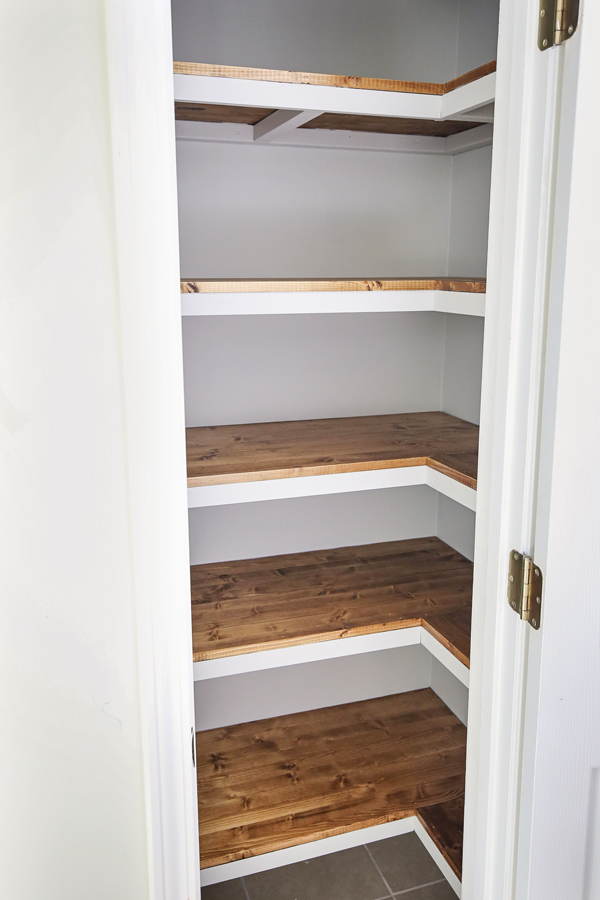
And now here are our new corner pantry shelves!
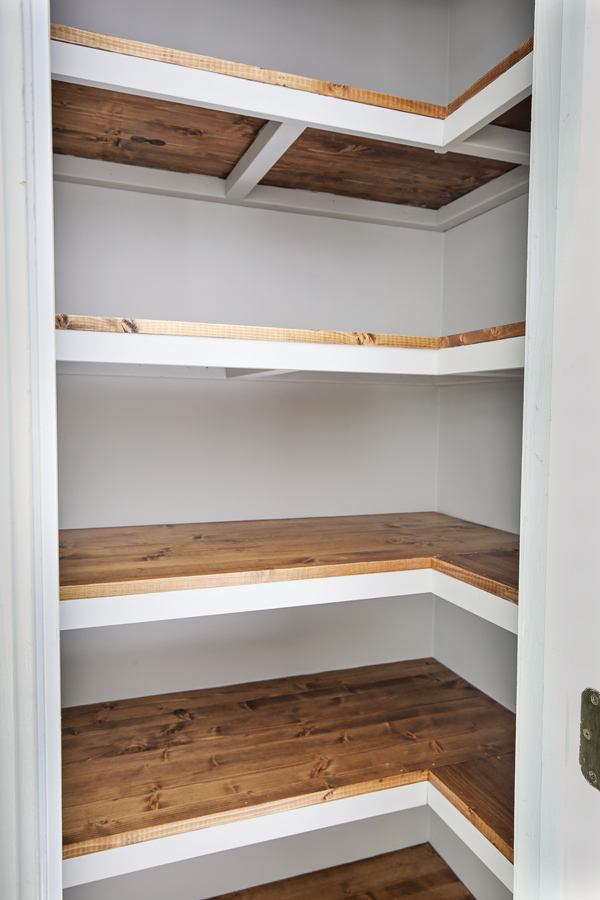
These corner pantry shelves are similar looking to our more simple pantry shelves, as far as the design and stain color goes.
I wanted these shelves to have the look of DIY floating corner shelves, so no brackets!
Although this tutorial is for corner pantry shelving, it can be used for other closet shelving too as long as the items are more lightweight and not really heavy.
Note, this post contains some affiliate links. For more info see my disclosures here.
DIY Woodworking Made Simple
Want to learn how to DIY and use power tools, but don’t know how to get started? Check out our digital course DIY Woodworking Made Simple to help get you started in significantly less time and frustration than trying to figure it out by yourself!
How to Build Corner Pantry Shelves:
Materials Needed
- Edge glued panel boards***
- 1×2s @ 8ft (I used pre-primed wood boards)***
- 2x2s @ 8ft***
- 1 1/4″ brad nails
- 3 1/2″ screws (I used self tapping screws)
- 2 1/2″ Kreg screws
- Wood stain (I used this color)
- Polyurethane (optional)
- Paint
- Spackle
Tools Needed:
- Miter Saw
- Drill
- Brad nailer
- Kreg Jig
- Clamps
- Tape Measure
- Stud finder
- Level
- Table saw or circular saw
***Note: Adjust materials and cuts for your custom pantry size! See step #2 for more details on material options and cut measurements.
DIY Corner Pantry Shelves Video Tutorial:
Subscribe to my YouTube Channel here!
1. Clear pantry out and remove old shelving
Start by clearing all of the items of your pantry out.
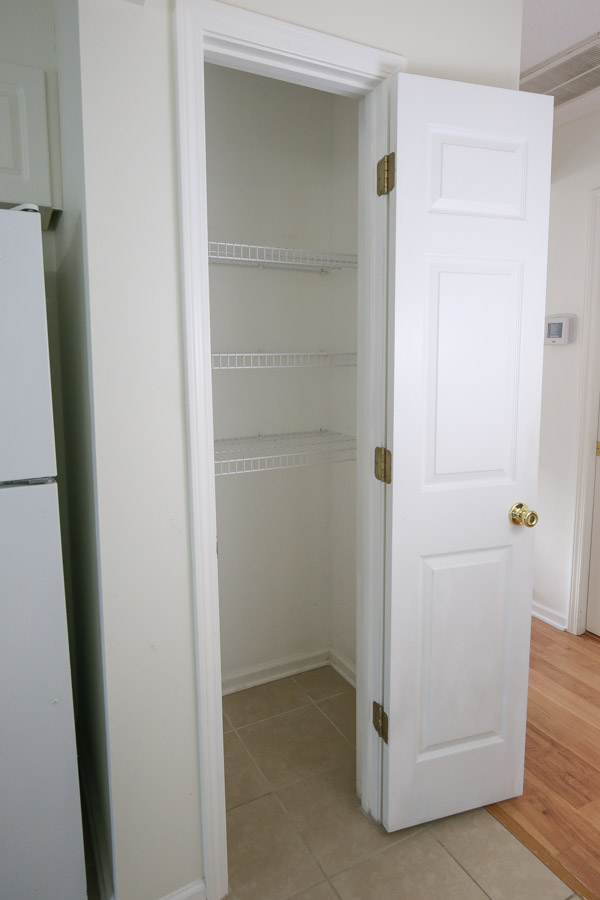
Remove any old shelving. We removed our ugly wire shelving using a prybar since the brackets were installed with anchors and large nails.
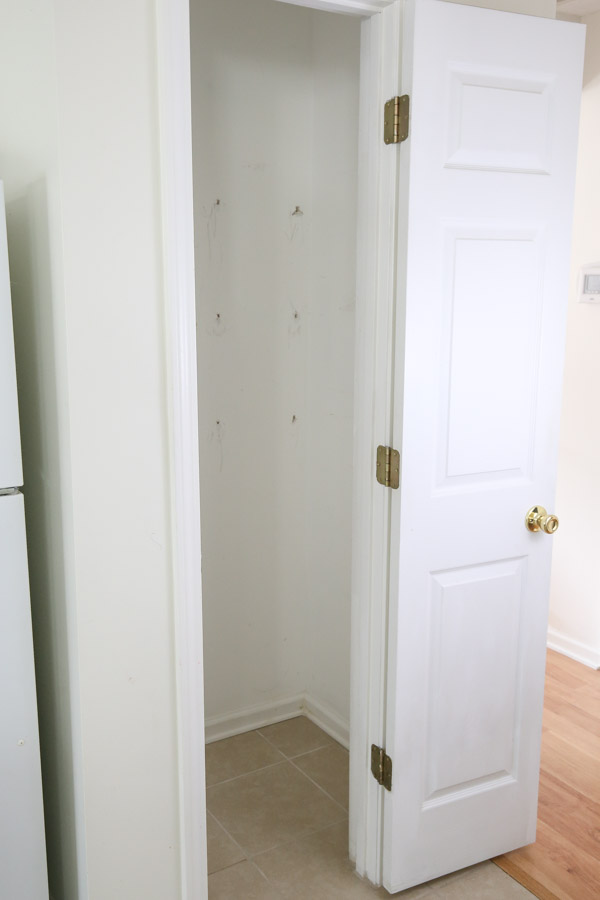
Of course the anchors left large holes which we filled with joint compound. For the smaller holes we used spackle. Once the filler dried, we sanded it for a smooth finish.
2. Cut wood to size for the shelves, trim, and supports
Since all pantries vary in size as well as the number of shelves needed, I am not going to provide a cut list for these DIY corner closet shelves.
But, here is a build plan draft of our shelves with the measurements we used to help you determine your measurements:
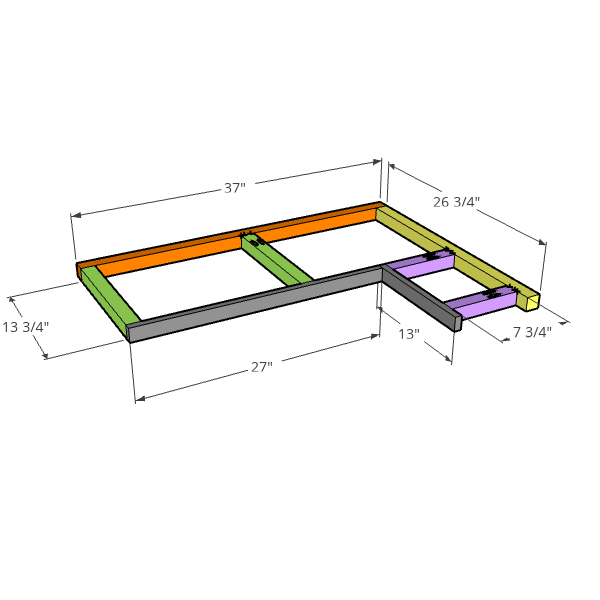
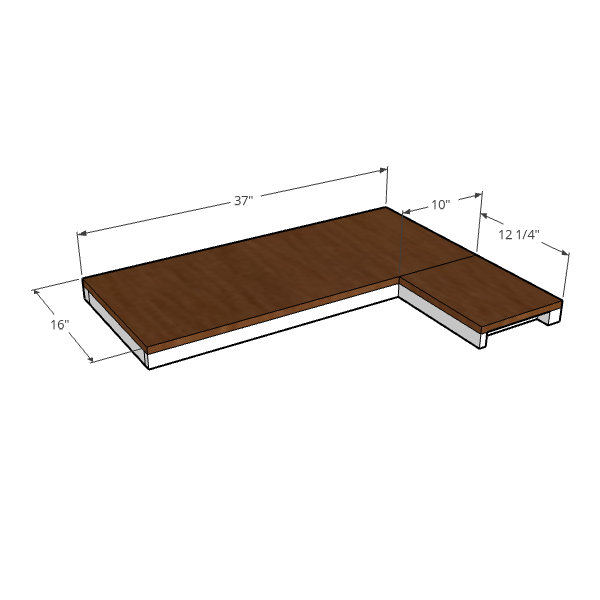
Measure the length, width, and depth of your pantry walls. Cut your DIY pantry shelves with a miter saw or circular saw to size based on your measurements.
We used 16″ and 12″ wide premium edge glued panel boards for the shelves. But, you can use standard edge glued panel boards for cost savings.

Or you can use 1x12s like I did for our first DIY pantry shelves. Plywood is yet another option, but you would need to use edge banding to cover the rough edges.
Next, use a miter saw and cut the 2×2 support brackets to size for the back wall supports, two side wall supports, and the middle supports. NOTE, use more middle supports if your pantry closet is larger!
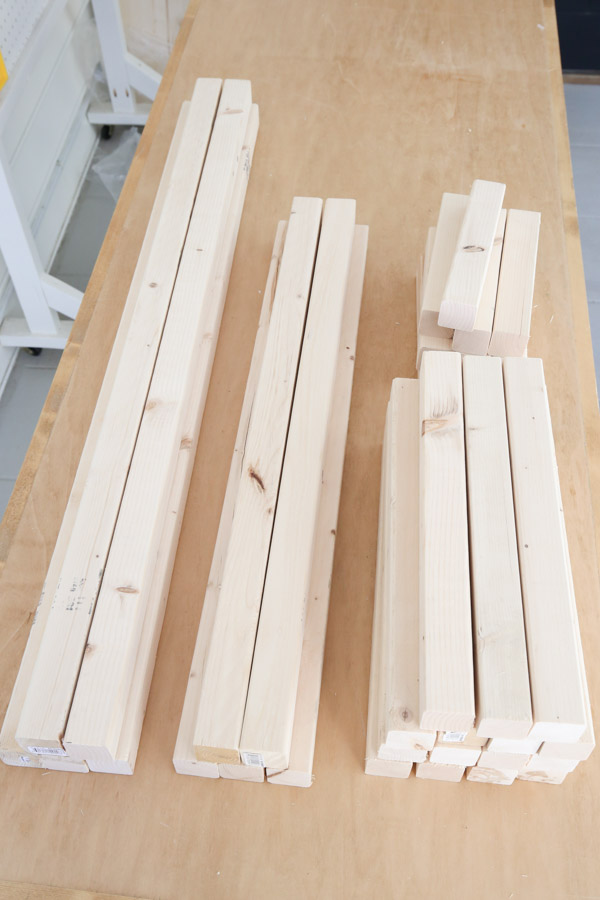
Finally, cut the 1×2 trim boards to size for the front of the shelves. Note, you can also wait till the supports are installed to make these cuts in case you want to double check your math with the measurements of these boards!
3. Stain the wood shelving boards
Stain the top and bottom of the wood boards being used for the shelving. To match our other pantry shelves, I used Provincial by Minwax.
After the stain dried, we used polyurethane on the top and front edges of the wood boards to help protect them and make them more wipeable.
For tips on staining and finishing, check out my how to stain wood tutorial and my how to apply polyurethane tutorial.
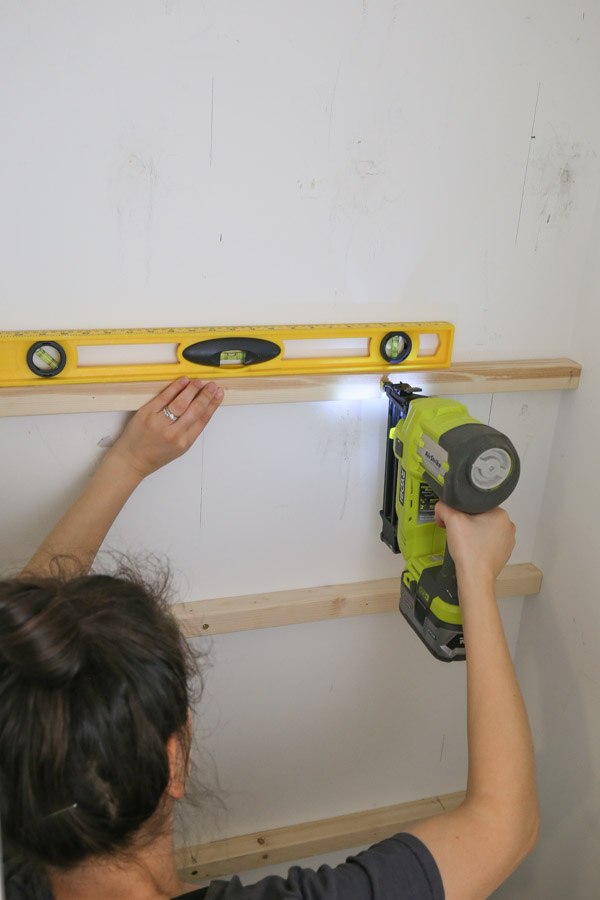
4. Attach supports to the wall for DIY corner pantry shelves
Use a a pencil and mark where you want your pantry shelves to be hung on the wall.
Make sure to account for the thickness of each shelf board (3/4″) and trim board (1 1/2″), a total of 2 1/4″ thick in addition to the space you want between each shelf.
Use a stud finder and mark where the wall studs are located.
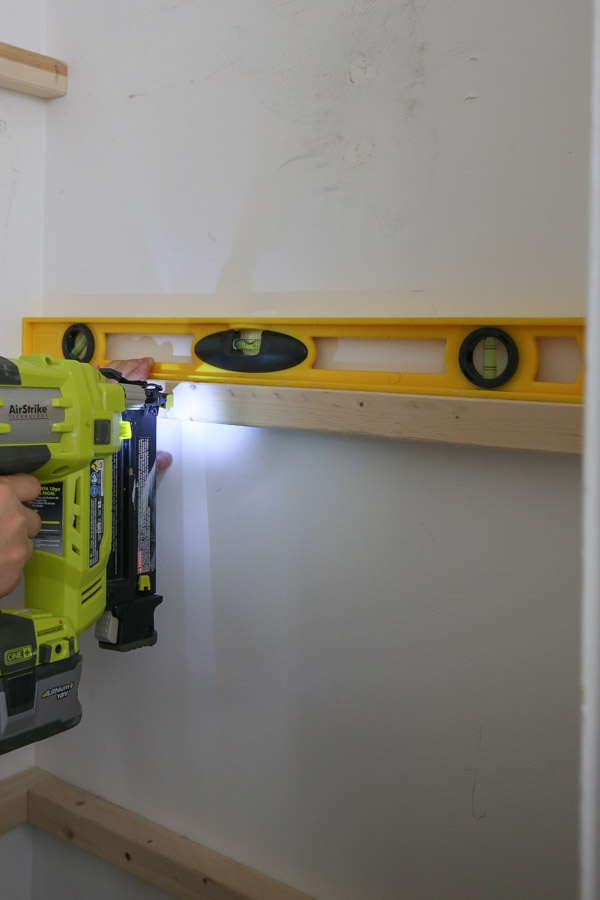
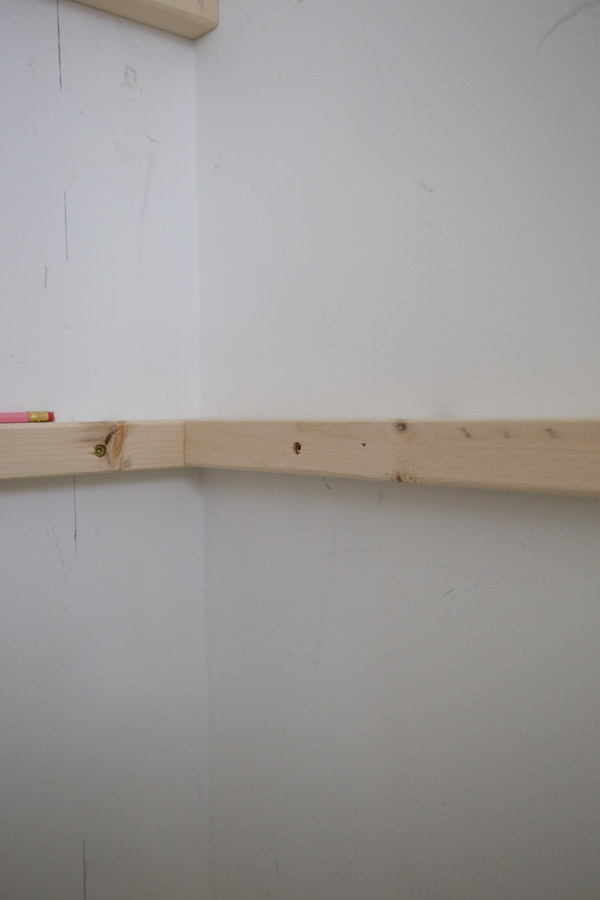
Attach your back 2×2 wall shelf supports to the wall one at a time using a level to ensure they are level.
I first attached my boards with a brad nailer to hold them in place.
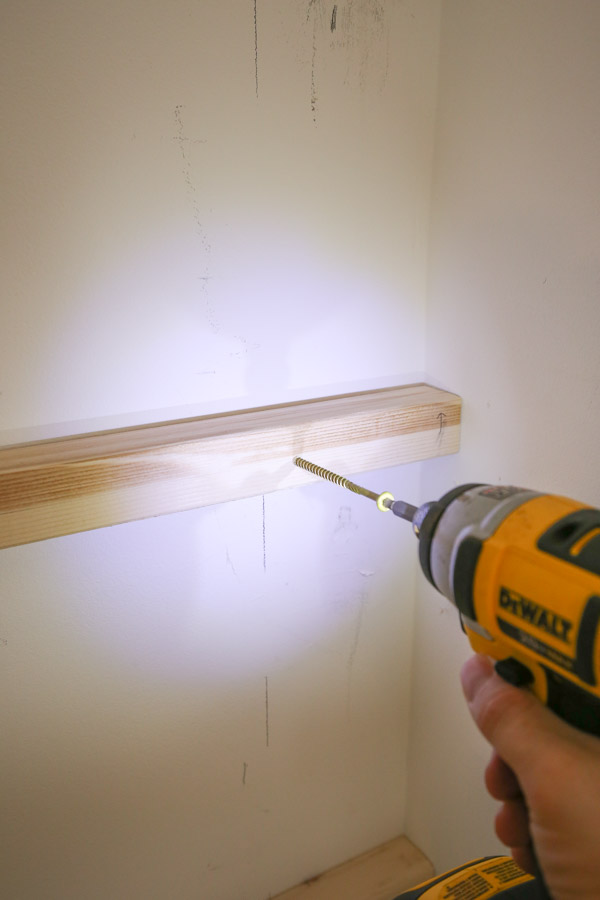
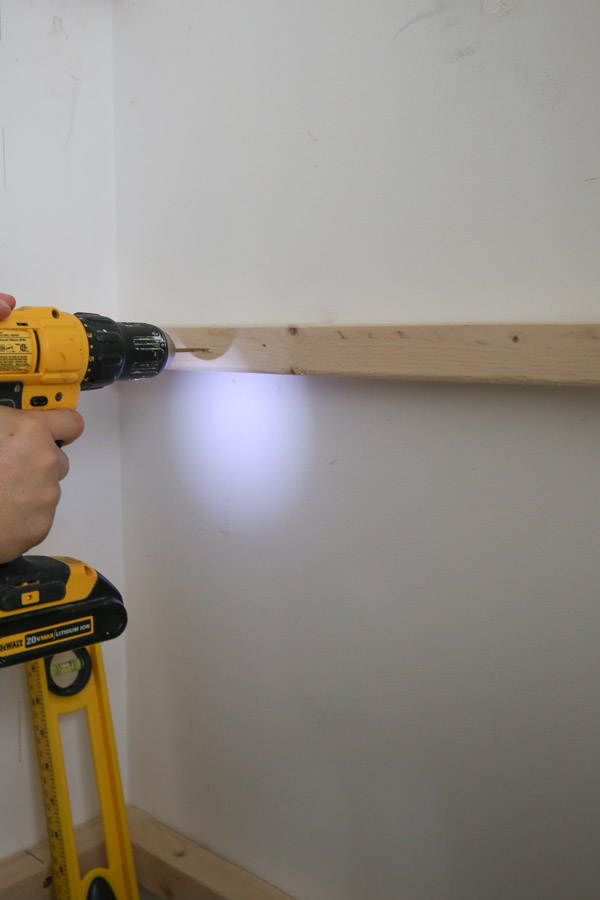
📩 Want to Save This?
Then I drilled a 3 1/2″ screw through the supports into the wall studs. I used self tapping screws so no pilot holes were needed. I also countersunk each screw a bit into the wood to make it easy to fill them with spackle.
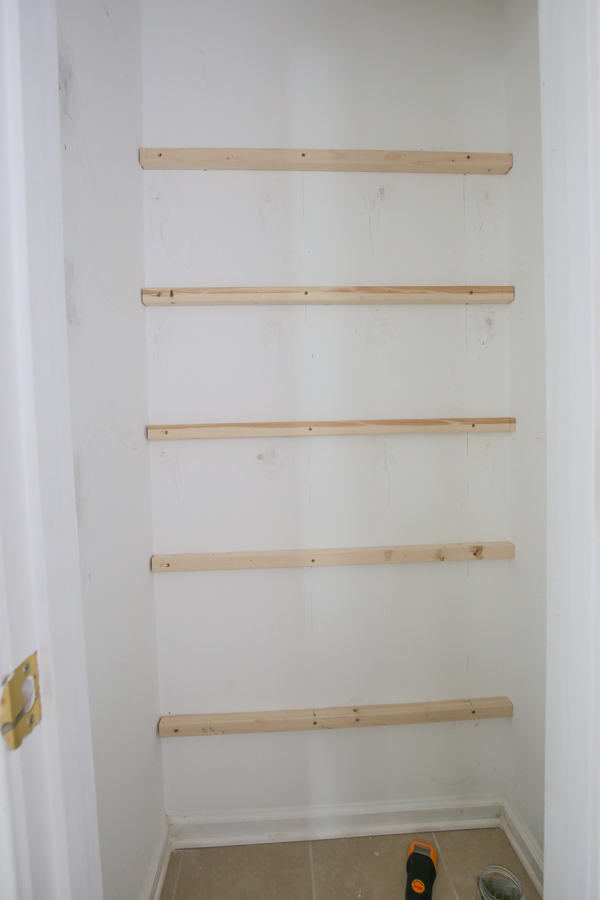
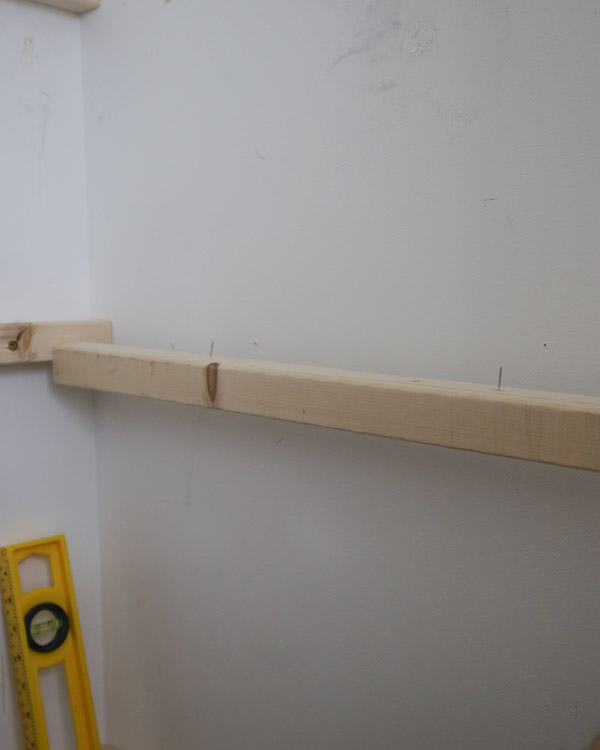
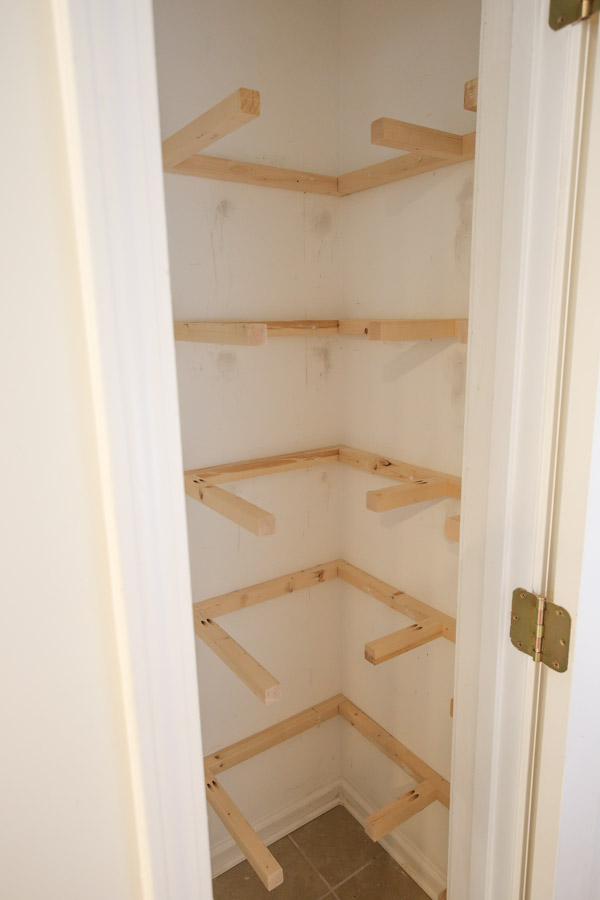
After the back supports are installed, attach the right and left wall supports.
Unfortunately, we didn’t cross any wall studs on our left wall and one spot on our right wall so we had to use wall anchors.
You can see all of this in action in the DIY corner pantry shelves video here. But, to do this, we nailed the 2×2 in place (just 2 nails) and pre-drilled a pilot hole through the 2×2 and wall.
Then, we carefully removed the 2×2 from the wall and drilled the hole for the anchor and tapped the anchor in place with a hammer.
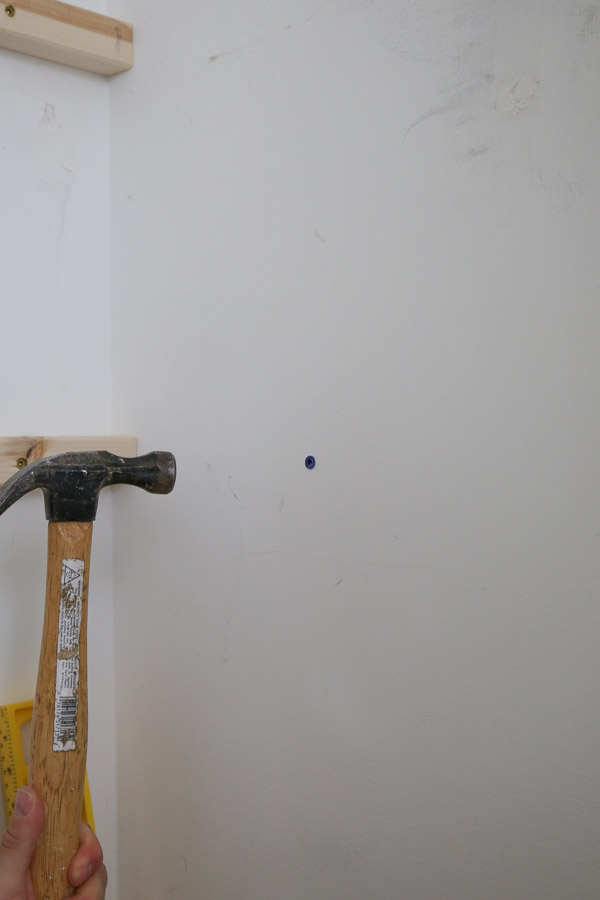
Next, we put the 2×2 back on the wall by lining up the nails with the nail holes and installing the screw through the pre-drilled pilot hole. This method allowed us to make sure our holes were all perfectly lined up!
Make sure these 2x2s supports are all very secured to the wall.
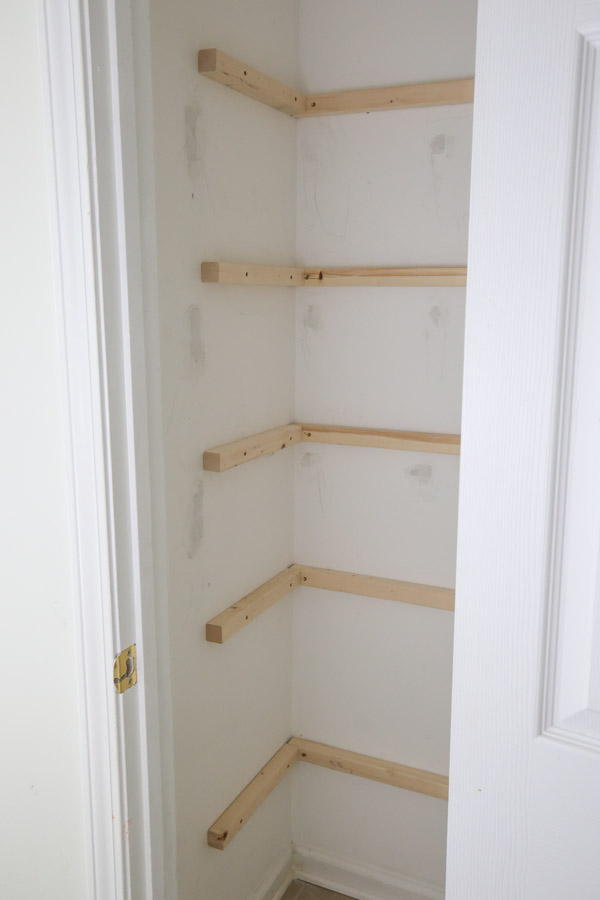
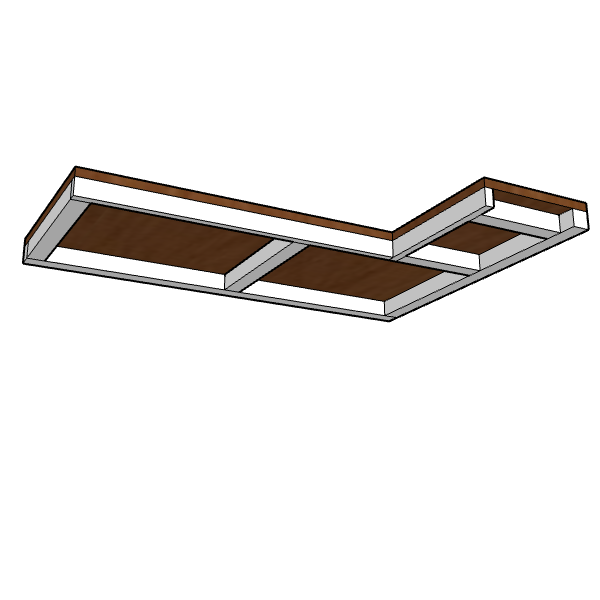
5. Install the middle support brackets for the DIY corner closet shelves
Use a Kreg Jig and drill pocket holes into one end of the 2×2 middle support brackets.
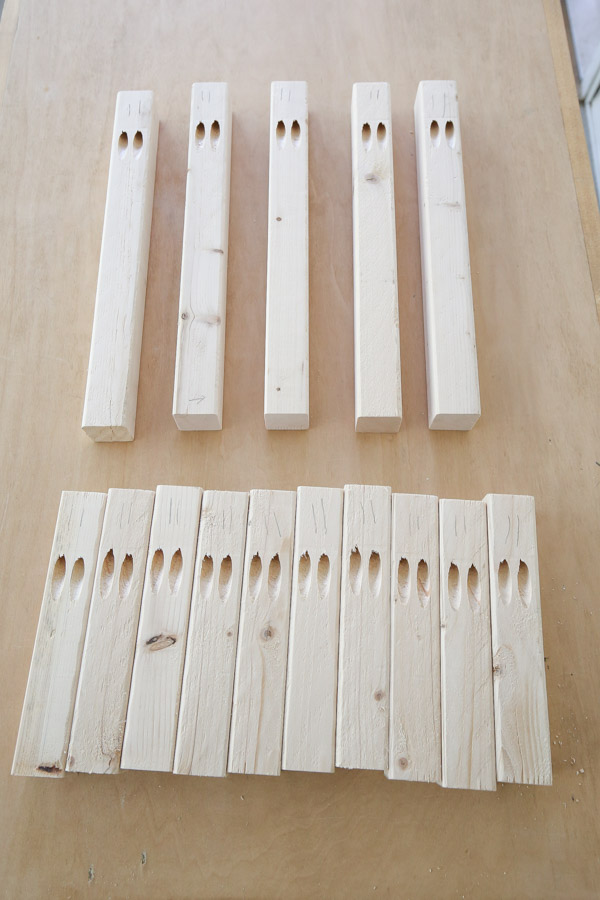
These middle support brackets are key for how to build corner pantry shelves.
Attach the middle support boards with 2 1/2″ Kreg screws. We used a clamp to help with this step.
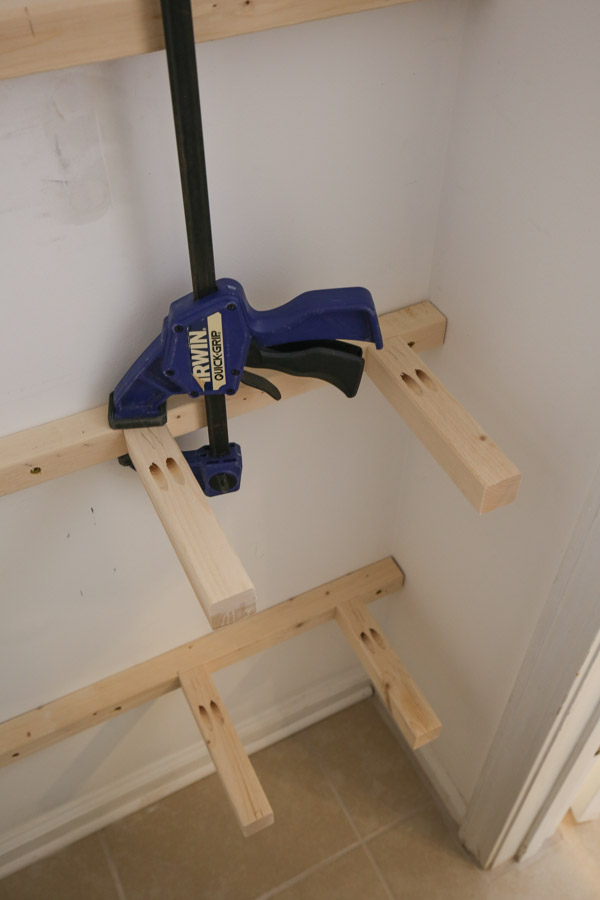
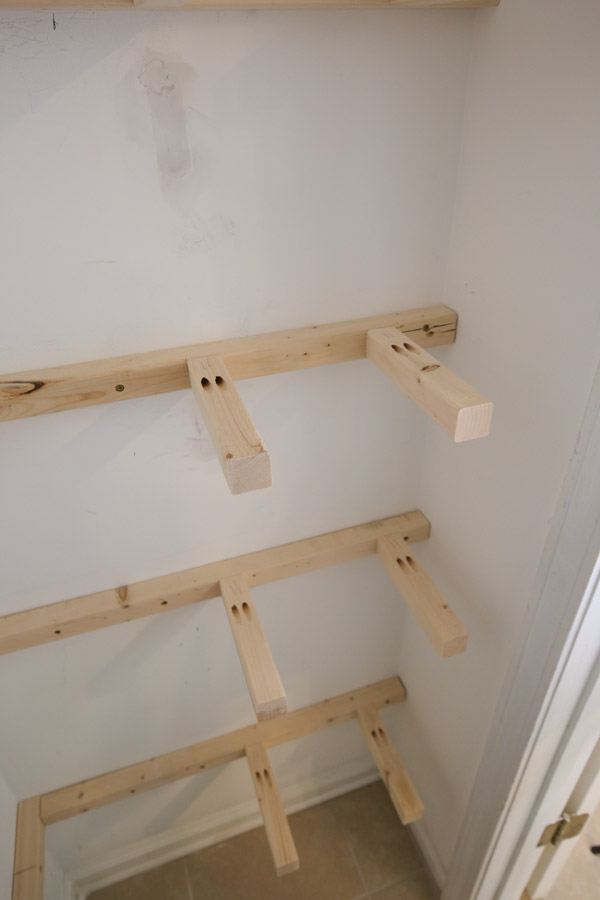
Make sure one of the middle supports along the side wall will be installed where the two shelf boards meet so they can both rest on the support board (as shown in the diagram in step #2).
6. Prime and paint the 2x2s, trim, and walls
Fill and sand any nail holes and screw holes with spackle.
Prime the 2x2s and 1x2s if you aren’t using pre-primed wood.
Paint the 2×2 supports and walls.
Also, go ahead and paint the front and bottom edge of the 1×2 trim boards.
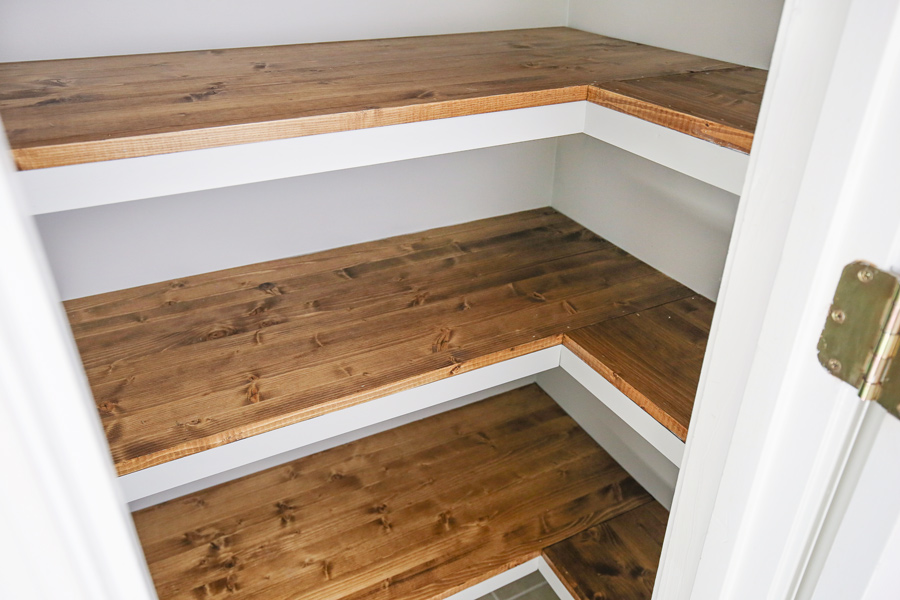
7. Install the wood pantry shelves and 1×2 trim
Start from the bottom and place your bottom wood pantry shelf and corner shelf on top of the bottom supports.
Next, clamp the side 1×2 trim in place and nail the trim and corner shelf into the 2×2 supports and each other. We used 1 1/4″ brad nails.
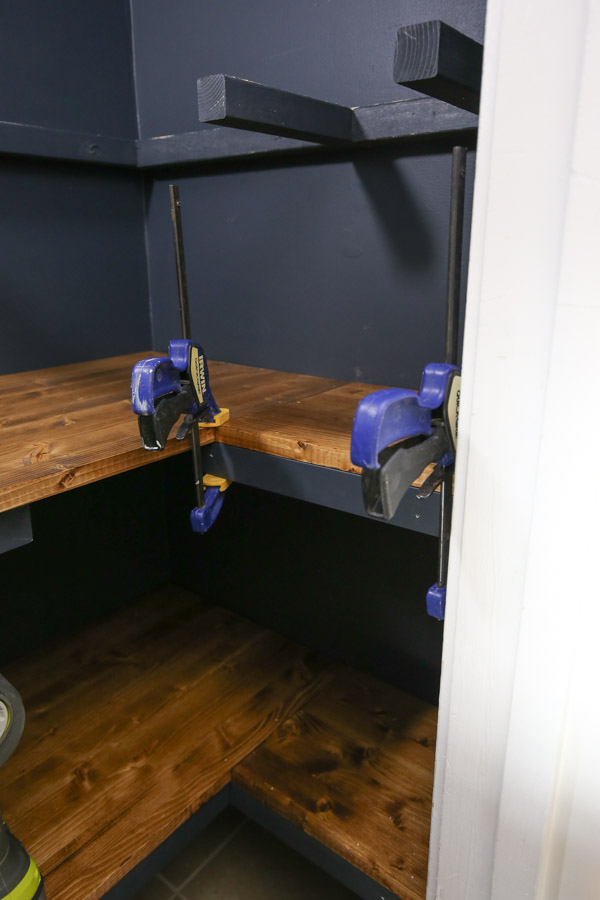
Then clamp and attach the longer front trim board to the longer front shelf board and nail in place. Continue this process for each shelf working your way up.
Make sure to check out the DIY corner pantry shelves video to see all of this installation process in action!
Fill the nail holes with some spackle and touch them up with paint.
After trying a dark paint color (gravel gray by Benjamin Moore), last minute I decided it was just too dark for a pantry with no additional lighting.
So Brandon painted it a lighter color, gray owl by Benjamin Moore, that we had on hand already.
These corner shelves are much deeper than our other DIY pantry shelves, so it was really hard for me to photograph and so dark even after repainting a lighter color! I am going to install battery operated under shelf lighting for the final pantry makeover next week!
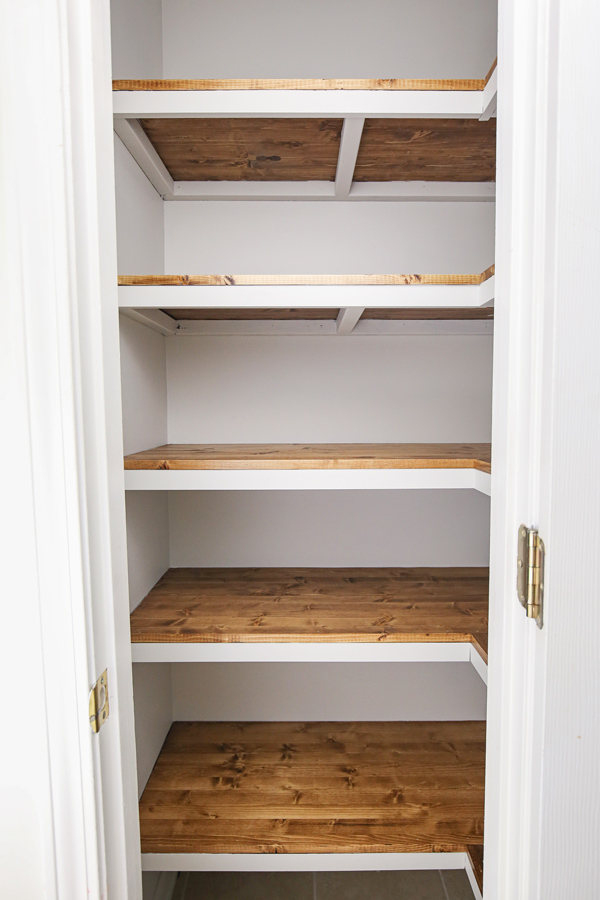
Here’s a wide angle view inside of the pantry:
What do you think? Definitely a bit more involved than our simple wooden DIY pantry shelves, but super functional! I hope this how to build corner pantry shelves tutorial has been helpful!
I can’t wait to get this pantry organized and all pretty too! First I need to declutter all of our stuff though! Make sure to follow along and don’t miss the final pantry makeover!
Follow along on Instagram and YouTube!
Want to save for later?! Pin it here!
Jacqueline
Monday 17th of November 2025
This is my first time doing a project like this. Any Home Depot recommendations (links) for the "2x2s @ 8ft"?
Judy Pope
Wednesday 8th of January 2025
When you go from step 6 to 7 there are no pictures that show how to attach front boards. Not sure how to attach.
Angela Marie Made
Thursday 9th of January 2025
You can see it more clearly in the video tutorial: https://youtu.be/_fb3VisENOI
Ben
Sunday 22nd of January 2023
These shelves look great! I was planning on redoing my pantry and I like the idea of not using brackets and this method could work. My pantry is a little bit bigger though and I worry that the shelves and food will be too heavy to not use brackets. The shelves will be 5 and 6 feet long and I was hoping to make them 16 inches deep. I know I will need more supports but I was curious if you think the shelves would hold in my case.
Angela Marie Made
Thursday 26th of January 2023
Try to attach the support boards to as many wall studs as you can and make sure to add more middle support boards but that should hold up well!
Rikki
Thursday 1st of December 2022
I'm curious why you used 2x2 supports as opposed to 1x2 in your first pantry build? I'm planning out a pantry build for a 66" pantry closet, no corners (my first project ever!!). Would 2x2 or 1x2 be better? Also, I'm thinking that since my closet is so long I should probably do the middle support brackets with the pocket hole jig for extra support, would you agree? Thanks!!
Sarah
Monday 24th of February 2025
@Angela Marie Made, Would you put pocket holes on both ends of the middle support brackets if you are using 2x2s?
Angela Marie Made
Monday 5th of December 2022
With deeper shelves, a longer length, and the corner feature, the 2x2s offer more support than the 1x2s for this size pantry. I would have to see the closet, but since it sounds wide, I would probably go with the 2x2s. And yes I would do middle support brackets as well.
Gabrielle
Wednesday 20th of April 2022
I love this! I was just wondering about how much this project cost you to do?