Learn about the best finish for butcher block countertops and how to stain, seal, and finish butcher block countertops!
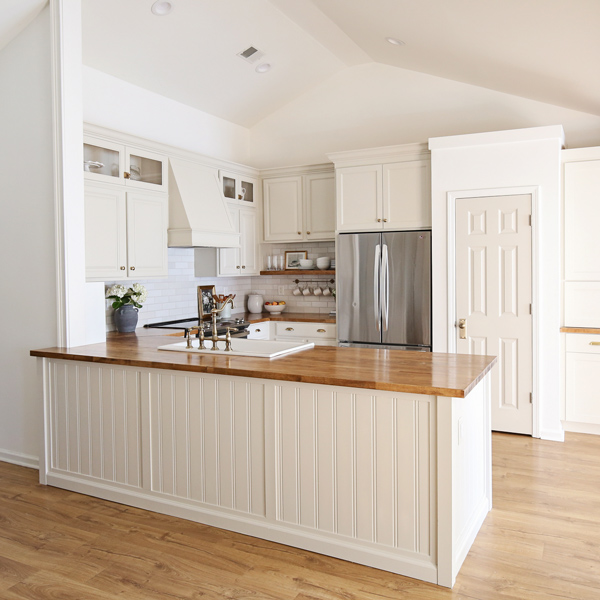
As part of our kitchen makeover, we replaced our laminate kitchen countertops with butcher block. A big part of this process was the finishing process and sealing butcher block countertops.
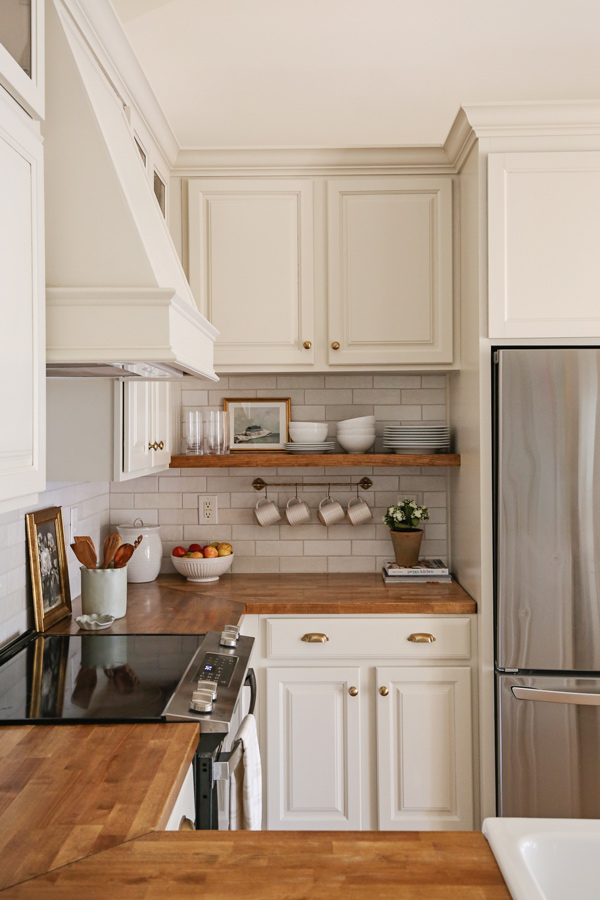
I love the warmth and character that the butcher block brought to the room and I think that the way we finished it definitely helped!
Below I am sharing in detail all about the butcher block we used and why, as well as the finishing process, including the pre-finish steps, the staining and the sealing process.
Note, this post contains some affiliate links. I may earn a commission if you shop those links (at no cost to you). Thank you for supporting my small business. For more info see my disclosures here.
Types of butcher block and what we used
When it comes to staining wood, the species of wood can make a big difference in the final look and color of the wood.
Therefore, I highly recommend testing out a few colors on your particular butcher block to see exactly how it is going to look. And test it out with all of the other finishing steps below too.
If you need some stain color ideas, check out my favorite wood stain colors!
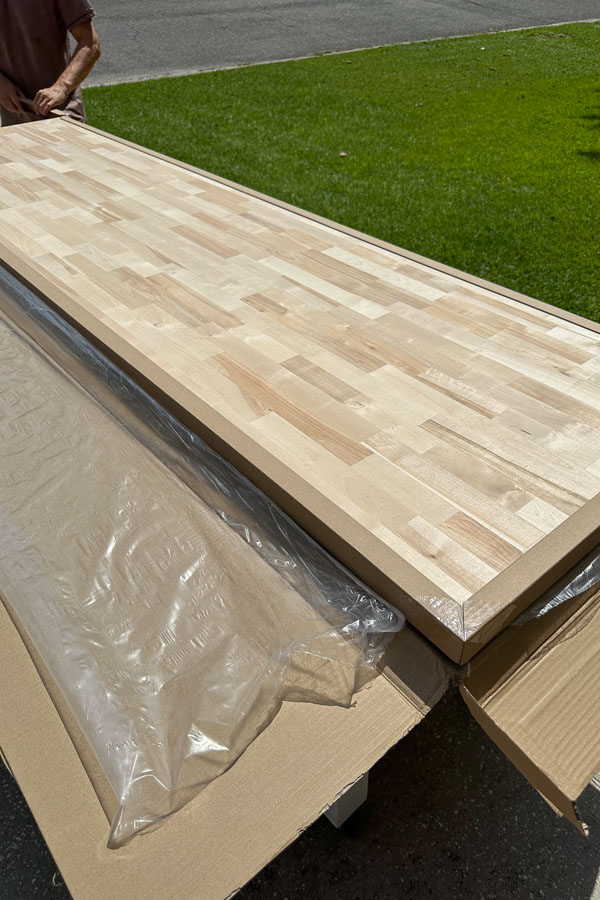
Some of the common types of butcher block available are hevea, acacia, birch, walnut, and oak. These are hardwood species, however, species like hevea and birch are more affordable than species like walnut and oak.
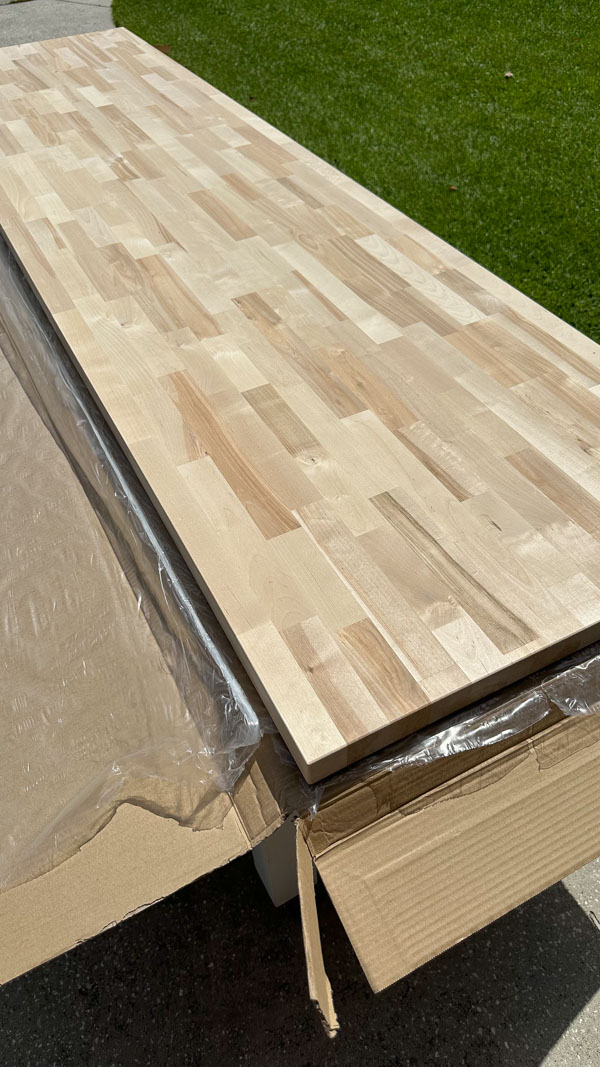
We went with this birch butcher block because it’s more affordable and we were able to purchase it in both the standard countertop width of 25″ wide AND our island size width of 39 inches which we needed!
There were also multiple lengths available too!
What is the best sealer for butcher block countertops
I did quite a lot of research on sealing butcher block countertops because I really wanted a sealer that was going to be the most durable with the least maintenance required!
There are a ton of different products available on the market. Ultimately, though the sealer that is the most durable and least maintenance is oil based polyurethane.
If you really want the rich look of butcher block, especially on a higher end species like walnut, and you don’t mind the maintenance of having to refinish it every few years, then going with an oil such as this butcher block oil or Waterlox is the way to go.
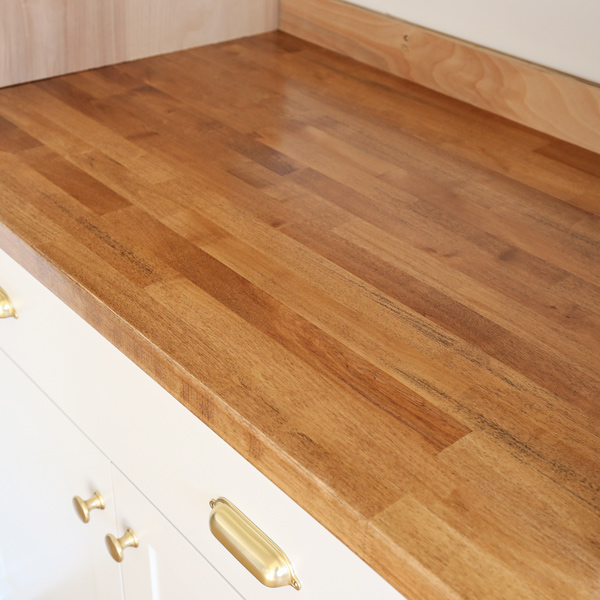
Oil provides a more lustrous look while polyurethane is a more glossy look. Although, I used a satin poly for the least amount of shine! Here is a close up look of it on our kitchen built in:
Note, polyurethane is best for things like butcher block countertops where you will be using a cutting board. Once it’s cured, it’s safe to put food on it, but you shouldn’t cut directly on it.
For finishing something like a butcher block cutting board itself, there are food safe oils available for finishing.
In the end, there is no sealer that will last forever, but polyurethane is durable the longest. No matter what you use, butcher block is wood and it can always be refinished if needed!
My tutorial below though will explain how to finish butcher block countertops with polyurethane.
How to finish butcher block countertops
Materials Needed:
- Butcher block (we used this butcher block)
- Wood Stain
- Polyurethane (oil based)
- SealCoat
- Foam brushes
- Staining rags
- Orbital sander
- Sandpaper (80, 120, and 220 grit)
- Tack cloth
There are 3 main steps to finishing butcher block: pre-finish steps, staining, and sealing.
If there are any finishing directions that come with your butcher block, make sure to review them.
For example, our butcher block directions said that all finishing steps needed to be completed within 48 hours of removing the plastic from the butcher block.
Also, make sure to test all of these steps out first on a scrap piece, backside, or hidden area of your butcher block to make sure you like how it will look in the end! I recommend this anytime you want to stain wood.
📩 Want to Save This?
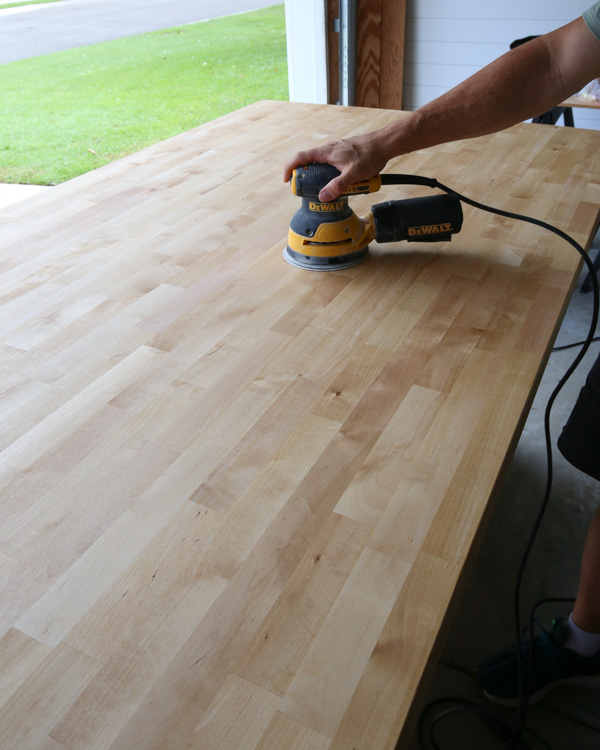
1. Pre-finish steps: Sanding and pre-stain
The first step is to sand the butcher block. It’s not very rough, but it should be sanded for a beautiful, final finish.
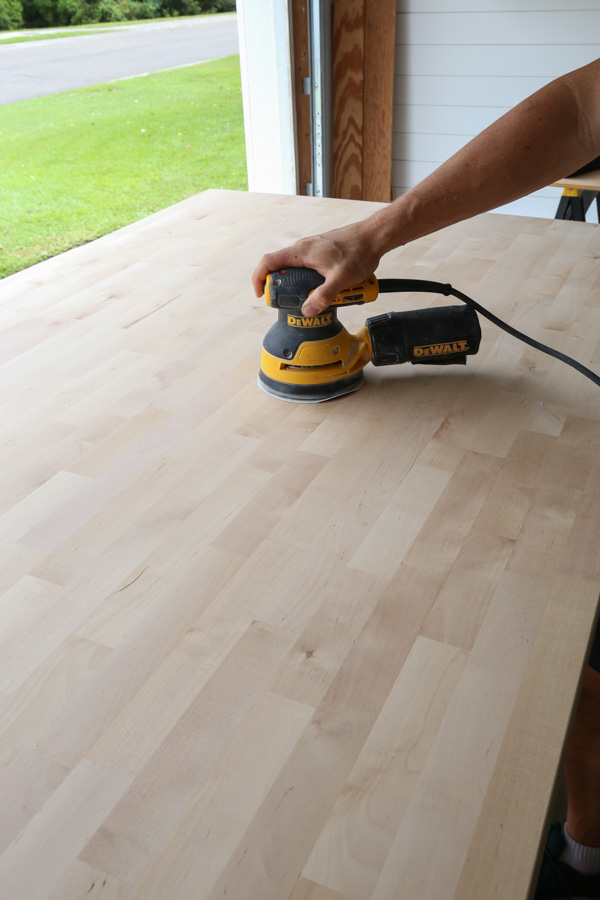
Make sure to wipe the sawdust off with tack cloth! Check out my how to sand wood post for more details.
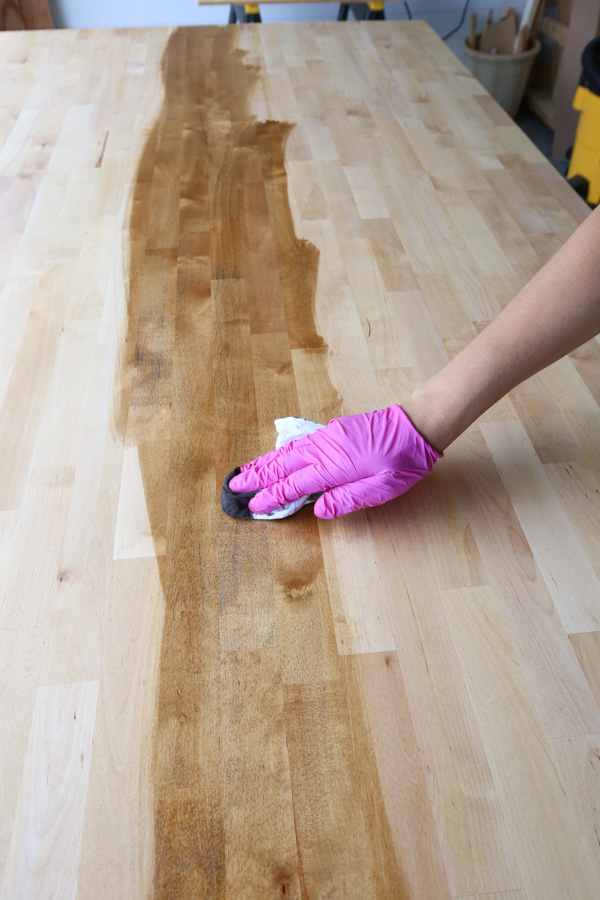
How to avoid blotching
Butcher block, especially birch, is very prone to blotching once stain is applied, even more than regular wood.
So, when I was first finishing butcher block for our DIY kitchen built in, I did a lot of testing and found that even a pre-stain wood conditioner did not help much to reduce the blotching.
To avoid this blotching on butcher block you can use a gel stain, however the colors are more limited. The other option is to use a shellac/sanding sealer (rather than pre-stain wood conditioner).
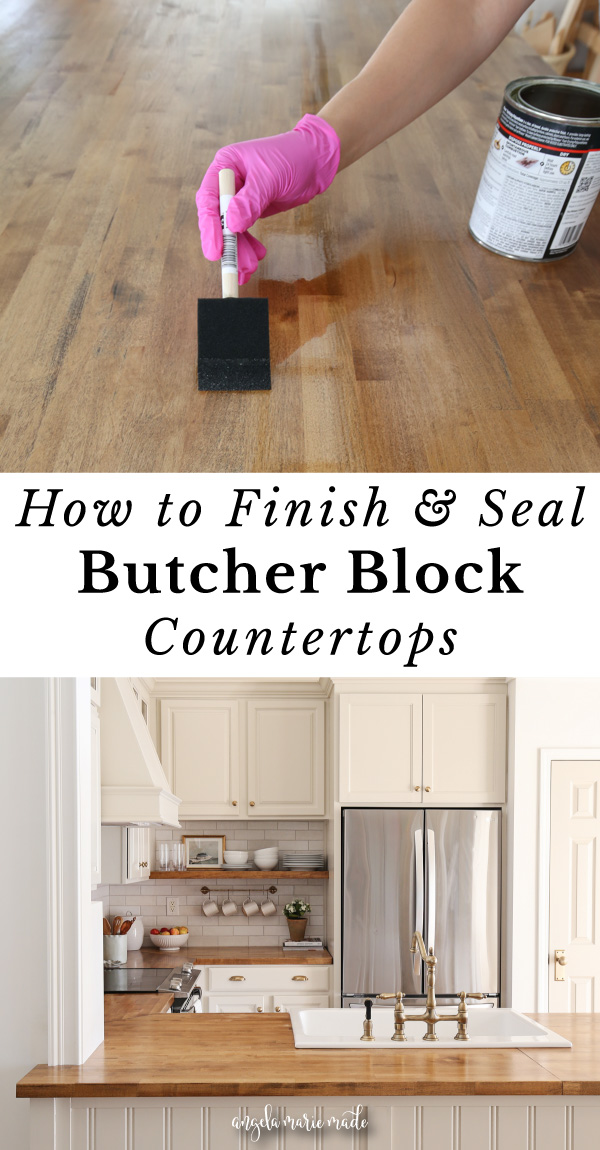
I used SealCoat and it did the trick! Here is how to apply it, it’s very similar to applying polyurethane.
Apply a coat of SealCoat, with a foam brush in long strokes.
Let it dry for about 45 minutes.
Then, sand the SealCoat with 120 and 220 grit sandpaper and an orbital sander. Be careful not to sand off too much!
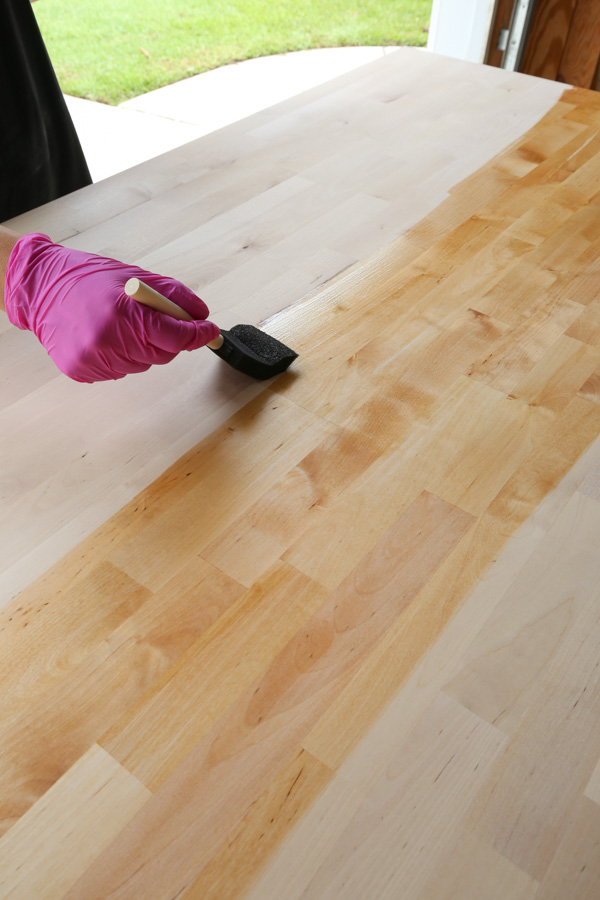
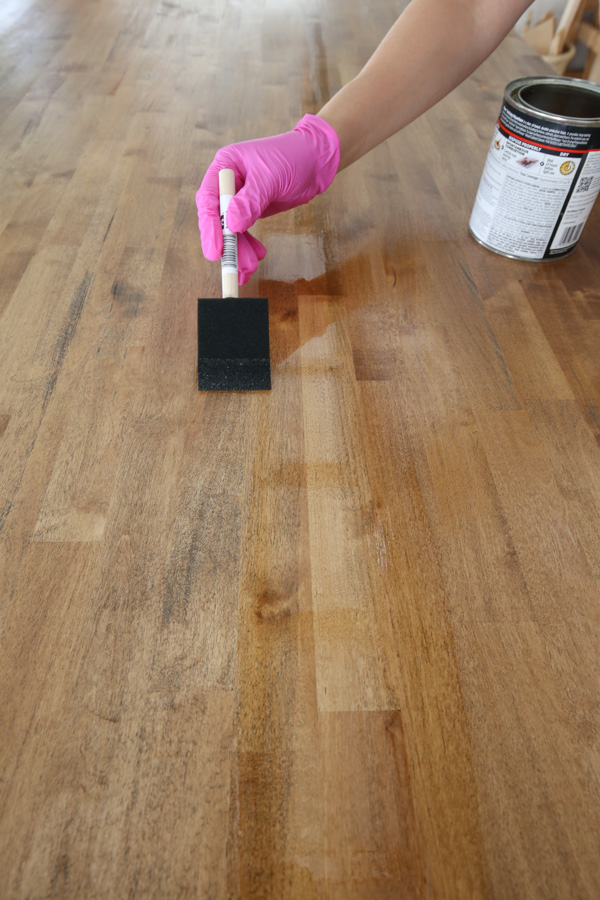
2. How to stain butcher block countertops
The next step is to apply the first coat of stain and let it dry. Then, apply a second if desired. Check out my how to stain wood for more details on staining!
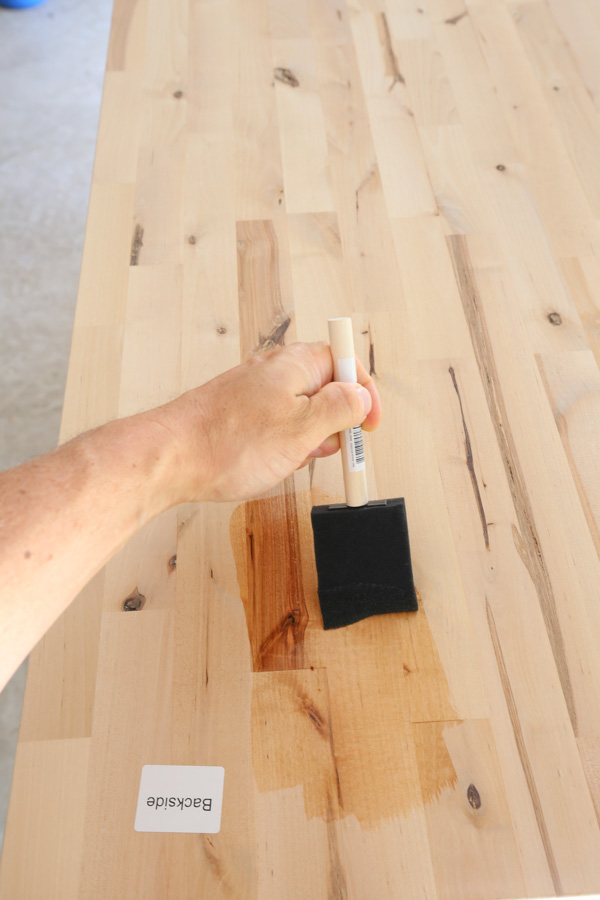
We applied two coats of Provincial wood stain and let it dry overnight.
For the backside, we only stained about 1-2 inches of the edges where they would be overhanging our cabinets. The rest we left unstained.
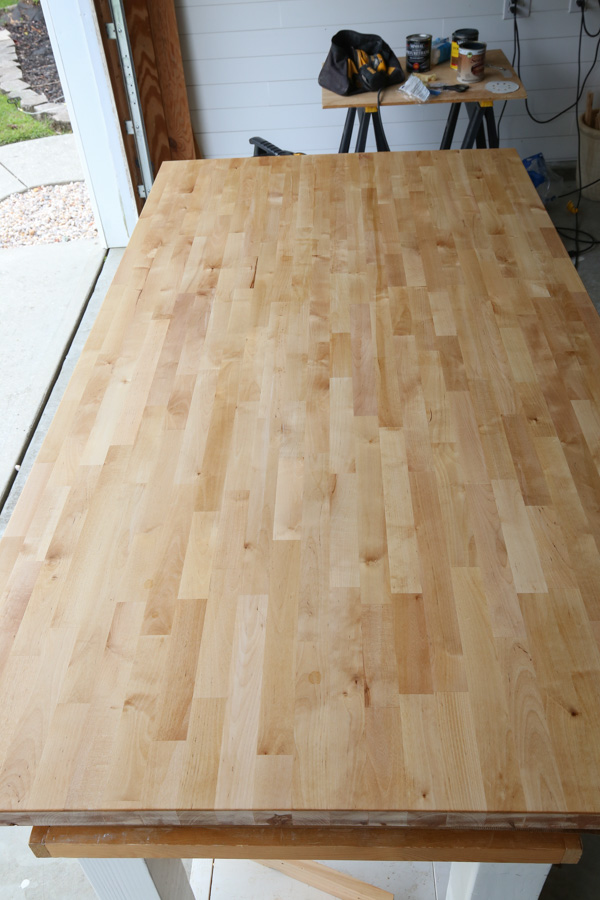
3. How to seal a butcher block countertop
The last step is sealing butcher block countertops. Apply at least two coats of polyurethane. We applied THREE coats for extra durability! Learn how to apply polyurethane here!
We used this oil based polyurethane.
***Note, for butcher block, ALL SIDES (including the bottom) must have a sealer/poly applied to them to prevent cracking of the wood.**
It’s best to wait at least a day (3 days is even better) to let the polyurethane cure before installing it.
And that’s it! I love how ours turned out! See all of our kitchen makeover photos here!
I hope this tutorial on how to finish butcher block countertops and sealing butcher block countertops has been helpful.
Let me know if you have any other questions on butcher block countertops.
Follow along for my latest projects and sneak peaks on Instagram, YouTube, TikTok, and Facebook!
Lindsey
Tuesday 24th of March 2026
How did you deal with the off gassing smell from oil based poly? I want my butcher block to be sealed well but the smell is too much for me. Is water based poly the next best option?
Angela Marie Made
Thursday 9th of April 2026
Yes water based poly will have less of a smell!
Kristin
Thursday 19th of March 2026
Hi, my counters have polyurethane, but I’m worried about joints and around sink. My sink is undermount, but I’m wondering if a drop in would be better. This home will also be a rental lol. I’ll probably leave cutting boards out with a sign that says to use cutting boards, not the counter 😆. Also, any thoughts on a light sand and then a marine grade sealer on top? Thank you!!
Ashley
Friday 23rd of January 2026
Did you sand in between the coats of poly?
Angela Marie Made
Monday 26th of January 2026
Yes, just a light hand sand with 200 grit
Courtney
Sunday 18th of January 2026
How did you go about minimizing the look of the seam where two pieces are joined?
Angela Marie Made
Thursday 22nd of January 2026
We used pocket holes to join them for a tight fit. Then we mixed wood glue and the sawdust from when we sanded the countertops to create a wood filler. That worked better than regular wood filler for blending the seam!
Angel
Monday 1st of September 2025
I heard Waterlox was the best sealer. Do you think the polyurethane you used would be better?