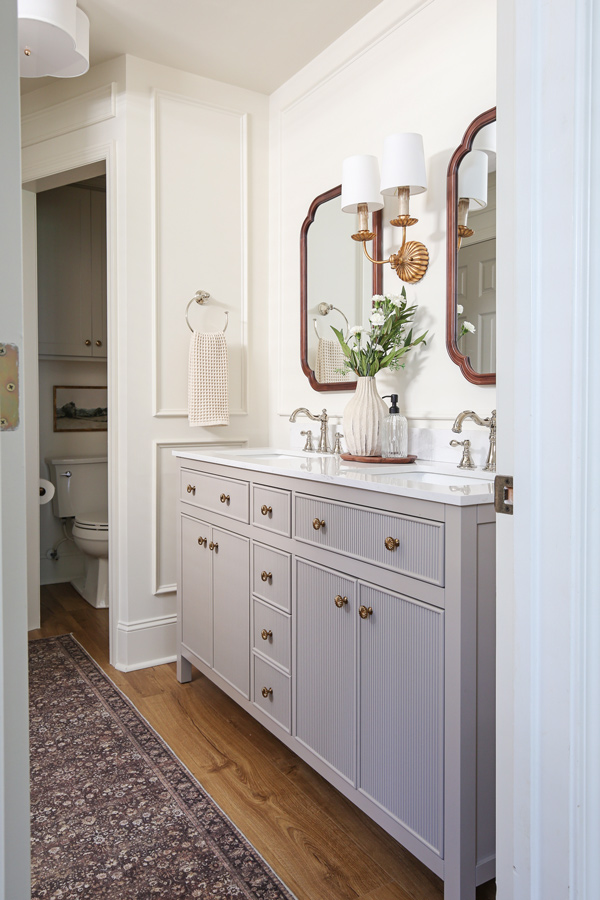
Our primary bathroom makeover is finally complete and it now looks and feels like a totally different space!
Here is a BEFORE and AFTER of our makeover!
Below I am sharing all of the makeover details of this bathroom transformation story and more before and after photos!
Note, all products used are linked at the bottom of this post!
Primary Bathroom Plan
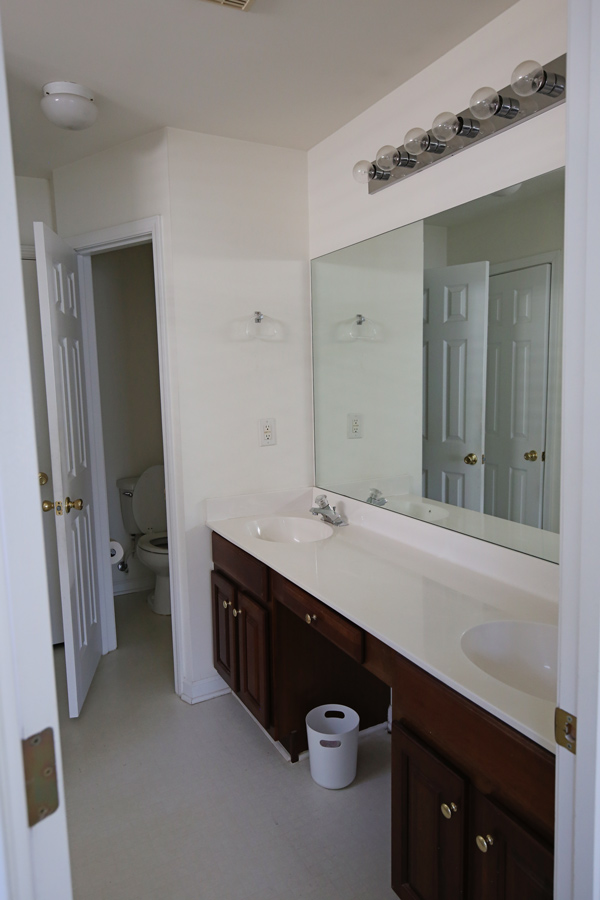
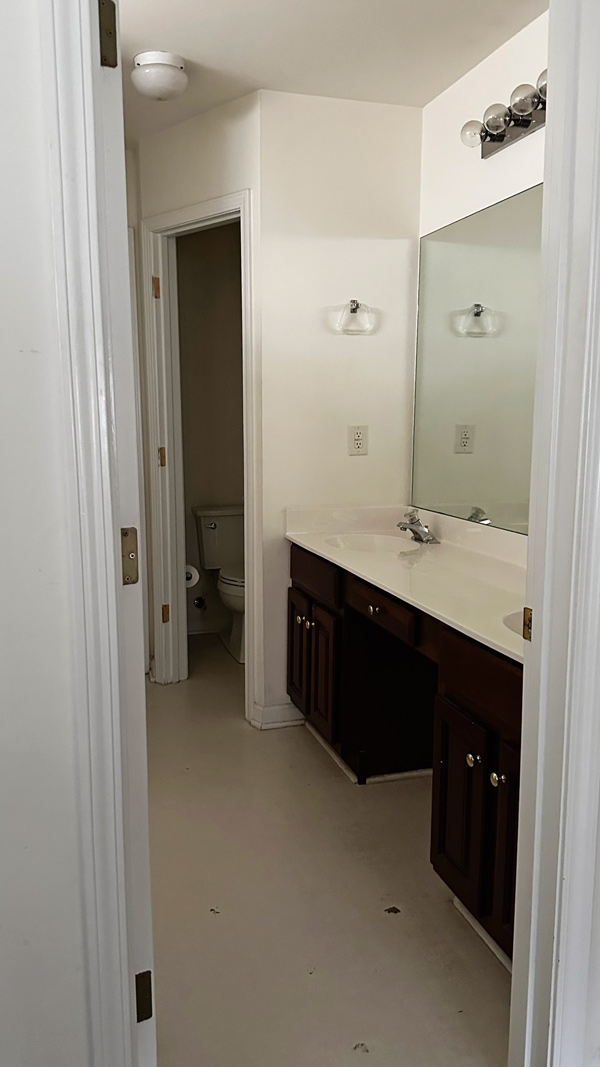
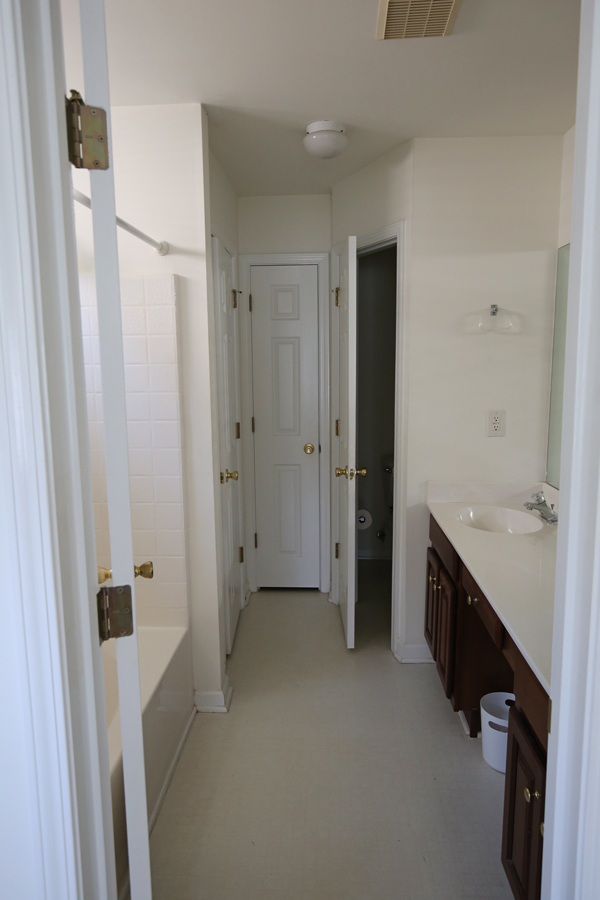
Before the makeover, the bathroom was outdated, dreary looking, and bland. The wood vanity was too dark and a big waste of space in a very narrow room that lacked bathroom storage space.
The wall-to-wall mirror and strip of outdated, builder grade vanity lights dominated the room, giving it a very utilitarian feel.
And the water closet door was super awkward in this narrow bathroom. It couldn’t even open fully, making it feel very closed in. We removed it right after moving in!
My plan was to make this primary bathroom feel like a relaxing, elevated bathroom with classic charm.
After finishing our recent guest bathroom makeover for this house, we wanted to keep the budget lower. So, we decided to put most of the budget into the vanity wall and save money by keeping the existing tub and shower surround in place.
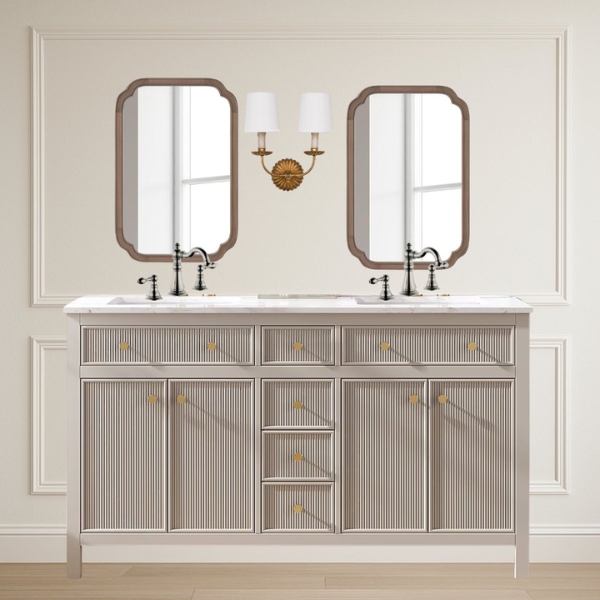
Here is my final mood board from planning:
Note, this post contains some affiliate links. I may earn a commission if you shop those links (at no cost to you). Thank you for supporting my small business. For more info see my disclosures here.
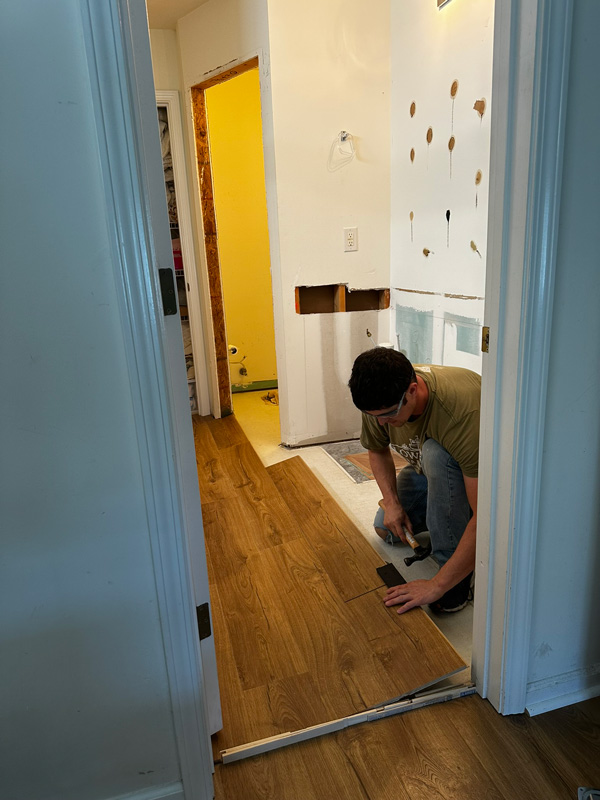
Installing waterproof laminate wood floors
Although I would have loved to install marble tile or marble look tile floors in this bathroom like we did for our guest bathroom makeover and our previous home’s primary bathroom makeover, we chose to install this laminate wood flooring.
It’s the same flooring we installed in the rest of our home and we had several leftover boxes of it! Also, it’s waterproof and very durable!
Further it was easy to install over our existing sheet vinyl flooring, so it worked out great!
Removing the builder grade mirror and vanity light
We carefully removed the huge builder grade mirror from our wall. We did need to do some drywall repair/sanding afterwards.
We also removed the builder grade vanity which really opened up the space.

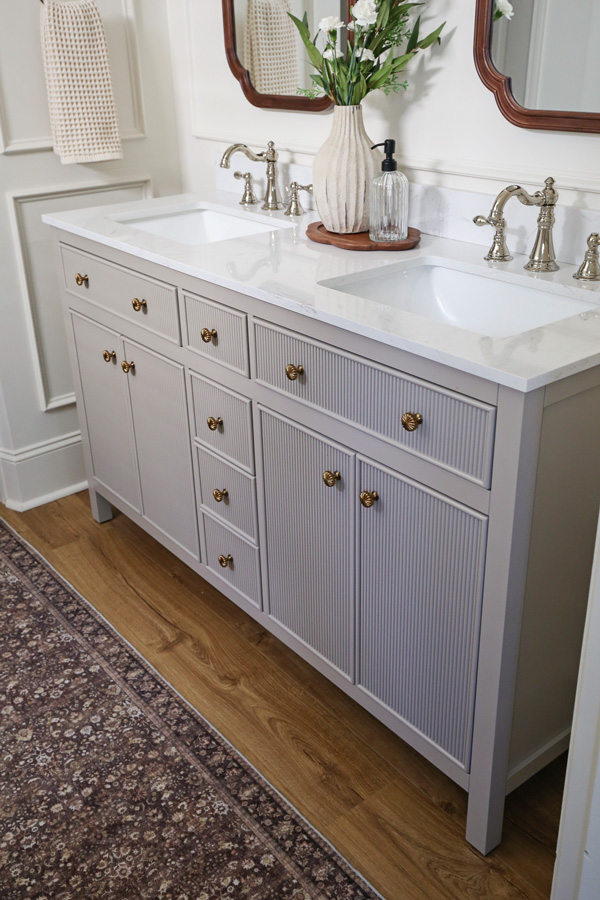
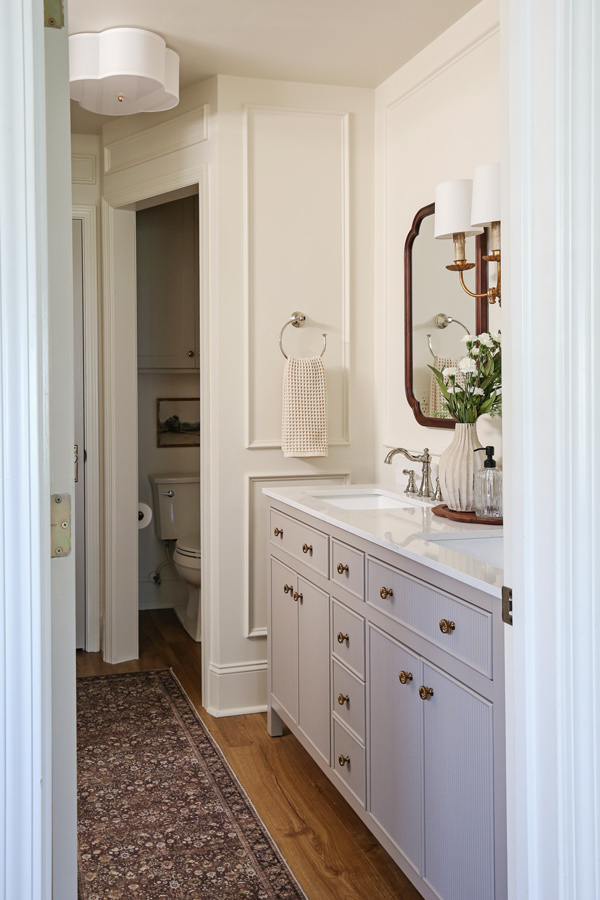
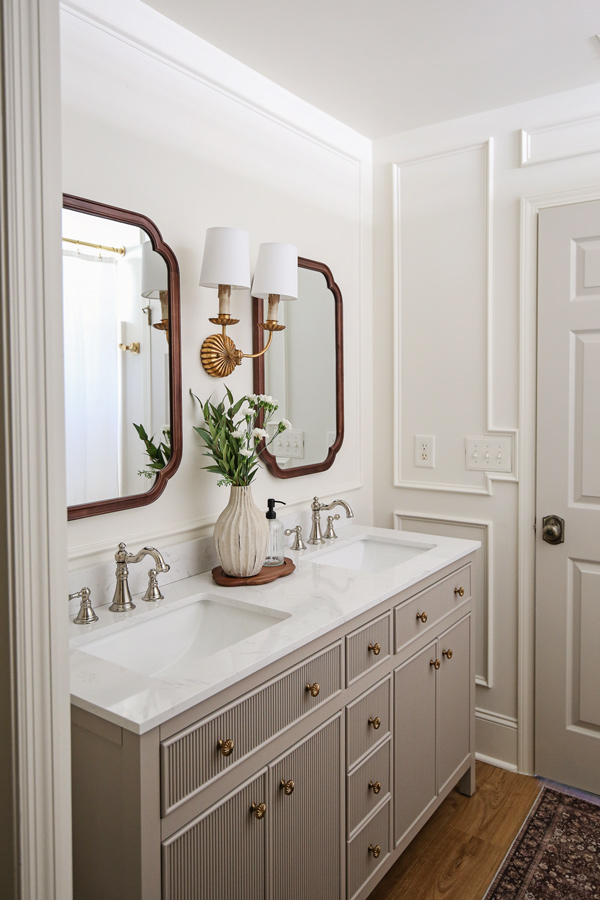
Double Sink Bathroom Vanity with Marble Look Stone Top
The old vanity was replaced with this beautiful, double sink bathroom vanity with a marble look top!
It comes in greige and white, we went with the greige! This 60″ bathroom vanity is such a great value for the price and look! Multiple sizes are available too!
Adding picture frame molding & baseboard
Originally I wanted to install a wainscoting with wallpaper and crown molding above it.
But, after further thought, we decided against it, due to all of the awkward angles and minimal wall space in the bathroom. Angles make crown molding and wallpaper significantly more difficult and time consuming!
We went with classic picture frame molding instead and it adds character and helps give that elevated look.
The baseboards were replaced with 7″ tall baseboards too. I love a tall baseboard!
Here is a before and after showing all of the angles, the new baseboard, and molding!
BEFORE
Painting the walls and doors
Since I chose the greige bathroom vanity, we went with white walls. After testing several white paint colors, Soft Chamois by Benjamin Moore was the winner, it looks soft, warm, and creamy compared to the stark, bland white originally in the room.
📩 Want to Save This?

I also loved how the Soft Chamois looked with the door paint color – Revere Pewter by Benjamin Moore, which worked well with the greige color of the bath vanity.
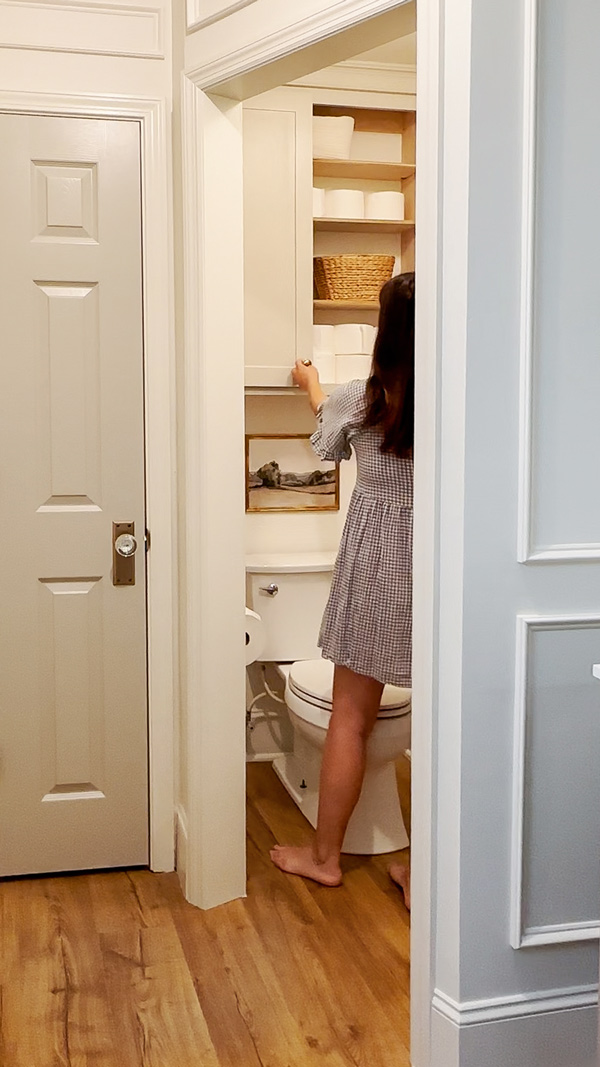
Over the toilet cabinet in the water closet
To add extra storage and character, we added a cabinet over the toilet in our water closet.
I shared all about it in my over the toilet storage cabinet post, but it really was a great way to utilize a big waste of wall space!
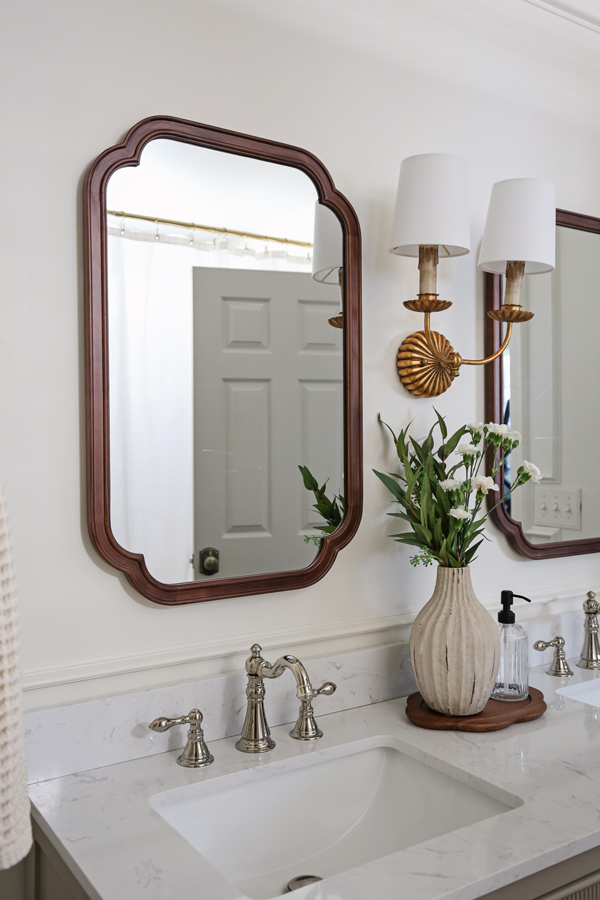
Lighting
I’ll be sharing more details about our new lighting soon, but one of the most dramatic updates to the space was removing the 6 bulb builder grade light and replacing it with this gorgeous double wall sconce!
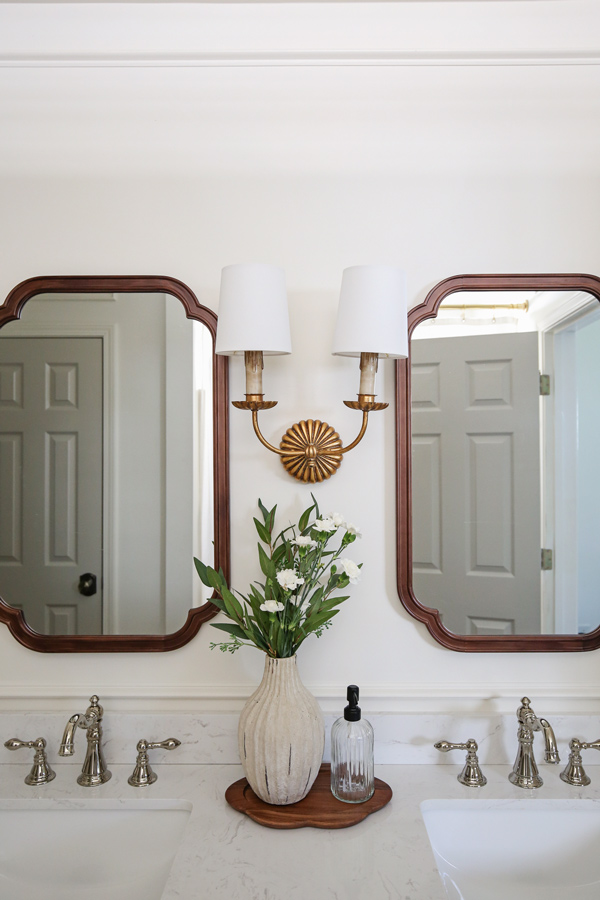
Not only do I love the look of it, but I really love having softer, ambient light in the bathroom instead of always having a harsh, bright light!
Also, the flush mount ceiling light was replaced with this fabric shade flush mount for a touch of whimsy!
Fixtures, Hardware, & Decor
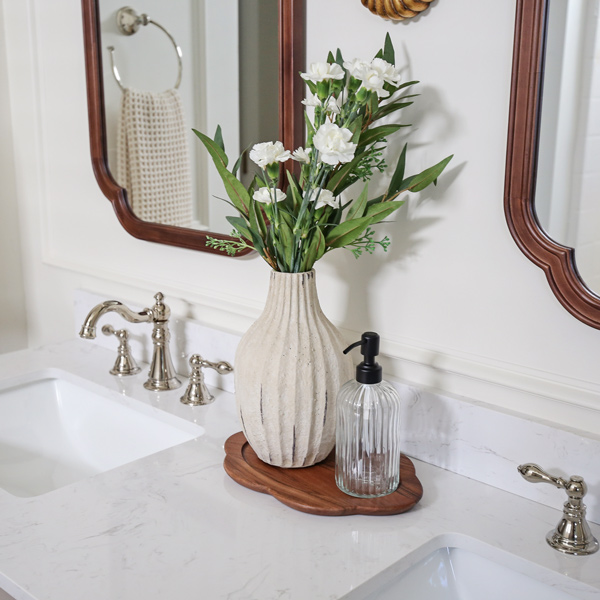
For the fixtures and hardware, I mixed metals and finishes, including brass, polished nickel, and walnut wood.
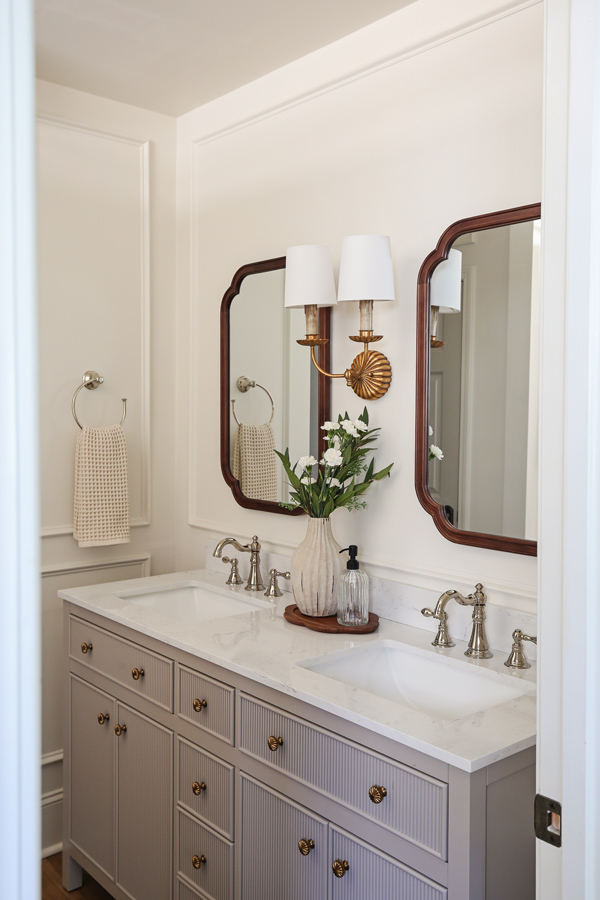
These classic looking bathroom faucets in polished nickel were a look for less compared to the bathroom faucets we used in our guest bathroom makeover and previous home’s primary bath makeover.
Also, went with polished nickel for our towel ring holder.
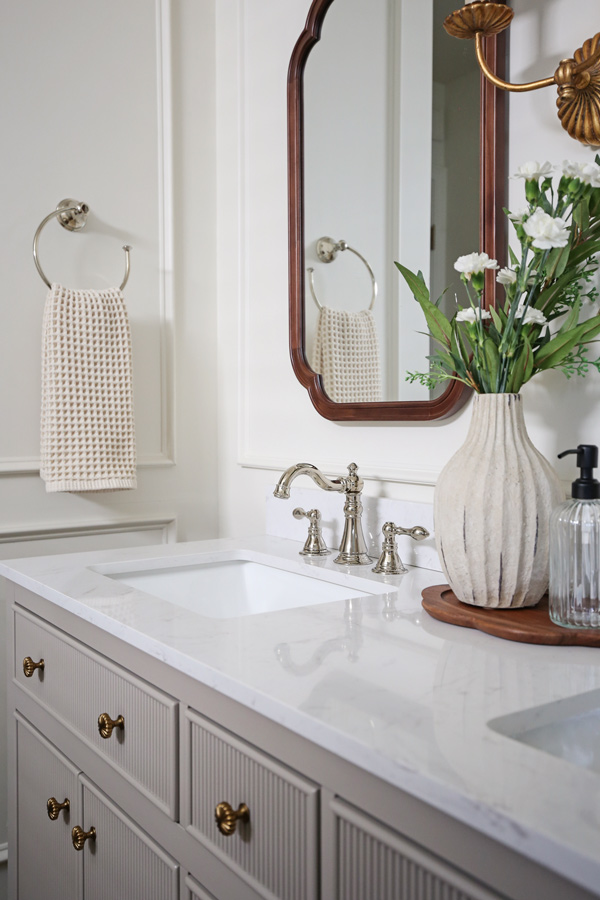
The walnut wood arch mirrors really helped to add warmth to the room.
I replaced the brass knobs that came with the double vanity with these vintage look brass cabinet knobs, that really compliment our wall sconce well!

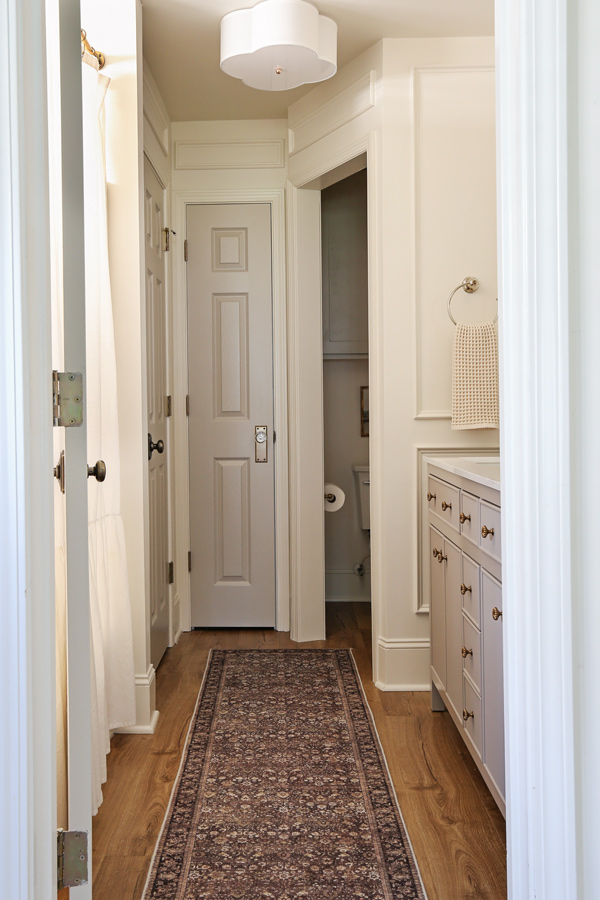
The door knobs were replaced with this charming brass and glass door knob on the linen closet and these antique brass door knobs on the other door that we are using throughout our home on all the doors.
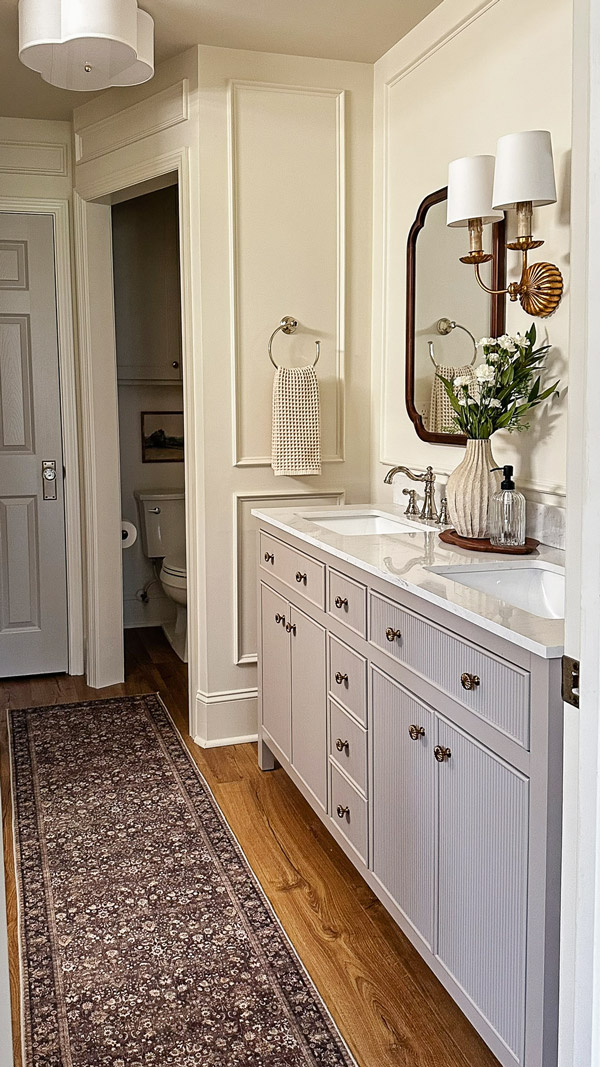
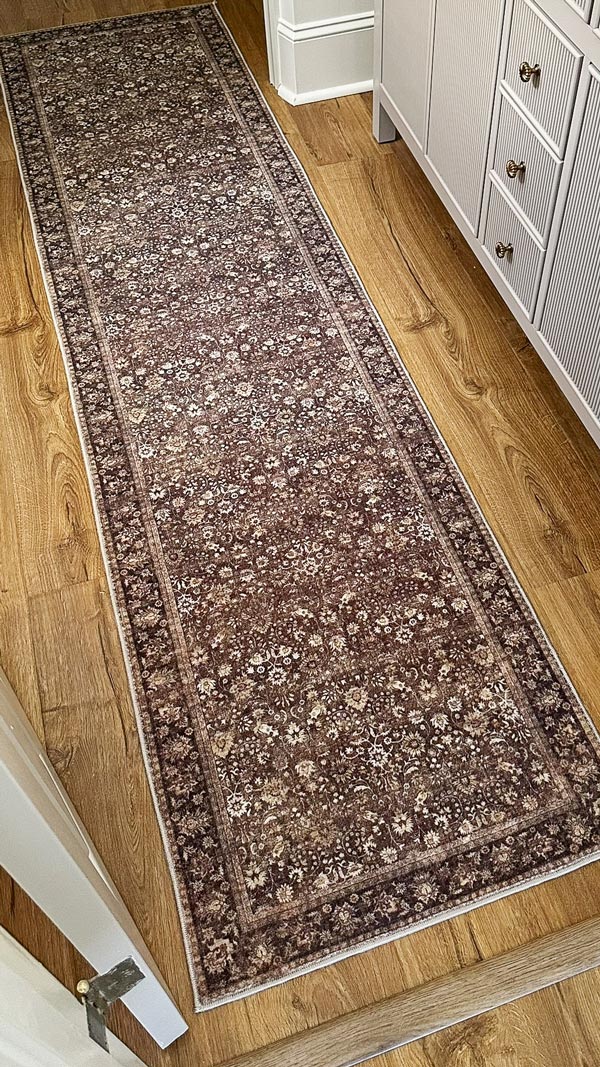
Finally, I finished off the flooring, with a brown and white runner which adds some coziness to the room. It comes in many sizes too!
Extra long shower curtain and screw mount shower rod
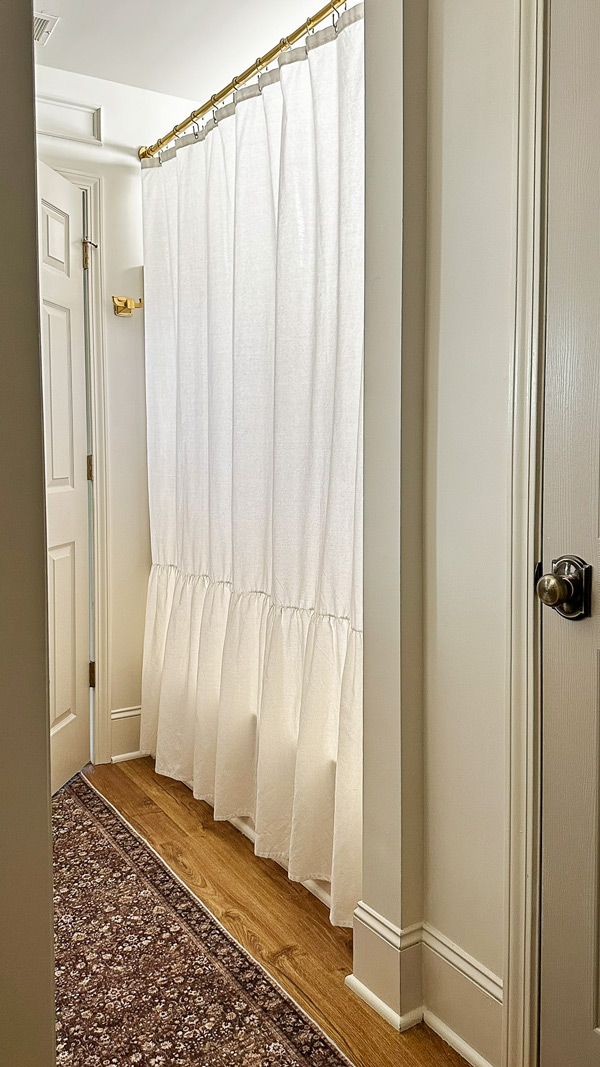
As I said earlier, we kept the existing tub and shower surround in place. To make it fit the updated space better, we added an extra long shower curtain with a ruffle.
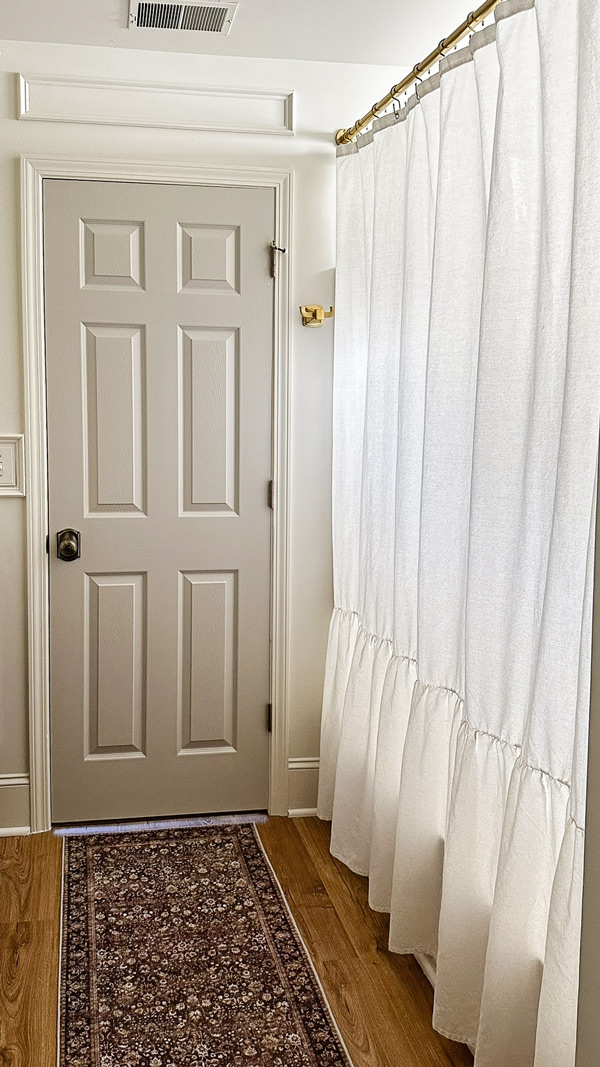
It makes the room feel larger and I love this shower curtain! It looks like linen and I used it in our guest bathroom makeover too!
Also, I can’t stand tension shower curtain rods, they always fall down eventually. So, we used a screw mount shower rod instead and it has been great!
Follow along for my latest projects and sneak peaks on Instagram, YouTube, and Facebook!
VIDEO of this makeover!
Check out a before and after video of this bathroom makeover on Instagram here!
Primary Bathroom Makeover Sources
- Extra long shower curtain
- Shower rings
- Screw mount shower curtain rod
- Double towel hook
- Towel ring holder
- Waffle hand towel
- Wood tray on vanity
- Vase – old Pottery Barn but similar vase here
- Soap dispenser
- Brown & white runner rug
- Laminate wood flooring
- Double sink vanity with marble top
- Vintage look brass hardware
- Double wall sconce light fixture
- Fabric shade flush mount light fixture
- Bathroom faucets
- Walnut wood arched mirrors
- Brass glass doorknob
- Antique brass doorknob
Heather
Saturday 16th of August 2025
Wow! You certainly have a knack for good design. Amazing job.
If you don’t mind a slight critique, the only thing that stuck out to me was the trim on the wall to the right of the vanity where it goes in a square around the switches. I would have stopped the trim just above the switches, thus keeping the same profile and width as the trim below, just like on the opposite side, but above the switches. I think it would draw less attention to the switches if you did that.
Well done!!
Angela Marie Made
Friday 22nd of August 2025
Thank you! Thanks for the tip!