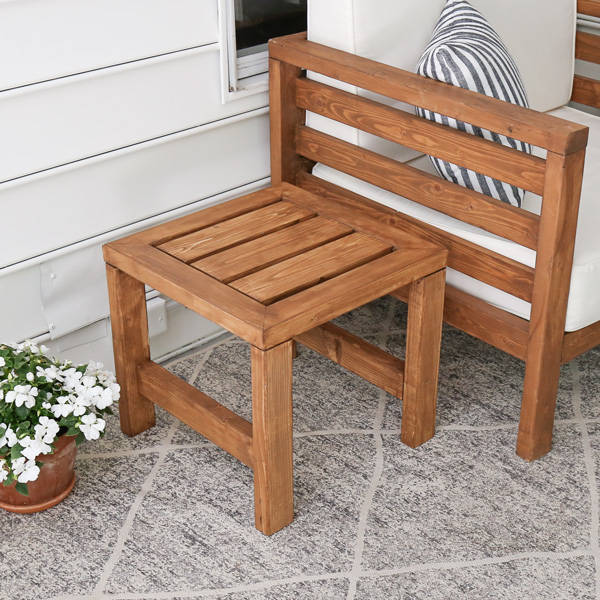
Learn how to build a DIY outdoor side table for less than $16 in lumber!
I’m excited to be sharing our new DIY outdoor side table which matches our DIY outdoor furniture set, including our DIY outdoor chair, DIY outdoor couch, and DIY outdoor coffee table! I also have a DIY outdoor dining table that compliments the outdoor furniture set too!
Even with the higher cost of lumber these days, this outdoor side table only cost me $16 in lumber! It’s a super budget friendly project!
Want to save for later?! Pin it here:

I love how it matches our DIY outdoor furniture set perfectly!
Overall, this outdoor side table build is very similar to the DIY outdoor coffee table, but with a few modifications and less lumber. I will still break it down step by step below along with a full video tutorial AND printable build plans!
Note, you could also turn this table into a DIY umbrella stand side table too!
Note, this post contains some affiliate links. I may earn a commission if you shop those links (at no cost to you). Thank you for supporting my small business. For more info see my disclosures here.
How to Build a DIY Outdoor Side Table:

OR click here for the whole DIY outdoor furniture set plans BUNDLE DEAL!
Materials:
- (2) 2×3 @ 8ft (framing lumber)
- (1) 1×4 @ 6ft
- 2 1/2″ Self tapping screws
- 2″ Brad nails
- 2 1/2″ Kreg screws (weather resistant)
- 1 1/4″ Kreg screws (weather resistant)
- Exterior Stain
- Stainable wood filler
- Waterproof Wood Glue
Outdoor Side Table Video Tutorial:
Subscribe to my YouTube Channel here!
Watch the DIY Side Table VIDEO TUTORIAL here!
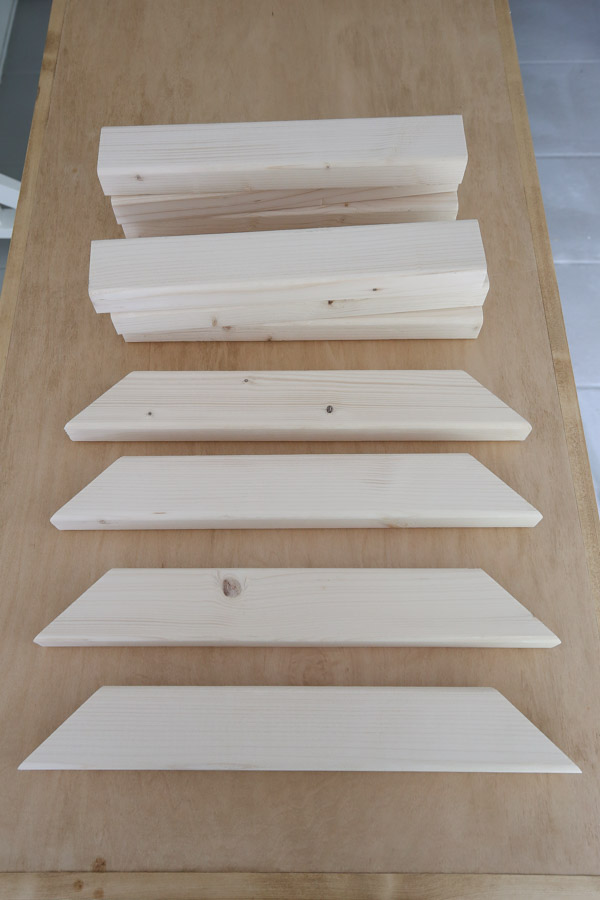
1. Make the initial lumber cuts
Click here for the printable DIY outdoor side table plans which include the cut list and step by step building steps with easy to follow diagrams!
Use a miter saw and cut six 2x3s @ 14 1/2″ (for the table legs).
Then, cut four 2x3s with a 45 degree angle at 17 1/2″ from long point to long point for the table top frame.
2. Assemble the top frame of the side table
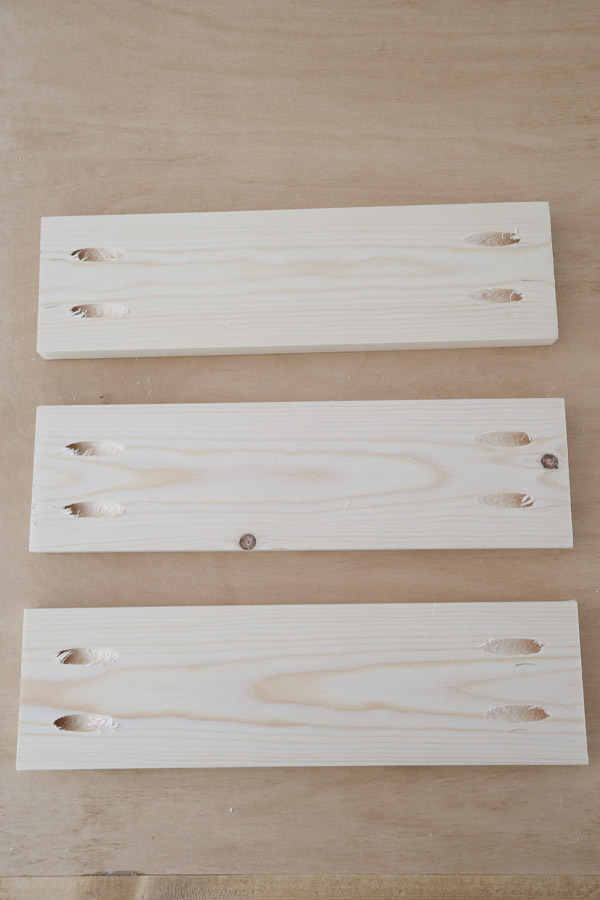
Use a Kreg Jig and add one pocket hole on each side of two of the 2x3s @ 17 1/2″ with 45 degree cuts.
Because these boards are cut with a 45 degree angle, they are only wide enough to fit one pocket hole that doesn’t show on the side of the board. So, when drilling the hole for each one, make sure to line the board up carefully with drill hole B on the Kreg Jig as shown here:
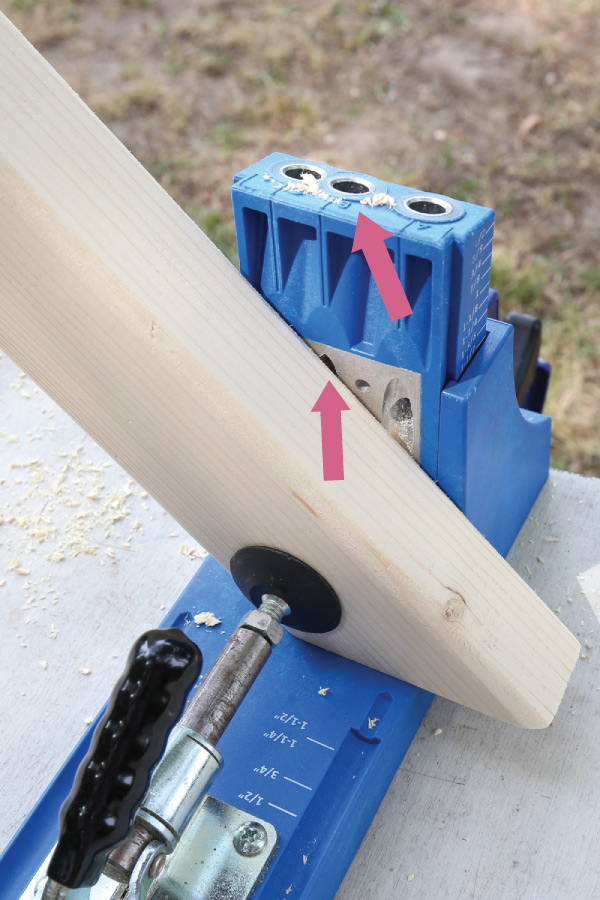
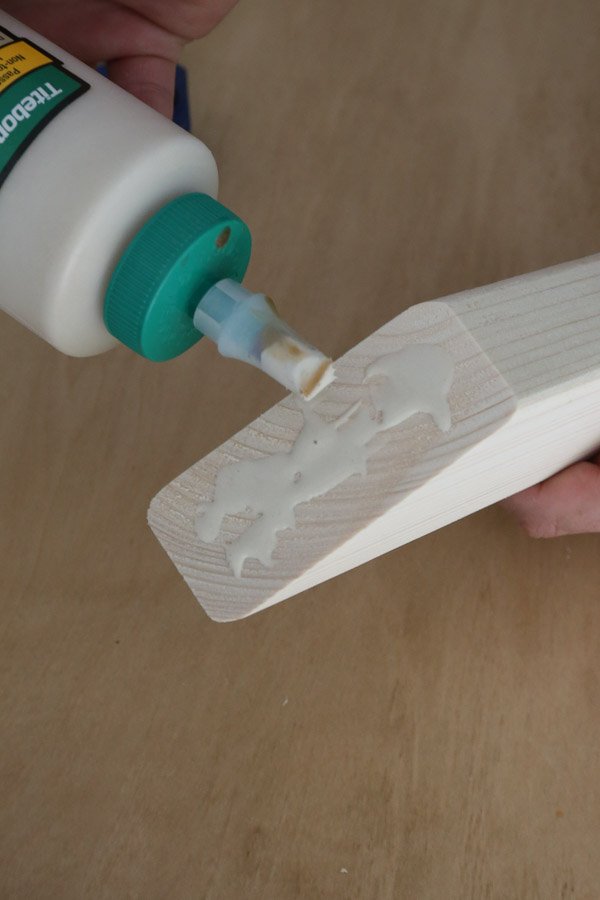
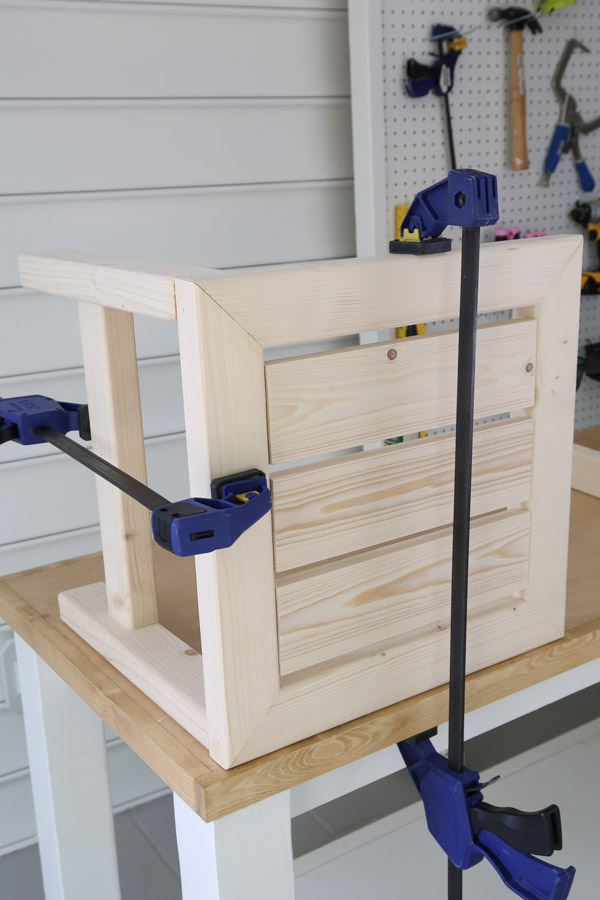
Next, add waterproof wood glue between one of the 2x3s @ 17 1/2″ with a pocket hole and one 2×3 @ 17 1/2″ without the holes. Then, clamp them down together to your work surface.
Use a brad nailer and 2″ brad nails and nail through the two boards together. Make sure to stay away from where the pocket hole screw will be going through.
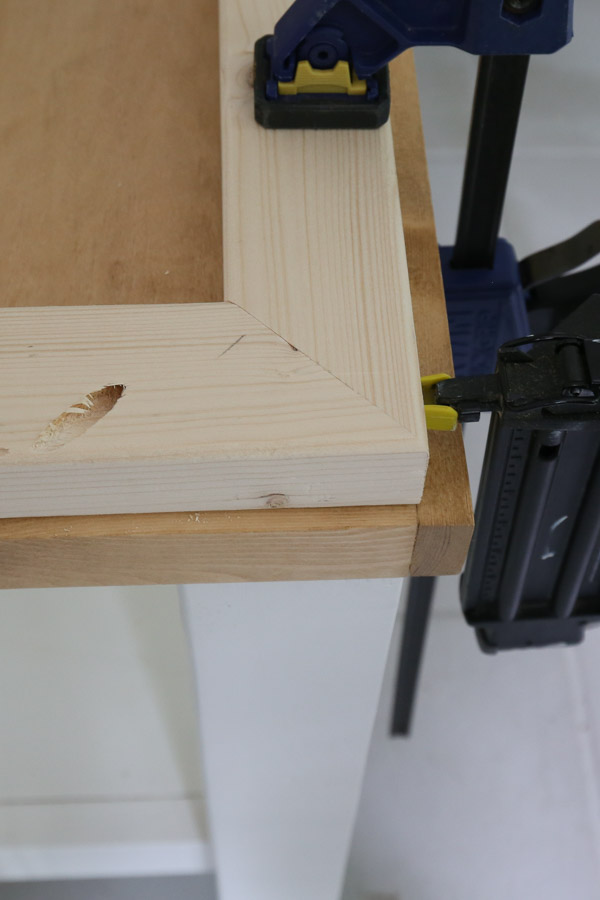
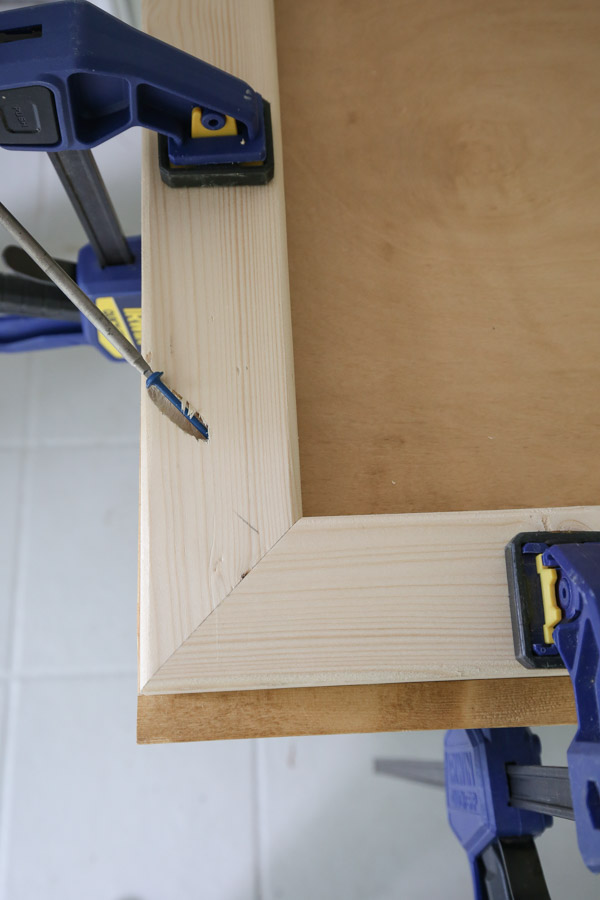
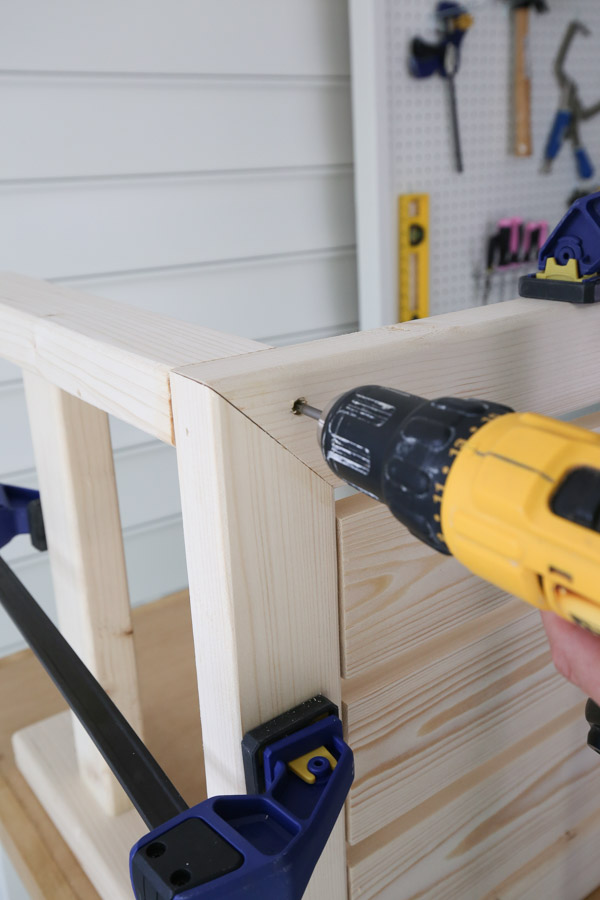
After nailing, add a 2 1/2″ outdoor Kreg screw into the pocket hole. Add the screw in slowly since the hole is near the corner.
Note, you can see all of these steps in action in the DIY outdoor side table VIDEO tutorial here!
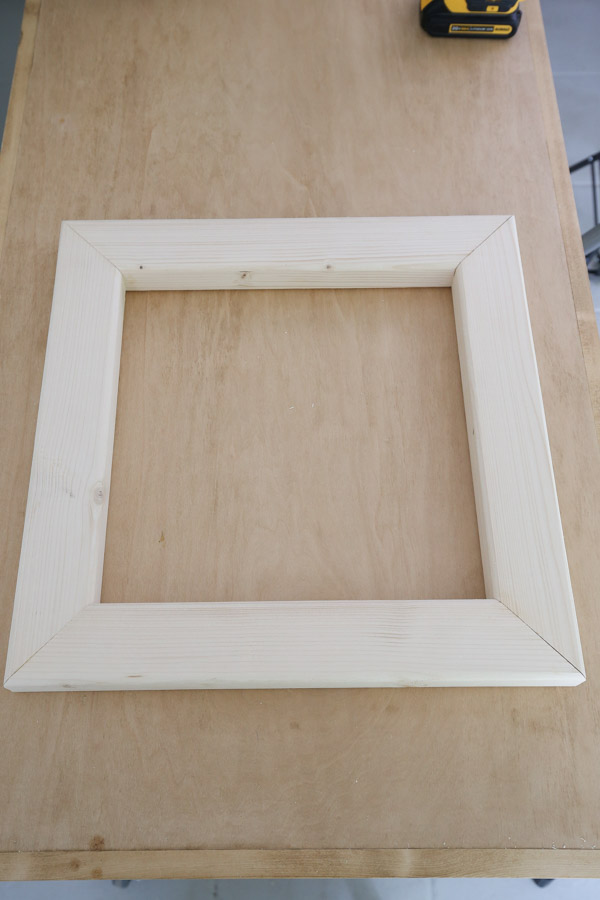
Repeat these steps on the other three sides to complete the square frame of the outdoor side table.
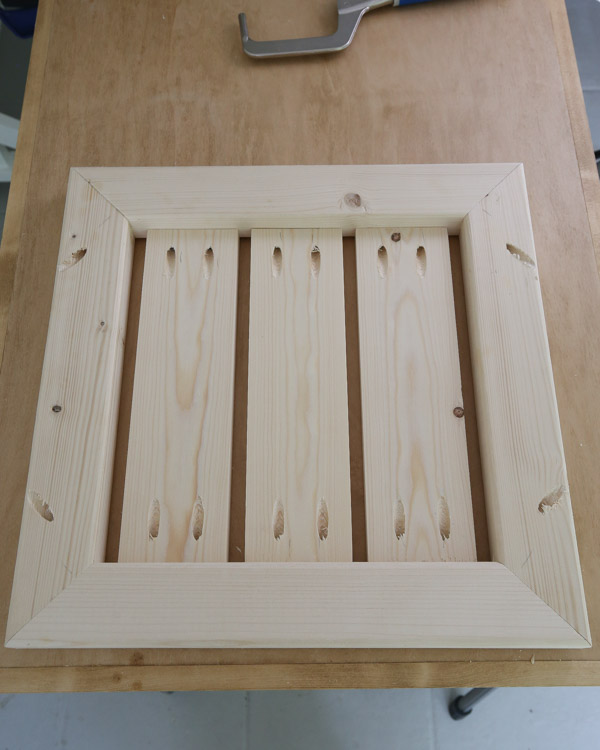
3. Add slat boards to the top frame
Measure the exact distance between the side frames and cut three 1x4s to this size. The measurements should be 12 1/2″ but since we’re working with framing lumber, they may be slightly different.
Make sure to adjust your Kreg Jig settings for 3/4″ thick wood and then add two pocket holes to each end of the 1×4 boards.
📩 Want to Save This?
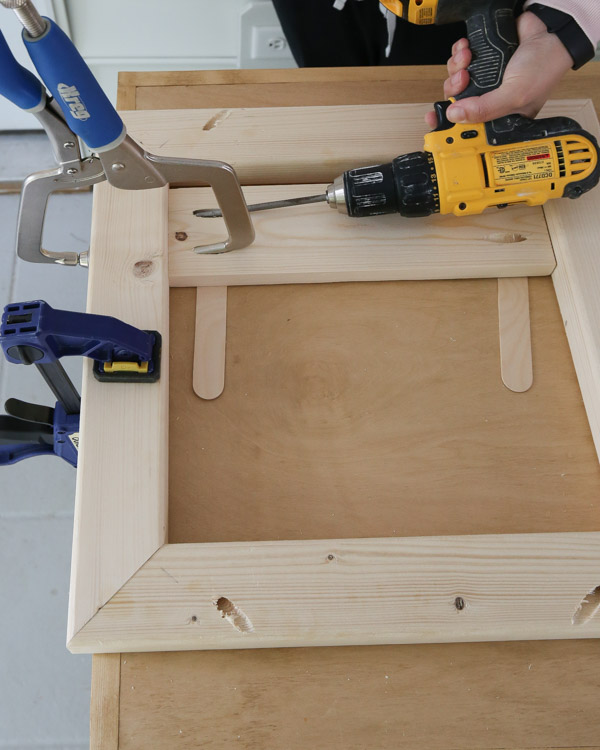
When attaching framing lumber to square edge lumber it helps to place a popsicle stick (or wood shim) under your slat boards when attaching them to the frame, otherwise they may stick up slightly above the 2×3 framing lumber frame once you flip the tabletop over.
The 1×4 slat boards should be attached with a 1/2″ gap between each of them and the side table frame.
Attach each board one at a time with 1 1/4″ outdoor Kreg screws. Also, I found it easiest to use our Kreg right angle clamp to help with this step.
4. Assemble DIY outdoor side table legs
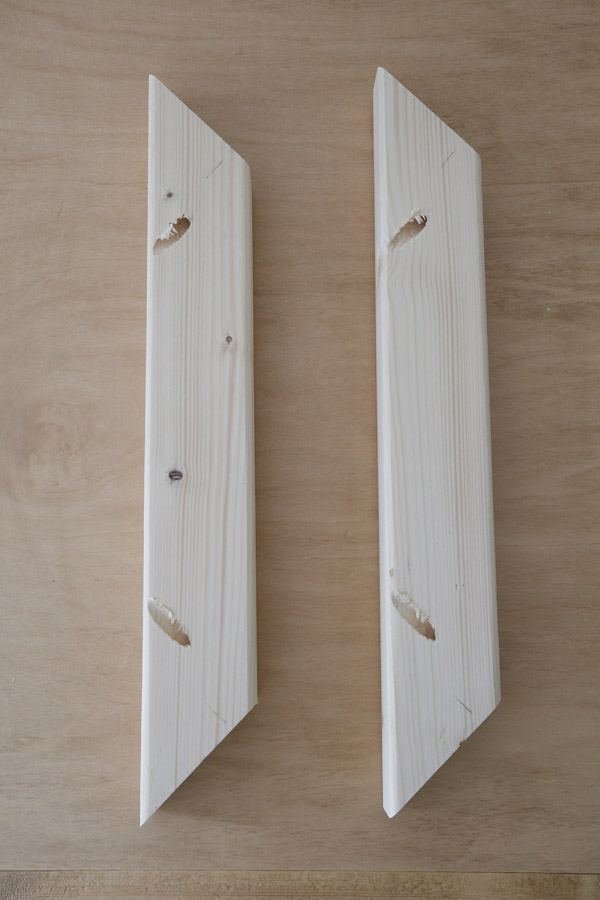
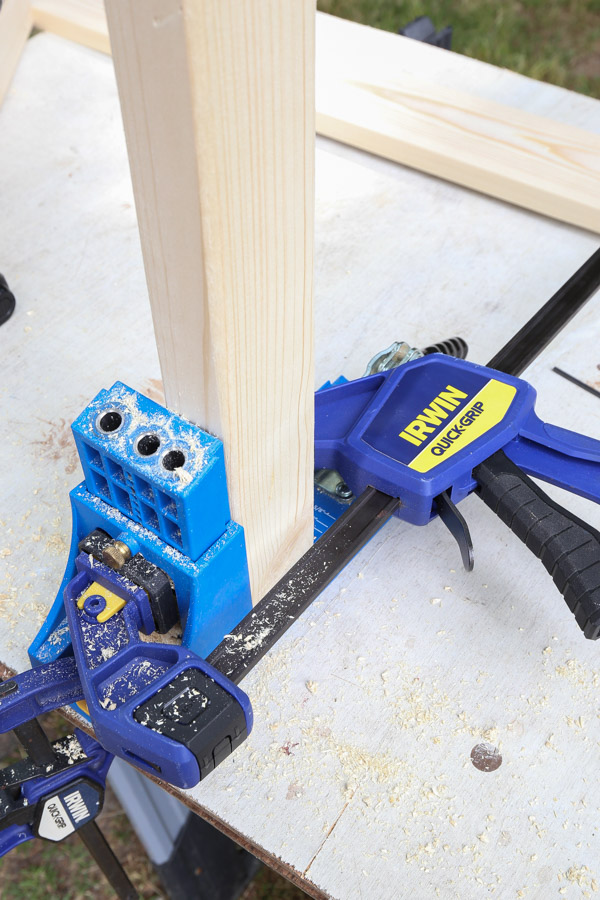
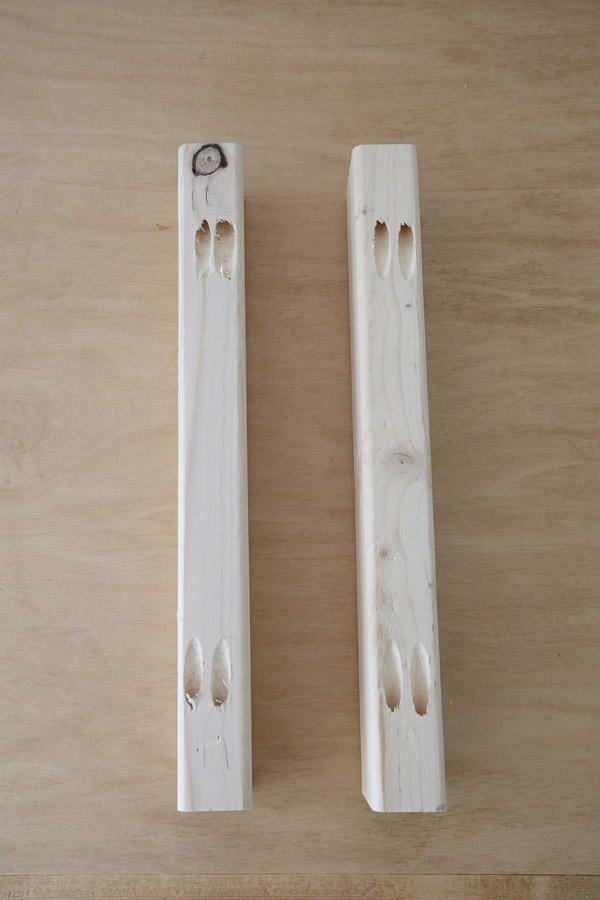
Adjust the Kreg Jig setting for 1 1/2″ thick wood then add two pocket holes on both sides of two of the 2x3s @ 14 1/2″.
Make sure to add them on the side edges as shown in the photo below so that the holes will be hidden.
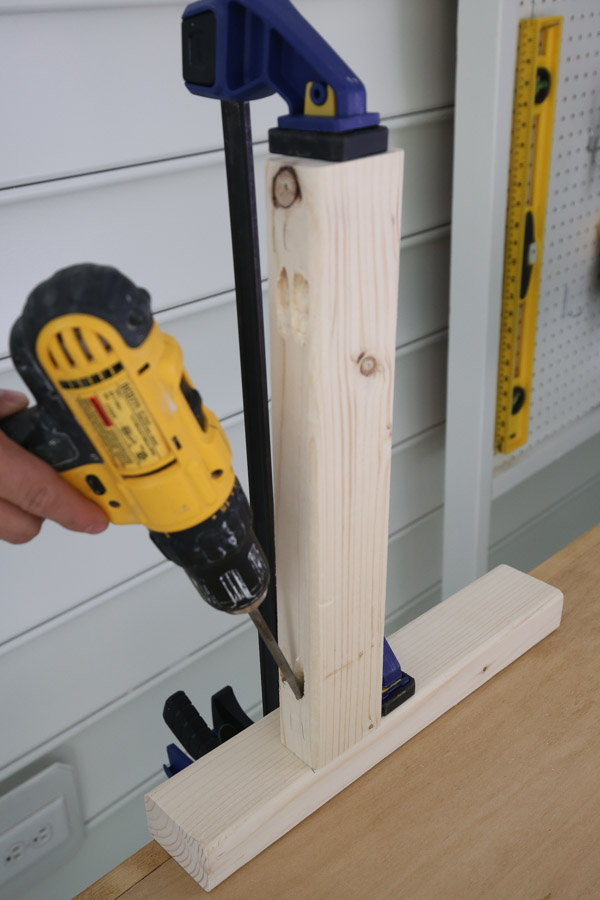
We had to use a large clamp to hold the boards in place on our Kreg Jig in order to drill them into the 2×3 side edges.
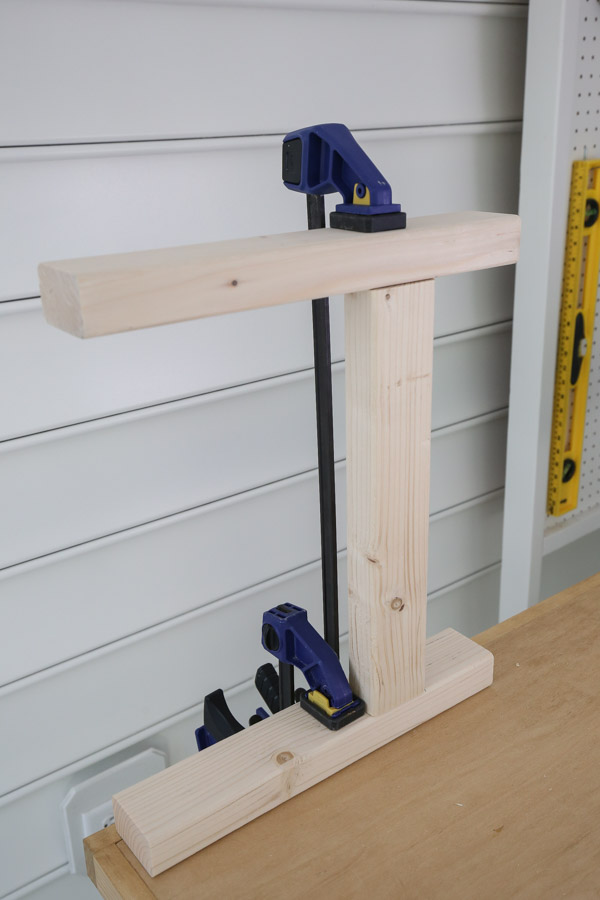
Next, mark 3 1/2″ up from the bottom of two of the 2×3 boards @ 14 1/2″ without pocket holes.
Attach the 14 1/2″ board with pocket holes at this mark perpendicular and flush with the edge using 2 1/2″ Kreg screws and wood glue. We found it easiest to clamp the boards down to our work surface for easy attaching.
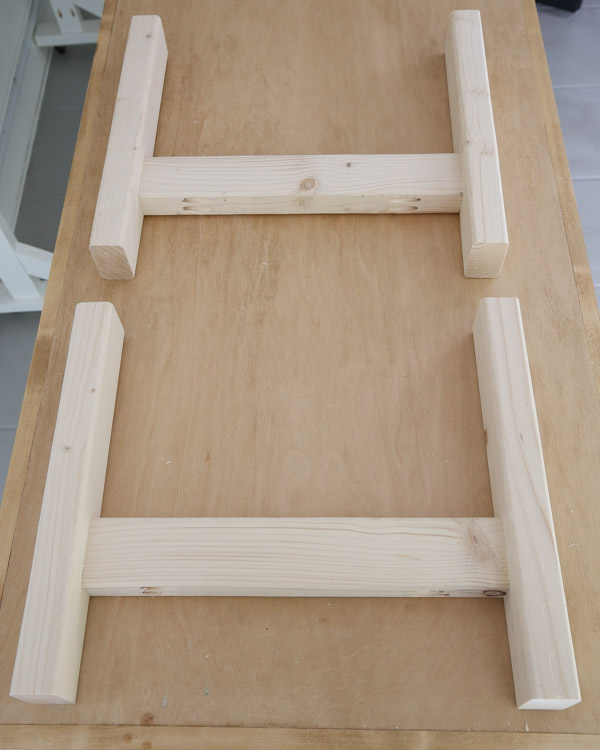
Repeat this on the other side to form one of your DIY outdoor side table leg sides.
Repeat all of these steps again to create a second table leg.
5. Attach table legs to the tabletop
Attach one of the table legs to the table top with waterproof wood glue and a 2 1/2″ deck screw (these self tapping screws don’t require pre-drilling). We found it easiest to lay the table top on its side with a clamp and then clamp the table leg to it.
Make sure the screws are countersunk beneath the wood surface since you will fill them with wood filler later.
Also, make sure to avoid drilling through the area where the Kreg screw and brad nail went through on the table frame.
Repeat these steps on the other side of the side table to complete the build!
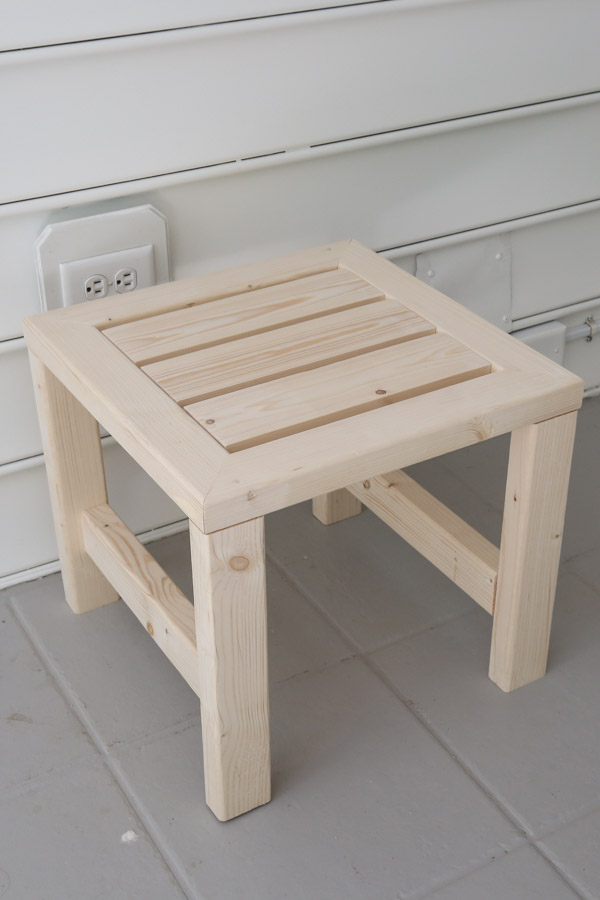
6. Fill holes, sand, and stain the side table
Fill the screw and nail holes with stainable wood filler. Then, sand the wood filler and any joints that don’t sit flush with each other.
Lastly, stain your outdoor side table!
Just like the matching DIY outdoor chair, DIY outdoor couch, and DIY outdoor coffee table, and DIY outdoor dining table, we used one coat of Valspar semi transparent exterior stain in Pine bark. To get between the slat boards we used a foam brush.
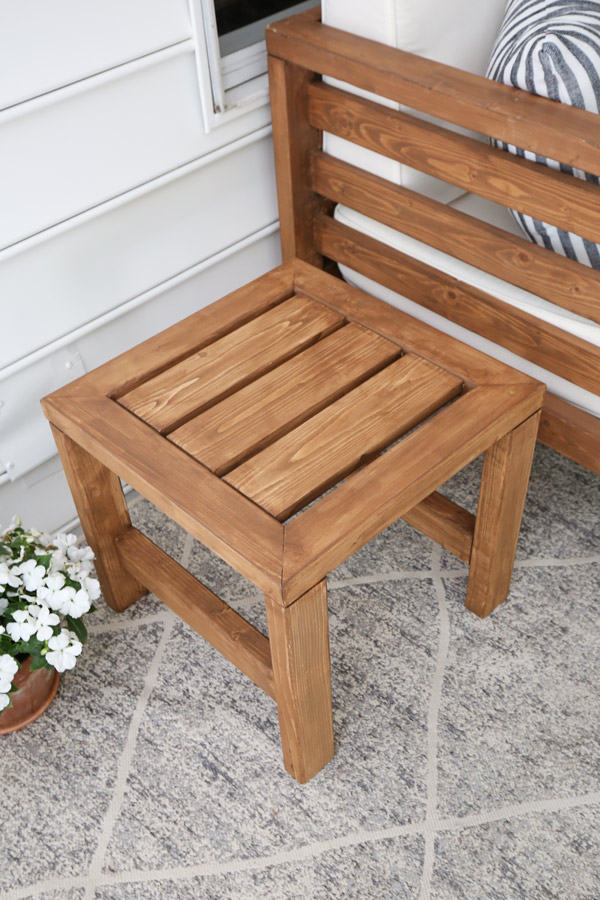
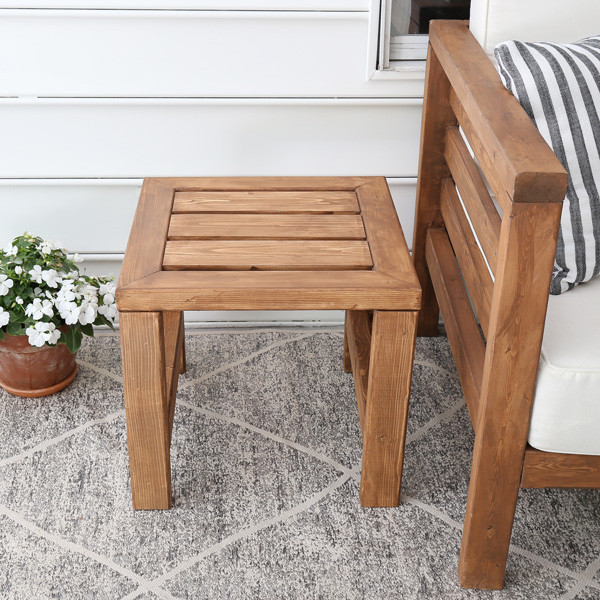
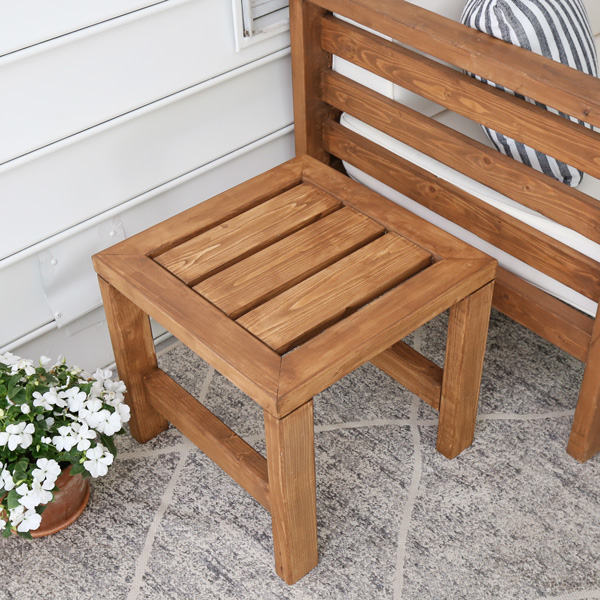
Our DIY outdoor side table is so cute and matches our outdoor furniture set perfectly!
Don’t forget to download the printable DIY outdoor side table plans or the whole DIY outdoor furniture set BUNDLE deal (which includes this side table and the matching outdoor chair and coffee table and outdoor couch)!
And another fun idea is to turn this side table into a DIY umbrella side table stand!
Follow along for my latest projects and sneak peaks on Instagram, YouTube, TikTok, and Facebook!
James Beall
Saturday 26th of July 2025
Excellent!!!!!!
Danny
Thursday 19th of December 2024
You should start including the "average" cost of these builds so people have an idea. Specifically, the materials cost like lumber and screws, not the tools. I like how simple the design is though, can't wait to start building it!
Kyle
Saturday 5th of August 2023
Is there any reason not to use 1x4 for the whole project?
Angela Marie Made
Tuesday 8th of August 2023
You can definitely modify if you would like, I used framing lumber in the rest of my DIY outdoor furniture and wanted it to match!
Devin
Sunday 7th of May 2023
Is this for one side table or two?
Angela Marie Made
Thursday 11th of May 2023
This is for 1 side table!
Valerie
Friday 18th of March 2022
I just finished the little side table and absolutely love it! I ended up using the Kreg Jeg the entire project, no top holes. Thanks to you, I have a beautiful little table. I can't wait to jump on to your next project!❣️
Angela Marie Made
Wednesday 23rd of March 2022
Yay! I'm so happy to hear that, thanks for sharing with me!