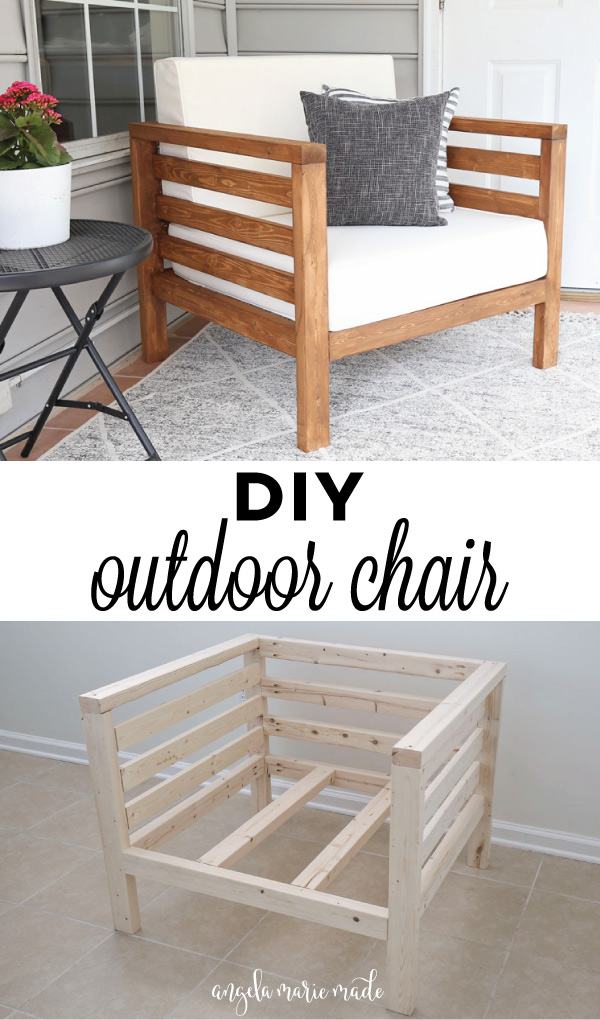
After many requests, I’m excited to share our new DIY outdoor chair that matches our DIY outdoor couch and DIY outdoor coffee table and DIY outdoor side table! I also have a DIY outdoor dining table that compliments the outdoor furniture set too!
Now our DIY outdoor furniture set is complete!
It’s starting to feel like springtime in Charleston! The azaleas are blooming and the weather was sunny and around 60 degrees this past weekend. It was the perfect weather to get outside and do some woodworking!
I have the full step by step tutorial, video tutorial, AND printable build plans below for this build to help make it a fun and easy weekend project!!
Cushions Used & Cushion Options
Just like our DIY outdoor couch, the matching chair was built to go with two sets of outdoor cushions that are no longer sold or in stock (they use to go out of stock all of the time). I have many other cushion options listed below and updated for 2024!
The original cushions I used were 28.75 long x 28.75″ wide each (the seat cushion size). The closest in size that I have seen currently in stock are these 28×28 cushions (and they come in multiple colors).
*Make sure to get your cushions first before building in case they go out of stock!
Spring 2024 Cushion Update:
The cushions I used are still out of stock. Here are currently stocked options in 28×28 and 24×24 sizes as of spring 2024. I have alternative cut lists for these two different cushion sizes in the printable DIY outdoor chair plans!
- Cushion Option 1 (these cushions are also available here)
- Cushion Option 2
- Cushion Option 3
- Cushion Option 4
- Cushion Option 5 (More colors here)
- Cushion Option 6 (28 x 28)
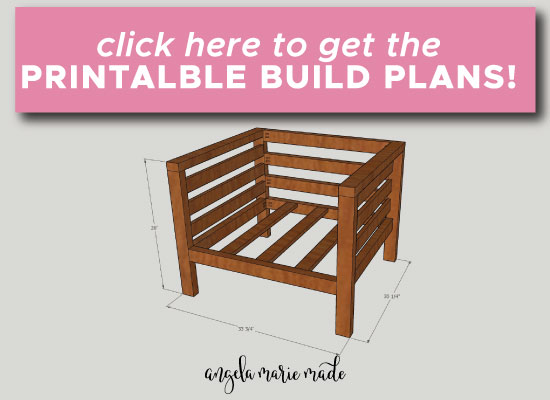
Printable Build Plans & How to Change the Cut List for Different Cushions
Click below for printable build plans and an easy formula for changing the cut list for different size cushions (no matter what size the cushions are), as well as some alternative cut list examples for common cushion sizes:
OR click here for the whole DIY outdoor furniture set plans BUNDLE DEAL!
Overall, the chair build is very similar to the DIY outdoor couch, there are a few modifications and a few less 2×3 boards. But, I will still break it down step by step below and I have a full video tutorial below as well!
Also, if you are new to woodworking and building, see my woodworking for beginner’s post with 6 easy tips to get started!
Note, this post contains some affiliate links. For more info see my disclosures here.
How to build a DIY Outdoor Chair:
Materials:
- (6) 2×3 @ 8ft (framing lumber)
- (2) 1×3 @ 8ft
- 2 1/2″ Deck screws (or self tapping screws)
- 2″ Brad nails
- 2 1/2″ Kreg screws (weather resistant)
- Waterproof wood glue
- Stainable wood filler
- (1) sets of outdoor cushions**
- Exterior wood stain (I used a quart of Valspar exterior stain in Pinebark)
Tools:
- Kreg Jig (or Kreg Jig mini)
- Miter saw
- Drill
- Brad nailer
- Clamps
- Tape Measure
- Speed square (optional)
*If you use different cushions than I did, make sure to adjust the below cut measurements!
** See the printable build plans for details on how to change the cut measurements for different cushions!**
The final size of this DIY outdoor chair is 26″ tall x 33 3/4″ wide x 30 1/4″ deep.
VIDEO TUTORIAL:
Subscribe to my YouTube Channel here!
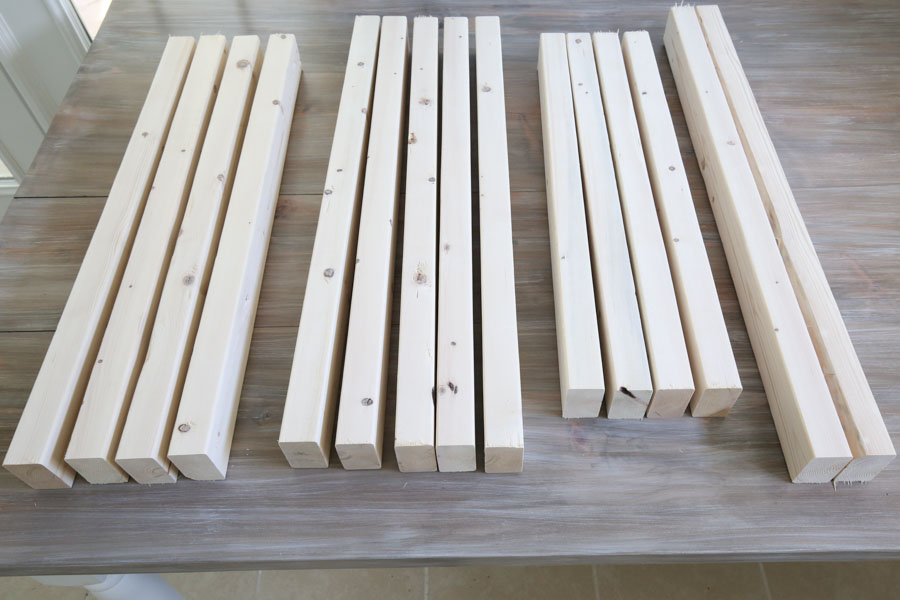
1. Make cuts for outdoor chair frame
Use a miter saw and make the following cuts from the 2x3s:
- 4 pieces @ 24 1/2″ (for side frames)
- 2 pieces @ 30 1/4″ (for side frames)
- 5 pieces @ 28 3/4″ (for back & front frames)
- 5 pieces @ 27 1/4″ (for side & bottom frames)
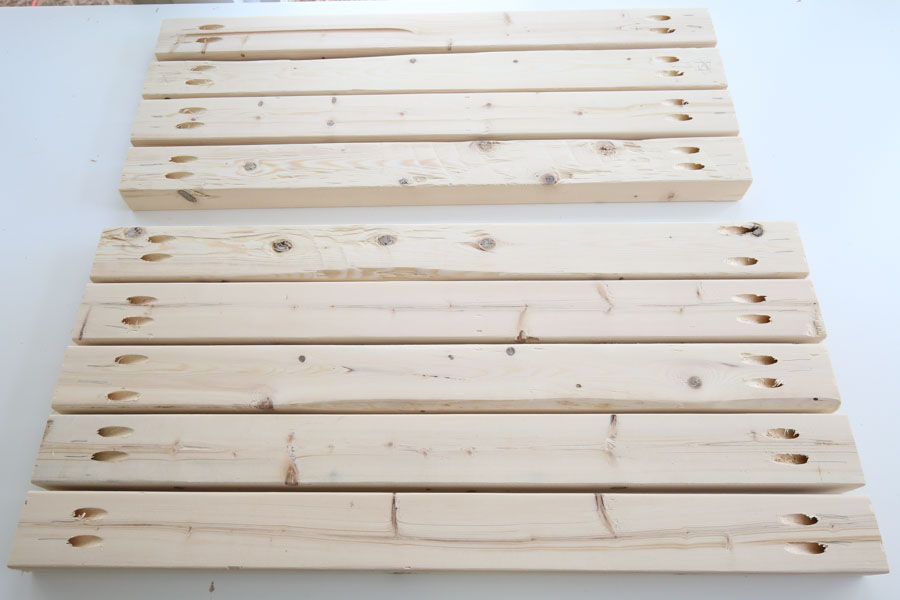
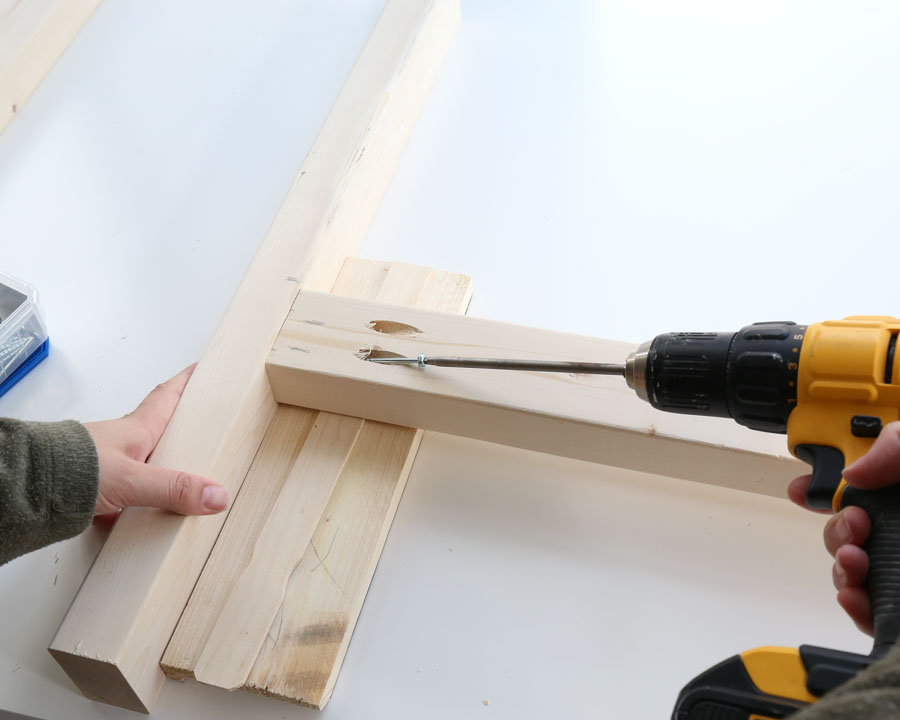
2. Add pocket holes to wood
Make sure your Kreg Jig is set to 1 1/2″ thick wood. Add two pocket holes to each end of the following 2×3 pieces:
- 5 pieces @ 28 3/4″
- 5 pieces @ 27 1/4″
Tip: See my how to use a Kreg Jig post for an easy, step by step tutorial and video tutorial on how to use the Kreg Jig!
Note, my pic below is missing the 5th piece at 27 1/4″ because I ran out of lumber during this step.
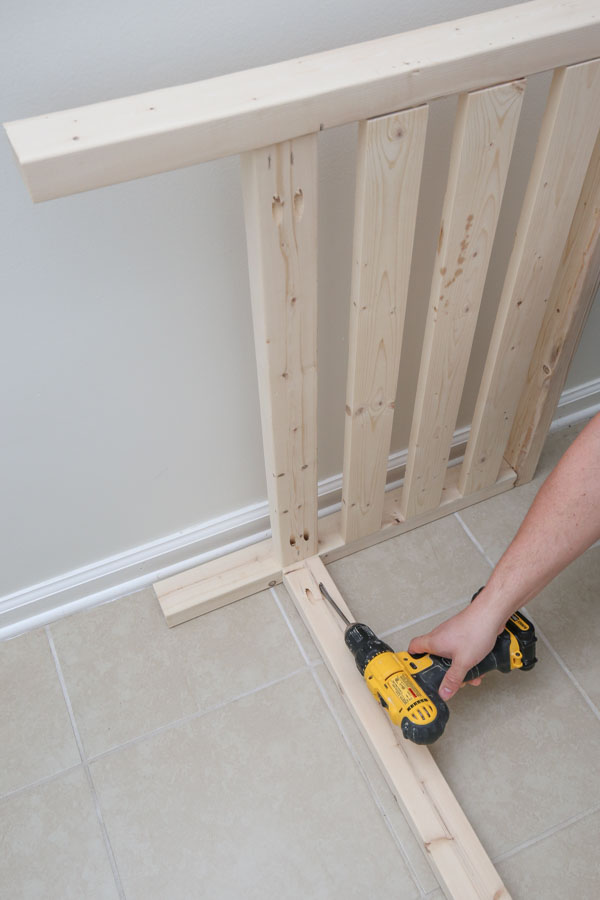
3. Assemble DIY patio chair side frames
The frames of this DIY outdoor chair are built exactly the same way as the DIY outdoor couch side frames. See that post for a few more photos of this step. Or you can refer to the DIY chair video tutorial as well!
Mark 10″ up from the bottom of one of the 24 1/2″ pieces. Attach one of the 27 1/4″ pieces perpendicularly to the 24 1/2″ piece at the 10″ mark. Then, attach them together with 2 1/2″ Kreg screws and waterproof wood glue. Repeat on the other side.
I used a scrap 1×4 and paint stick underneath of the 2×3 to hold it up so the edges would be flush for when I attached the two boards.
*Note: If you prefer the seat to sit higher than 10″ (plus your cushion height), increase the 10″ marks by a few inches to your desired seat height!*
Also, another thing to note is that I am using 2 1/2″ indoor Kreg screws because it’s what I had on hand and my chair is going to be in a sunroom. But, if your chair is going to be totally outside, you should use the blue, outdoor Kreg screws.
Next, attach one of the 30 1/4″ boards to the top of the frame with 2 1/2″ deck screws and waterproof wood glue. Make sure they are countersunk beneath the wood surface (you will fill them with wood filler later). I used self tapping deck screws that do not require pre-drilling.

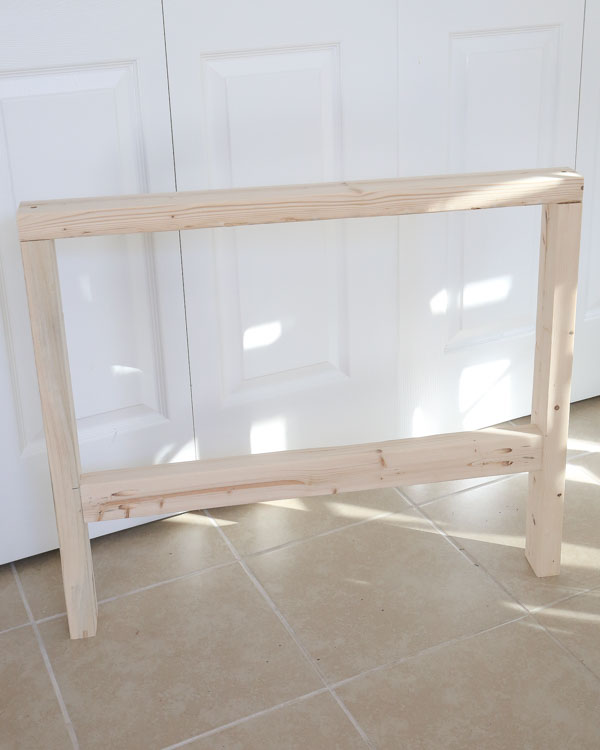
Repeat the above steps for the second side chair frame.
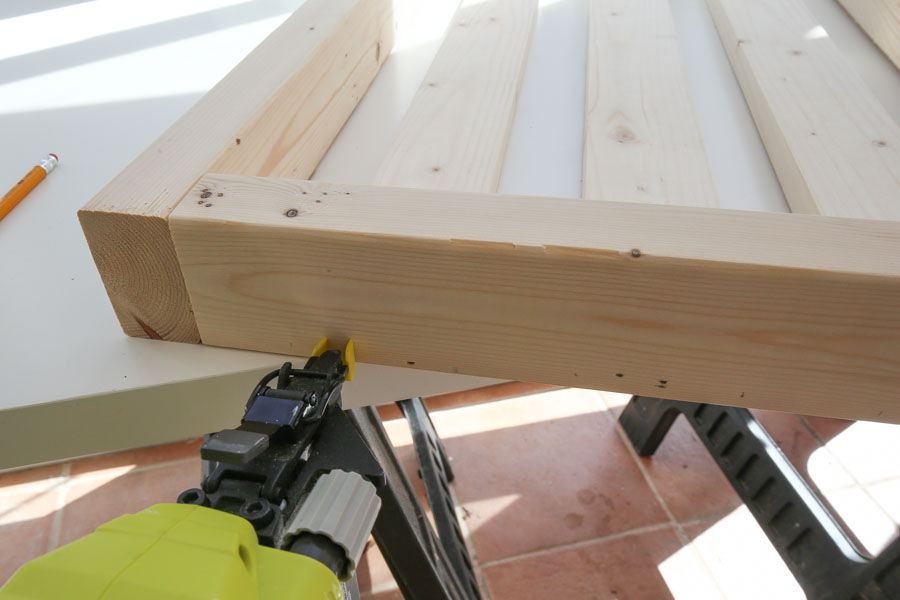
4. Add side slat boards to chair side frames
Measure the exact distance between the two legs of the side frames and cut three 1x3s to this size. The measurements should be close to 27 1/4″ but since we’re working with framing lumber, they may not be. My 1x3s were about 1/16 different and I wanted the measurements to be precise so that there were no gaps!
Add each 1×3 one at a time with 2″ brad nails through the side 2×3 legs. Space them 1 3/4″ apart starting from the top 2×3.
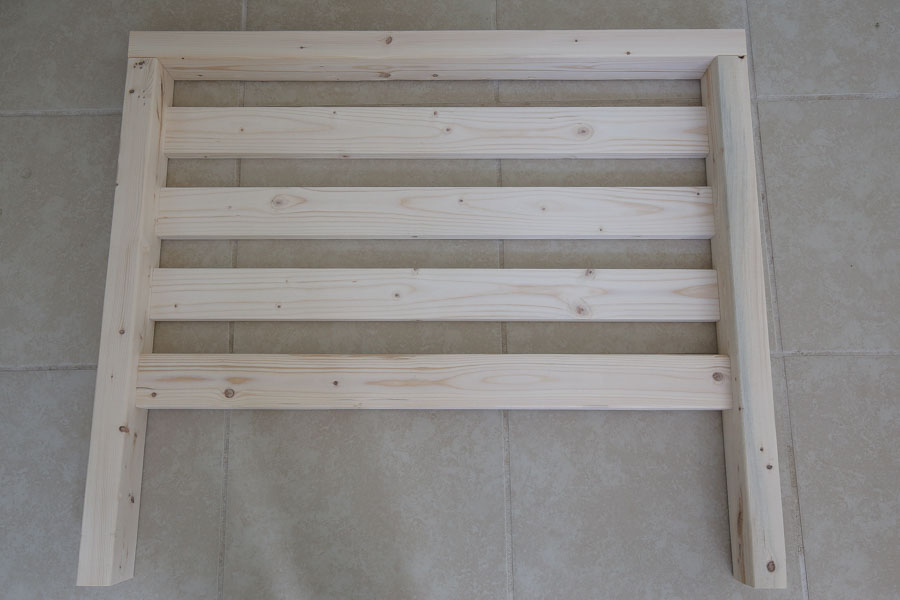
5. Attach sides of DIY outdoor chair together
Attach the two side frames together by attaching the front and back bottom boards (two of the 28 3/4″ boards). Use 2 1/2″ Kreg screws and a drill and waterproof wood glue. Make sure that the pocket holes are facing the inside of the chair frame.
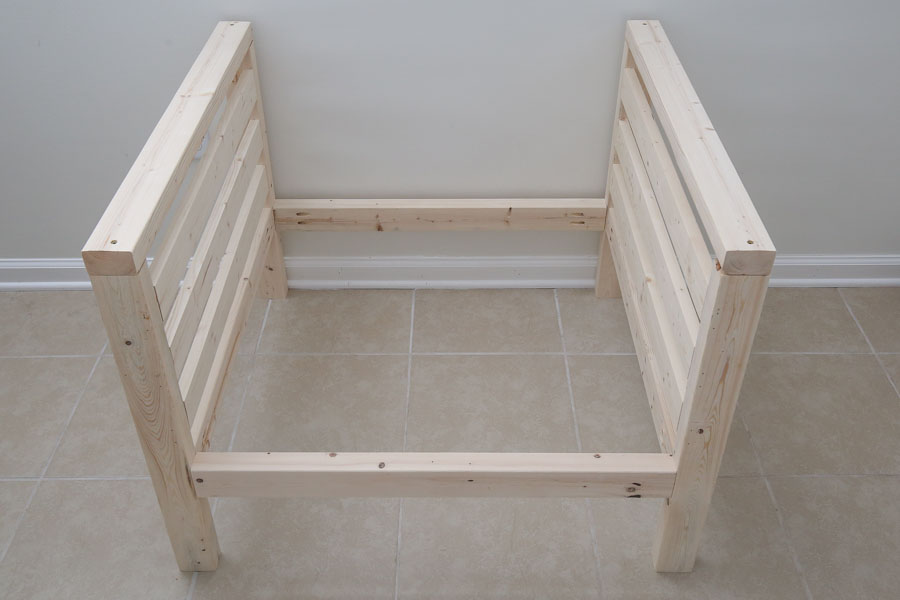
Next, add the bottom support boards using the remaining three 27 1/4″ boards and 2 1/2″ Kreg screws and waterproof wood glue. Space the bottom support boards about 5″ apart. *Note: I ran out of lumber and had to use just just two boards spaced 8″ apart as shown in the photo and video. But I recommend using three bottom support boards in this step, instead of 2, for the best support!

6. Add back frame boards to the chair
Finally, attach the remaining three, 28 3/4″ boards to the side frames to create the back frame of the DIY patio chair (space the boards about 2 3/4″ apart).
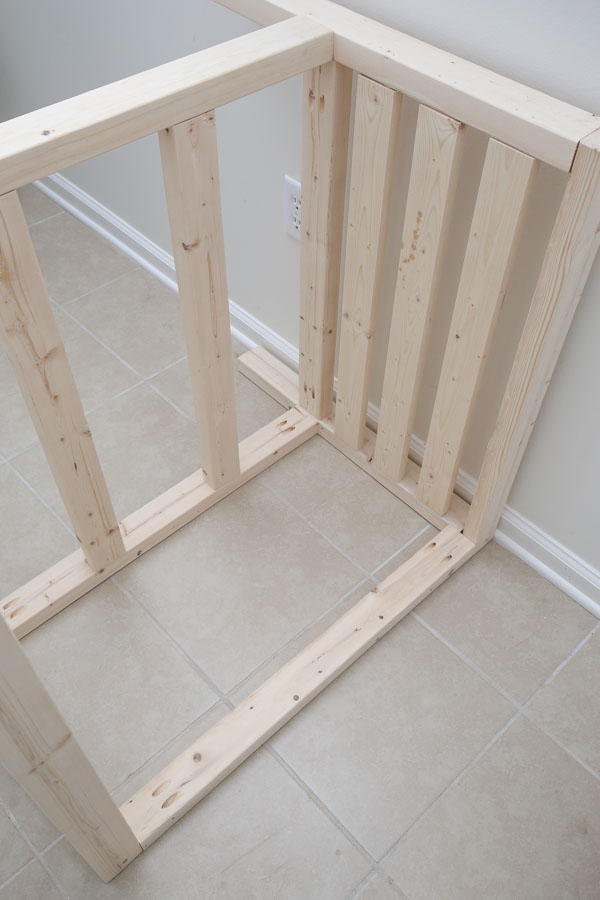

And that’s it for the build!
7. Fill holes, sand, and stain the outdoor chair
The last step is to fill the screw and nail holes with stainable wood filler. Also, finish any needed sanding. For tips on sanding wood, check out my easy guide on how to sand wood.
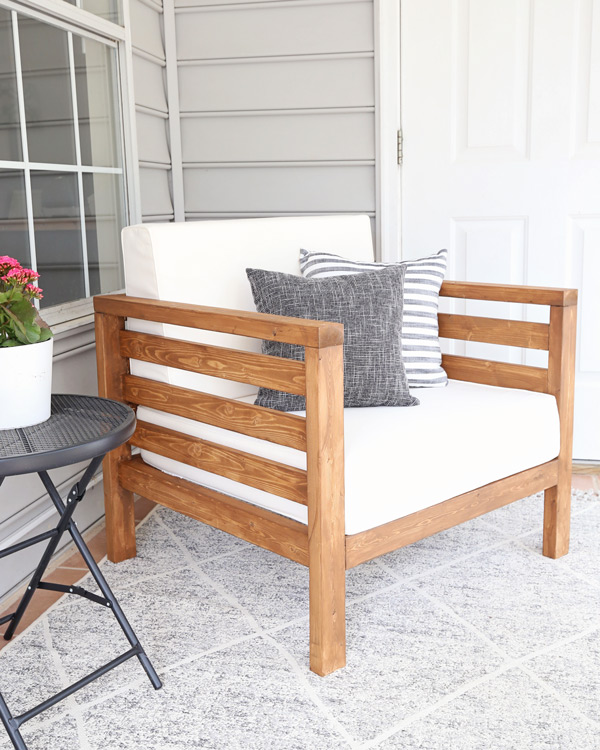
Finally, stain your DIY outdoor chair! I used one coat of Valspar semi transparent exterior stain in Pine bark. It was one of the only exterior stains I could find that came in a quart size and not a gallon size. See my tutorial on how to stain wood for a beautiful finish and the best way to apply stain!
Let the stain fully dry and then add your cushions!
I can’t wait to start using our new DIY patio chair. I’m glad I’ve got the full spring and summer to enjoy it now! Bring on the warm weather!! Maybe this summer I will finally makeover our sunroom too!
Don’t forget to check out the matching DIY outdoor coffee table and DIY outdoor side table! And the the whole DIY outdoor furniture set plans BUNDLE DEAL!
I also have a DIY outdoor dining table that compliments the outdoor furniture set too!
If you make this DIY chair, please share it with me on social media @angelamariemade or #angelamariemade! *You can also share your build in our Woodworking for the Home facebook group, be sure to join!
Follow along on my latest projects and sneak peaks on Instagram, YouTube, and Facebook!

If you want to save this tutorial for later, Pin It here:
Decor Product Sources:
- Striped Pillow Covers – From Amazon & discontinued, similar here (18×18 size) with 20×20 Pillow Inserts
- Black Pillow Covers (16×16 size) with 18×18 Pillow Inserts
- 5×7 Outdoor Rug
- Round Black Metal Accent Table (similar one here!)
Lexie
Sunday 16th of April 2023
Just finished our chair; made some tweeks, ended up flipping it over because it was a little low and making a back for it (since we we flipped it). Love the way it turned out. Got the cushions at Lowes, they are a little smaller than the ones on here. Got them for $60.
Angela Marie Made
Monday 17th of April 2023
So very happy to hear that!! :)
Tyree
Tuesday 11th of April 2023
What would be the max weight this chair would be able to hold?
Meredith Wilson
Friday 17th of September 2021
Hi I am wondering how it’s held up to repeated us? I’m considering going with pressure treated wood just for the added stability
Angela Marie Made
Monday 20th of September 2021
It has held up really well!
amino
Sunday 12th of September 2021
guud
Lilly
Wednesday 8th of September 2021
Anymore cushion links? No one has this size except a few places and they are always out of stock. Chair is built but can’t find a cushion.
Angela Marie Made
Friday 10th of September 2021
Above the post where it says the 2021 update, there are 2 links for some more cushion options on target and wayfair.