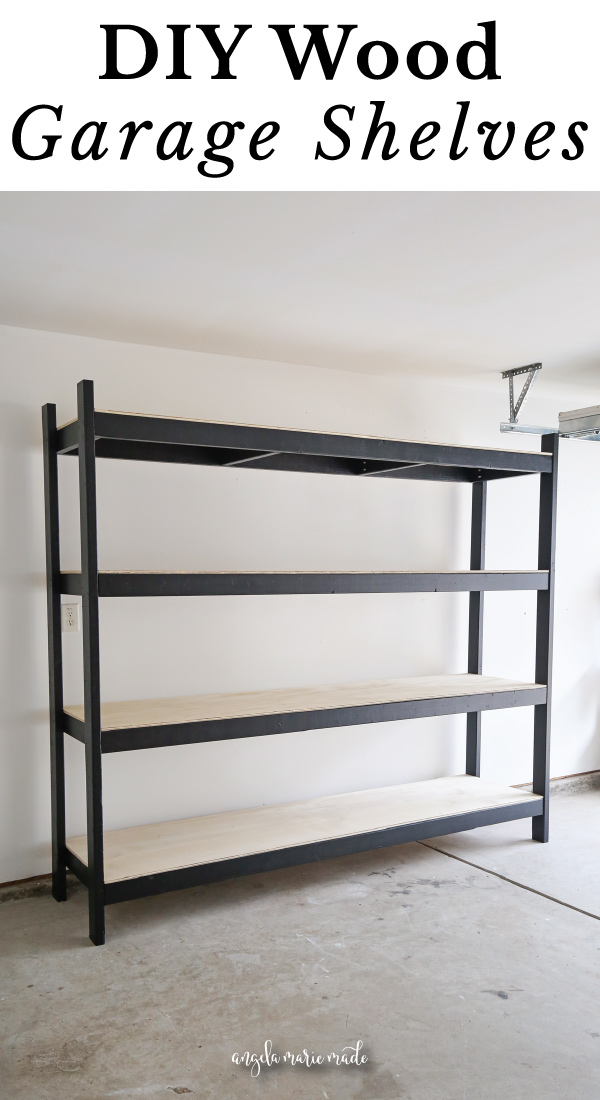
Learn how to easily build DIY wood garage shelves to add organization and storage to your garage!
Our garage was totally empty when we moved in and we always wanted to build DIY garage shelves for extra storage and organization.
DIY garage storage shelves is one of those projects every garage can benefit from and I only wish we made this our first project before moving in! Although we did build DIY garage cabinets and a wall pegboard which added some storage and organization to this space!
Before we started this project, our garage was an embarrassing, hot mess, it was filled with stuff and had become a dumping ground for everything. Here’s a visual:
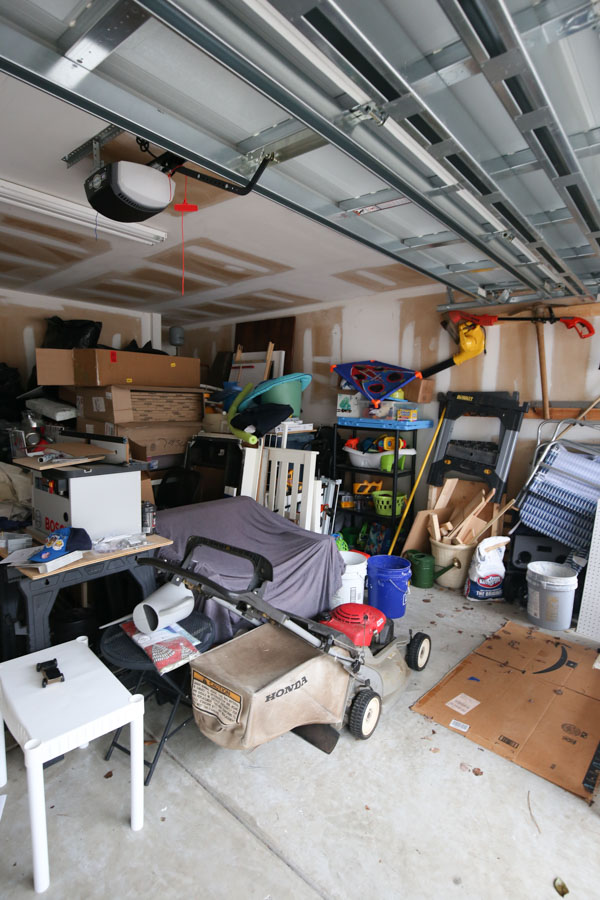
I really feel like part of the problem is that the storage/closet space is lacking inside of our house. But, the other problem is that we just haven’t had time to declutter, a lot of what we have been storing could have been donated or thrown out.
With our new garage shelving storage space, we are getting more organized in the garage now and working on a major decluttering of the space!
Note, this post contains some affiliate links. I may earn a commission if you shop those links (at no cost to you). Thank you for supporting my small business. For more info see my disclosures here.
DIY wood garage shelves design plan
When designing these shelves, I wanted to utilize 8 foot plywood boards from floor to ceiling with long shelves to have plenty of room for storage.
I also wanted to make sure they would fit the storage totes I am going to be using on them. So, we needed deep shelves too.
We also had to take into consideration the wall space length and height we had to work with. Our garage is 105″ tall but we had to make sure our shelves total height was less than our garage door track when opened. So, make sure to check these things in your current garage before building!
But, the great thing about this design, is that it can be modified in several ways if you need to shorten it in the length or height. Either way though, it’s an easy and quick DIY project you can knock it in a weekend!
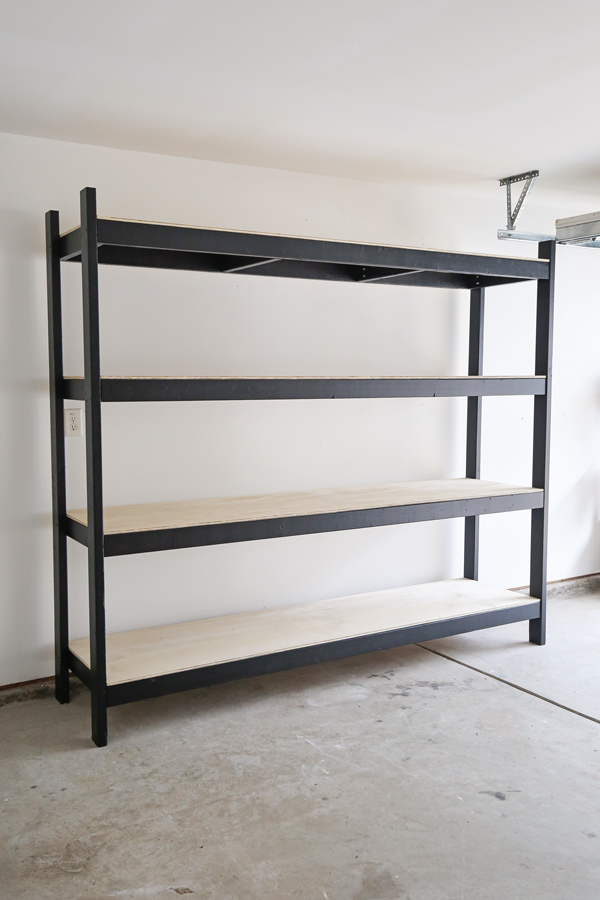
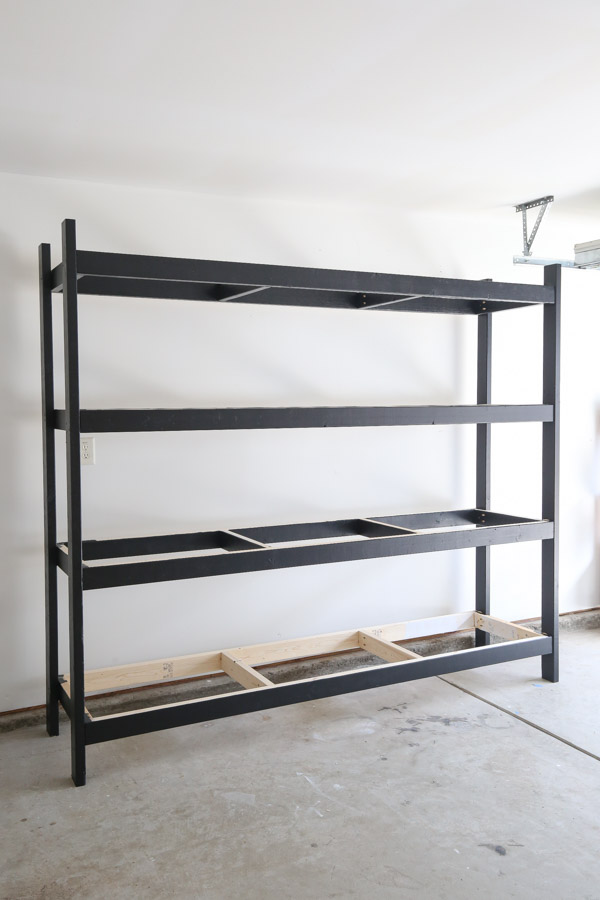
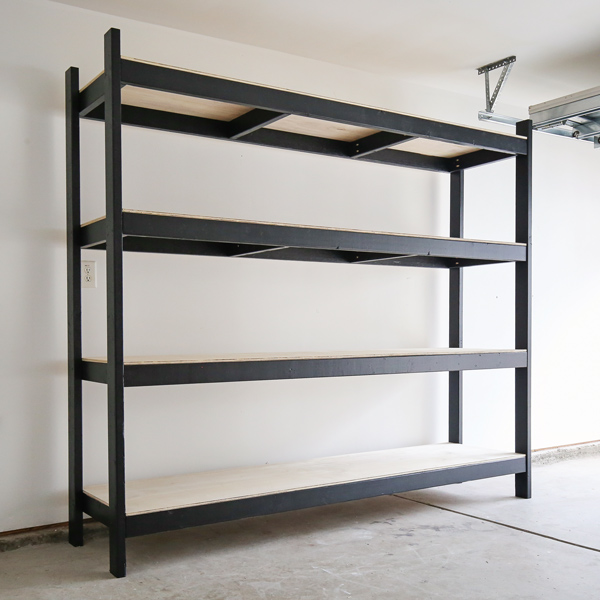
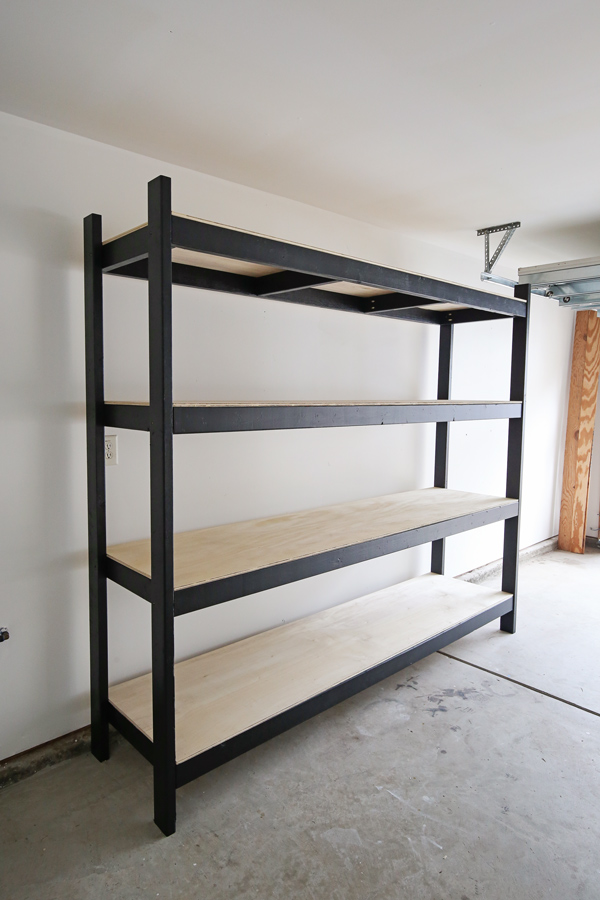
Also, when designing these shelves, I didn’t want them to look like basic garage shelves, I wanted to level it up, and make them look a little nicer. So, we painted the frame black and I just love how it looks with the raw wood of the plywood!
The last design consideration was the vertical shelf supports. I wanted these shelves to stand on their own in case we wanted to bring them with us in the future when we might move.
Therefore, they are strong and stable enough to be freestanding for moving purposes, however for the best security and stability for daily use and storage, they should be secured to the wall studs! See the last step for more details.
DIY garage shelves size
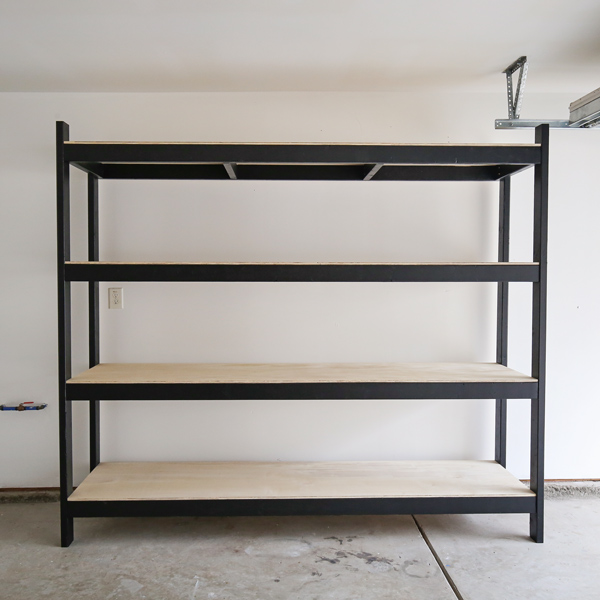
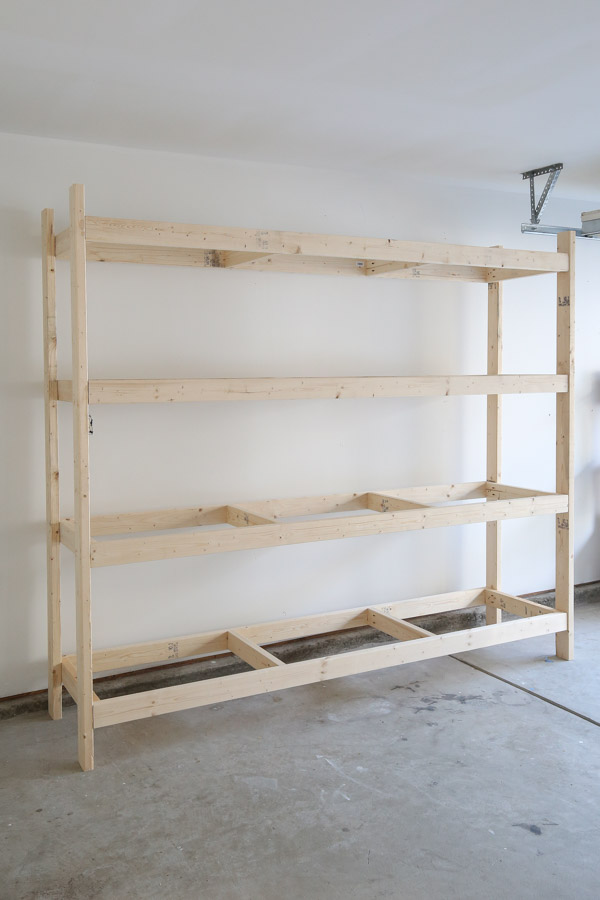
The final dimensions of our DIY garage shelves are 99 inches long x 24 inches wide x 86 inches tall.
You can adjust where the shelves are attached for different shelf spacing as well as the total size.
Cost of the DIY garage storage cabinets
These shelves cost us about $150 to build. But, we used premium plywood. You can use less expensive plywood or particle board for more cost savings! Although, as far a quality goes, the premium plywood is the best choice!
Printable DIY garage shelves plans
To make the build process even easier, make sure to get the premium printable DIY garage shelves plans which include the cut list and step by step building steps with easy to follow diagrams!
How to Build DIY Wood Garage Shelves

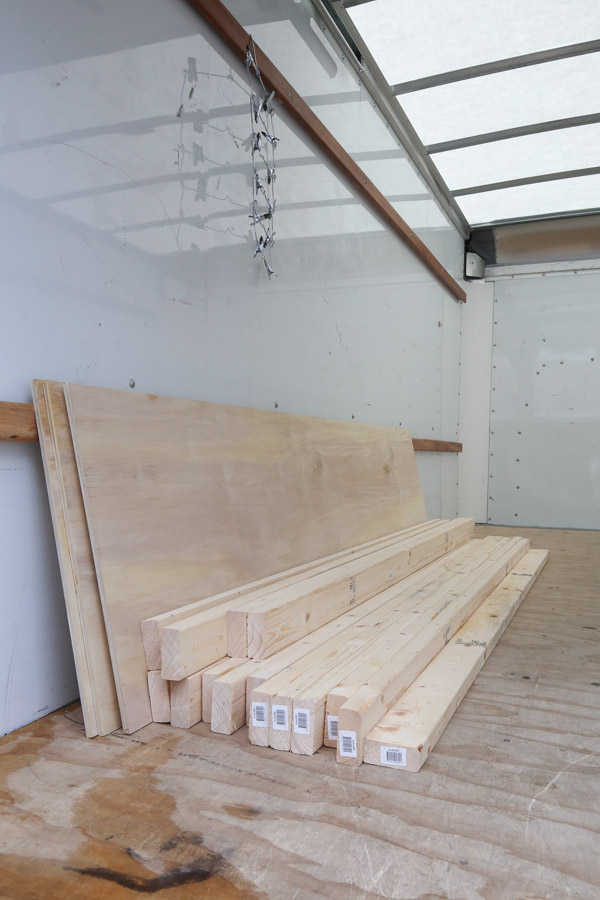
Materials
- (11) 2×4 @ 8ft
- (4) 2×4 @ 10ft
- (2) 4ft x 8ft @ 1/2″ thick plywood
- Wood Glue
- 2 1/2″ and 3″ self-tapping or regular wood screws
- 2 1/2″ Kreg screws
- 1″ or 1 1/4″ brad nails
- Paint and primer (optional)
Tools
- Brad nailer
- Miter saw
- Circular Saw or Table saw (optional)
- Kreg Jig
- Drill
- Clamps
- Tape Measure
- Rubber mallet (optional)
- Stud finder
DIY Garage Shelves Video:
Subscribe to my YouTube Channel here!
Check out this build in action with our DIY wood garage shelves video!
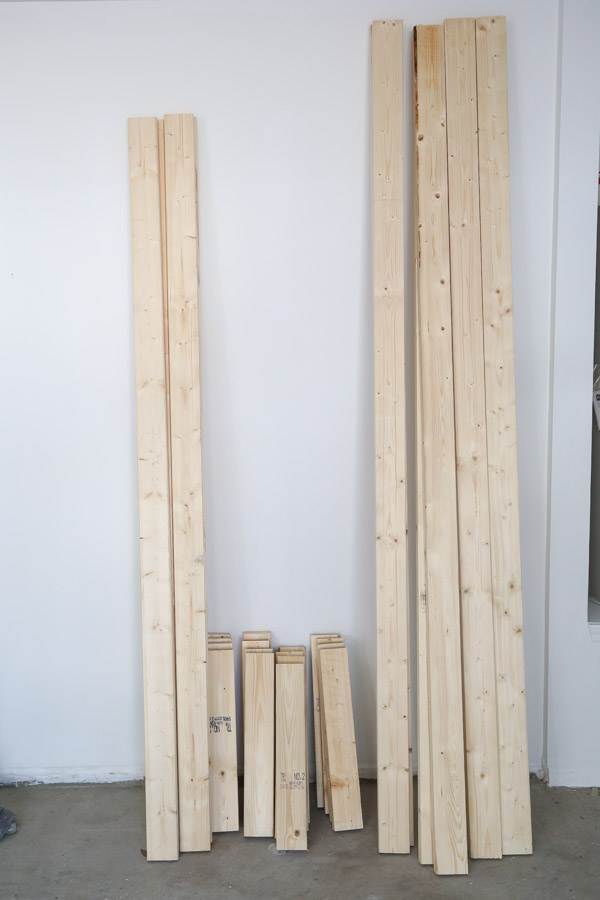
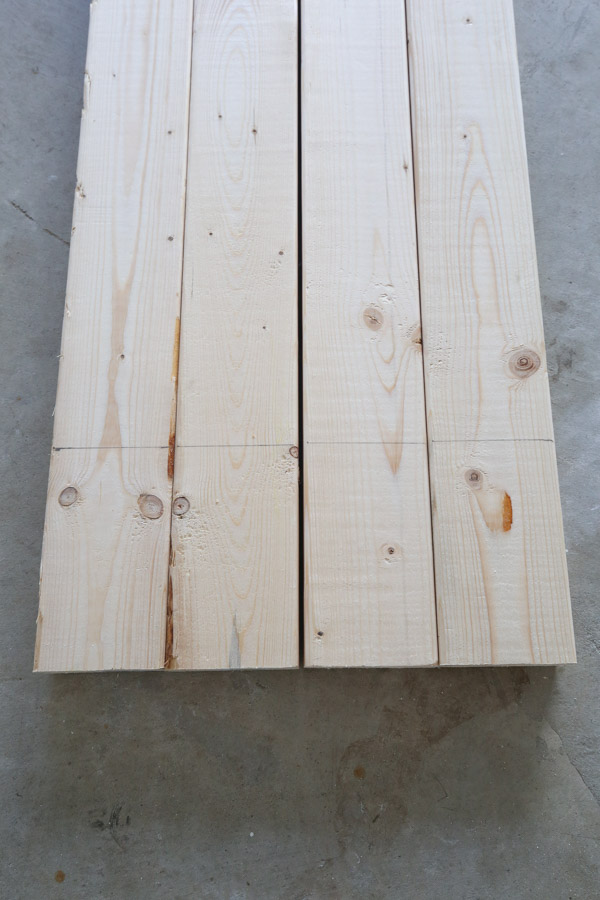
1. Make the lumber cuts
Click here for the printable DIY garage shelves plans which include the cut list and step by step building steps with easy to follow diagrams!
Begin by making the lumber cuts.
For the plywood, we had our boards cut at Home Depot.
Alternatively, use a circular saw and straight edge guide or table saw to make the plywood cuts.
Make the following cut from the 4ft x 8ft plywood:
- (4) boards @ 24″ x 95 7/8″ (for shelves)
- Note 1: when ripping the plywood in half one of the boards will be a little less than 24″ due to the blade thickness, that’s ok for these plans!
- Note 2: we trimmed an 1/8″ off the ends of the boards so they would fit easier in between the shelf frames
Use a miter saw and make the following cuts from the 2×4s:
- (4) 2×4 @ 86″ (the vertical shelf supports)
- Note: Make these first cuts from the 2x4s @ 10ft
- (16) 2×4 @ 21″ (the inside shelf frame boards)
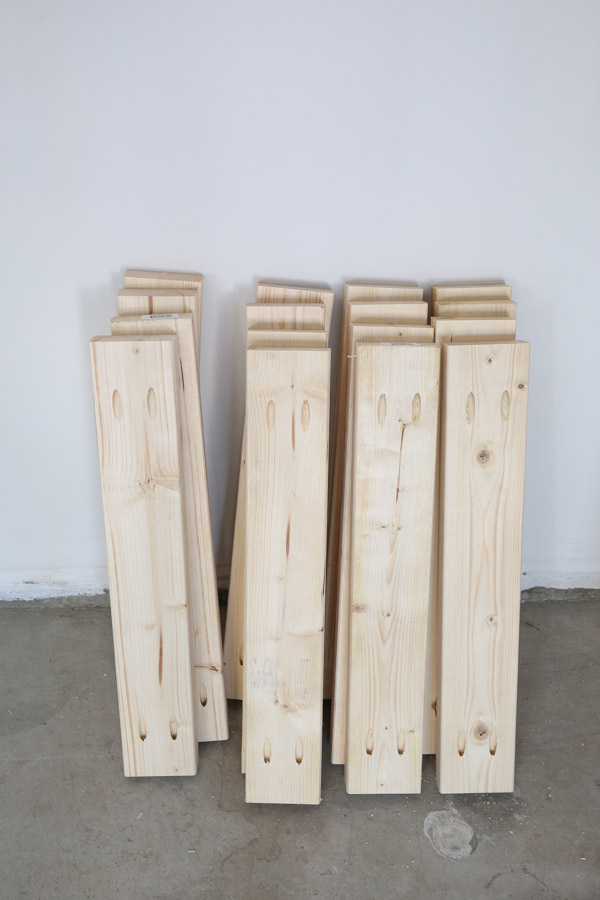
2. Add pocket holes to boards
Make sure the Kreg Jig is set for 1 1/2″ thick wood. Check out my how to use a Kreg Jig tutorial if you don’t know how to use one!
Add pocket holes on each end of the (16) 2×4 @ 21″.
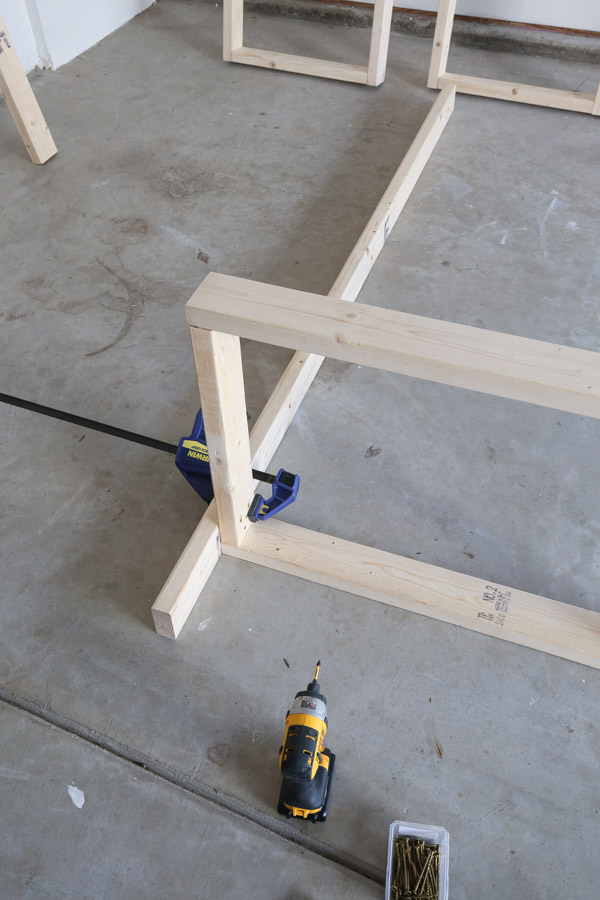
3. Assemble the shelf frames of the DIY garage shelves
Place (4) of the 2x4s @ 21″ in between two of the 8ft. 2x4s, with one on each end, and the two in the middle evenly spaced apart, about 30″ between each other as shown in the below photo.
Assemble the first shelf frame together for the DIY wood garage shelves with wood glue and 2 1/2″ Kreg screws through the pocket holes.
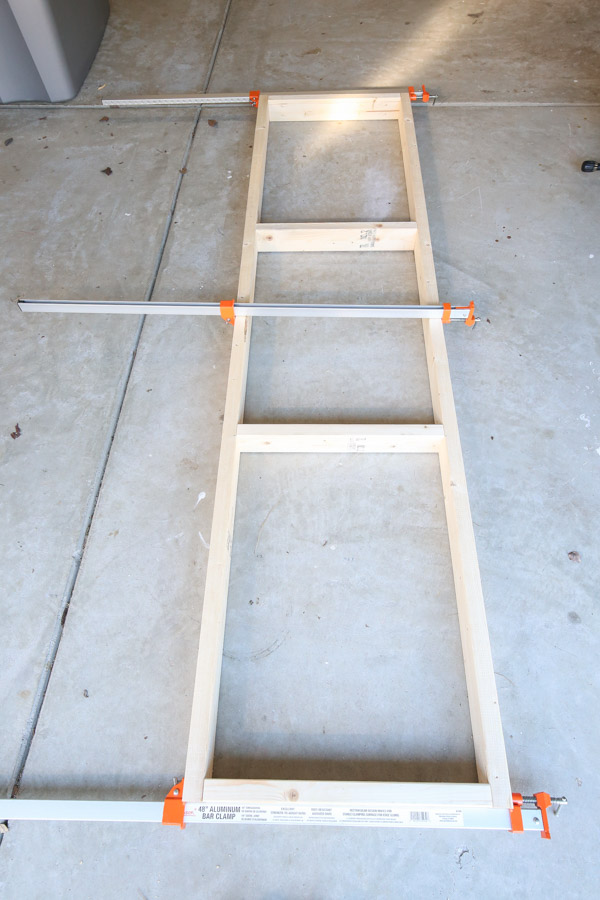
📩 Want to Save This?
We found it easiest to do this on the garage floor since the frames are so large! We also used our 48″ clamps which helped too!
Repeat these steps again for the other 3 shelf frames.
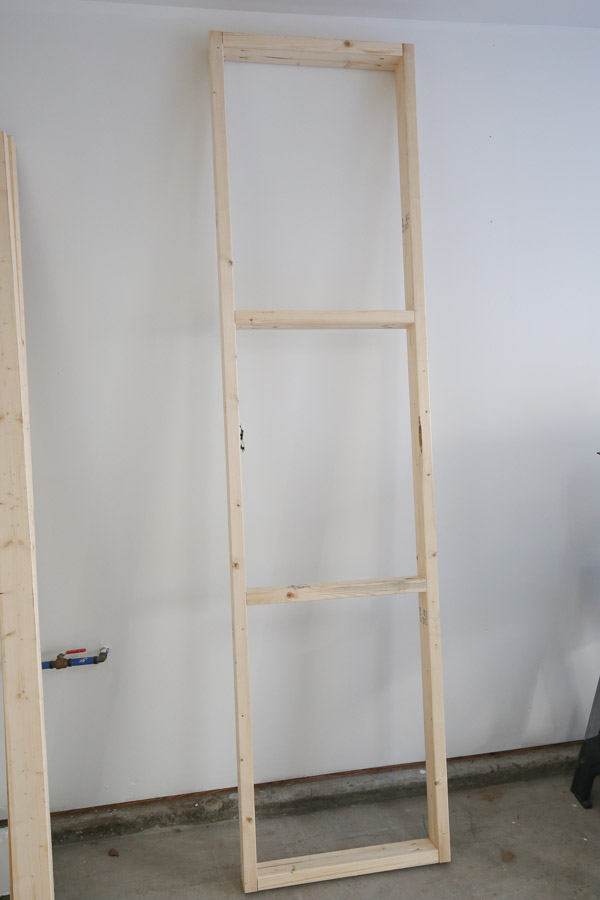
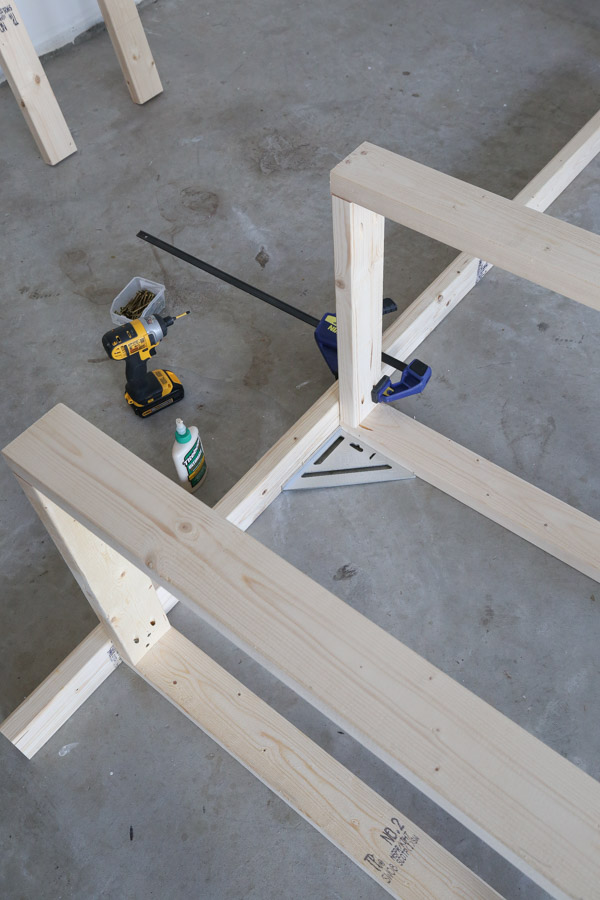
4. Attach the shelf frames to the DIY garage storage shelves vertical shelf supports
First, mark on the (4) 2x4s @ 86″, the vertical shelf supports, where you want to install your shelves and make sure to account for the 3 1/2″ width of a 2×4 plus the 1/2″ plywood thickness, which equals 4″ for each shelf frame and shelf.
We made our shelves so that they were each 20″ apart for our plastic storage bins. So, we marked at 6″, 30″, 54″, and 78″ on our (4) 2x4s at 86″.
Tip: Line these 4 boards up next to each other and mark at the same time with a straight edge.
Attach the first shelf frame to the vertical supports. Line up the bottom of the first shelf frame with the first mark for the bottom shelf. Make sure the boards are perpendicular to each other as shown in the below photo:
*Tip: Double check the bottom of your first shelf frame is lined up with the first mark on your shelf frame support that will be the bottom of the shelves when standing! We messed this up at first and lined it up with our top line for our top shelf by mistake as you can see in the garage shelves video!
Use wood glue and 2 1/2″ self tapping deck screws to attach the first shelf frame side to one of the four vertical support boards. Use screws on both the inside and on the exterior side when attaching together.
Tip: Try to attach everything together as squarely as possible. It doesn’t have to be perfect though with this 2×4 framing lumber.
Repeat these steps again for the remaining 4 shelf frames at the height for each shelf.
Then, repeat the above steps again for the right shelf support frame on the opposite side.
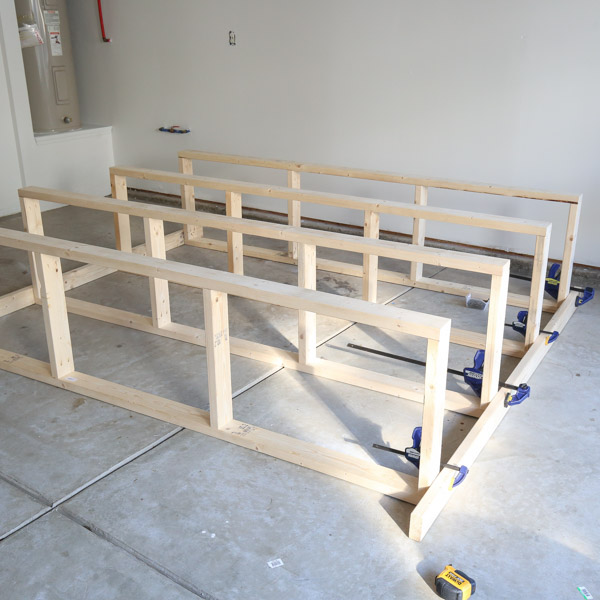
*Carefully flip the DIY wood garage shelves over. See this in action in the DIY garage shelves video! It’s easiest to do this with two people!
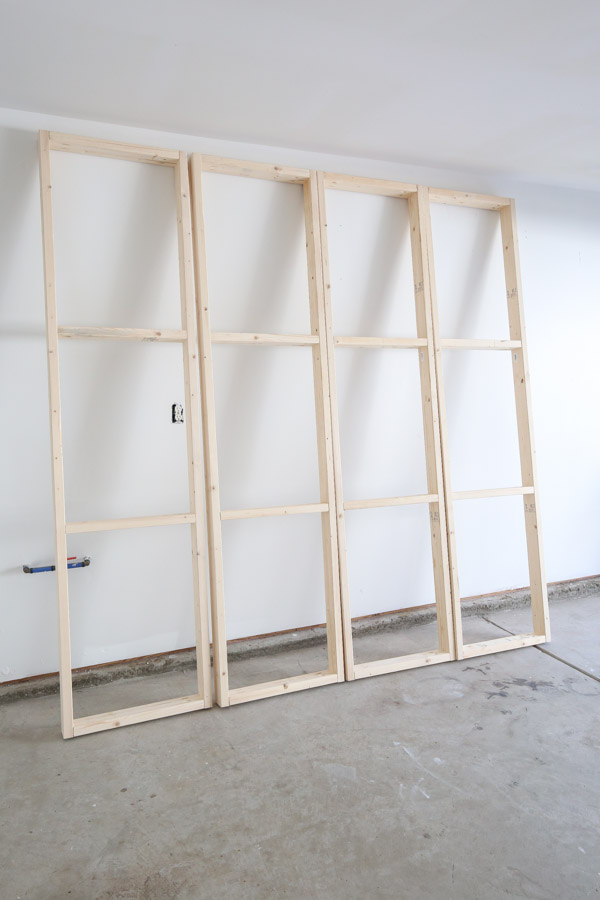
Next, finish attaching the remaining two shelf support boards (2x4s at 86″).

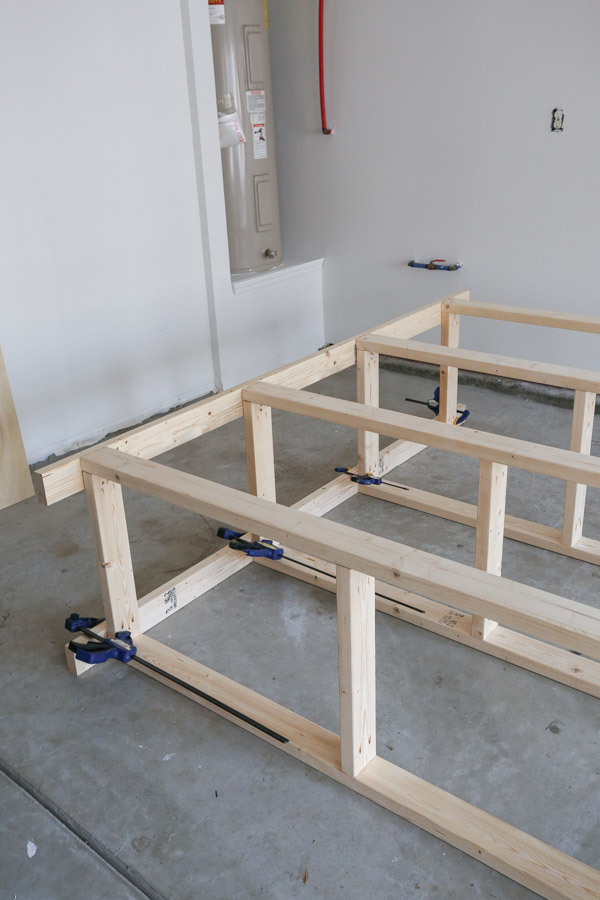
Stand your DIY garage shelves frame up in place!
5. Paint/stain the DIY garage shelves (optional)
Most people leave garage shelves unfinished, but I wanted to make our shelves look a little nicer and more finished.
So we painted our frame black, Tricorn black by Sherwin Williams. It’s one of my favorite garage wall paint colors to use!
This is the best time to paint or stain everything easily if you want too!
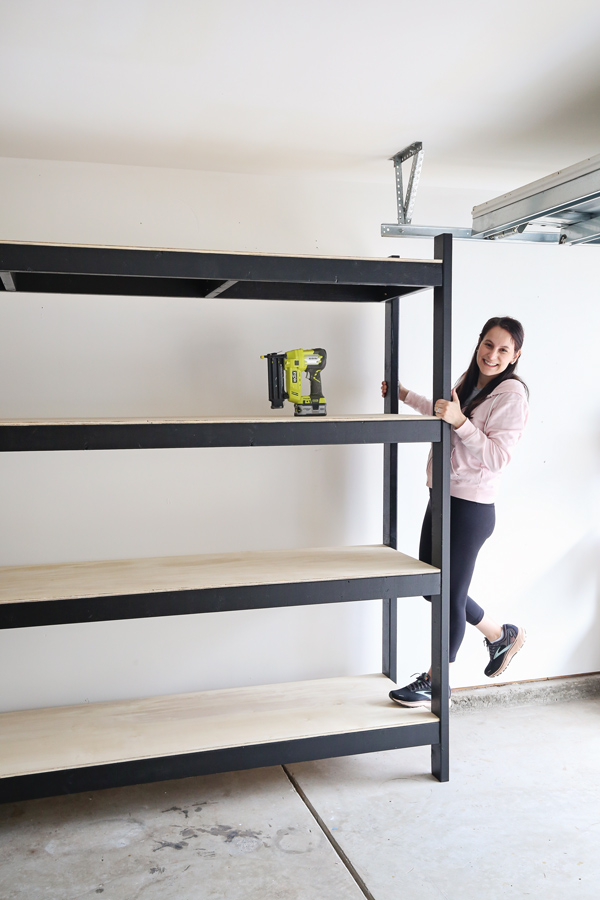
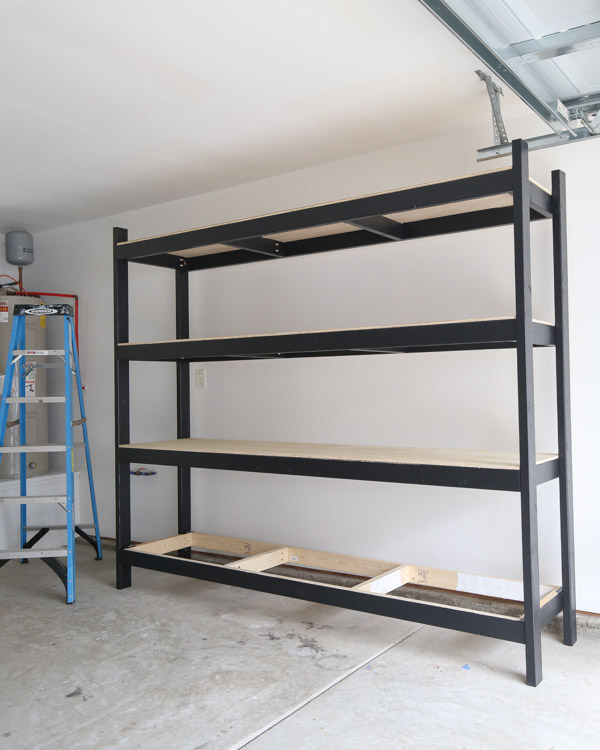
6. Attach the plywood shelves to the DIY wood garage shelves frame
Make sure your shelf frame for the DIY wood garage shelves is in place where you want it to be.
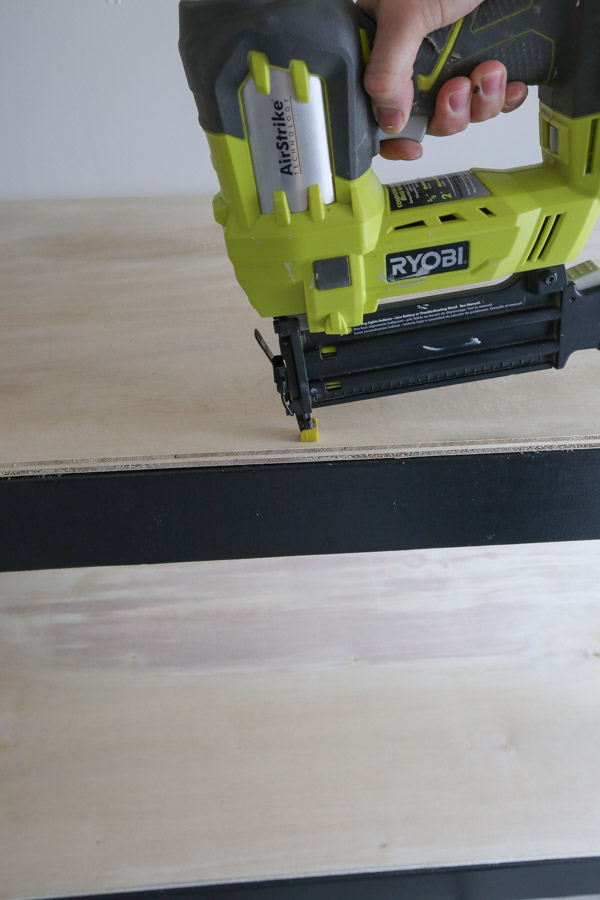
Then, attach each of the four plywood shelves on top of each shelf frame with 1″ or 1 1/4″ brad nails and a brad nailer.
Note, for a few of the boards that were not square, we just used a rubber mallet a little bit to help tap the boards in place if they were a really snug fit. You could also sand the edges that are too snug or trim a little more off the edge if needed with a circular saw.
7. Secure the DIY wood garage shelves to the wall
The final step is to secure the shelves to the wall.
As I said earlier, these DIY wood garage shelves can stand on their own for easy removing/moving. However for the best security and stability, especially with heavier items, they should be attached to the wall studs, by drilling through each of the four back 2×4 shelf frames into the wall studs.
Use a stud finder to locate your wall stud locations. And make sure to use long enough screws depending on your drywall thickness, such as 3″ or 3 1/2″ long screws.
Unfortunately, we have a concrete ledge about 3″ thick along our garage floor. So we had to first secure two 2x2s to the wall and then attach our shelf frames to those for securing our shelves to the wall.
And that’s it!
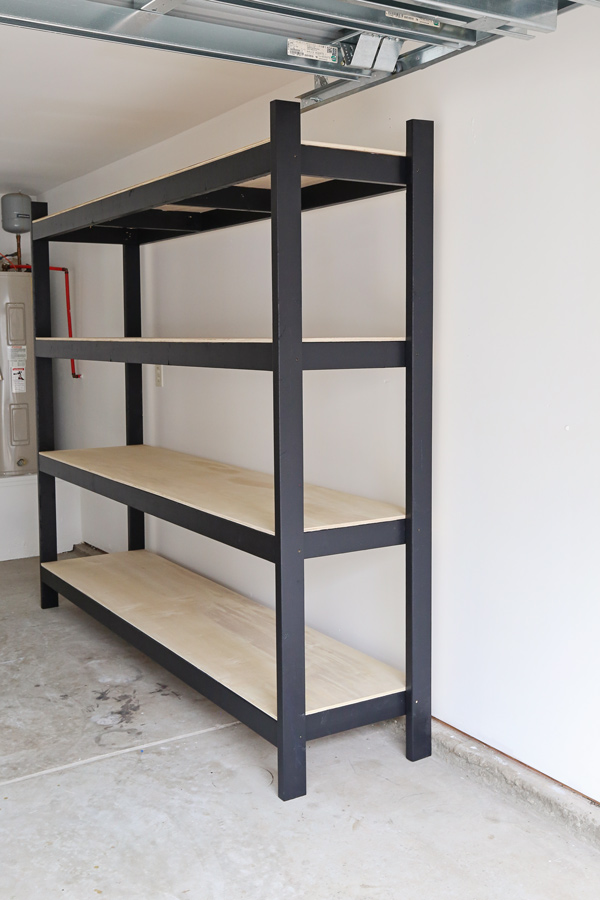
These DIY wood garage shelves have provided us so much extra vertical storage and there should definitely be enough room for what we need.
I can’t wait to fill them up and start organizing them next week when I share some DIY garage organization projects! I just can’t wait to have an organized garage and no more garage clutter! We are so close!

I’m also very happy that we took the time to paint the frame. I think the black looks great against our white garage paint color and also coordinates well with our DIY garage cabinets and wall pegboard too! It just all looks so good and I love our new garage shelves!
Follow along for my latest projects and sneak peaks on Instagram, YouTube, and Pinterest!
Ron
Tuesday 27th of May 2025
Great plans thank you. I used this design to create 54 feet ( 544 linear feet total! ) of shelves on one wall of my 1500 Sq foot garage. I like to take one pass on each 2x4 with my Ryobi planer. It takes the roundness out of the wood and gives it dimensional wood look. Looks much cleaner with square edges and only takes minutes per board. I'll send pics if you like. God bless!