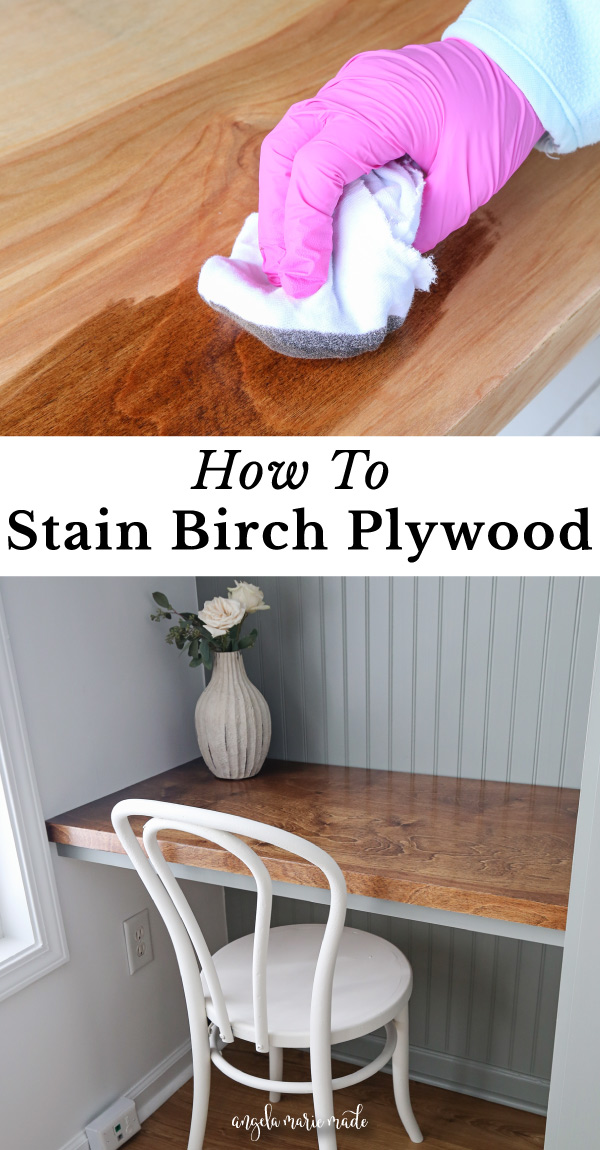
Learn the best way how to stain birch plywood, tips for getting the best finish on birch plywood, and how to avoid blotching when staining birch plywood!
When it comes to the steps for how to stain birch plywood, it’s very similar to how to stain wood and the best way to apply stain.
However, there is one big difference with staining birch compared to other wood types and hardwood species, it blotches a lot more! So, there are some ways to work around this extra blotching that I will be sharing below!
I love using birch plywood for DIY projects, it’s one of the most affordable hardwood plywoods and readily available at many home improvement stores like Home Depot.
And if birch is stained properly, it can be a beautiful, wood finish for any project!
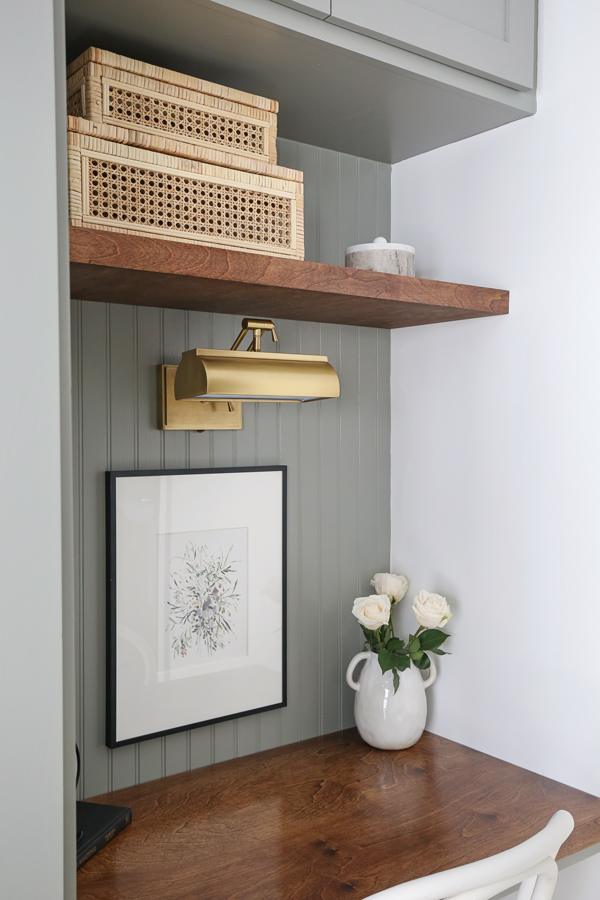
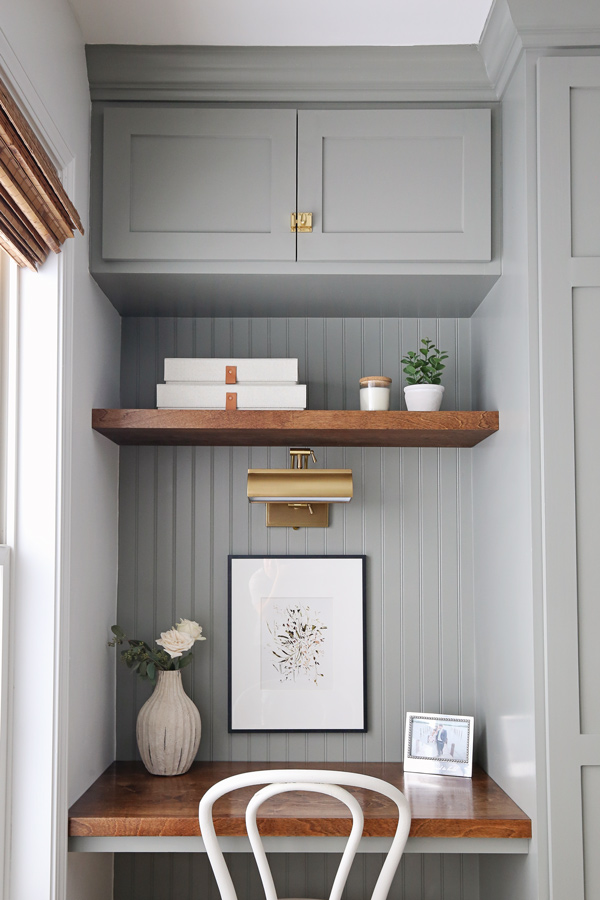
I’ll be staining my DIY wood desk top for our DIY built in desk as my example in this tutorial for how to stain birch plywood. I also used this process for many past building projects with birch plywood, including our DIY floating shelves in our office makeover!
Note, this post contains some affiliate links. I may earn a commission if you shop those links (at no cost to you). Thank you for supporting my small business. For more info see my disclosures here.
Where to get birch plywood and type of plywood
Before I get into the tutorial, I want to mention that when it comes to getting a beautiful, stained finish with birch plywood, it’s a good idea to use a higher quality birch plywood.
I love using these higher quality and grade, formaldehyde free birch plywood boards. They stain really well. They are affordable and easy to find at Home Depot.
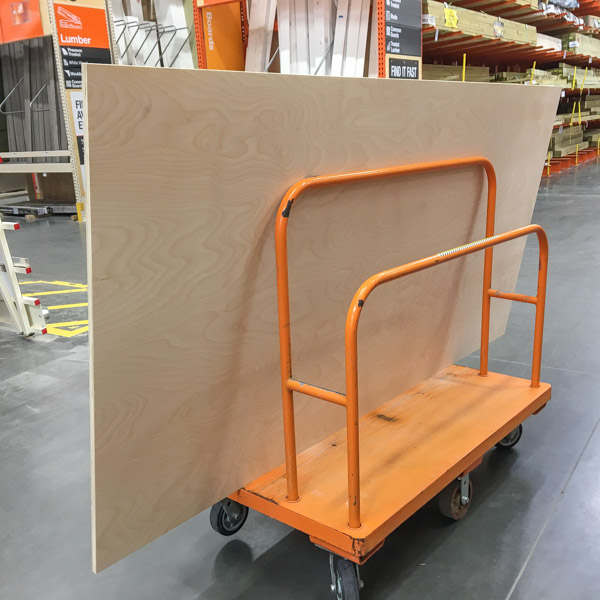
But, you can also get comparable plywood boards or even higher grade birch plywood boards at your local lumber store as another option! They usually carry baltic birch plywood which is very premium.
Best type of stain to use when staining birch plywood
I recommend going with an oil based stain for birch plywood.
Oil-based stains are very common, affordable and popularly used. They create beautiful, enhanced wood grain colors. They do take longer to dry, but it makes it easier to apply, so that’s why it can be the best choice for stain.
Water based stains dry faster, so it can be more difficult to apply the stain evenly, which can cause even more blotching. However, you can test a water-based stain out as described in step #3 below if you want to see how it will look.
Gel-based stain is another option to use to help prevent the extra blotching that sometimes occurs with birch. However, the color choices are limited and you may not need to use it. See step #3 for more details!
If you need help deciding on the best stain color, make sure to check out 10 favorite wood stain colors and 5 gray wood stain colors!
Work area prep and PPE (Personal Protective Equipment) to wear when staining
When staining wood (especially with oil-based stain), here are some key guidelines to follow with setting up your work area and wearing the right personal protective equipment (PPE):
- Always apply stain outside or in a really well ventilated area because it is smelly and high VOCs (you can wear a paint respirator mask to help with this too while staining)
- Make sure to put some plastic, cardboard, scrap wood, or a drop cloth down to protect your work surface
- You can also place some scrap 2x2s down under the project to raise it off the work surface for easy finishing
- Wear chemical resistant gloves, I prefer nitrile gloves
How to Stain Birch Plywood
Materials
- Birch plywood
- Orbital palm sander
- Sandpaper for orbital sander
- Tack cloth
- Wood Stain
- Pre-stain wood conditioner
- Gloves (Nitrile gloves or Chemical resistant)
- Lint free rags
- Foam brushes (optional)
1. Sand the wood
When it comes to the best results for a beautiful finish, no matter what species of wood, the first key is in the preparation of the surface of the wood, especially the sanding!
For a detailed step by step tutorial for sanding, check out my how to sand wood beginner’s guide.
For most projects, especially birch plywood, I recommend using an orbital palm sander and starting with 80 grit, then use 120 or 150 grit, and finish sanding with 220 grit for a very smooth surface on the wood.
The nice thing about starting with a higher grade plywood is that it doesn’t take as long to sand.

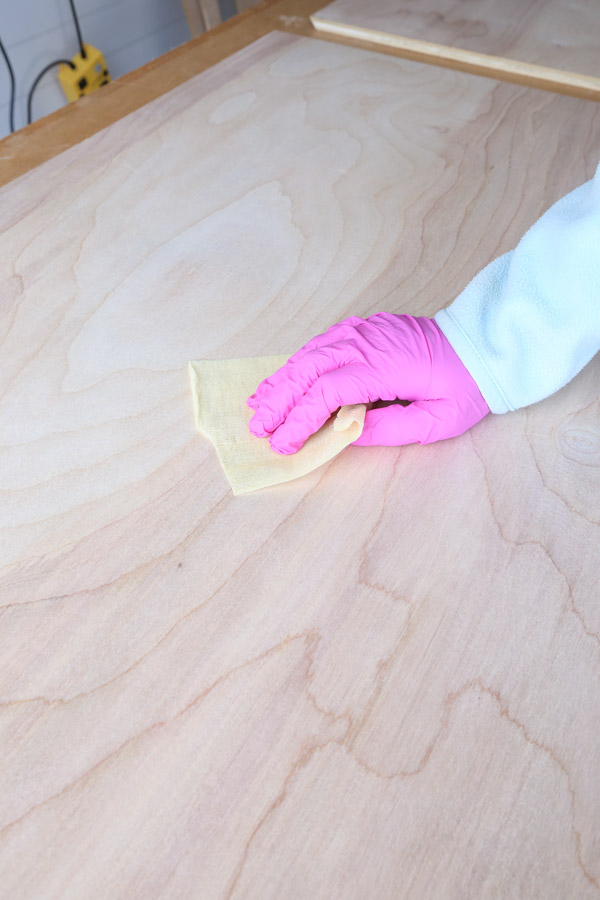
2. Remove the sawdust from the plywood
It’s important to remove all of the sawdust from the wood surface before staining.
Use a shop vac or soft bristled brush or broom and sweep off the saw dust, then to remove the rest of it, wipe the plywood with tack cloth.
Tip: Tack cloth is sticky so I wear gloves when cutting/handling it!
3. Test your wood stain on the birch plywood
When it comes to how to stain birch plywood, testing your wood stain out first on your plywood is annoying but very important.
Make sure to test on the underneath side of your project or in a more hidden area or on a scrap piece that is the same type of wood as your project.
Testing stain on birch plywood is super important because birch is extra prone to blotching and you won’t know how much your specific board will blotch until you test it out!
Also, staining birch can also make your stain appear to be a dark stain or dark color compared to the label.
Here is how to test everything out:
Test first with a pre stain wood conditioner
First, apply pre-stain wood conditioner (if you are going to be using an oil based stain and you can use this kind for water based stains) to your test spot.
This can easily be applied to the wood with a lint free rag. Follow the directions on the can, but basically you apply this to your clean plywood surface and let it sit 5 – 10 minutes before applying your stain.
Make sure to apply extra generously for birch plywood!
As I explained in how to stain wood and the best way to apply stain, Pre-stain or wood conditioner helps tremendously in preventing blotching on the wood finish once stain is applied.
📩 Want to Save This?
Apply wood stain to the test spot
After letting the wood conditioner dry for 5 – 15 minutes, apply your wood stain with a lint free rag and let it dry. Testing is a great time to try different stain colors to see what you like best!
Need more wood stain color ideas? Check out 10 favorite wood stain colors and 5 gray wood stain colors!
If you like how the test spot finish looks, then proceed with the staining process.
But, if your birch plywood is extra blotchy with the wood stain, and you want less blotching, you can try two other options.
How to avoid blotching when staining birch plywood
Using a pre-stain conditioner helps a lot for most birch wood projects to avoid blotching of the wood stain finish.
If it’s not working enough, another option to try is gel stain. But, the options are limited for gel stain colors, so the other option to try is a shellac/sanding sealer, like SealCoat to help prevent blotching.
We used this on our birch butcher block finish for our DIY built in kitchen cabinets because the birch butcher block was blotching really bad and it worked amazingly well.
Check out our DIY built in kitchen cabinets for more details, but you basically just apply a coat of SealCoat, let it dry, then sand the wood some with 120 and 220 grit sandpaper and an orbital sander. Then, proceed with staining.
4. Apply the wood conditioner to the birch plywood
Once the testing process is complete and you know exacly what you are using, proceed with applying it to the full project.
So, for my DIY built in desk top, I did not need to use shellac, so I applied my pre-stain wood conditioner to all of the visible parts of the project.

Note, even if you are using gel stain, you still need to apply a wood conditioner first!
Apply the wood conditioner with a lint free rag. Let the wood conditioner dry for 5 to 15 minutes.
5. Apply your wood stain to the birch plywood
Now it’s time for the stain for how to stain birch plywood!
First, stir the stain in the can before using (don’t shake it) with a popsicle stick, plastic spoon, paint stir stick, or something similar.
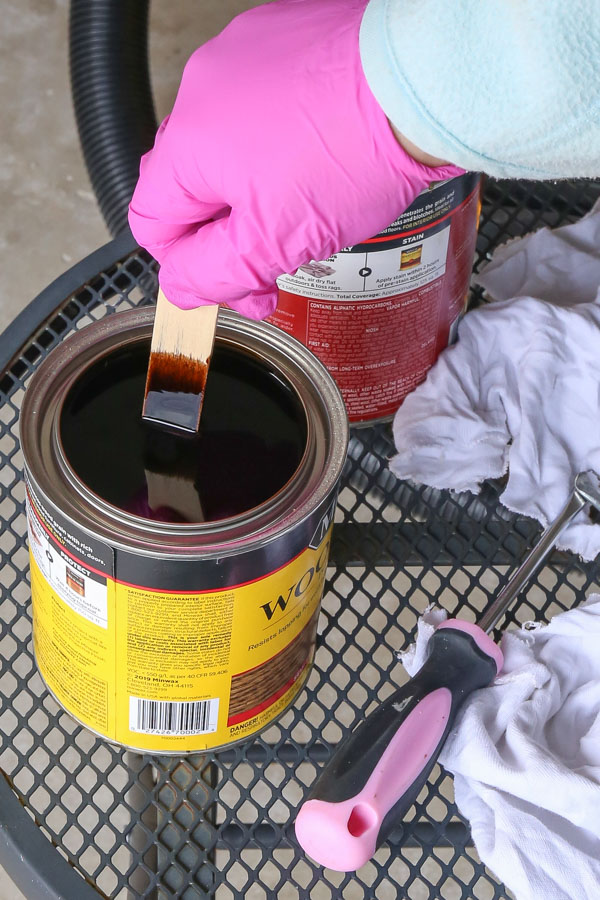
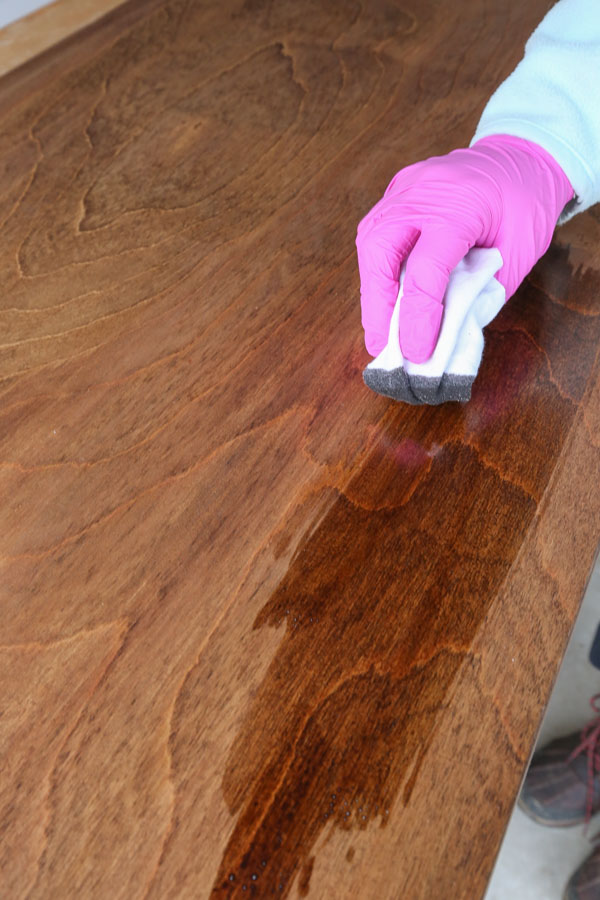
I prefer applying my stain with a lint free rag or cloth because I find that it’s easiest to control how much is applied and it can be thrown away after use. I don’t need to clean it up with mineral spirits. However, I do discuss proper clean up in the last step!
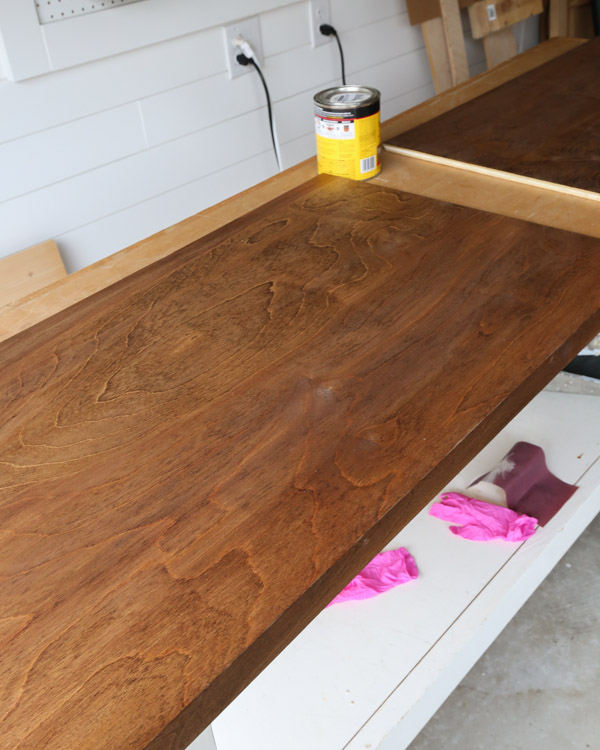
Apply one coat of stain with the grain of the wood and use the lint free rag to wipe any excess stain off.

If you want a darker color, let the stain sit a minute or two on the wood before wiping off the excess.
Use a foam brush for hard to reach areas. Note, it goes on heavier. Check out the best way to apply stain for more details!
Let the first coat of stain dry before adding a second coat if desired. Check your stain directions for dry time, as it can vary by brand and type of stain used.
For even more tips on staining wood, check out my how to stain wood tutorial!
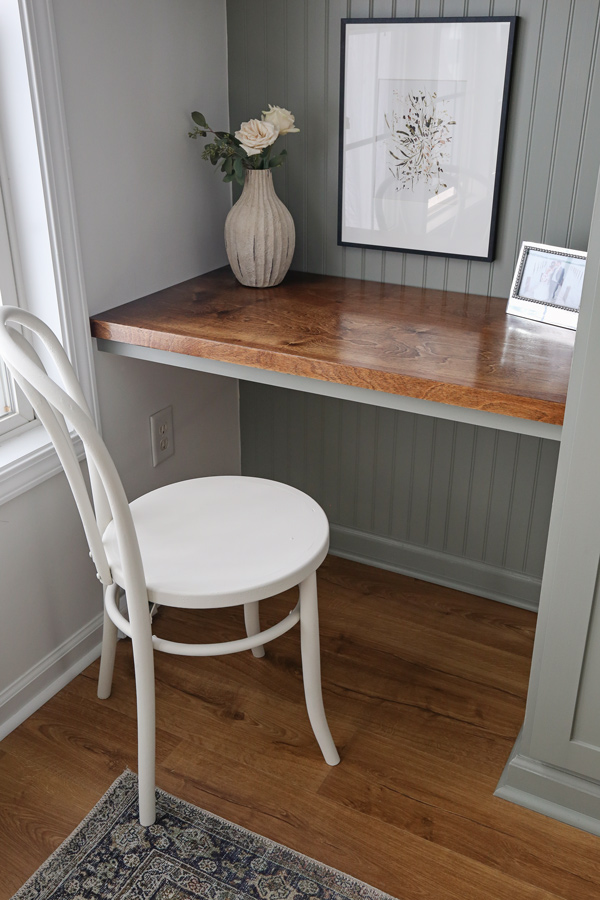
For our desk tops, I did apply a second coat, which looked great!
6. Apply a top coat to the birch plywood (optional)
You can either leave your project as is or add a top coat or sealant for the best durability and enhancing of the final wood finish.
The most often used top coat that I use is a fast drying oil-based polyurethane in a satin finish because it provides strong durability and really brings out the beauty and grain of the wood.
Check out how to apply polyurethane to wood for a step by step tutorial!
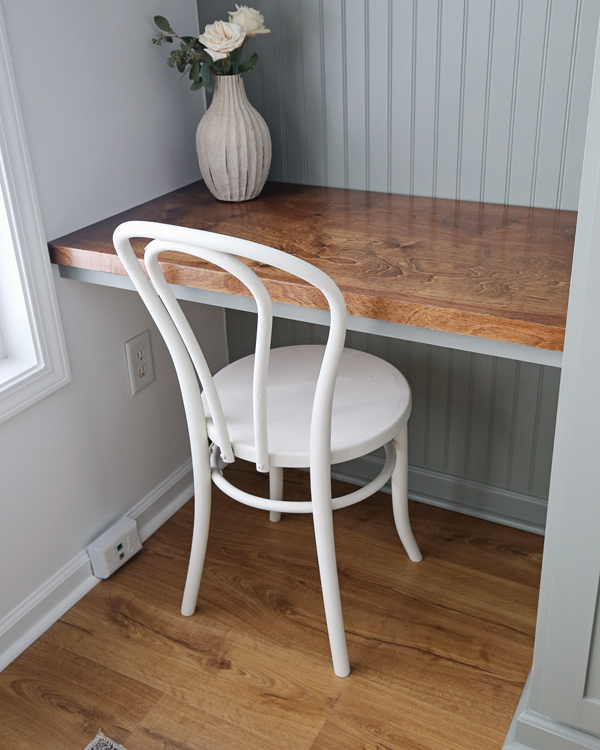
For our DIY wood desk top for our DIY built in desk, we used three coats of the polyurethane for the durability and to make the final finish look really beautiful and warm. I love the final result!
7. Clean up oily rags properly
If you are using an oil based stain or polyurethane, proper, safe clean up needs to be used rather than just throwing the oily rags right into the trash which can be a risk.
Check out this helpful tutorial from This Old House on how to safely dispose oily rags and why it is so important!
***
Here is how the final finish turned out, just so pretty! I used the same process on the DIY shelves too!
Best tips for how to stain birch plywood
Here is a summary of my best tips for how to stain birch plywood:
- use premium birch plywood if possible
- sand the plywood well
- test out the wood stain first on your birch plywood
- use a pre-stain wood conditioner generously
- if blotching is really bad, test out a shellac, sanding sealer or gel stain
- always stain with the grain of the wood
I hope this how to stain birch plywood tutorial has been helpful!
Follow along for my latest projects and sneak peaks on Instagram, YouTube, and Pinterest!
Alice
Friday 13th of March 2026
I purchased a litter box cover (about 20" deep x 22"wide x 17" high) made of unfinished birch plywood, which comes already sanded. I'd like to stain it and the vendor recommends using tung oil, which she says is easier to apply and doesn't take long to dry, but my understanding is that a water-based wood stain will dry much faster. The tung oil finish might look better but I am not looking to make this piece gorgeous or spend much time on it, given its purpose and its placement in my apartment -- it's just going to cover a cat litter box! Any advice about using tung oil vs a water-based wood stain (or something else)?
Priya S
Wednesday 30th of April 2025
Why doesn’t the edge of the plywood look like it has the exposed layers? How did you handle that?
Angela Marie Made
Thursday 19th of June 2025
I designed the desk top to hide the plywood edge! You can see how I built the desk top here: https://angelamariemade.com/diy-built-in-computer-desk/
Alex
Monday 24th of February 2025
Thank you so helpful
Rich
Friday 8th of March 2024
Hi! Which color stain are you using on the desk top? I love all of htem on the 10 favorites list, but that one really stands out!
Angela Marie Made
Thursday 21st of March 2024
It's Provincial by Minwax, one of my favorites!