
Learn how to easily grey wash wood! This weathered gray stain finish works great for how to make wood look old and gray!
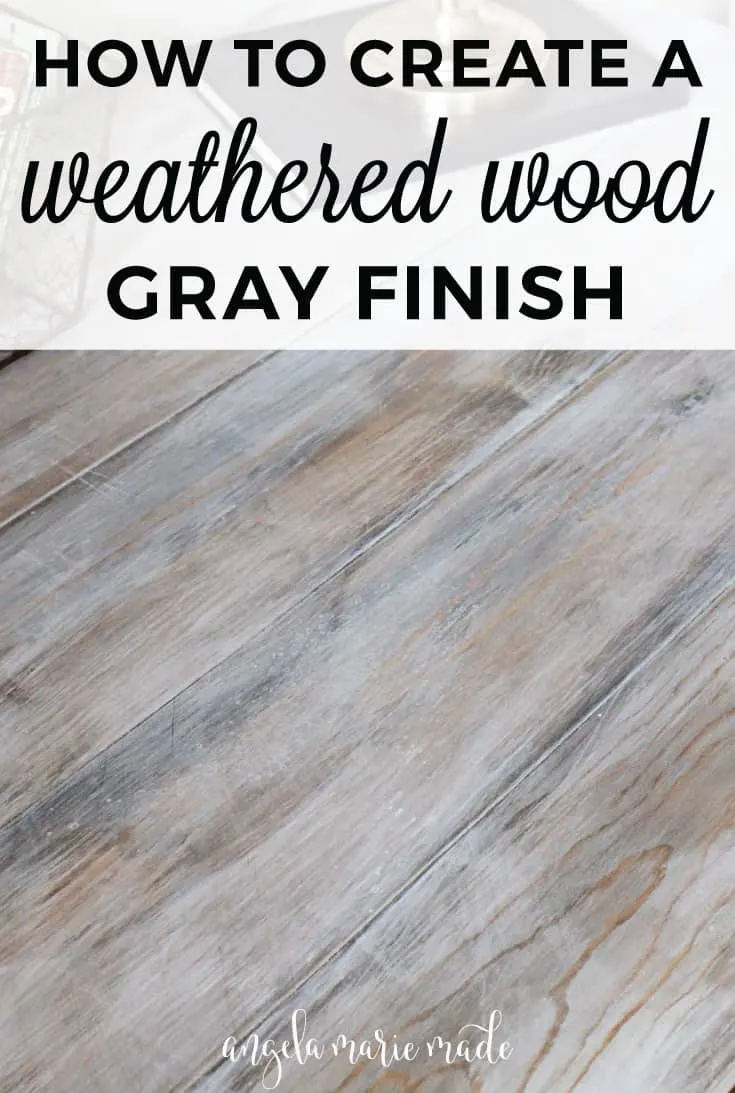
Last week on the blog, I shared a rustic DIY desk that Brandon built and finished. The photos I took didn't quite show off the gray wash stain finish like I wanted, so I am sharing some close up photos today of the finish as well as how we created a weathered wood gray finish.
We tested out a few different combinations to get a more gray washed look.
Ultimately, we decided on using a combination of stain and white washed paint (paint mixed with water) to achieve a more weathered gray stain tone. It's a great, easy way to distress wood with paint!
Note, this post contains some affiliate links. For more info see my disclosures here.
How to Create a Weathered Wood Gray Finish:
Supplies Needed for a DIY Gray Wash Stain:
- Pre-Stain Wood Conditioner
- Dark Walnut Stain (also available here)
- White Paint (we used White Dove by Benjamin Moore in a flat finish)
- A little bit of water
- Staining Rags
- Sandpaper (we used 80 grit) or sanding block
- Paint Brush
*A printable version of this tutorial and step by step video are at the bottom of this post!*
1. Stain your wood
Before staining, make sure your wood is properly prepared for finishing. To learn more about how to prepare your wood surface for a weathered wood finish, as well as other weathered wood finish tutorials and how to protect your weathered wood surface, check out Weathered Wood Recipes!

Then, apply the pre-stain wood conditioner and let dry.
Next, apply one coat of the Dark Walnut stain. Wipe away any excess stain. Allow your stain to fully dry.
See my tutorial on how to stain wood for tips on staining wood!

2. Apply a white wash mixture to the wood
To create a whitewash paint mixture, we mixed about 1 part water to 1 part white paint. We ended up making the mixture a bit thicker with paint and less watery to achieve our desired finish.
Next, apply the white wash paint mixture to the wood in long strokes with a paint brush.
Allow the paint mixture to set for 3-5 seconds, then rub over the white wash paint strokes with a staining rag or lint free rag to smear the paint mixture into the wood. Allow it to fully dry.
See my whitewashing wood tutorial for more details on how to whitewash wood.


3. Distress the wood finish with sandpaper to create a grey wash wood look
Finally, very lightly distress the wood finish with sandpaper until you achieve your desired look!
I prefer to use 80 or 150 grit sandpaper wrapped around a piece if wood and hand sand until I get the look I want. A sanding block may be used too.
And that's it! Pretty simple! You can also add a top coat of poly or wax if you'd like, we chose not to since we liked the look at this point.
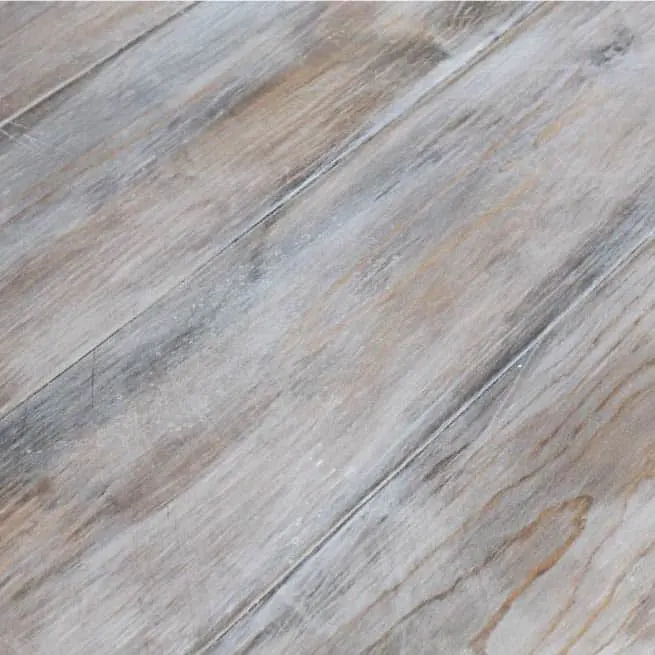
Here is a close up of the wood grain with this rustic, gray, weathered wood finish. I just love how the grain lightly shows through with this grey wash wood stain finish!


What do you think of our weathered wood, gray finish? I think it definitely gives off a rustic vibe and it's perfect for how to make wood look old and gray or how to grey wash wood! It's definitely one of the easiest ways to distress wood with paint!
📩 Want to Save This?
If you want to see another example of this finish, check out my easy DIY entryway bench which we applied the same finish to as well!
Want to save it for later?! Pin it here:

More DIY Weathered Gray Stain Finishes:
If you're interested in more easy weathered wood finish tutorials with a gray wash stain look, learning how to properly prepare your surface for a weathered wood finish, or learning about top coats and how to protect your finish for the best results, check out Weathered Wood Recipes here!
Weathered Wood Recipes includes easy and budget friendly tutorials on how to create weathered wood finishes like this:
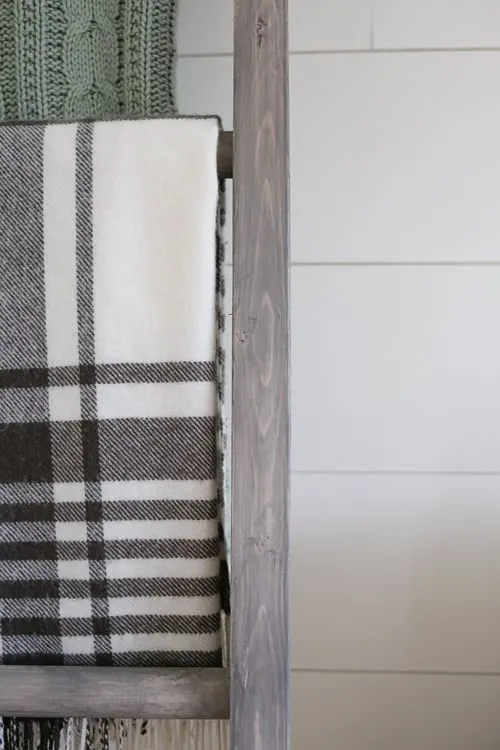

And this!

Click here to learn more about Weathered Wood Recipes!
I’d love to see photos of your project using the weathered wood finish in this tutorial! Feel free to share your DIY grey wash wood finish with me on Instagram @angelamariemade, Facebook, or e-mail pictures to [email protected]!
Also, if you're interested in more wood finish ideas just using stain, be sure to check out my 10 favorite wood stain colors, 5 favorite grey wood stain colors, and 3 white wood stain options.
Be sure to follow along on Instagram, Facebook and Pinterest for my latest projects, fun updates, and sneak peeks!
Subscribe to my YouTube Channel here!
How to Create a Weathered Wood Gray Finish
Easy tutorial on how to create a weathered wood gray finish. Make new wood look like old weathered wood or refinish your furniture with this gray wash look!
Materials
- Pre-Stain Wood Conditioner
- Minwax Dark Walnut Stain
- White Paint (we used White Dove by Benjamin Moore)
- A little bit of water
- Staining Rags
- Sandpaper (we used 80 grit)
Tools
- Paint Brush
Instructions
- Make sure your wood is properly prepared. Then, apply a pre-stain wood conditioner.
- Stain your wood with one coat of Minwax Dark Walnut stain. Wipe away any excess stain. Allow it to fully dry.
- Apply a white wash mixture to the wood, using one about 1 part water to 1 part white paint. Apply the white wash to the wood in long strokes with a paint brush. Allow the paint mixture to set for 3-5 seconds, then rub
over the white wash paint strokes with a staining rag to smear the paint mixture into the wood. Allow it to fully dry. - Lightly distress the wood finish with sandpaper until you achieve your desired look!
Recommended Products
As an Amazon Associate and member of other affiliate programs, I earn from qualifying purchases.


Hi there. I'm interested in doing this technique on built-in bookcases that are already stained and varnished. Do I need to sand off the varnish before whitewashing?
You probably will need to sand the varnish off, but before doing that you can try the white wash in a small test area first over the varnish to see how it looks. It may not absorb right with the varnish, but it's worth trying! You can then try in another test spot sanding the varnish off and applying the white wash to see how it works and which way you like best.
I’m remodeling my office which has old 70’s wood paneling. It has already been sanded and washed, wondering if this would work for that?
It should work! You can try testing it out in a small area to see how it looks.
We tried this technique today on an older pine table. Stripped and sanded it down, followed your instructions to a T and yet RED came through! Not the gray look we were looking for. We have no idea what happened. Do you have any suggestions on what to do to get the right look? Thanks!
Sometimes with older furniture, especially from the 1930s and 1940s, when a white or light colored paint is applied it causes the tannins of the wood to bleed through causing a red or yellow discoloration. The only way I know how to prevent bleed through is by spraying the piece with a clear shellac first, however, this may not work well with trying to achieve this finish. Did the red come through after you added the stain or the white paint mixture? If it occurred just with the paint, you could try the following to see if it works: In a small test spot, sand down to the bare wood, add the dark walnut stain, then spray with the clear shellac, allow to dry, then try adding the white paint mixture, allow to dry, then lightly sand to see how it looks. I'm not sure if it will work with the shellac being used, but it's worth testing it out in small spot if you really want the look!
I'm assuming the Minwax walnut stain you used is water based? I've only seen it as oil based.... Water based paint won't stick to oil stain, will it?
The stain I used is oil-based. You can use water based paint over oil stain, just make sure the stain has dried for at least 8-12 hours before applying the paint.
Thank you so much for your prompt response. So dried up oil stain won't alter the adhesion and durability of water based paint applied on top?
Sure! It shouldn't, but you can always test it out in a small test spot on your specific piece to see how it looks first!
Angela - amazing project and the outcome is jaw-dropping for me...just the colour I want to achieve on my pine crates. Do you think this would work on yellow-ish pine or does this need to on white pine? I love your ladder towel rail result. Was this on yellow pine or a different wood?
Also, I am in the UK and havent found Minwax available so easily. As it is a first try on a DIY project, I am going to use some spare water-based stain I have at hand. I hope it works - your thoughts?
Once again - brilliant post and outcome!
Thank you so much Rekha for your kind comment! This would work on yellow pine too. The blanket ladder wood was an inexpensive, stud grade wood from the home improvement store, they call it whitewood stud, but it's very similar to a knotty pine. The water-based stain should work if it's similar in color. I'd recommend testing the finish out in a small area on your project first to make sure you like how it looks with using the different stain as the base. Hope that helps!
Super easy and very effective. So glad I stumbled onto your blog with this posting.
Thanks!!
I was wondering what you would suggest using to finish...if you use an oil based stain and then a water based paint, would you seal with oil or water based poly for a table!? Also could I use white chalk paint to achieve the same look?? Thanks, Britany
You can use either an oil based or water based poly over the finish, just make sure to wait 12-24 hours before applying the poly after the finish is complete. An oil based finish might change the color some since white paint is being used, so I'd probably go with a water based poly. But, you can always test both out in a small, inconspicuous area first to see how it looks over the finish. Also I've never tried this finish with chalk paint but it should work! Again I'd recommend testing it out in a small area or on a scrap piece of wood first just to be sure.
Angela - Thanks for sharing. I built some shelves for my daughter. She sent me this link to your website and asked for it to be stained "just like this". It came out very well. I was amazed. So much so, that I just bought your Weathered Wood Recipe book, well worth the money. Now she wants me to build a dresser with the Black Expresso Pine weathered look you designed. -Ray
Thank you so much Ray for letting me know!! I'm so glad to hear the shelves for your daughter turned out very well! And thank you so much for purchasing Weathered Wood Recipes too! I'd love to see photos of your project once your finished!
I’m doing a shiplap look on my wall and around bar area. Today I stained the pine wood and will let it dry overnight. Tomorrow I will apply the white paint. Do you recommend us to place the boards and nail them in place then paint them white or does it work better to do it before they are hung?
Hi Traci, you can do it either way but I think it would be easier to do it before they are hung so it's a little less messy in your space with the light sanding and you have more control over the application. Hope it turns out great!!!
We are making a fireplace mantle and want to try the weathered grey finish that you achieved against a charcoal brick surround. What would you suggest as a stain color if we want it to pull the pine wood grain and don't want the finished product to be too light. Our kitchen cabinets are a dark cherry wood in an adjacent room. Also do you distress before or after staining?
You distress at the very end. So, first stain, let it dry for several hours, then apply the white wash mixture, let it dry, then distress with sandpaper as the last step.
To still achieve a similar finish, I'd still use the same dark walnut stain, but maybe try adding more water to the paint white wash mixture so it's more opaque and allows more wood grain to show through. Or you can always sand more of the white wash off to allow more of the wood grain to show through. Either way, I'd suggest testing it out in a small test spot first on your mantel to see what look you like best before applying to the entire thing!
Hi, thanks for the post! In one place in these comments you said to let the oil based stain dry 4 hours before applying the water based white wash, in a later comment you said to let the oil-based stain dry 8-12 hours before applying the white wash. Can you clarify?
Also, I am thinking of doing all my oak bathroom cabinets and trim with this, every room in my farmhouse is varnished oak, floor/cupboards/trim and its just too much brown wood. Would you strip down all the bathroom cabinets before doing this, and if so, what are your thoughts on using liquid sander/deglosser? How would you do it? It's a whole lot of trim & cabinets to sand. =/ Thanks! Excited to try!
I'd let it dry for at least 4-6 hours for sure, but if you can let it dry overnight that's even better. If I were doing this on my bathroom cabinets, I'd first try sanding the finish and see if that takes it off well. I've used a liquid stripper before and it did not work out well, so I personally avoid using it if possible. But, there are many different brands, so some may work better than others. Either way I'd do some testing first, trying both methods to see which you prefer best.
Hi Angela. I live in a log home which I would like to “liven up”a bit. I have considered creating an accent wall using your weathered look but am concerned the contrast between the stained log walls and a weathered accent wall might not look right together. Have you ever seen this done before? Also, the stain on my walls is more of a medium pecan than dark walnut. Do you think I could create a similar effect with the lighter color? Thank you got your help.
Hi DeeDee, I haven't seen a stained log wall and a weathered accent wall before, I've only ever seen one or the other next to a solid color wall before. But that doesn't mean it can't be done if you want to 🙂 I think a similar effect can be done with the pecan color instead of dark walnut, it will still look weathered, but will just be a lighter version. You can try testing it out in a small, non-conspicuous area first to see how it looks over the pecan color to make sure you like it before doing it to the entire wall.
Hi Angela, I have a very large shelving unit in a retail space that is flat black painted. I want to use your distressed white wash look on it , can I achieve it over the black paint.... it is much to large to strip or sand .
I'm thinking a gray rather than white paint..... what is your advice ? thanks!! Jane
Hi Jane, I don't think it would work well over a black painted piece that's not sanded. But you could always test it out in a small area first to try it out and see how it looks! Also, you could get some new wood just to attach over the shelves only and add the finish to the new wood which would look cool next to the black paint on the rest of the unit. Just another idea!
I love this! After you applied the white wash and got the desired look, did you sand before applying poly? If so, what grit sandpaper would you use? And if I apply 2 coats of poly, do I sand between those coats? Thanks!!
thanks Kathleen! After applying the white wash and letting it dry, we lightly sanded it with 80 grit sandpaper to get the more weathered wood look. For this project, we didn't use any poly. But, if we had I would remove any sawdust from the wood first with tack cloth. Then, apply the first coat of poly. After that dries, I'd lightly sand with 220. Then, finish with a second coat of poly.
Also, you used oil based Minwax stain? Was the white wash paint water based? and how long do you have to wait to put water base paint on top of oil based stain? If I do that, I’m wondering what kind of poly to use- water or oil based?
Yes, I used oil based Minwax stain and water based latex paint. Let the stain dry fully (at least 4-6 hours or more) before applying the white wash paint mixture. I would just use water based poly over this finish. You can test the poly out in a small, inconspicuous area first to be sure of how it will look over the finish on your piece.
You did not indicate what kind of wood you started out with. I'm doing a 5 x 8 foot island and i love the look, but it will definitely matter which wood you are starting with.
I used pine wood from Lowe's which worked great
Hi!! Thank you so much for sharing this! I truly love this and just purchased your ideas for prepping as I am planning on doing a small under staircase basement bathroom in ship lap. I want to do this as the treatment to the walls aa I think it is gorgeous!! Can you advice me as to what tyoe og white paint you used? Flat? Does it matter? Also with the walnut stain? Is one brand better than another? Thank again!! Love your ideas!!! ❤❤
Thank you Stacy! For this tutorial, I used flat paint. I usually do a flat or eggshell finish for paint since it works better for the more weathered look. For the walnut stain, I would stick with the Minwax brand since that's what I used in this tutorial and it worked well. Hope that helps!! Thanks again!
Currently working on a coffee table for the main living room with this technique. Our white wash goes on today. So far the piece looks beautiful, the stain really brought out the grain in the cedar we're using. And we love how easy the steps have been so far, thank you for that! (the tutorials in your book have been so informative and easy as well)! Can't wait for our finished product!
Thank you so much for letting me know Katie! I am so glad to hear that the book tutorials have been helpful and the finish is turning out great!! 🙂
Wow! This is exactly the look I want for my baseboard to break up all the mostly browns I have on the floors and walls. Does grain/species of wood make a great difference in bringing out the character of the wood/ look overall? I know you said you used pine, but what about poplar or alder that is commonly found in a baseboard purchase. Also, do I do this technique first before the install and touch up where necessary after the install, probably easier and less messy, right?
Yes, different types of wood will look a little bit different especially if they have less grain to them. You can totally use poplar or alder, but I'd recommend testing the finish out in a small test area first on your type of wood to see how it will look and to make sure you like it before doing it to your whole project. Also, yes I think it would be easiest to do this first before installing!
I am going to do this to a dark stained hope chest and use it as a coffee table. Do I just sand it and go right to the paint/water step? Also, which type paint would be look best, eggshell, flat, semi-gloss? I plan to polyurethane the top when done. Thanks!
I'd try testing out the process (of starting with the white wash paint mixture) in a small area first to see how it will look over the current dark stain before applying to the whole chest since the original stain could cause the finish to look a little different. I used a flat paint when I did it, but eggshell would work well too!