
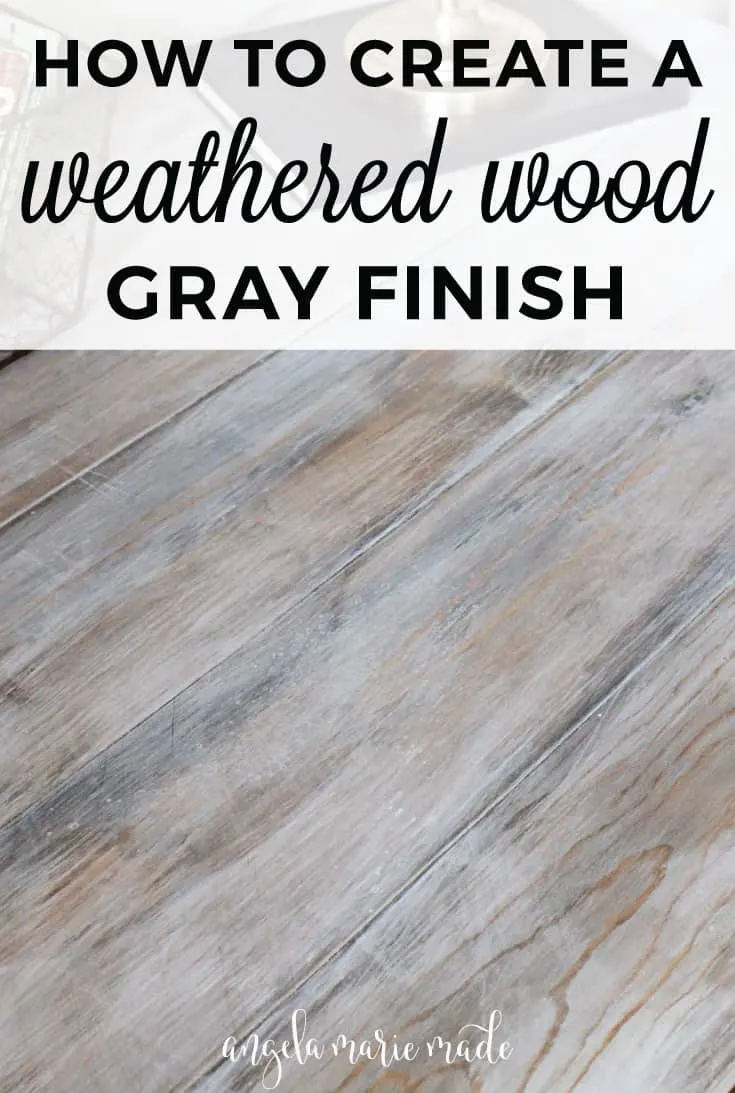
Learn how to easily grey wash wood! This weathered gray stain finish works great for how to make wood look old and gray!
Last week on the blog, I shared a rustic DIY desk that Brandon built and finished. The photos I took didn't quite show off the gray wash stain finish like I wanted, so I am sharing some close up photos today of the finish as well as how we created a weathered wood gray finish.
We tested out a few different combinations to get a more gray washed look.
Ultimately, we decided on using a combination of stain and white washed paint (paint mixed with water) to achieve a more weathered gray stain tone. It's a great, easy way to distress wood with paint!
Note, this post contains some affiliate links. For more info see my disclosures here.
How to Create a Weathered Wood Gray Finish:
Supplies Needed for a DIY Gray Wash Stain:
- Pre-Stain Wood Conditioner
- Dark Walnut Stain (also available here)
- White Paint (we used White Dove by Benjamin Moore in a flat finish)
- A little bit of water
- Staining Rags
- Sandpaper (we used 80 grit) or sanding block
- Paint Brush
*A printable version of this tutorial and step by step video are at the bottom of this post!*
1. Stain your wood
Before staining, make sure your wood is properly prepared for finishing. To learn more about how to prepare your wood surface for a weathered wood finish, as well as other weathered wood finish tutorials and how to protect your weathered wood surface, check out Weathered Wood Recipes!

Then, apply the pre-stain wood conditioner and let dry.
Next, apply one coat of the Dark Walnut stain. Wipe away any excess stain. Allow your stain to fully dry.
See my tutorial on how to stain wood for tips on staining wood!

2. Apply a white wash mixture to the wood
To create a whitewash paint mixture, we mixed about 1 part water to 1 part white paint. We ended up making the mixture a bit thicker with paint and less watery to achieve our desired finish.
Next, apply the white wash paint mixture to the wood in long strokes with a paint brush.
Allow the paint mixture to set for 3-5 seconds, then rub over the white wash paint strokes with a staining rag or lint free rag to smear the paint mixture into the wood. Allow it to fully dry.
See my whitewashing wood tutorial for more details on how to whitewash wood.


3. Distress the wood finish with sandpaper to create a grey wash wood look
Finally, very lightly distress the wood finish with sandpaper until you achieve your desired look!
I prefer to use 80 or 150 grit sandpaper wrapped around a piece if wood and hand sand until I get the look I want. A sanding block may be used too.
And that's it! Pretty simple! You can also add a top coat of poly or wax if you'd like, we chose not to since we liked the look at this point.
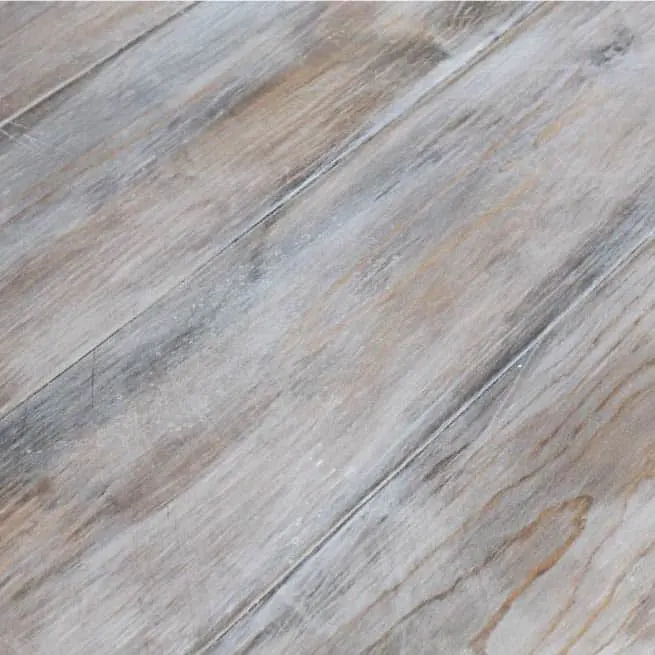
Here is a close up of the wood grain with this rustic, gray, weathered wood finish. I just love how the grain lightly shows through with this grey wash wood stain finish!


What do you think of our weathered wood, gray finish? I think it definitely gives off a rustic vibe and it's perfect for how to make wood look old and gray or how to grey wash wood! It's definitely one of the easiest ways to distress wood with paint!
📩 Want to Save This?
If you want to see another example of this finish, check out my easy DIY entryway bench which we applied the same finish to as well!
Want to save it for later?! Pin it here:

More DIY Weathered Gray Stain Finishes:
If you're interested in more easy weathered wood finish tutorials with a gray wash stain look, learning how to properly prepare your surface for a weathered wood finish, or learning about top coats and how to protect your finish for the best results, check out Weathered Wood Recipes here!
Weathered Wood Recipes includes easy and budget friendly tutorials on how to create weathered wood finishes like this:
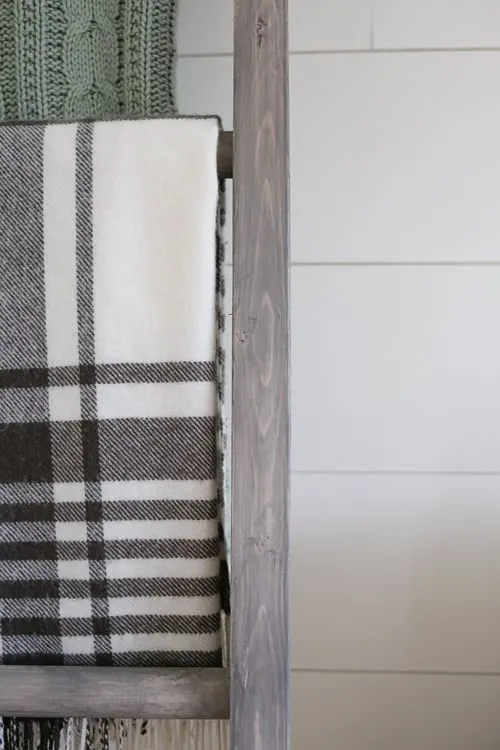

And this!

Click here to learn more about Weathered Wood Recipes!
I’d love to see photos of your project using the weathered wood finish in this tutorial! Feel free to share your DIY grey wash wood finish with me on Instagram @angelamariemade, Facebook, or e-mail pictures to [email protected]!
Also, if you're interested in more wood finish ideas just using stain, be sure to check out my 10 favorite wood stain colors, 5 favorite grey wood stain colors, and 3 white wood stain options.
Be sure to follow along on Instagram, Facebook and Pinterest for my latest projects, fun updates, and sneak peeks!
Subscribe to my YouTube Channel here!
How to Create a Weathered Wood Gray Finish
Easy tutorial on how to create a weathered wood gray finish. Make new wood look like old weathered wood or refinish your furniture with this gray wash look!
Materials
- Pre-Stain Wood Conditioner
- Minwax Dark Walnut Stain
- White Paint (we used White Dove by Benjamin Moore)
- A little bit of water
- Staining Rags
- Sandpaper (we used 80 grit)
Tools
- Paint Brush
Instructions
- Make sure your wood is properly prepared. Then, apply a pre-stain wood conditioner.
- Stain your wood with one coat of Minwax Dark Walnut stain. Wipe away any excess stain. Allow it to fully dry.
- Apply a white wash mixture to the wood, using one about 1 part water to 1 part white paint. Apply the white wash to the wood in long strokes with a paint brush. Allow the paint mixture to set for 3-5 seconds, then rub
over the white wash paint strokes with a staining rag to smear the paint mixture into the wood. Allow it to fully dry. - Lightly distress the wood finish with sandpaper until you achieve your desired look!
Recommended Products
As an Amazon Associate and member of other affiliate programs, I earn from qualifying purchases.


With the stain you used, you said leave it on. Most stains require they be wiped off...did you just apply the stain and not wipe off? Lovely, and thanks for sharing?
Thanks Janie! We just applied a small section of stain at a time and wiped the excess stain off at the same time until the whole desk top was covered.
Thank you for responding so promptly, and sharing your talents!
Can you use white chalk paint or do not recommend it?
Sure you can use chalk paint, I would test it out first on some scrap wood to make sure you like it.
I will be using this technique on a bed that my husband and I are going to build this week. I will post pictures when it's finished. I'm excited to try this
That sounds awesome Jacque! I can't wait to see the finished photos!!
This is so beautiful! I just got an tank pedestal table and cannot wait to refinish it! I want to try the gray weathered wood look. My question is this... Since it is for a kitchen table, I need the finish to be protected (I have two boys!) What do you suggest I use to put on top of the paint to protect it? Thank you!
Thanks Amy! I'd try a water based polyurethane in a matte finish, such as Minwax Polycrylic. The water based poly is much less likely to yellow the finish color but will provide a good protection. I would test the poly out in a small, inconspicuous area first on the table over the finish to make sure you like how it looks!
Wow, looks amazing and so easy? I have just sanded an old trunk and want to get that look and don't really want to change depth of the colour of the wood so is the stain necessary?
Thanks Cindy! You can skip the stain and just do the white wash part, it will definitely have a different color/look, but I think it will still turn out really pretty! I'd try testing out the white wash over a small, area of the trunk first to see if you like how it looks without the stain. You can always sand the test spot away if you don't like how it looks.
I have whitewashed over bare timber as I want a white weathered look. Will this work with chalk paint?
It should work with chalk paint, you can test it out in small area first to see how it looks with the chalk paint to be sure.
How long do you let the stain set for before starting the white wash? Thanks for sharing!
Hi Allison, the stain should dry for at least 4 hours before applying the white wash. Thanks!
And, will the top paint process work the same. Sorry for the repeat questions.
Love this! I have an already painted wall, just regular paint on rough-like boards. Could I try to put the stain over the paint (its a light yellow off white color), and then proceed as you've shown? Think that would work? Not sure about stain over painted wood. Thanks!
thanks Janie! I've never tried paint overs stain before so I'm not sure how it would work. But, the stain may have trouble penetrating the wood if there is a paint layer in between. You could always try testing it out on a scrap piece of painted wood first and see how it looks! Also, you could then do the top paint process the same, but it will most likely have a different look/outcome with the paint on the base layer.
I LOVE the look of this and am going to attempt doing this to the trim in my home. What base of paint did you use (water, latex, oil)? Do you think trim would require a sealant like a matte Minwax Polycrylic? Thanks so much for the tutorial!!!
Thank you! We used latex paint. I don't think trim needs a sealant since its more decorative. But, you can definitely add a sealant like Minwax Polycrylic if you wanted to be able to wipe the trim down easily for cleaning purposes. I would test out the sealant first on a scrap piece over the weathered finish if possible to make sure you like how it looks with that sealant!
Thank You for sharing this, I love how it turned out. I'm making some rustic wood pumpkins and am going to try this technique.
Thanks Tonya! Wood pumpkins sounds adorable, I'd love to see a photo!
Could this look be achieved on a laminate top surface? Maybe skipping the stain part?
I don't think it would work very well on laminate since the paint mixture (or the stain) wouldn't have any porous surface to soak into.
I am going to try this today thanks for the info
Great! You're welcome!
Thank you for this post. I was searching on line to see how I was going to finish a pine door slab that I bought to use as a barn door between my laundry room and bathroom. Then, I saw your idea and it seemed simple. It turned out fabulous and will be a great accent piece when hung.
You're welcome Leah! I'm so happy to hear that the finish turned out great for your barn door!!!
@Leah L., I’m
thinking of doing my barn doors as well. Do you have a pic of your final project?
What type of wood did you do this process on--red oak? White oak? Seems like white oak would work better, but I'mhaving a hard time finding retrofit white oak stair teads and risers in Houston after all the flooding.
We used common pine boards from Lowe's. I haven't tried it out on red oak before, but its worked well for others on different kinds of wood. Maybe try testing it on a small area of some red oak and see if it works well?
Hi Angela! This is beautiful. I have never tried anything like this before, but am thinking about giving this a shot! Obviously you have a lot more knowledge of these types of DIY projects. I am curious about knotty pine paneling as an option? We just bought an old cottage with what looks like the knotty pine paneling. I was trying to figure out how we could save some of the paneling for the house we build on the lot after tearing the cottage down, and maybe make an accent wall in the new home. I really love the gray/brown look. Do you think it might work? Thanks!
Thank you Melanie! I think an accent wall using the knotty pine paneling from the old cottage sounds like a great idea that would be so pretty! I'd recommend sanding the paneling really well first and also testing out the finish on some scrap paneling first to make sure you like how it looks! I'd love to see photos of the end result!!
Hi Angela,
We are redoing 5 chairs that were a natural wood. We had them stained dark walnut and really don't like the way they look! We would like a blueish/gray distressed look. Do we still use white paint? Can we just paint over it and then distress like your demonstration? Thanks!
Hi Denise,
If you want more of distressed paint look, then it would probably be easiest to just paint over the dark walnut with paint or chalk paint in the color you want and then lightly sand till you achieve the amount of distressing you want. You could test it out on a small area on them first to see if you like how it looks doing that way!
This looks great! I have been at a loss as to what we can do with our engineered hard wood floors in the kitchen. Replacing them just isn't an option right now but I love this look and they are already stained and distressed with virtually no poly left from when I refinished them the first time. Sanding and restraining won't work because we are down to the final layers of wood. I'm going to use your whitewash technique and cover with lots of poly this time. This is so inspiring. Thank you!
Thanks Heather! I hope it turns out great! Whitewashing definitely helps with covering imperfections! I'd recommend testing the poly out in a small area first though over the whitewash to make sure it doesn't change the color too much.
I know you used flat paint but was it trim paint or wall paint? Does it matter?
It was wall paint, but it doesn't really matter, the more important thing is that the sheen is not too shiny, so flat, eggshell, matte, or satin.
Hi Angela!
We have Redwood siding throughout our hose. I really want a weathered grey wood look, to break up the monotony of so much wood. Because I am starting with redwood, would I still stain and then paint? Or skip the stain?
Thank you for your post!!
Much Aloha,
Melissa
Hi Melissa! I'd test it out both ways to see which way you like best! So, you could test using the stain and the paint mixture in a small, more hidden area. Then, in another small area test just doing the paint mixture with no stain. Since Redwood takes stains differently than pine (which is what I used), this will give you the best idea of which version you like better!
Can this be done on a wood table that is currently painted black(purchased that way)? Do i need to sand it down to natural wood or use pain remover?
It most likely can, depending on the type of wood that the table is made out of. I'd try sanding a small area underneath or in a inconspicuous area first and testing the finish out to see if it will work well. For removing all the paint, you can do either method, all sanding or paint remover and then a little sanding after that, whichever you prefer! I like to try just sanding first and only use paint remover if I really need too since it's so messy.
Thank you! That is what i was thinking as well. Going to try a spot underneath first!
Omg love your work!!You are amazing!!Love the stains you created and everything!!Are there separate pics of pieces done in each color? Wasn't sure...love the blanket ladder stain...which stain is that one? Ps I am neighbors with your mom...3 doors down..hope all is well???
Melissa K.
Thank you Melissa!!! There's a photo of the full desk top that was done in the weathered gray finish described in this post here: https://angelamariemade.com/2016/11/rustic-tree-branch-desk-diy/. And then the tutorial for the blanket ladder finish is one of the recipe finish tutorials I included in my e-book Weathered Wood Recipes, but I have a full photo of the blanket ladder (as well as how I built it) in this post: https://angelamariemade.com/2017/09/easy-diy-blanket-ladder/
Sorry if that's confusing! I should compile photos of all the pieces in the different colors in one place!!
I'm doing well, hope all is well with you and the fam and hope you guys were able to enjoy the snow yesterday :)! I was actually at my mom's baking some Christmas cookies!
Beautiful weathered gray finish, I have an old table that I would love to refinish using this technique, but I am trying to find a sealer that doesn't eventually cause that ugly yellowing since the table will be used daily. Thanks for the simple step-by-step instructions. Wish me luck!!
Good luck Susanne! It's tough with the older tables, they tend to yellow more with sealers, hopefully you can test some different ones out and find one that does the trick with your particular table!